Love this? Save it for later!
Share the inspiration with your friends
My friend Jess asked why I couldn’t just pile everything into individual cups instead of wrestling with a giant board that falls apart the second someone reaches for a cracker. I started to explain that charcuterie boards need space, you know, the whole visual landscape thing. Then I stopped. Honestly? She was right. I’d spent years meticulously arranging meats and cheeses on massive wooden slabs, only to watch them devolve into a chaotic pile of crumbs and displaced olives within minutes. The idea felt almost too simple, too easy. But the more I thought about it, the more I realized she had stumbled onto something genius. So, on a random Tuesday, with a bag of pre-sliced salami and a few tiny plastic cups, I gave it a shot. And let me tell you, the result was a total game-changer. No more fighting over the last slice of prosciutto, no more sad, abandoned crackers at the bottom of a giant platter. These little cups were perfect, personal, and somehow even more impressive than the full-sized board. That first batch was for just the two of us, but I knew immediately they were destined for something bigger. They were meant for a crowd, for a celebration, for a Friendsgiving where everyone gets their own perfect little bite. I mean, who knew that letting go of control would lead to the best party food I’d ever made?
Why You’ll Love These Individual Friendsgiving Charcuterie Cups
Let me be real with you for a second. I have tested this concept more times than I care to admit. I have made them for book clubs, birthday parties, and even a very fancy bridal shower. Each time, they disappear faster than anything else on the table. There is something undeniably satisfying about having your own curated selection of goodies, and these cups deliver that experience without any of the fuss. They are the ultimate host hack, and here is why you will absolutely fall in love with them.
- Zero Stress Hosting: No more worrying about a giant board looking perfect. These cups can be assembled hours in advance and simply pulled out when guests arrive. You get to actually enjoy your own party.
- Perfectly Portioned: Everyone gets an equal share of the good stuff. No more awkward moments of someone taking the last piece of brie or leaving behind a lonely pile of crackers.
- Customizable for Every Guest: Have a friend who hates blue cheese? A cousin who is gluten-free? You can easily tailor each cup to individual preferences without ruining the overall presentation.
- Incredibly Visually Impressive: These cups look like they came from a fancy catering company. The layered effect of meats, cheeses, fruits, and nuts is stunning and will have your guests snapping photos before they even take a bite.
- Minimal Cleanup: The best part? No giant cutting board to scrub. Just a few small cups that can be tossed in the dishwasher. You are welcome, future you.
What makes these different from every other charcuterie idea out there? It is the attention to detail and the balance of flavors in each individual serving. I am not just throwing random ingredients into a cup. I am layering textures and tastes-savory prosciutto against sweet grapes, creamy brie against crunchy almonds-so that every single bite is a little moment of joy. This is not just snack food; it is a curated experience for your guests, and it shows them you care without you having to spend the whole party in the kitchen.
What Ingredients You Will Need
This recipe uses a beautiful mix of savory, sweet, and salty ingredients to create a balanced and satisfying snack. The beauty of these cups is their flexibility, but here is a solid foundation to start with. You can easily swap things in and out based on what you love or what is on sale at your local market.
- For the Meats:
- 4 ounces prosciutto, thinly sliced (I love the salty, delicate texture of Prosciutto di Parma)
- 4 ounces genoa salami, sliced into thin ribbons or small rounds (adds a robust, peppery flavor)
- 4 ounces soppressata, diced into small cubes (for a spicy, chewy bite)
- For the Cheeses:
- 4 ounces brie, cut into small wedges (creamy and mild, a crowd-pleaser)
- 4 ounces sharp cheddar, cut into small cubes (adds a sharp, tangy contrast)
- 4 ounces gouda, cut into small cubes (smoky and buttery)
- 2 ounces blue cheese, crumbled (for the adventurous eaters-optional but highly recommended)
- For the Fruits & Veggies:
- 1 cup red seedless grapes, washed and dried (adds a burst of sweetness)
- 1/2 cup dried apricots, halved (chewy and tart)
- 1/2 cup dried figs, quartered (if you can find them, they add incredible texture)
- 1/2 cup cornichons or small pickles (for that essential briny pop)
- 1/4 cup kalamata olives, pitted (adds a salty, Mediterranean flair)
- For the Crunch & Extras:
- 1 cup assorted crackers (I recommend a mix of buttery rounds and whole wheat crisps)
- 1/2 cup roasted and salted almonds (adds a satisfying crunch)
- 1/4 cup honey, for drizzling (a touch of sweetness to tie everything together)
- Fresh rosemary sprigs, for garnish (optional, but makes them look so fancy)
When selecting your ingredients, look for high-quality items where you can. A good prosciutto from a local deli counter will taste worlds better than the pre-packaged stuff. For the cheese, I always grab a block and cut it myself-it tastes fresher and you can control the size of the cubes. And please, do not skip the cornichons! That little pop of acidity is what cuts through all the rich fat and makes each bite feel balanced.
Equipment Needed
You do not need anything fancy to make these beautiful cups. The equipment list is short and sweet, which is another reason I love this recipe for entertaining.
- 12 (8-ounce) Plastic or Glass Cups: I prefer clear plastic cups so the layers are visible. You can find them at any party supply store. Glass tumblers work beautifully too if you want a more upscale feel.
- A Sharp Chef’s Knife: For slicing meats and cutting cheeses into uniform cubes. A dull knife will just tear the prosciutto.
- A Small Cutting Board: To keep your workspace organized and your counters clean.
- A Pair of Kitchen Shears: These are a lifesaver for snipping prosciutto ribbons and trimming herbs.
- Measuring Cups and Spoons: For portioning out the nuts and fruits.
- Small Serving Spoons or Tongs: For assembling the cups without getting your hands too messy.
If you do not have 8-ounce cups, you can use smaller ones and just make more of them. I once used small mason jars for a rustic-themed dinner, and they were a huge hit. Just make sure whatever you use is clear so you can show off those beautiful layers!
Preparation Method
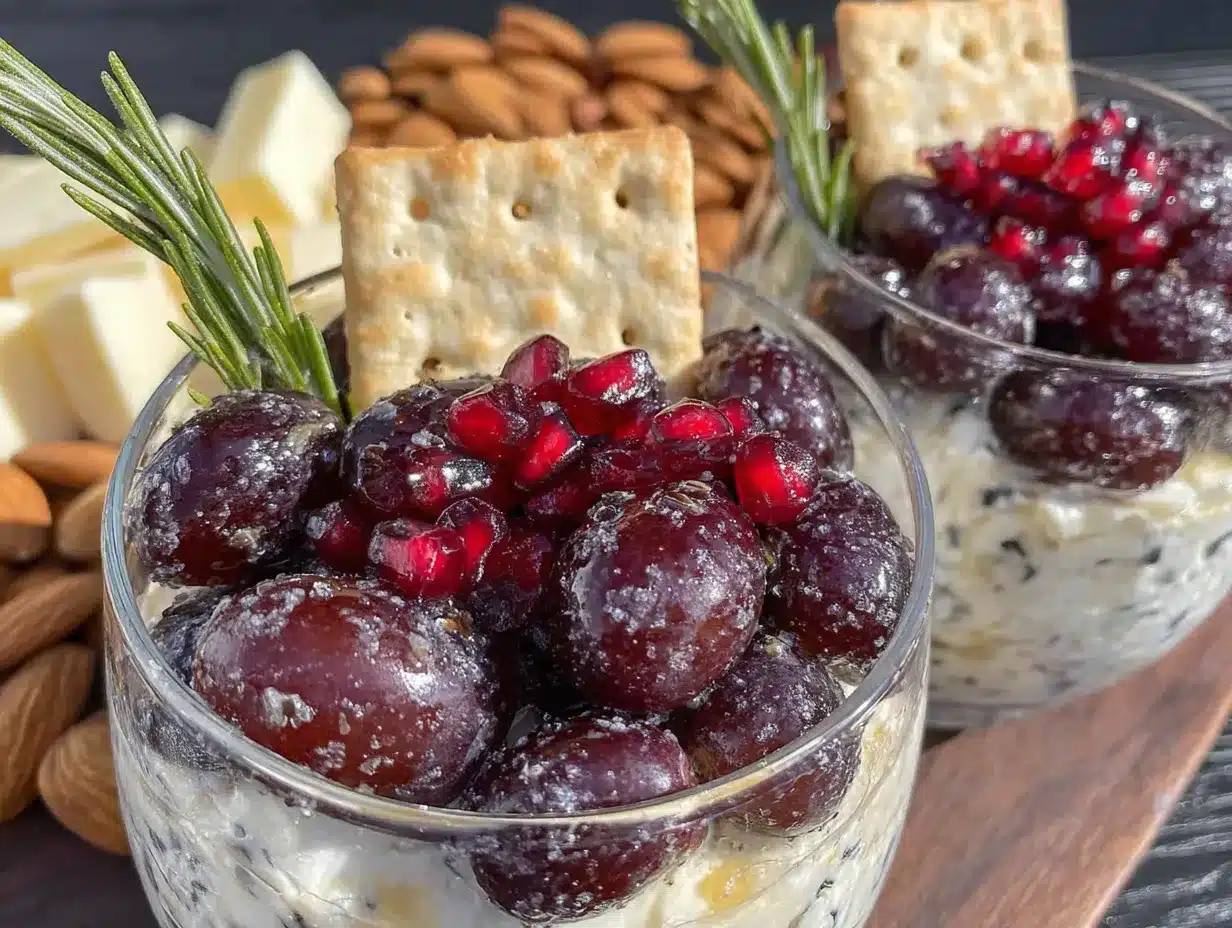
Alright, let’s get to the fun part. This is where the magic happens. The key is to work methodically and think about the visual layers as you go. I like to set up a little assembly line on my kitchen counter. It makes the process fast and almost meditative.
- Prep Your Ingredients (10 minutes): Start by washing and thoroughly drying your grapes. Any moisture will make the crackers soggy. Cut your brie, cheddar, and gouda into even, bite-sized cubes (about 1/2-inch). Crumble your blue cheese. Slice your salami into thin ribbons by stacking a few slices and cutting them into strips. Halve your dried apricots and quarter your figs. Set everything out in small bowls so it is all within reach.
- Start with the Base (2 minutes per cup): Take your first cup. Add a small handful of almonds to the very bottom. This creates a stable foundation and adds a nice crunch that will be waiting for you at the end. On top of the almonds, place a few cubes of your heartier cheeses-like the cheddar and gouda. You want the heavier items at the bottom so the cup doesn’t tip over.
- Add the Meats (3 minutes per cup): Next, take a slice of prosciutto and gently fold it into a loose ribbon or a small rose. Place it against the side of the cup so it is visible. Do the same with your salami ribbons. The goal here is to create visual interest by having the meats peek out from different sides. Add a few cubes of soppressata in the center to fill the gap.
- Layer in the Fruits and Pickles (2 minutes per cup): Now, tuck in your grapes, dried apricots, and figs around the meats. Add a couple of cornichons and a few kalamata olives. This is where the color really starts to pop. The bright red of the grapes against the deep purple of the olives is just gorgeous.
- Top with Soft Cheese and Crackers (2 minutes per cup): Place a wedge or two of the brie on top, along with a sprinkle of blue cheese if you are using it. Then, carefully arrange 3-4 crackers on the very top, leaning them against the rim of the cup. This makes the cup look full and abundant. Drizzle a tiny bit of honey over the brie and the crackers.
- Garnish and Chill (5 minutes): Finish each cup with a small sprig of fresh rosemary. It adds a lovely aroma and a pop of green. Once all your cups are assembled, place them on a large tray and refrigerate them for at least 30 minutes before serving. This allows the flavors to meld together and makes the presentation even more stunning.
Here is a little tip I learned the hard way: do not overfill the cups. You want them to look generous, but if you cram everything in, it becomes a mess to eat. Leave a little breathing room at the top so your guests can easily grab a cracker or a piece of cheese without everything tumbling out.
Cooking Tips & Techniques
After making these cups for every single gathering for the past year, I have picked up a few tricks that make the process smoother and the final product even better. Trust me on these.
Keep Your Knife Sharp: This is non-negotiable. A dull knife will smash your soft cheeses and shred your delicate prosciutto. I learned this the hard way when I tried to rush through prep with a dull blade and ended up with a pile of cheese mush. Take the time to sharpen it, or use a serrated knife for the softer cheeses like brie.
Dry Your Grapes Thoroughly: Wet grapes are the enemy of a good charcuterie cup. They release moisture that can make your crackers soggy and your meats slippery. After washing them, spread them out on a clean kitchen towel and pat them dry. I even let them sit for a few minutes to air dry before I start assembling.
Think About the Eating Experience: This is the biggest lesson I learned. At first, I was just throwing ingredients in randomly. But then I realized that guests want to be able to grab a cracker, top it with cheese, and add a piece of fruit without having to dig. So, I started placing the crackers on top and arranging the cheeses and meats so they are easily accessible. It sounds small, but it makes a huge difference in how much people enjoy them.
Assemble in Batches: Do not try to make all 12 cups at once if you are new to this. I recommend making 4 cups at a time. It keeps the process focused and prevents you from forgetting which cup has which ingredient. Once you get the hang of it, you will be able to speed up, but starting in batches saves you from mistakes.
Variations & Adaptations
One of the best things about this recipe is how endlessly adaptable it is. I have made so many different versions based on the season, my mood, or who is coming over. Here are a few of my favorite twists.
The Mediterranean Twist: Swap the cheddar and gouda for feta cheese and fresh mozzarella pearls. Replace the prosciutto with sliced capicola or even grilled chicken. Add cherry tomatoes, cucumber slices, and a dollop of hummus at the bottom. It is fresh, bright, and perfect for a summer gathering.
The Sweet & Spicy Version: For a flavor bomb, use spicy soppressata and pepper jack cheese. Add some pickled jalapeños for heat and balance it with slices of fresh mango or peach. A drizzle of hot honey instead of regular honey takes it over the top. This one always gets rave reviews from my spice-loving friends.
The Vegetarian Delight: Skip the meat entirely and double up on the cheese and veggies. Add roasted red peppers, marinated artichoke hearts, and a variety of olives. You can also add some marinated mushrooms or even a few slices of grilled halloumi. It is just as satisfying and beautiful as the original.
I once tried a “breakfast for dinner” version with mini pancakes, bacon, cheddar cubes, and maple syrup for dipping. It was a total experiment that turned out to be a massive hit at a brunch party. Do not be afraid to break the rules!
Serving & Storage Suggestions
These cups are best served chilled, straight from the fridge. The cold temperature keeps the cheese firm and the meats from becoming greasy. I like to arrange them on a large, clean wooden board or a simple white platter. It creates a stunning visual effect, especially if you have a mix of different colored cups.
For a full Friendsgiving spread, these cups pair beautifully with a warm bowl of butternut squash soup or a simple arugula salad with a lemon vinaigrette. They also go perfectly with a glass of crisp Sauvignon Blanc or a fruity Pinot Noir. If you are serving them as an appetizer, I would recommend having one cup per person, as they are quite filling.
If you have leftovers (which rarely happens in my house), you can store the cups in the refrigerator for up to 24 hours. The crackers might lose a bit of their crunch, but the flavors will actually meld together and become even more delicious. To refresh them, simply swap out the top layer of crackers for fresh ones before serving. I do not recommend freezing these cups, as the texture of the cheese and fruit will suffer.
Nutritional Information & Benefits
While these cups are definitely a treat, they also offer some surprising nutritional benefits. The protein from the meats and cheeses will keep your guests feeling satisfied, while the healthy fats from the nuts and olives provide sustained energy. The grapes and dried fruits offer natural sweetness and a dose of fiber and antioxidants.
Here is an estimated breakdown for one cup (based on the ingredients listed above):
- Calories: Approximately 450-550
- Protein: 20-25 grams
- Fat: 30-35 grams (mostly healthy fats)
- Carbohydrates: 25-30 grams
- Fiber: 4-6 grams
- Sugar: 15-20 grams (naturally occurring)
Please note that these values are estimates and will vary based on the specific brands and quantities you use. If you have dietary restrictions, this recipe is easily adaptable. It is naturally gluten-free if you use gluten-free crackers, and you can easily make it dairy-free by using vegan cheeses and skipping the honey drizzle.
Conclusion
These Perfect Individual Friendsgiving Charcuterie Cups are more than just a recipe; they are a solution to the age-old problem of party food. They are thoughtful, beautiful, and incredibly easy to execute. I love them because they let me focus on what really matters: spending time with my friends and family, instead of fussing over a giant board that will be destroyed in minutes. They have become my signature dish, and every time I make them, I think of Jess and that random Tuesday when she proved me wrong. Honestly, I am so glad she did.
I would love to see your versions! Please leave a comment below and tell me how you customized your cups. Did you add something wild? Did your guests love them? Share your photos and tag me on social media-I cannot wait to see what you create. Now go forth and host the best Friendsgiving ever!
Frequently Asked Questions
Can I make these cups a day ahead of time?
Absolutely! In fact, I often make them the night before a party. Just assemble the cups completely, cover the tray tightly with plastic wrap, and store them in the refrigerator. The flavors will meld beautifully overnight. Just add the fresh rosemary garnish right before serving for the best visual appeal.
What is the best type of cup to use?
I recommend clear, 8-ounce plastic cups for their convenience and visibility. However, small mason jars or clear glass tumblers work wonderfully for a more elegant presentation. The key is to use a cup that is wide enough to easily arrange the ingredients without everything getting smashed together.
How many cups should I plan per person?
If you are serving these as a main appetizer alongside other dishes, one cup per person is usually perfect. If they are the only snack you are offering during a longer gathering, I would suggest planning for 1.5 to 2 cups per person. They are quite filling, so it is better to have a few extra than to run out.
Can I use pre-sliced cheese from a bag?
You can, but I really encourage you to buy a block and cut it yourself. Pre-shredded or pre-sliced cheese often contains anti-caking agents that affect the texture and flavor. Cutting your own cheese ensures it tastes fresher and looks more appealing in the cup. It only takes a few extra minutes and makes a huge difference.
What if I have a guest with a nut allergy?
No problem at all! Simply omit the almonds and replace them with roasted chickpeas, pumpkin seeds, or even a few extra crackers for crunch. You can also add more dried fruit or even some dark chocolate chips for a sweet and salty element. The cups are incredibly flexible, so you can easily accommodate any dietary need.
Pin This Recipe!
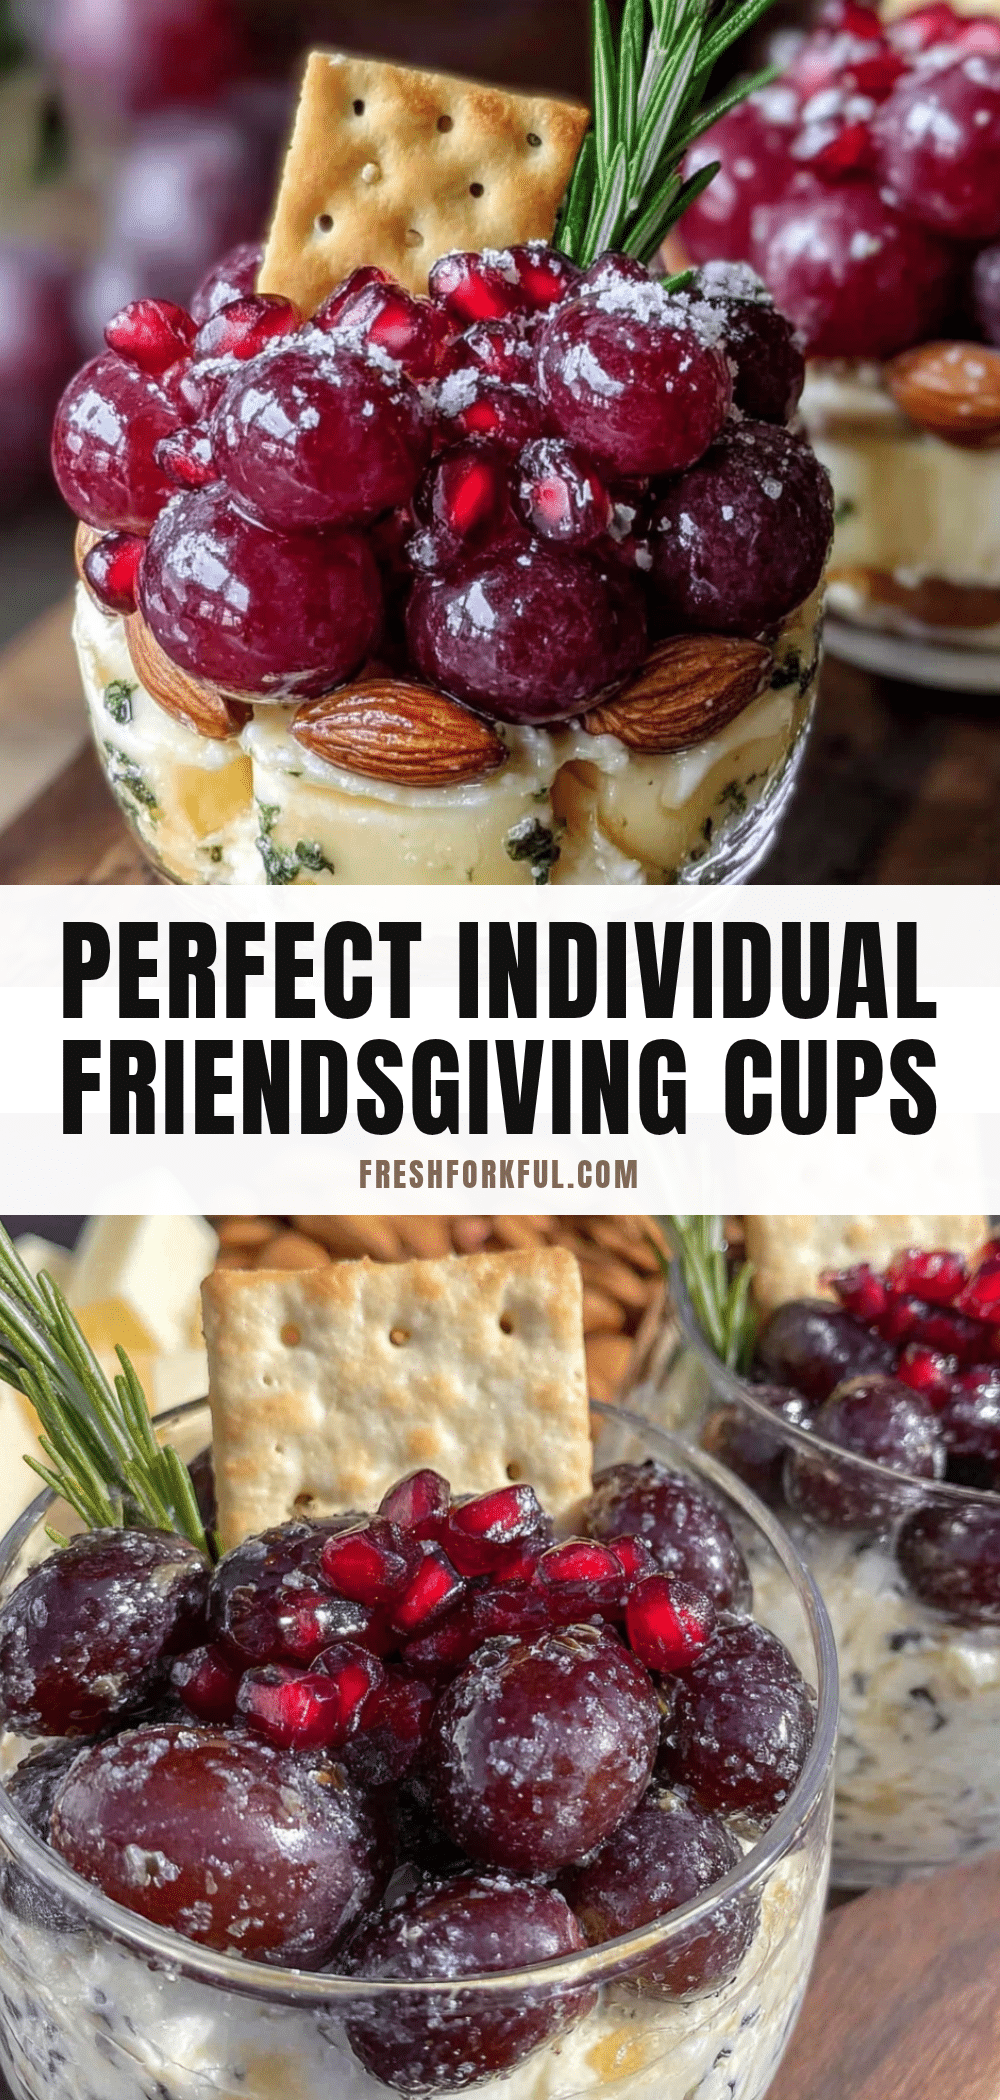
Easy Individual Friendsgiving Charcuterie Cups
These individual charcuterie cups are the ultimate host hack—perfectly portioned, visually stunning, and zero-stress. Each cup is a curated experience with savory meats, creamy cheeses, sweet fruits, and crunchy nuts, making them ideal for Friendsgiving or any gathering.
- Prep Time: 20 minutes
- Cook Time: 0 minutes
- Total Time: 50 minutes (includes 30 minutes chilling)
- Yield: 12 servings 1x
- Category: Appetizer
- Cuisine: American
Ingredients
- 4 ounces prosciutto, thinly sliced
- 4 ounces genoa salami, sliced into thin ribbons or small rounds
- 4 ounces soppressata, diced into small cubes
- 4 ounces brie, cut into small wedges
- 4 ounces sharp cheddar, cut into small cubes
- 4 ounces gouda, cut into small cubes
- 2 ounces blue cheese, crumbled
- 1 cup red seedless grapes, washed and dried
- 1/2 cup dried apricots, halved
- 1/2 cup dried figs, quartered
- 1/2 cup cornichons or small pickles
- 1/4 cup kalamata olives, pitted
- 1 cup assorted crackers
- 1/2 cup roasted and salted almonds
- 1/4 cup honey, for drizzling
- Fresh rosemary sprigs, for garnish
Instructions
- Prep Your Ingredients (10 minutes): Wash and thoroughly dry grapes. Cut brie, cheddar, and gouda into even, bite-sized cubes (about 1/2-inch). Crumble blue cheese. Slice salami into thin ribbons by stacking a few slices and cutting them into strips. Halve dried apricots and quarter figs. Set everything out in small bowls.
- Start with the Base (2 minutes per cup): Add a small handful of almonds to the bottom of each cup. Place a few cubes of cheddar and gouda on top of the almonds.
- Add the Meats (3 minutes per cup): Fold a slice of prosciutto into a loose ribbon or small rose and place it against the side of the cup. Do the same with salami ribbons. Add a few cubes of soppressata in the center.
- Layer in the Fruits and Pickles (2 minutes per cup): Tuck grapes, dried apricots, and figs around the meats. Add a couple of cornichons and a few kalamata olives.
- Top with Soft Cheese and Crackers (2 minutes per cup): Place a wedge or two of brie on top, along with a sprinkle of blue cheese. Carefully arrange 3-4 crackers on the very top, leaning them against the rim. Drizzle a tiny bit of honey over the brie and crackers.
- Garnish and Chill (5 minutes): Finish each cup with a small sprig of fresh rosemary. Place cups on a large tray and refrigerate for at least 30 minutes before serving.
Notes
Do not overfill the cups; leave a little breathing room at the top. Keep your knife sharp for clean cuts. Dry grapes thoroughly to prevent soggy crackers. Assemble in batches of 4 cups for focus. These cups can be made a day ahead; add fresh rosemary garnish just before serving.
Nutrition
- Serving Size: 1 cup
- Calories: 500
- Sugar: 18
- Sodium: 800
- Fat: 32
- Saturated Fat: 12
- Carbohydrates: 28
- Fiber: 5
- Protein: 22
Keywords: charcuterie cups, individual charcuterie, Friendsgiving appetizer, party food, easy appetizer, no-cook appetizer


