Love this? Save it for later!
Share the inspiration with your friends
It was 11:47 PM on a random Wednesday, and I had that familiar, restless energy—the kind that makes you open the fridge door just to stare at the shelves. My body was screaming for something sweet, but my brain (the responsible part, anyway) was reminding me that I’d skipped the gym for three days straight. I didn’t have the energy to bake a batch of cookies, and I definitely didn’t have the willpower to stop at just one. But I did have a half-empty jar of peanut butter, a bag of oats that was about to expire, and this crazy idea that maybe—just maybe—I could make a snack that actually *helped* my workout goals instead of sabotaging them.
Honestly, I was skeptical at first. I mean, protein balls? They always seemed like something you’d find in a perfectly curated Instagram post, not in my messy kitchen at nearly midnight. But I was too tired to overthink it, so I just started mixing. The peanut butter went in first, then the oats, a scoop of protein powder, and a drizzle of honey. I rolled the mixture into little balls, stuck them in the fridge, and forgot about them until the next morning when I was running late for work. I grabbed one on my way out, expecting a sad, dry lump of disappointment. Instead, I got this perfect little bite of peanut buttery goodness that actually kept me full until lunch. Let me tell you, I was hooked.
These easy high-protein peanut butter protein balls have become my emergency snack, my post-workout reward, and my late-night craving killer. They’re the kind of recipe that feels like you’re cheating, but you’re really just being smart. Maybe you’ve been there—staring into your pantry, wanting something good but also something that won’t undo all your hard work. Well, this is it. They’re simple, they’re fast, and they’re honestly the best thing I’ve made in my kitchen all year.
Why You’ll Love This Recipe
Let me be real with you. I’ve tested this recipe about a dozen times, tweaking the ratios, swapping ingredients, and even messing up a batch so badly it turned into crumbly peanut butter sand. But after all that trial and error, I can say with confidence that this version is the one. It’s not just another protein ball recipe—it’s the one that actually works, every single time.
- Quick & Easy: These come together in under 10 minutes. No baking, no fancy equipment, no waiting around. You mix, you roll, you eat. That’s it.
- Simple Ingredients: You only need 5 ingredients, and I bet you already have most of them in your pantry right now. No weird health food store finds required.
- Perfect for Meal Prep: Make a batch on Sunday, and you’ve got grab-and-go snacks for the whole week. They’re lifesavers for busy mornings or afternoon slumps.
- Crowd-Pleaser: I’ve brought these to work, shared them with friends, and even tricked my picky nephew into eating them. Everyone loves them—kids and adults alike.
- Unbelievably Delicious: The texture is soft and chewy, not dry or chalky. The peanut butter flavor is rich and satisfying, and the honey adds just the right amount of sweetness.
What makes this recipe different from all the others? It’s the ratio. I’ve found the perfect balance of wet to dry ingredients so that your protein balls hold together without being sticky or falling apart. Plus, I use a specific type of protein powder that doesn’t leave that weird aftertaste. Trust me, I’ve tried them all, and this combination is the winner.
This recipe isn’t just good—it’s the kind that makes you close your eyes after the first bite. It’s comfort food that actually fuels your body, a snack that satisfies your sweet tooth without the sugar crash. Whether you’re a fitness fanatic or just someone who wants a healthier snack option, these protein balls are about to become your new best friend.
What Ingredients You Will Need
This recipe uses simple, wholesome ingredients to deliver big flavor and satisfying texture without any fuss. Most of these are pantry staples, so you probably won’t need a special trip to the store.
- Creamy Peanut Butter (1 cup / 240g): Use a natural, no-stir peanut butter for best results. I prefer Smucker’s Natural or Justin’s because they have the right consistency. Avoid the super oily kind that separates, or your balls might turn out greasy. If you only have crunchy, go for it—just expect a little extra texture.
- Rolled Oats (1 cup / 90g): Old-fashioned rolled oats work best here. Quick oats will work in a pinch, but they make the texture a bit mushy. Steel-cut oats are too hard and won’t blend well. For a gluten-free option, use certified gluten-free oats.
- Vanilla Protein Powder (1/2 cup / 50g): This is where you can customize. I use Orgain Simple Vanilla or Ghost Whey Vanilla for a clean taste. If you’re vegan, a plant-based protein powder works great. Just avoid super gritty or chalky brands—your balls will thank you.
- Honey (1/4 cup / 85g): This binds everything together and adds natural sweetness. Maple syrup works as a vegan substitute, but it makes the mixture slightly stickier. Agave nectar is also fine, but it’s sweeter, so you might want to use a little less.
- Mini Chocolate Chips (1/4 cup / 45g): These are optional but highly recommended. They add little pockets of melted chocolate that make each bite feel like a treat. Use dark chocolate chips for a lower sugar option, or dairy-free chips if needed.
One thing I’ve learned the hard way: don’t skip the protein powder. It’s not just for the protein boost—it helps absorb moisture and gives the balls their signature texture. If you try to leave it out, you’ll end up with a sticky, unrollable mess. Trust me on this.
For the best results, make sure your peanut butter is at room temperature. Cold peanut butter is harder to mix and won’t incorporate evenly. If your kitchen is chilly, microwave the peanut butter for 10-15 seconds to soften it up.
Equipment Needed
One of the best things about this recipe is that you don’t need any fancy equipment. Here’s what you’ll need:
- Large Mixing Bowl: Any bowl will do, but a wide one makes mixing easier. I use my grandmother’s old ceramic bowl, but a stainless steel one works just as well.
- Spatula or Wooden Spoon: For mixing everything together. A rubber spatula is great for scraping the sides.
- Measuring Cups and Spoons: For accurate measurements. I like using a set of metal cups because they’re sturdy and easy to clean.
- Baking Sheet or Plate: To hold the protein balls while they chill. Line it with parchment paper for easy cleanup.
- Parchment Paper: Not strictly necessary, but it makes cleanup a breeze. Plus, it prevents sticking.
- Cookie Scoop (Optional): If you want perfectly uniform balls, a small cookie scoop (about 1 tablespoon size) is a game-changer. I got mine from a kitchen supply store for under $10.
- Refrigerator: Yes, this counts as equipment! The balls need at least 30 minutes to firm up. Patience is key here.
If you don’t have a cookie scoop, just use your hands. A light coating of cooking spray or a little water on your palms will prevent the mixture from sticking while you roll.
Preparation Method
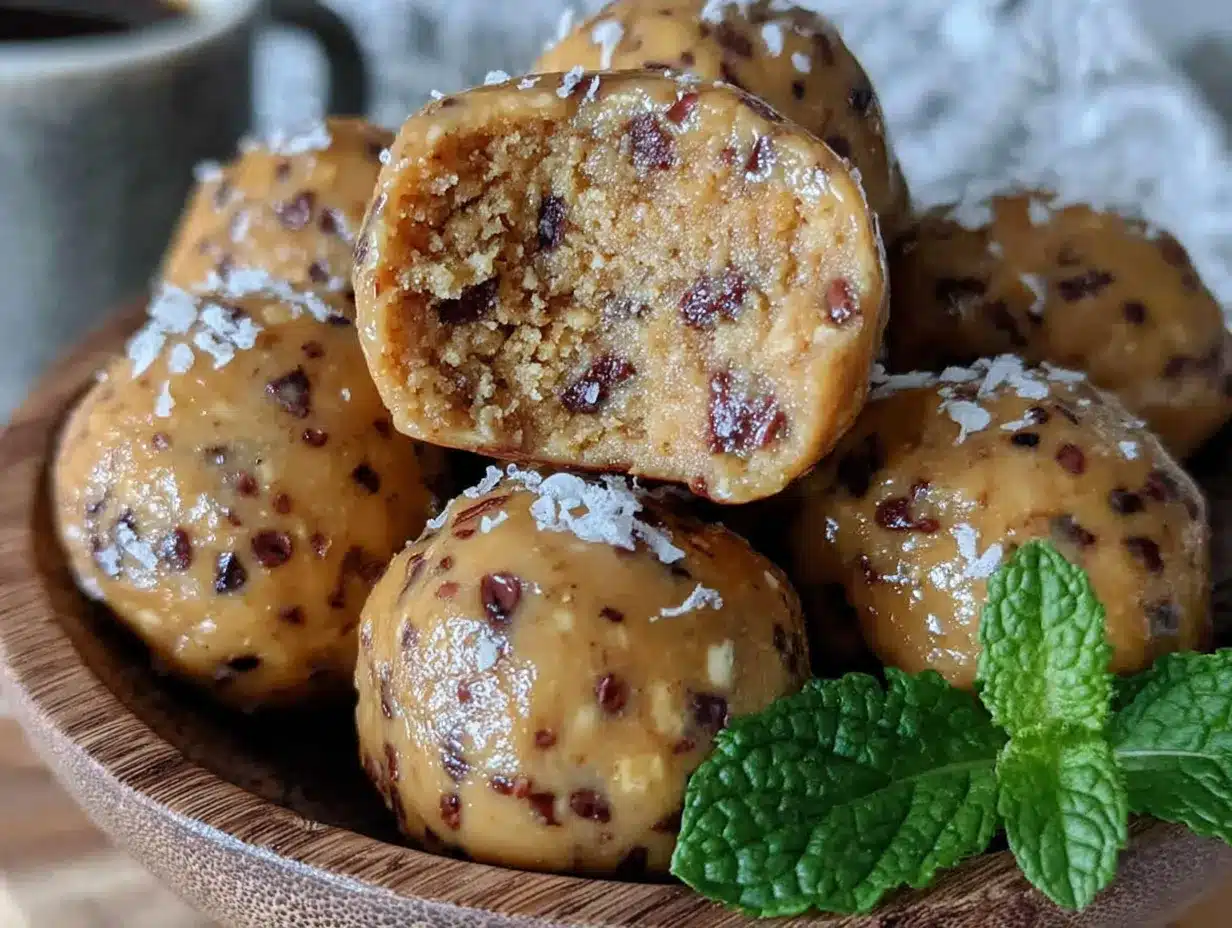
Alright, let’s get rolling! This is the fun part. Follow these steps, and you’ll have perfect protein balls in no time.
- Prep Your Workspace: Line a baking sheet or large plate with parchment paper. This gives you a dedicated spot for the finished balls. Clear your counter and make sure your hands are clean.
- Combine the Dry Ingredients: In a large mixing bowl, add 1 cup (90g) of rolled oats and 1/2 cup (50g) of vanilla protein powder. Whisk them together with a fork until evenly distributed. This step prevents clumps of protein powder from hiding in your final mixture.
- Add the Wet Ingredients: Add 1 cup (240g) of creamy peanut butter and 1/4 cup (85g) of honey to the bowl. Don’t add the chocolate chips yet—they’ll get crushed if you mix too vigorously. Use your spatula to fold everything together, starting from the bottom and working your way up.
- Mix Thoroughly: This is where you need a little elbow grease. Stir until the mixture forms a cohesive dough. It should be slightly sticky but firm enough to hold its shape when pressed. If it feels too dry, add a teaspoon of honey or a splash of milk. If it’s too wet, add a tablespoon of oats. I’ve had to adjust both ways depending on the brand of peanut butter I used.
- Fold in the Chocolate Chips: Once the base mixture is smooth, gently fold in 1/4 cup (45g) of mini chocolate chips. Be careful not to overmix—you want the chips to stay intact so you get those little chocolate pockets in every bite.
- Chill the Mixture (Optional but Helpful): If your kitchen is warm or your hands are naturally hot, pop the bowl in the fridge for 10-15 minutes. This makes the mixture easier to handle and less sticky. I skip this step in winter but always do it in summer.
- Roll into Balls: Scoop out about 1 tablespoon of the mixture (use a cookie scoop for consistency) and roll it between your palms to form a smooth ball. Place each ball on the prepared baking sheet. You should get about 16-18 balls, depending on size. If the mixture sticks to your hands, lightly wet your palms or spray them with cooking spray.
- Chill to Set: Place the baking sheet in the refrigerator for at least 30 minutes. This step is non-negotiable—it allows the balls to firm up and hold their shape. If you skip this, they’ll be too soft and might fall apart when you try to eat them.
- Store or Serve: Once chilled, transfer the protein balls to an airtight container. They’re ready to eat immediately, but they get even better after a few hours in the fridge as the flavors meld together.
Your mixture should feel like a soft, pliable dough—not crumbly, not sticky. If it crumbles, add a little more honey or peanut butter. If it’s too sticky, add more oats or protein powder. The texture is your guide.
Cooking Tips & Techniques
After making these protein balls more times than I can count, I’ve picked up a few tricks that make the process smoother and the results better. Here are my best tips:
Use Room Temperature Ingredients. Cold peanut butter is a nightmare to mix. It forms hard lumps that refuse to incorporate. Let it sit on the counter for 20 minutes before you start, or give it a quick 10-second zap in the microwave. Your future self will thank you.
Don’t Overmix the Chocolate Chips. I learned this the hard way. If you stir too aggressively, the chocolate chips get crushed and you end up with brown-tinted dough instead of distinct chocolate pockets. Fold them in gently, just until they’re evenly distributed.
Wet Your Hands for Easier Rolling. This is my number one tip. Keep a small bowl of water nearby, and dip your fingers in it before rolling each ball. The moisture creates a barrier between the sticky dough and your skin. It’s a game-changer, especially if you have warm hands.
Use a Cookie Scoop for Uniform Size. I know it’s an extra tool, but it makes a huge difference. Uniform balls chill at the same rate, look more professional, and make portion control easier. If you don’t have one, just eyeball it—perfection isn’t the goal here.
Chill Before Rolling If Needed. If your mixture feels too sticky to handle, don’t fight it. Pop the whole bowl in the fridge for 15 minutes. The cold firms up the fats in the peanut butter, making the dough much easier to work with. I do this every time I use a runny peanut butter.
One Mistake I Made: The first time I made these, I used old oats that had been sitting in my pantry for over a year. They were stale and had absorbed moisture, which made the balls taste flat and slightly musty. Fresh ingredients matter, even in a simple recipe like this one. Check your oats before you start.
Variations & Adaptations
One of the best things about this recipe is how customizable it is. Here are some variations I’ve tried and loved:
Chocolate Peanut Butter: Swap the vanilla protein powder for chocolate protein powder and use dark chocolate chips. You get a double chocolate hit that’s absolutely decadent. I made these for a party once, and they disappeared in minutes.
Vegan Version: Use a plant-based protein powder (I like Vega Sport or Garden of Life) and replace the honey with maple syrup or agave nectar. The texture is slightly softer, so you might need to add an extra tablespoon of oats to compensate.
Nut-Free Option: Substitute the peanut butter with sunflower seed butter or tahini. Sunflower seed butter has a similar consistency but a slightly different flavor. Note that it can react with baking soda if you ever bake these (which I don’t recommend), so stick to no-bake versions.
Add Some Crunch: Fold in 2 tablespoons of chopped peanuts, almonds, or even crushed pretzels for extra texture. The salty crunch pairs beautifully with the sweet, creamy base. Just make sure your additions are small enough to roll into balls.
Spiced Version: Add 1/2 teaspoon of cinnamon and a pinch of nutmeg to the dry ingredients. It gives the balls a warm, cozy flavor that’s perfect for fall. I made these during a chilly October weekend, and they were the perfect afternoon pick-me-up.
Protein Boost: If you’re looking for even more protein, add 1 tablespoon of chia seeds or flaxseed meal. These also add fiber and omega-3s. Just be aware that they’ll absorb some moisture, so you might need to add an extra teaspoon of honey.
My personal favorite variation is the chocolate peanut butter version. I made it on a whim one Sunday afternoon, and now it’s the only version I make. The chocolate protein powder pairs so well with the peanut butter that it tastes like a dessert, not a health snack.
Serving & Storage Suggestions
These protein balls are incredibly versatile when it comes to serving. Here’s how I like to enjoy them:
Serving Temperature: They’re best served cold, straight from the fridge. The chill keeps them firm and gives them a satisfying, fudgy texture. If you let them sit at room temperature for too long, they’ll soften up and become a bit messy. I usually take one out of the fridge and let it sit for 2-3 minutes before eating—just enough to take the chill off without losing the structure.
Presentation Ideas: For a pretty presentation, arrange the balls on a wooden board or a white plate. You can dust them with a little cocoa powder or crushed peanuts for visual appeal. If you’re giving them as a gift, layer them in a mason jar with parchment paper between each layer. Tie a ribbon around the jar, and you’ve got a thoughtful, homemade present.
Complementary Dishes: These protein balls pair beautifully with a cold glass of almond milk or a hot cup of coffee. For a more substantial snack, serve them alongside fresh fruit like apple slices or strawberries. They’re also great crumbled over Greek yogurt for a high-protein breakfast bowl.
Storage Instructions: Store the protein balls in an airtight container in the refrigerator. They’ll stay fresh for up to 2 weeks, though they rarely last that long in my house. You can also freeze them for up to 3 months. To freeze, arrange them in a single layer on a baking sheet and freeze until solid (about 1 hour), then transfer to a freezer-safe bag or container. This prevents them from sticking together.
Reheating: There’s no need to reheat these, but if you want a softer texture, let one sit at room temperature for 10-15 minutes. Don’t microwave them—it melts the chocolate chips and turns the balls into a gooey mess. I learned this the hard way when I was impatient one afternoon.
Flavor Development: Here’s a secret: these protein balls actually taste better on day two. The flavors meld together as they sit, and the oats absorb some of the moisture from the peanut butter, creating a more cohesive texture. So if you can resist eating them all on day one, you’re in for a treat.
Nutritional Information & Benefits
These protein balls aren’t just delicious—they’re packed with nutrients that support your body and your goals. Here’s a breakdown of what you’re getting in each ball (based on 16 servings):
- Calories: Approximately 155-175 per ball
- Protein: 8-10 grams (depending on your protein powder)
- Carbohydrates: 16-18 grams
- Fiber: 2-3 grams
- Fat: 8-10 grams (mostly healthy unsaturated fats from peanut butter)
- Sugar: 8-10 grams (naturally occurring from honey and minimal added sugar)
Key Health Benefits:
- High Protein: The combination of peanut butter and protein powder provides a substantial protein boost, which helps with muscle repair, satiety, and stable blood sugar levels. This makes them an excellent post-workout snack or midday hunger buster.
- Healthy Fats: Peanut butter is rich in monounsaturated fats, which support heart health and help your body absorb fat-soluble vitamins.
- Fiber-Rich Oats: Rolled oats are a great source of soluble fiber, which aids digestion and helps you feel full longer. They also provide steady energy without the crash.
- Natural Sweetness: Honey provides antioxidants and has antibacterial properties. It’s a more natural sweetener than refined sugar, though you should still enjoy it in moderation.
Dietary Considerations: These protein balls are naturally vegetarian. For a vegan version, use plant-based protein powder and maple syrup. They can be made gluten-free by using certified gluten-free oats. They contain peanuts and dairy (from chocolate chips and some protein powders), so they’re not suitable for those with allergies to these ingredients. Always check your protein powder label for potential allergens.
I personally love that these balls give me a clean energy boost without the jitters or crash. They’re my go-to for long workdays or before a workout when I need something light but sustaining.
Conclusion
So there you have it—my easy high-protein peanut butter protein balls that have become a staple in my kitchen. They’re proof that healthy eating doesn’t have to be complicated, expensive, or boring. With just 5 ingredients and 10 minutes of your time, you can create a snack that fuels your body and satisfies your cravings at the same time.
What I love most about this recipe is how forgiving it is. You can tweak it, adjust it, and make it your own without worrying about ruining it. Maybe you’ll add a pinch of sea salt on top, or swap the chocolate chips for dried cranberries. The possibilities are endless, and that’s what makes cooking so fun.
I’d love to hear how these turn out for you! Did you try a variation? Did you discover a new favorite combination? Drop a comment below and let me know. And if you share them on social media, tag me—I’m always excited to see your creations. Now go ahead, grab that peanut butter jar, and make yourself a batch. You deserve it.
Happy snacking!
Frequently Asked Questions
Can I use crunchy peanut butter instead of creamy?
Absolutely! Crunchy peanut butter adds a nice texture and works just as well. Just be aware that the final balls will have little peanut pieces throughout, which some people love. The binding properties are the same, so you don’t need to adjust anything else.
Why are my protein balls too dry and crumbly?
This usually happens when your peanut butter is too thick or your protein powder is very absorbent. Try adding an extra tablespoon of honey or a splash of milk (dairy or plant-based) to bring the mixture together. If you’ve already rolled the balls, you can dip them in a little melted peanut butter to help them hold together.
How long do these protein balls last?
In the refrigerator, they’ll stay fresh for up to 2 weeks in an airtight container. In the freezer, they’ll last for up to 3 months. Just make sure they’re well-sealed to prevent freezer burn. I like to label my containers with the date so I know when I made them.
Can I make these without protein powder?
You can, but the texture will be different. The protein powder helps absorb moisture and gives the balls their structure. If you skip it, you’ll need to add about 1/4 cup more oats and possibly a tablespoon of flaxseed meal or chia seeds to help bind everything together. The protein content will be lower, but they’ll still taste great.
Can I use quick oats instead of rolled oats?
Yes, quick oats will work, but the texture will be softer and less chewy. Rolled oats give the balls a more satisfying bite and hold their shape better. If all you have is quick oats, go ahead and use them—just expect a slightly different mouthfeel. You might also need to add a tablespoon less honey since quick oats absorb moisture differently.
Pin This Recipe!
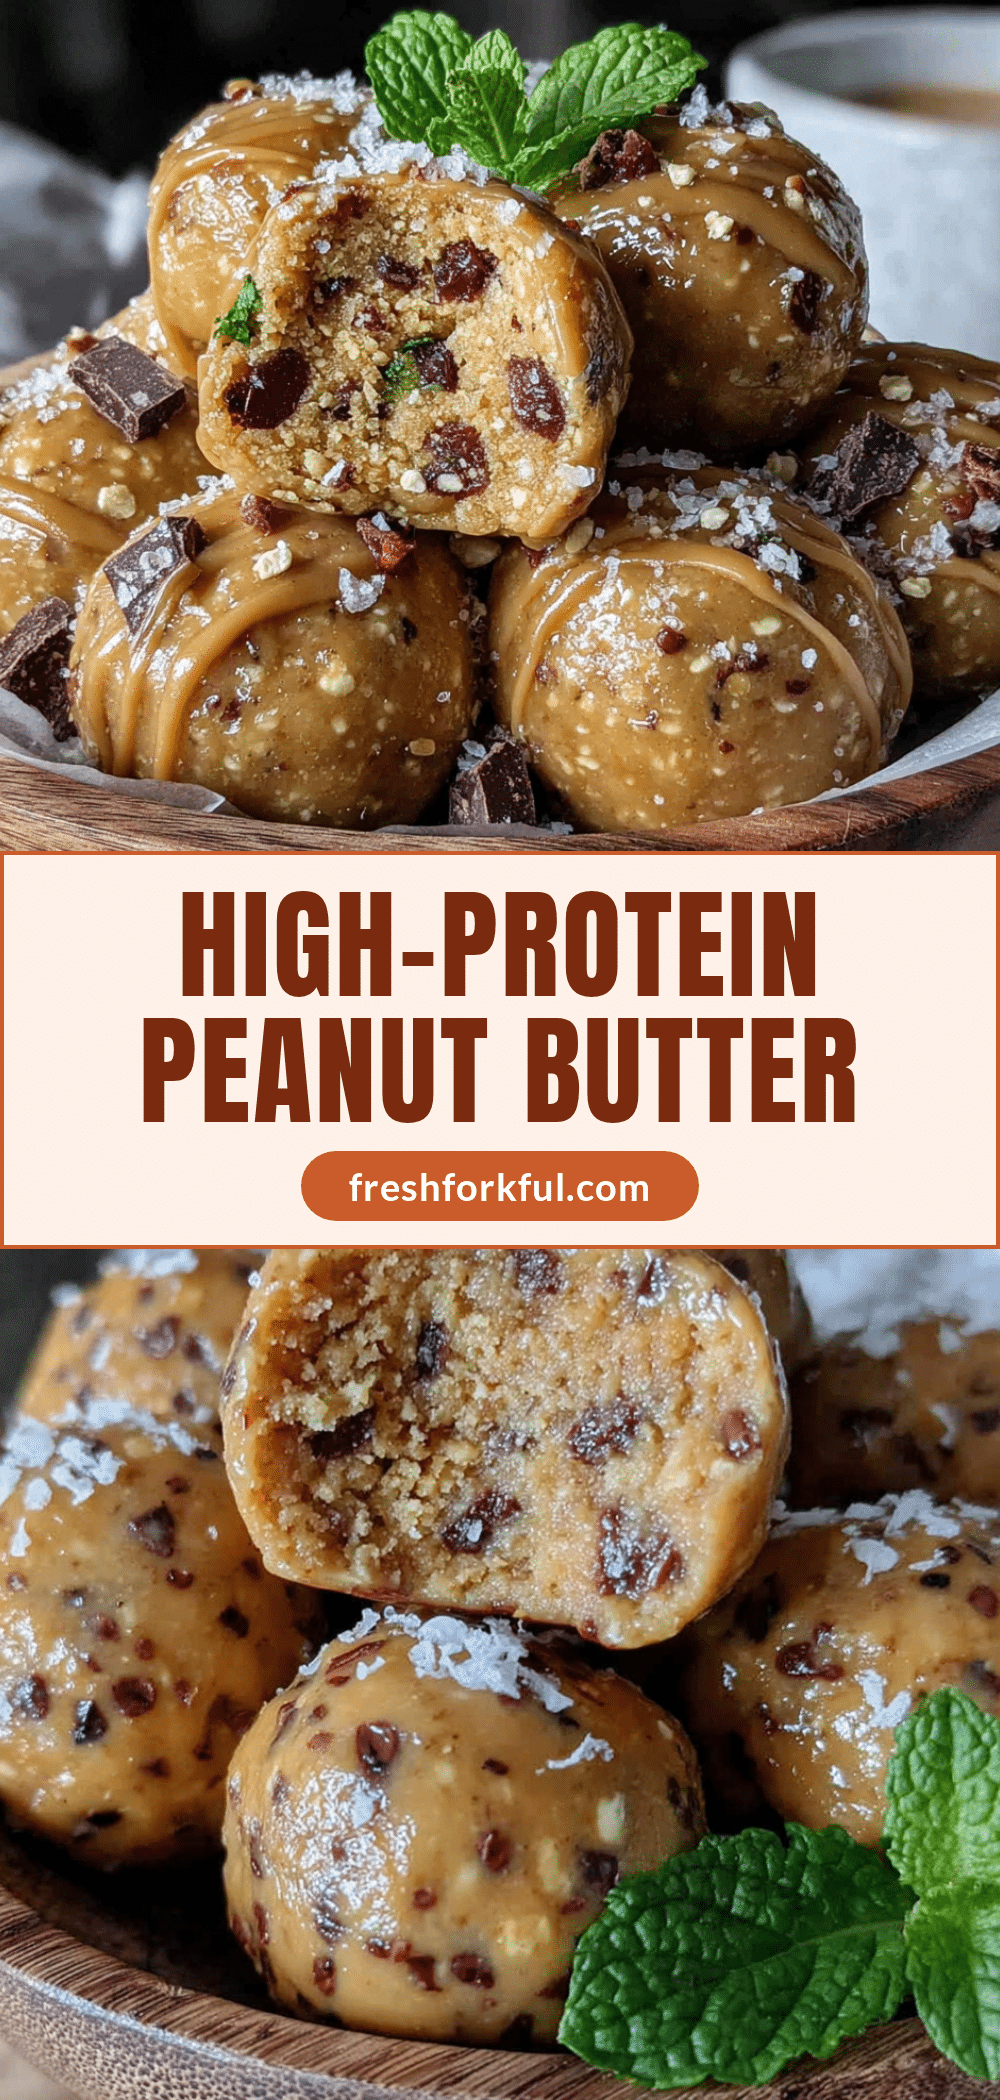
Easy High-Protein Peanut Butter Protein Balls (5 Ingredients)
These easy high-protein peanut butter protein balls are the perfect emergency snack, post-workout reward, and late-night craving killer. Made with just 5 simple ingredients, they come together in under 10 minutes and are packed with protein and healthy fats.
- Prep Time: 10 minutes
- Cook Time: 0 minutes
- Total Time: 40 minutes
- Yield: 16-18 balls 1x
- Category: Snack
- Cuisine: American
Ingredients
- 1 cup (240g) creamy peanut butter
- 1 cup (90g) rolled oats
- 1/2 cup (50g) vanilla protein powder
- 1/4 cup (85g) honey
- 1/4 cup (45g) mini chocolate chips
Instructions
- Line a baking sheet or large plate with parchment paper.
- In a large mixing bowl, combine 1 cup (90g) rolled oats and 1/2 cup (50g) vanilla protein powder. Whisk together until evenly distributed.
- Add 1 cup (240g) creamy peanut butter and 1/4 cup (85g) honey to the bowl. Fold together with a spatula until a cohesive dough forms.
- Gently fold in 1/4 cup (45g) mini chocolate chips until evenly distributed.
- If the mixture is too sticky, refrigerate for 10-15 minutes.
- Scoop about 1 tablespoon of the mixture and roll between your palms to form a smooth ball. Place on the prepared baking sheet. Repeat with remaining mixture (makes about 16-18 balls).
- Refrigerate for at least 30 minutes to set.
- Transfer to an airtight container and store in the refrigerator.
Notes
Use room temperature peanut butter for easier mixing. If mixture is too dry, add a teaspoon of honey or a splash of milk. If too sticky, add a tablespoon of oats. Wet your hands with water or cooking spray to prevent sticking while rolling. For best flavor, let the balls sit in the fridge for a few hours or overnight before serving.
Nutrition
- Serving Size: 1 ball
- Calories: 165
- Sugar: 9
- Sodium: 80
- Fat: 9
- Saturated Fat: 2
- Carbohydrates: 17
- Fiber: 2
- Protein: 9
Keywords: protein balls, peanut butter protein balls, high protein snack, no bake, healthy snack, 5 ingredients


