Love this? Save it for later!
Share the inspiration with your friends
My brother-in-law Mark had claimed to hate pumpkin for thirty-seven years. Thirty-seven years of wrinkling his nose at pumpkin bread, pushing pumpkin pie around his plate at Thanksgiving, and making that little sound of disgust whenever someone mentioned pumpkin spice season. Then last October, I caught him standing alone in my kitchen, eating a mini cheesecake straight off the baking sheet, eyes half-closed, clearly in a state of pure, unapologetic bliss. “These are… not pumpkin,” he said, mouth still full. “These are something else entirely.”
That moment cracked something open for me. Here was a man who had built an entire identity around hating a vegetable, caught red-handed with crumbs on his shirt. And honestly? I get it now. Most pumpkin desserts taste like someone dumped a can of puree into a sugar bowl and called it a day. They’re heavy, one-note, and frankly, a little sad. But these mini pumpkin cheesecakes? They’re different. The pumpkin is there, sure, but it’s playing backup to the tangy cream cheese, the warm spices, and that buttery graham cracker crust that shatters when you bite into it.
I developed this recipe on a rainy Tuesday afternoon, three weeks before Halloween, when I was supposed to be working on something completely different for the blog. But the idea wouldn’t leave me alone — mini cheesecakes, individual portions, no slicing required, perfect for a Halloween party where people want to grab and go. The first batch came out too dense. The second was too sweet. The third, with a little more sour cream and a little less sugar, was the one. I brought them to a neighborhood potluck that weekend, and someone asked if I’d cater their Halloween party. I mean, that’s how you know you’ve got something.
These little cheesecakes have become my October tradition now. They’re what I bring to every pumpkin carving party, every Halloween get-together, every time someone says “I don’t really like pumpkin desserts.” The look on their face after the first bite — that’s the whole point. You know that feeling when you prove someone wrong without even trying? That’s this recipe.
Why You’ll Love This Recipe
Let me tell you why these mini pumpkin cheesecakes are going to become your new fall obsession. I’ve made these at least two dozen times now, tweaking and testing until every single detail was just right, and here’s what I’ve learned:
- Quick & Easy: These come together in about 30 minutes of active prep time, then the oven does the rest. Perfect for busy weeknights or last-minute Halloween party invites.
- Simple Ingredients: No fancy grocery trips needed. You probably have most of these in your pantry already — graham crackers, cream cheese, pumpkin puree, eggs, and basic spices.
- Perfect for Halloween Parties: Individual portions mean no slicing, no serving utensils, no mess. Just grab one (or three) and go mingle.
- Crowd-Pleaser: I’ve watched self-proclaimed pumpkin haters eat three of these in one sitting. Kids love them, adults love them, everyone loves them.
- Unbelievably Delicious: The texture is what gets people — creamy, tangy, with just enough pumpkin flavor to feel festive without overwhelming the palate.
What makes this recipe different from all the other pumpkin cheesecake recipes out there? It’s the ratio. I spent a lot of time figuring out the perfect balance between cream cheese and pumpkin, so you get that luscious cheesecake texture with the warm, cozy flavor of fall. Plus, the mini format means you can enjoy one without the commitment of a full slice. It’s portion control that actually tastes good.
This isn’t just another pumpkin dessert. It’s the kind of recipe that makes you close your eyes after the first bite, the kind that gets requested year after year, the kind that converts pumpkin skeptics into believers. Honestly, it’s comfort food reimagined — familiar enough to feel nostalgic, but different enough to be exciting.
What Ingredients You Will Need
This recipe uses simple, wholesome ingredients that work together to create something truly special. The magic is in how they balance each other — the tangy cream cheese against the sweet pumpkin, the warm spices against the buttery crust. Here’s everything you’ll need:
For the Crust
- 1 ½ cups graham cracker crumbs (about 12 full sheets, crushed finely — I like using Honey Maid brand for consistent texture)
- ¼ cup granulated sugar
- 6 tablespoons unsalted butter, melted (salted butter works too, just reduce the added salt slightly)
- Pinch of salt (skip this if using salted butter)
For the Cheesecake Filling
- 16 ounces cream cheese, softened to room temperature (Philadelphia brand is my go-to for that consistently smooth texture)
- ½ cup granulated sugar
- ¼ cup packed light brown sugar (adds a deeper, almost caramel-like sweetness)
- 2 large eggs, room temperature (cold eggs can make the batter lumpy — trust me on this one)
- 1 cup pumpkin puree (not pumpkin pie filling! Libby’s brand is reliable and consistent)
- ¼ cup sour cream, room temperature (adds tanginess and makes the texture extra silky)
- 1 teaspoon vanilla extract
- 1 ½ teaspoons pumpkin pie spice (or make your own: ½ tsp cinnamon, ¼ tsp nutmeg, ¼ tsp ginger, ⅛ tsp cloves, ⅛ tsp allspice)
- ½ teaspoon ground cinnamon
- ¼ teaspoon salt
For the Topping (Optional but Recommended)
- ½ cup heavy cream (for homemade whipped cream)
- 1 tablespoon powdered sugar
- ¼ teaspoon vanilla extract
- Caramel sauce, for drizzling (store-bought is fine, or make your own if you’re feeling ambitious)
- Mini chocolate chips or candy eyes, for decoration (because Halloween!)
A few notes on ingredients: Make sure your cream cheese is truly softened — not cold, not melted, but that perfect room temperature where it gives slightly when you press it. Cold cream cheese creates lumps that are nearly impossible to remove. Same goes for the eggs and sour cream. I usually take everything out of the fridge about an hour before I start baking. For the pumpkin puree, I always buy a few extra cans during fall because stores run out, and there’s nothing worse than wanting to make these in November and finding empty shelves. If you want to substitute, canned pumpkin is really the best option here — fresh pumpkin puree tends to be too watery and will affect the texture.
Equipment Needed
You don’t need a professional bakery setup for these mini cheesecakes, but having the right tools makes the process so much smoother. Here’s what I use:
- 12-cup standard muffin tin — this is non-negotiable. I’ve tried making these in a mini muffin tin and they’re just too small to get that perfect cheesecake-to-crust ratio.
- Muffin liners — I prefer foil liners because they peel off easily and look nicer. Paper liners work but tend to stick a little more.
- Electric hand mixer or stand mixer — you can mix by hand if you’re patient, but a mixer gives you that silky smooth texture with way less effort.
- Mixing bowls — at least two, one medium and one large.
- Measuring cups and spoons — accurate measurements matter in baking.
- Food processor or rolling pin — for crushing the graham crackers. A food processor gives you the most consistent crumbs, but a rolling pin and a zip-top bag work perfectly fine.
- Small saucepan or microwave-safe bowl — for melting butter.
- Wire cooling rack — essential for cooling the cheesecakes evenly without condensation building up.
- Piping bag or zip-top bag — for piping the whipped cream topping prettily.
If you don’t have a food processor, don’t worry. I actually prefer the texture of hand-crushed graham crackers sometimes — they have more character, you know? Just put the crackers in a zip-top bag, seal it, and go to town with a rolling pin. It’s oddly satisfying and takes about two minutes. For the mixer, any brand works — I’ve used a $20 hand mixer for years and it does the job beautifully.
Preparation Method
Alright, let’s make these mini pumpkin cheesecakes. I’ve broken this down into clear steps with all the little details I’ve learned from making these over and over. Take your time, and don’t rush the cooling process — that’s where the magic happens.
Step 1: Prep Everything
Preheat your oven to 325°F (163°C). Line your muffin tin with 12 foil liners. Set your cream cheese, eggs, and sour cream on the counter to come to room temperature if you haven’t already. This step matters more than you think — I once tried to rush it and ended up with lumpy batter that never fully smoothed out.
Step 2: Make the Crust
In a medium bowl, combine the graham cracker crumbs, ¼ cup sugar, and a pinch of salt. Pour in the melted butter and stir with a fork until every crumb is moistened and the mixture looks like wet sand. The texture should hold together when you squeeze a handful — if it’s too dry, add another tablespoon of melted butter; if it’s too wet, add a few more crumbs.
Divide the crust mixture evenly among the 12 muffin liners. I use about 2 tablespoons per liner. Press it down firmly with the bottom of a small glass or a shot glass — you want it compacted so it holds together after baking. Don’t press it up the sides, just the bottom. Pop the pan in the fridge while you make the filling.
Step 3: Make the Filling
In a large bowl, beat the softened cream cheese with an electric mixer on medium speed until it’s completely smooth, about 2 minutes. Scrape down the sides and bottom of the bowl with a spatula — cream cheese loves to hide there. Add the granulated sugar and brown sugar, then beat for another minute until light and fluffy.
Add the eggs one at a time, beating on low speed after each addition until just combined. Overmixing at this stage can incorporate too much air, which leads to cracks in your cheesecakes. Add the pumpkin puree, sour cream, and vanilla extract, then mix on low until smooth. Finally, add the pumpkin pie spice, cinnamon, and salt, and mix until everything is evenly distributed. The batter should be thick, creamy, and a beautiful pale orange color.
Step 4: Fill and Bake
Remove the muffin pan from the fridge. Divide the filling evenly among the 12 liners, filling each almost to the top — these cheesecakes don’t rise much, so you can be generous. Give the pan a gentle tap on the counter to release any air bubbles.
Bake at 325°F (163°C) for 18-22 minutes. The edges should look set and slightly puffed, but the centers should still jiggle slightly when you gently shake the pan. This is the sweet spot — overbaking leads to dry, cracked cheesecakes. I usually start checking at 18 minutes and go from there.
Step 5: Cool Slowly
This is the most important step, and the one most people rush. Turn off the oven, crack the door open, and let the cheesecakes sit in the warm oven for 10 minutes. This gentle cooling prevents the dreaded crack. Then remove the pan from the oven and let it cool on a wire rack for another 30 minutes at room temperature.
Once they’re cool enough to handle, transfer the cheesecakes (still in their liners) to a wire rack and let them cool completely, about 1 hour. Then cover loosely with plastic wrap and refrigerate for at least 4 hours, but overnight is better. I know it’s hard to wait, but the texture improves dramatically after a good chill.
Step 6: Add Toppings
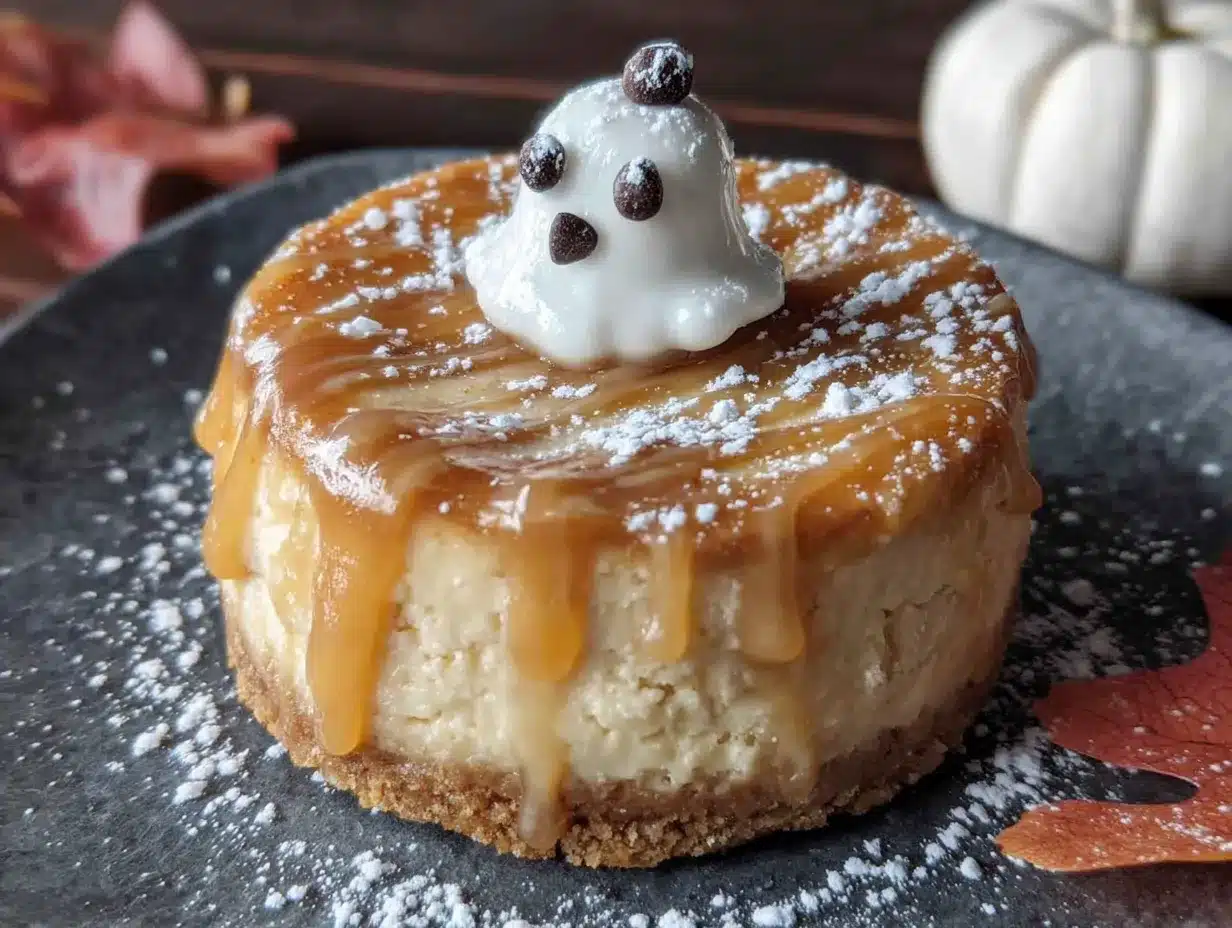
When you’re ready to serve, make the whipped cream by beating the heavy cream, powdered sugar, and vanilla extract together until soft peaks form. Pipe or spoon a dollop onto each cheesecake. Drizzle with caramel sauce and add mini chocolate chips or candy eyes for that Halloween vibe.
Cooking Tips & Techniques
After making these mini pumpkin cheesecakes more times than I can count, I’ve collected a few hard-won lessons. Let me save you some trouble:
Room temperature ingredients are not optional. I learned this the hard way when I made a batch for a Halloween party and ended up with lumpy batter. Cold cream cheese doesn’t blend smoothly, and cold eggs can seize the mixture. Set everything out an hour before you start. If you forget, you can soften cream cheese in the microwave in 10-second bursts, but it’s not quite the same.
Don’t overmix the batter. I know it’s tempting to keep beating until everything is perfectly smooth, but overmixing incorporates too much air. Those air bubbles expand in the oven and then collapse, leaving you with cracked cheesecakes. Mix just until everything comes together, then stop.
The water bath is optional for these. Full-size cheesecakes usually need a water bath to prevent cracking, but these mini versions are forgiving enough that you can skip it. Just make sure you don’t overbake them and you’ll be fine. If you’re nervous, place a pan of hot water on the rack below the cheesecakes while they bake — the steam helps keep them moist.
Check for doneness by jiggling, not by sticking a knife in. A knife inserted into the center of a cheesecake creates a crack. Instead, gently shake the pan. The edges should be set and the center should wobble like Jell-O. It will continue to set as it cools.
Patience with cooling pays off. I once tried to speed-cool cheesecakes in the freezer and ended up with condensation all over the tops. The gradual cooling method I described above — oven off, door cracked, then room temperature, then fridge — gives you the creamiest texture with no cracks.
Variations & Adaptations
One of the best things about this recipe is how adaptable it is. Here are some variations I’ve tried and loved:
Gluten-Free Version: Swap the graham cracker crumbs for gluten-free graham crackers or crushed gluten-free cookies. I’ve used gluten-free vanilla wafers with great results — they add a nice vanilla flavor that complements the pumpkin.
Dairy-Free Version: Use dairy-free cream cheese (I like Kite Hill or Violife brands), dairy-free sour cream, and a plant-based butter substitute. The texture will be slightly less creamy, but still delicious. Just make sure everything is at room temperature.
Chocolate Pumpkin Cheesecakes: Add ¼ cup of melted dark chocolate to the batter along with the pumpkin. The chocolate and pumpkin combination is surprisingly good — it tastes like a grown-up Halloween treat.
Gingerbread Crust: Replace the graham crackers with crushed gingersnap cookies for a spicier, more festive crust. This is my personal favorite variation during the holidays. The ginger and molasses flavors pair beautifully with the pumpkin filling.
Mini Pumpkin Cheesecake Bites: Use a mini muffin tin and bake for 12-14 minutes instead. These are perfect for parties where you want a truly bite-sized option. You’ll get about 24 mini cheesecakes from this recipe.
Vegan Version: I’ve tested this with vegan cream cheese, silken tofu (blended until smooth), and a flax egg (1 tablespoon ground flaxseed mixed with 3 tablespoons water). The texture is denser but still creamy. It’s a work in progress, but my vegan friends were happy with the results.
Serving & Storage Suggestions
These mini pumpkin cheesecakes are best served cold, straight from the fridge. I like to take them out about 15 minutes before serving to take the chill off slightly — it lets the flavors come through more. Arrange them on a platter with the whipped cream and caramel drizzle, and maybe scatter a few candy corn or mini pumpkins around for decoration.
For Halloween parties, I’ve found that these are the perfect make-ahead dessert. You can prepare them completely (minus the whipped cream topping) up to 3 days in advance and keep them covered in the refrigerator. Add the whipped cream and decorations just before serving so they look fresh and pretty.
If you have leftovers (unlikely, but possible), store them in an airtight container in the refrigerator for up to 5 days. The texture actually improves after a day or two as the flavors meld together. I wouldn’t recommend freezing these — the cream cheese texture can become grainy after thawing. But if you must, freeze them without the toppings in a single layer, then wrap individually and store in a freezer bag for up to 1 month. Thaw overnight in the refrigerator.
For reheating, I actually prefer these cold, but some people like them slightly warm. If that’s you, microwave one for about 10 seconds — just enough to take the chill off without melting the cheesecake.
Nutritional Information & Benefits
Let’s be real — these are a treat, not a health food. But they’re not as indulgent as you might think. Here’s the approximate nutritional breakdown for one mini cheesecake (without toppings):
- Calories: 285
- Fat: 18g
- Carbohydrates: 27g
- Protein: 5g
- Sugar: 18g
- Fiber: 1g
Pumpkin is actually a nutritional powerhouse — it’s packed with vitamin A (great for eye health), vitamin C, fiber, and antioxidants. The cream cheese adds calcium and protein, and the eggs provide additional protein and healthy fats. Yes, there’s sugar and butter, but in moderation, these are a perfectly reasonable indulgence.
For those with dietary restrictions: this recipe contains dairy, eggs, and gluten (from the graham crackers). See the variations section above for substitution options. The pumpkin itself is naturally vegan and gluten-free, so the adaptations are mostly about the other components.
I like to think of these as a balanced treat — they satisfy that dessert craving while giving you a little nutritional boost from the pumpkin. It’s all about moderation, right?
Conclusion
These mini pumpkin cheesecakes have become my signature fall dessert, and I think they’ll become yours too. They’re the perfect combination of creamy, tangy, sweet, and spiced — everything you want in a fall dessert, wrapped up in a neat little package that’s perfect for parties.
Mark, my pumpkin-hating brother-in-law, now asks for these every October. He still claims he doesn’t like pumpkin. “These aren’t pumpkin desserts,” he insists. “They’re cheesecakes that happen to have pumpkin in them.” I just smile and hand him another one. Some conversions don’t need words.
I’d love to hear how these turn out for you! Did you add any fun Halloween decorations? Did you try one of the variations? Leave a comment below and let me know — your feedback helps other readers too. And if you make these for a party, tag me in your photos. There’s nothing that makes me happier than seeing these little cheesecakes out in the world, converting pumpkin skeptics one bite at a time.
Happy Halloween, and happy baking!
Frequently Asked Questions
Can I use pumpkin pie filling instead of pumpkin puree?
No, please don’t! Pumpkin pie filling is already sweetened and spiced, so using it would throw off the entire recipe. Stick with 100% pure pumpkin puree (not pumpkin pie filling). The cans look similar, so double-check before you buy.
Why did my cheesecakes crack?
Cracks usually happen from overbaking or sudden temperature changes. Make sure you take them out when the centers are still slightly jiggly, and follow the gradual cooling method I described. Also, make sure your cream cheese is fully softened — lumps can create weak spots that crack.
Can I make these without a mixer?
Yes, but you’ll need some elbow grease. Make sure your cream cheese is very soft, and use a whisk to beat it until smooth before adding the other ingredients. A silicone spatula helps with scraping the bowl. It’ll take about 10 minutes of steady whisking, but it’s doable.
How far in advance can I make these?
You can make the cheesecakes (without toppings) up to 3 days in advance. Store them covered in the refrigerator. Add the whipped cream and decorations on the day you’re serving them. The flavors actually get better after a day or two as they meld together in the fridge.
Can I double this recipe?
Absolutely! This recipe doubles beautifully. Just make sure you have two muffin tins, and bake them on separate racks. You might need to rotate the pans halfway through baking if your oven has hot spots. The baking time should remain about the same.
Pin This Recipe!
Perfect Mini Pumpkin Cheesecakes: Easy Halloween Treats
These mini pumpkin cheesecakes are creamy, tangy, and perfectly spiced, with a buttery graham cracker crust. They’re individual portions ideal for Halloween parties, and they convert even the most devoted pumpkin skeptics.
- Prep Time: 30 minutes
- Cook Time: 20 minutes
- Total Time: 5 hours (includes cooling and chilling)
- Yield: 12 servings 1x
- Category: Dessert
- Cuisine: American
Ingredients
- 1 ½ cups graham cracker crumbs (about 12 full sheets)
- ¼ cup granulated sugar
- 6 tablespoons unsalted butter, melted
- Pinch of salt
- 16 ounces cream cheese, softened to room temperature
- ½ cup granulated sugar
- ¼ cup packed light brown sugar
- 2 large eggs, room temperature
- 1 cup pumpkin puree (not pumpkin pie filling)
- ¼ cup sour cream, room temperature
- 1 teaspoon vanilla extract
- 1 ½ teaspoons pumpkin pie spice
- ½ teaspoon ground cinnamon
- ¼ teaspoon salt
- ½ cup heavy cream (for topping)
- 1 tablespoon powdered sugar (for topping)
- ¼ teaspoon vanilla extract (for topping)
- Caramel sauce, for drizzling (optional)
- Mini chocolate chips or candy eyes, for decoration (optional)
Instructions
- Preheat oven to 325°F (163°C). Line a 12-cup muffin tin with foil liners. Ensure cream cheese, eggs, and sour cream are at room temperature.
- In a medium bowl, combine graham cracker crumbs, ¼ cup sugar, and a pinch of salt. Pour in melted butter and stir until mixture resembles wet sand. Divide evenly among liners (about 2 tablespoons each) and press firmly into the bottom. Refrigerate while making filling.
- In a large bowl, beat softened cream cheese with an electric mixer on medium speed until smooth, about 2 minutes. Add granulated and brown sugars; beat until light and fluffy, about 1 minute.
- Add eggs one at a time, beating on low after each until just combined. Add pumpkin puree, sour cream, and vanilla; mix on low until smooth. Add pumpkin pie spice, cinnamon, and salt; mix until evenly distributed.
- Remove muffin pan from fridge. Divide filling evenly among liners, filling almost to the top. Tap pan gently on counter to release air bubbles.
- Bake for 18-22 minutes, until edges are set and centers jiggle slightly. Turn off oven, crack door open, and let cheesecakes sit in warm oven for 10 minutes.
- Remove pan from oven and cool on a wire rack for 30 minutes. Transfer cheesecakes (still in liners) to rack and cool completely, about 1 hour. Cover loosely with plastic wrap and refrigerate for at least 4 hours, preferably overnight.
- Before serving, make whipped cream: beat heavy cream, powdered sugar, and vanilla until soft peaks form. Pipe or spoon onto each cheesecake. Drizzle with caramel sauce and add decorations if desired.
Notes
Room temperature ingredients are crucial for a smooth batter. Do not overmix to avoid cracks. Cool gradually to prevent cracking. Cheesecakes can be made up to 3 days ahead (without toppings). Store leftovers in an airtight container in the refrigerator for up to 5 days. Freezing is not recommended.
Nutrition
- Serving Size: 1 mini cheesecake
- Calories: 285
- Sugar: 18
- Sodium: 220
- Fat: 18
- Saturated Fat: 10
- Carbohydrates: 27
- Fiber: 1
- Protein: 5
Keywords: mini pumpkin cheesecakes, Halloween desserts, pumpkin cheesecake, fall baking, individual cheesecakes, easy pumpkin recipe