Love this? Save it for later!
Share the inspiration with your friends
I was standing in the baking aisle of our local grocery store last December, staring blankly at a wall of neon-colored gelatin boxes, when the smell hit me. It was the strangest thing—that unmistakable, slightly artificial cherry-vanilla scent that only comes from a specific brand of instant pudding. And just like that, I was seven years old at my Aunt Margie’s kitchen table in Buffalo, watching her stir a bubbling pot of red Jell-O on the stove while snow piled up outside the window. She’d let me “help” by dropping in the canned fruit cocktail, one spoonful at a time, and I’d sneak pieces of the cold, slippery peaches when she wasn’t looking.
Aunt Margie passed away five years ago, and honestly, I hadn’t thought about those wiggly, jewel-toned desserts in ages. But standing there in the fluorescent lighting, I got this overwhelming urge to recreate that feeling for my own kids. The problem? I’m not exactly the type to serve my family a dessert made mostly from sugar and artificial colors. I mean, I let them have treats—plenty of them—but I wanted something that felt special without the crash-and-burn sugar rush that follows. Maybe you’ve been there, trying to find that sweet spot between holiday magic and not sending your kids into orbit.
So I grabbed a few boxes—yes, I still needed some of the real stuff for texture—and started experimenting in my kitchen that night. After three failed attempts (the first batch turned into a sad, watery mess, and the second one tasted like a chemistry experiment gone wrong), I finally cracked it. These Lightened-Up Christmas Sparkle Jello Cups for Kids are my little victory lap. They’ve got that same nostalgic wobble and festive shimmer, but with real fruit juice, less sugar, and a creamy yogurt layer that actually makes them feel like a proper dessert. Honestly, they’re the kind of thing that makes you close your eyes after the first bite—not because they’re fancy, but because they taste like a memory you didn’t know you were holding onto.
Why You’ll Love This Recipe
Let me tell you, as someone who has tested this recipe about seven times (and eaten the “failures” myself at 10 p.m. while watching Christmas movies), these little cups are a game-changer for the holiday season. I’ve spent years developing healthier versions of classic treats for my family, and this one has become our absolute favorite. Here’s why I think you’ll feel the same way:
- Quick & Easy : These come together in about 20 minutes of active time. The hardest part is waiting for the gelatin to set, which is honestly a good thing—you can make them the night before a party and cross “dessert” off your list.
- Simple Ingredients : No fancy grocery trips needed. You probably already have yogurt, fruit juice, and gelatin in your kitchen. I tested this with both store-brand and name-brand ingredients, and honestly, the store-brand juice worked just fine.
- Perfect for Holiday Gatherings : These are great for Christmas Eve dinners, classroom parties, or even as a fun activity to make with the kids on a snow day. They’re small enough that little hands can hold them without making a huge mess.
- Crowd-Pleaser : I served these at our neighborhood cookie exchange last week, and the moms were asking for the recipe while the kids were asking for seconds. That’s a win-win in my book.
- Unbelievably Delicious : The texture is that perfect jiggly-but-creamy combo that makes you feel like you’re eating something indulgent. The yogurt layer adds a tangy richness that balances the sweetness of the fruit juice gelatin.
What makes this recipe different from all those other Jell-O cup recipes out there? For starters, I swapped out half the sugar by using 100% fruit juice as the base for the gelatin. I also blended in plain Greek yogurt for the creamy layer instead of sweetened condensed milk or heavy cream. The result is a dessert that feels festive and fun but won’t leave you or your kids crashing an hour later. It’s comfort food reimagined—healthier, faster, but with the same soul-soothing satisfaction that makes the holidays feel special.
What Ingredients You Will Need
This recipe uses simple, wholesome ingredients to deliver that nostalgic holiday flavor without all the unnecessary extras. Most of these are pantry staples or easy to find at any grocery store, which is exactly what you want when you’re already juggling a million holiday to-do lists.
For the Red and Green Gelatin Layers
- 2 cups 100% cranberry juice (unsweetened, or use pomegranate juice for a deeper color)
- 2 cups white grape juice (or apple juice works if that’s what you have)
- 4 packets unflavored gelatin (about 4 teaspoons total—I use Knox brand because it sets up reliably every time)
- 2 tablespoons honey (divided, or use maple syrup for a slightly different flavor profile)
- 1 teaspoon vanilla extract (divided, adds warmth and depth)
For the Creamy Yogurt Layer
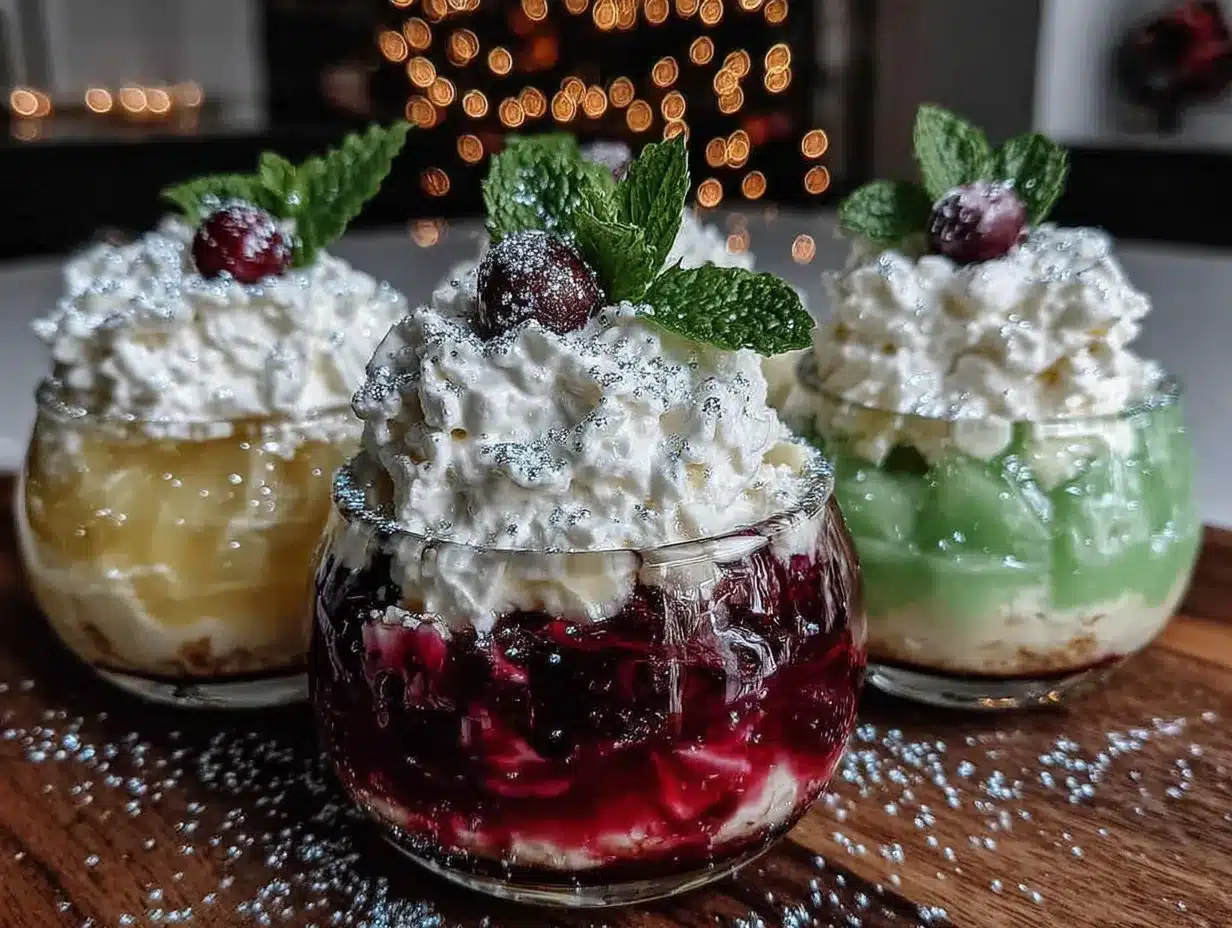
- 1 ½ cups plain Greek yogurt (full-fat or 2% works best for texture, but non-fat is fine too)
- 3 tablespoons honey (or agave nectar if you prefer a milder sweetness)
- 1 teaspoon vanilla extract
- 1 packet unflavored gelatin (dissolved in ¼ cup cold water)
For the Sparkle Topping
- ¼ cup unsweetened shredded coconut (optional, but adds that snow-like sparkle effect)
- Edible glitter or sanding sugar (look for brands that use natural colors if you want to keep it lighter)
- Fresh pomegranate arils or raspberries (for garnish, adds a pop of color and freshness)
One thing I learned the hard way—make sure your juice is cold when you bloom the gelatin. If it’s too warm, the gelatin can clump up and leave you with lumpy layers. I also recommend using a good-quality vanilla extract. I know it’s tempting to grab the imitation stuff, but trust me, the real deal makes a noticeable difference here. For the yogurt, I’ve tested this with Fage and Chobani, and both worked beautifully. Just avoid any yogurt with added fruit on the bottom—it throws off the texture.
If you’re looking for substitutions, you can easily make this dairy-free by using a thick coconut yogurt instead of Greek yogurt. The flavor will be slightly different—more tropical—but still delicious. For a completely sugar-free version, skip the honey and use a few drops of liquid stevia in both the gelatin and yogurt layers. Just be aware that the texture might be slightly softer without the honey acting as a stabilizer.
Equipment Needed
You don’t need a ton of fancy equipment for these cups, which is part of why I love making them. Here’s what you’ll need:
- Small clear cups or ramekins (I use 6-ounce plastic cups from the party supply store—they’re cheap and perfect for kids)
- 2 medium saucepans (for heating the juice mixtures separately)
- A whisk (a silicone one works best to avoid scratching your pans)
- A liquid measuring cup (glass is easiest for microwaving if you need to reheat)
- A small bowl (for blooming the gelatin)
- A baking sheet (to hold the cups while they set in the fridge)
- A fine-mesh strainer (optional, but helps remove any foam or undissolved gelatin bits)
I’ve made these with both glass ramekins and disposable cups, and honestly, the disposable ones are easier for kids’ parties—no worrying about broken glass, and you can just toss them when you’re done. If you’re using ramekins, make sure they’re completely dry before you start layering, or the gelatin might not stick to the sides properly. My first batch slid right down the sides of a slightly damp cup, and I ended up with a jiggly mess.
Preparation Method
Alright, let’s get to the fun part. I’m going to walk you through this step by step, including all the little things I wish someone had told me the first time I tried this.
- Bloom the gelatin for the red layer. In a small bowl, sprinkle 2 packets of unflavored gelatin over ½ cup of cold cranberry juice. Let it sit for 5-10 minutes until it looks like a spongy, solid mass. Don’t skip this step—if you add the gelatin directly to hot liquid, it can clump and never fully dissolve.
- Heat the cranberry juice mixture. Pour the remaining 1 ½ cups of cranberry juice into a small saucepan. Add 1 tablespoon of honey and heat over medium heat until it’s warm but not boiling—about 2-3 minutes. You want it hot enough to dissolve the gelatin but not so hot that it kills the natural fruit flavor. Remove from heat.
- Combine the bloomed gelatin with the warm juice. Whisk the bloomed gelatin into the warm cranberry juice until it’s completely dissolved. Add ½ teaspoon of vanilla extract and whisk again. If you see any foam on top, skim it off with a spoon or pour the mixture through a fine-mesh strainer.
- Pour the first layer. Divide the red gelatin mixture evenly among your cups, filling each about one-third full. Place the cups on a baking sheet and carefully transfer them to the refrigerator. Let them set for at least 1 hour, or until they’re firm to the touch. I usually do this step in the morning and then finish the rest in the afternoon.
- Repeat steps 1-4 for the green layer. Use the white grape juice instead of cranberry, and follow the same process. If you want a more vibrant green color, you can add a drop of natural green food coloring—I use a brand made from spinach extract. Pour this layer on top of the set red layer and refrigerate for another hour.
- Make the creamy yogurt layer. While the green layer is setting, bloom the last packet of gelatin in ¼ cup of cold water. In a small saucepan, gently warm the bloomed gelatin over low heat until it’s liquid again. In a separate bowl, whisk together the Greek yogurt, 3 tablespoons of honey, and 1 teaspoon of vanilla extract. Slowly pour the warm gelatin into the yogurt mixture while whisking constantly. This is important—if you dump it all in at once, the gelatin can seize up and leave you with lumpy yogurt.
- Add the creamy layer. Once the green gelatin layer is fully set, carefully spoon the yogurt mixture on top. You want to go slowly here so you don’t disturb the layers underneath. Fill each cup to about ¼ inch from the top. Refrigerate for at least 2 more hours, or until the yogurt layer is firm.
- Add the sparkle topping. Just before serving, sprinkle a pinch of shredded coconut on top of each cup for that snow-like effect. Add a few pomegranate arils or a raspberry in the center, and finish with a light dusting of edible glitter. The kids go absolutely wild for this part—it’s like watching their eyes light up.
A few things I’ve learned the hard way: Make sure each layer is fully set before adding the next one. I tried rushing once and ended up with a muddy pinkish-green mess that looked nothing like Christmas. Also, don’t skip the step of skimming the foam off the gelatin mixture. It doesn’t affect the taste, but it leaves little bubbles on the surface that make the layers look less clean.
Cooking Tips & Techniques
After making these cups more times than I care to count, I’ve picked up a few tricks that make the process smoother. Let me share what I’ve learned—including the mistakes that taught me the most.
Temperature is everything. Gelatin is finicky about temperature. If your juice is too hot when you add the gelatin, it can lose its setting power. If it’s too cold, the gelatin won’t dissolve properly. I aim for around 130-140°F—warm to the touch but not steaming. I actually burned my tongue testing the temperature of my first batch because I was impatient. Learn from my mistake and use a thermometer if you have one.
Patience with layers pays off. I know it’s tempting to rush through the setting process, especially when you’re making these for a party that starts in a few hours. But trust me, each layer needs a full hour in the fridge to set properly. I once tried to speed things up by putting the cups in the freezer for 20 minutes, and the edges set while the center stayed liquid. The layers ended up wavy and uneven. Not cute.
Multitasking is your friend. While the first layer is setting, you can prep the ingredients for the next layer. Measure out your juices, bloom the gelatin, and have everything ready to go. This cuts down on active time significantly. I usually make the yogurt mixture while the green layer is setting, so by the time I need it, everything is ready to go.
Consistency comes from practice. The first time you make these, they might not look perfect. That’s okay. My first batch looked like a science experiment gone wrong—the layers bled into each other, and the yogurt layer was lumpy. But by the third time, I had the timing down, and they came out looking like something from a bakery. Don’t give up after one try.
Variations & Adaptations
One of the things I love about this recipe is how easy it is to adapt. Here are some variations I’ve tried, and a few that are on my list to test next.
Dairy-Free Version: Swap the Greek yogurt for a thick coconut yogurt. I’ve used the brand CocoJune, and it works beautifully. The coconut flavor adds a nice tropical note that pairs surprisingly well with the cranberry and grape juices. Just make sure you choose a yogurt that’s thick—runny yogurt won’t hold up as a layer.
Holiday Flavor Twist: For a more grown-up version, try using pomegranate juice instead of cranberry and add a splash of orange juice to the green layer. The citrus brightens up the flavor and makes it feel more sophisticated. I made these for a holiday brunch last year, and the adults kept sneaking extras.
Berry Blast Variation: Instead of white grape juice, use a mixed berry juice for the green layer. The color comes out more purple than green, but the flavor is incredible. I’ve also added a few fresh blueberries to the bottom of each cup before pouring the first layer—they float to the top and look like little jewels.
Allergen-Friendly Options: This recipe is naturally gluten-free and nut-free, which makes it great for classroom parties or gatherings with dietary restrictions. If you’re avoiding honey, use maple syrup or agave nectar instead. For a sugar-free version, use liquid stevia to sweeten both the gelatin and yogurt layers.
My Personal Favorite: The variation I keep coming back to is adding a thin layer of crushed gingerbread cookies between the green gelatin and the yogurt layer. It adds a little crunch and that warm, spicy flavor that just screams Christmas. I discovered this by accident when I dropped a cookie crumb into one of the cups and decided to leave it. Now it’s a staple.
Serving & Storage Suggestions
These cups are best served chilled, straight from the fridge. The cold temperature keeps the layers firm and the yogurt layer nice and creamy. I like to take them out about 5 minutes before serving so they’re not ice-cold, but any longer than that and they start to soften.
Presentation Tips: For a holiday party, arrange the cups on a large platter or tray and garnish with fresh mint leaves and extra pomegranate arils. The red and green colors pop beautifully against a white platter. If you’re feeling fancy, you can drizzle a little honey on top just before serving—it adds a glossy finish that catches the light.
Complementary Dishes: These cups pair wonderfully with other light holiday treats. I love serving them alongside a plate of gingerbread cookies or a bowl of fresh fruit. They’re also great as a palate cleanser after a heavy meal—the tartness of the cranberry juice cuts through richness beautifully.
Storage Instructions: Store any leftover cups in the refrigerator, covered with plastic wrap or a lid. They’ll keep for up to 5 days, though the texture is best within the first 3 days. After that, the yogurt layer can start to separate slightly. I don’t recommend freezing these—the gelatin structure breaks down when frozen and thawed, leaving you with a watery mess.
Reheating: These are meant to be served cold, so no reheating needed. If you’ve stored them for a few days and the gelatin seems a bit soft, you can pop them in the fridge for 30 minutes to firm up again.
Flavor Development: One thing I’ve noticed is that the flavors actually meld together and deepen after a day or two in the fridge. The cranberry and grape juices infuse into the yogurt layer slightly, creating a more unified taste. So if you’re making these for a party, do it a day ahead—they’ll taste even better.
Nutritional Information & Benefits
I’m not a nutritionist, but I’ve done my best to estimate the nutritional values for these cups based on the ingredients I use. Here’s what you’re looking at per serving (one cup):
- Calories: Approximately 120-150
- Protein: 8-10 grams (thanks to the Greek yogurt)
- Carbohydrates: 20-25 grams (mostly from natural fruit sugars and honey)
- Fat: 2-4 grams (depending on the yogurt you use)
- Fiber: 1-2 grams
- Sugar: 15-18 grams (significantly less than traditional Jell-O cups)
Health Benefits: The Greek yogurt provides a good dose of protein and probiotics, which support digestive health. The cranberry juice is rich in antioxidants and vitamin C, while the gelatin itself is a great source of collagen, which supports skin and joint health. I love that I can serve these to my kids and feel good about what they’re eating—it’s a treat that actually has some nutritional value.
Dietary Considerations: This recipe is naturally gluten-free, nut-free, and soy-free. It can easily be made dairy-free by using coconut yogurt and sugar-free by using stevia. The only potential allergen is dairy from the yogurt, so if you’re serving these at a party, it’s a good idea to label them clearly if anyone has dairy sensitivities.
My Personal Wellness Perspective: I’ve always believed that treats should still feel like treats, even when they’re lighter. These cups hit that sweet spot for me—they’re festive and fun, but they don’t leave me feeling sluggish or guilty. And honestly, seeing my kids’ faces light up when they see the sparkle topping? That’s the real win.
Conclusion
These Lightened-Up Christmas Sparkle Jello Cups for Kids have become a staple in our holiday traditions, and I hope they find a place in yours too. They’re proof that you don’t have to choose between festive fun and wholesome ingredients—you can have both, and it can be delicious. Whether you’re making them for a classroom party, a family gathering, or just a cozy night in with the kids, these little cups bring a touch of magic without all the sugar.
I’d love to hear how yours turn out! Did you try a fun variation? Did your kids love the sparkle topping as much as mine do? Drop a comment below and let me know—I read every single one, and I’m always looking for new ideas to try. And if you’re looking for more holiday treats that balance flavor and nutrition, don’t miss my healthy Christmas cookies or this no-bake holiday treats roundup—they’re perfect for busy December days.
Until next time, happy cooking—and may your holidays be filled with sparkle, both on your table and in your hearts.
Frequently Asked Questions
Can I use flavored gelatin instead of unflavored?
You can, but it changes the nutritional profile significantly. Flavored gelatin packets contain a lot of sugar and artificial colors. If you want to keep this recipe lightened up, stick with unflavored gelatin and use 100% fruit juice for flavor. The texture will be slightly different—a bit softer—but still delicious.
How far in advance can I make these?
I recommend making them no more than 2-3 days ahead of time. The texture is best within the first 48 hours. After that, the yogurt layer can start to separate slightly, and the gelatin layers may become a bit softer. If you’re making them for a party, aim for the day before.
Can I use a different fruit juice?
Absolutely! The key is to use juice that’s naturally sweet and has a vibrant color. Pomegranate, cherry, or even beet juice work well for the red layer. For the green layer, try apple, pear, or even a green juice blend. Just avoid juices with added sugar or artificial sweeteners, as they can affect how the gelatin sets.
My yogurt layer turned out lumpy. What went wrong?
This usually happens when the gelatin mixture is too hot when you add it to the yogurt, or when you add it too quickly. Make sure the gelatin is just warm—not hot—and pour it in a slow, steady stream while whisking constantly. If you do end up with lumps, you can try straining the mixture through a fine-mesh strainer before pouring it into the cups.
Can I make these without the sparkle topping?
Of course! The sparkle topping is just for fun, and the cups are still delicious without it. If you’re serving these to very young children, you might want to skip the edible glitter or sanding sugar to avoid any choking hazards. The shredded coconut and fresh fruit garnish are plenty festive on their own.
Pin This Recipe!
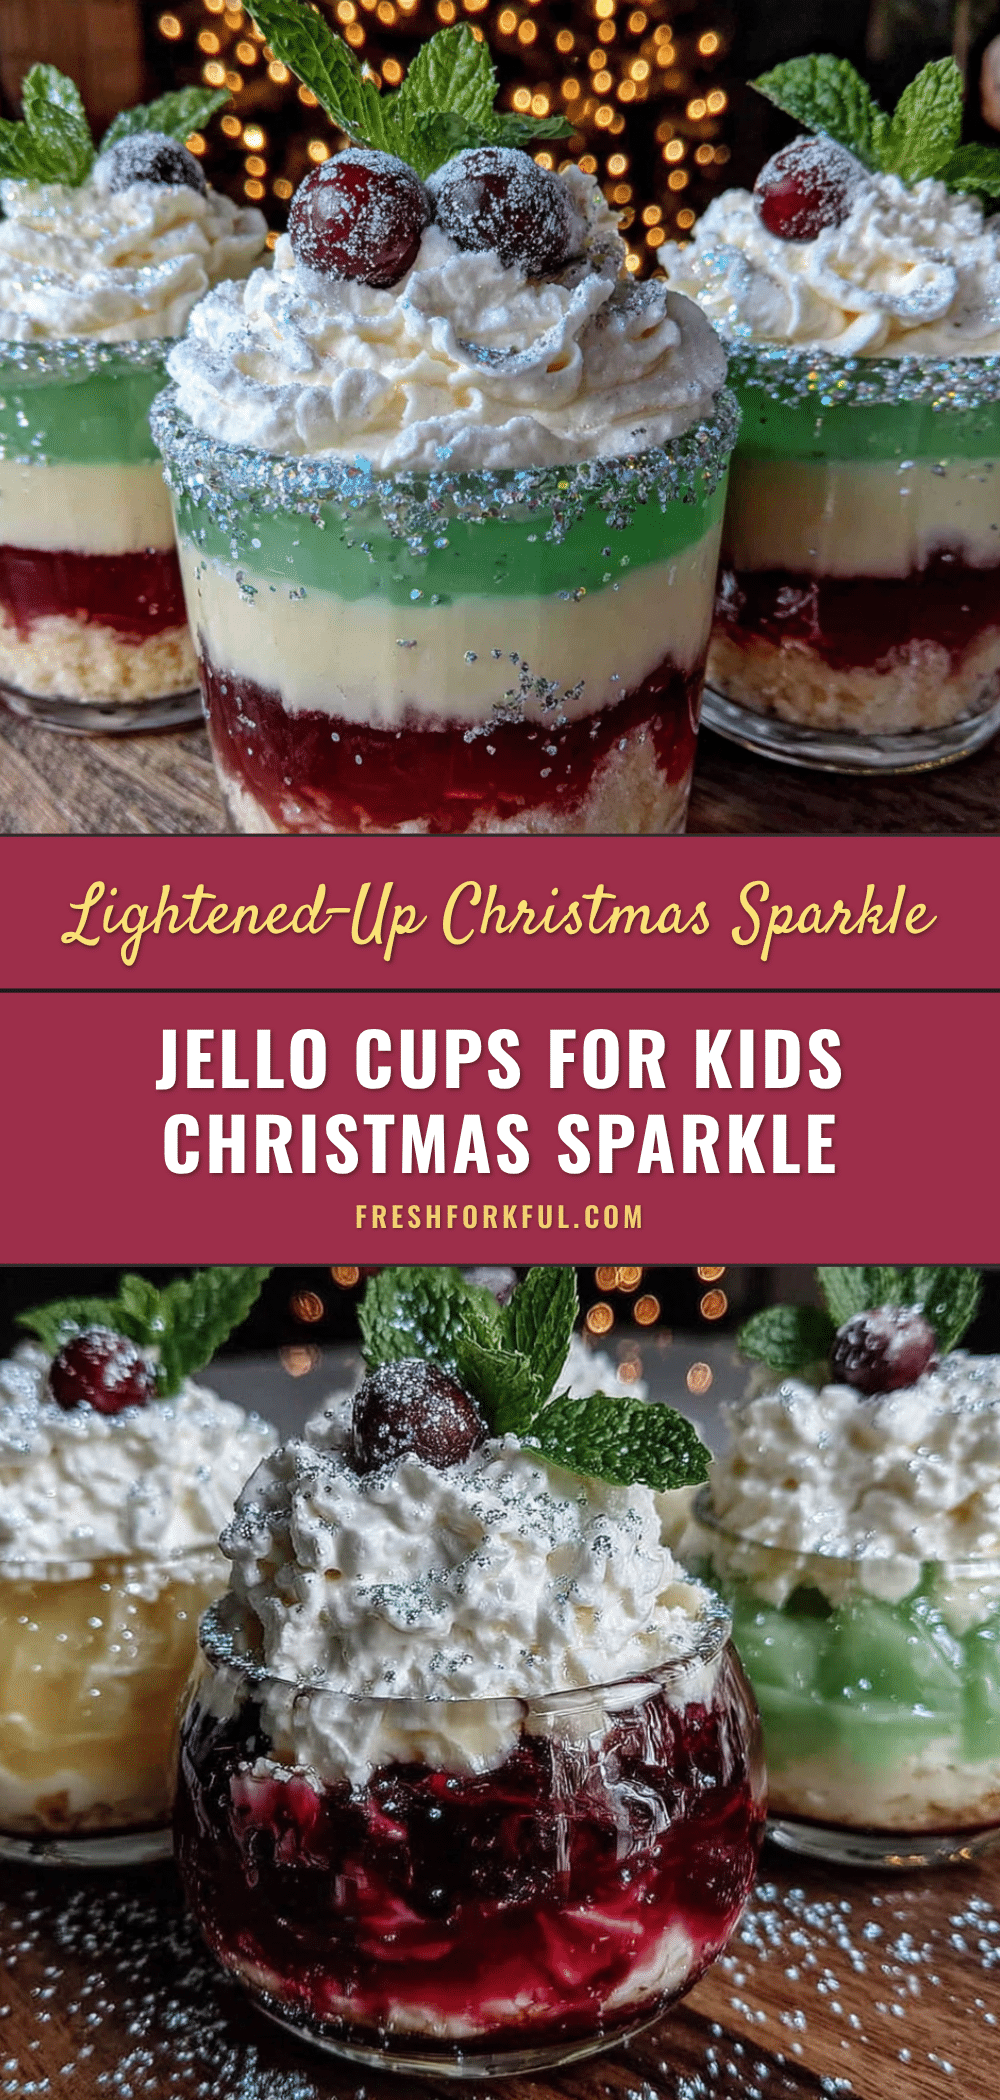
Lightened-Up Christmas Sparkle Jello Cups for Kids
These Lightened-Up Christmas Sparkle Jello Cups for Kids are a healthier twist on a nostalgic holiday treat, featuring layers of fruit juice gelatin, creamy Greek yogurt, and a sparkly topping. They’re quick to make, perfect for holiday gatherings, and sure to delight both kids and adults.
- Prep Time: 20 minutes
- Cook Time: 10 minutes
- Total Time: 4 hours 30 minutes (including chilling time)
- Yield: 6 servings 1x
- Category: Dessert
- Cuisine: American
Ingredients
- 2 cups 100% cranberry juice (unsweetened)
- 2 cups white grape juice
- 4 packets unflavored gelatin (about 4 teaspoons total)
- 2 tablespoons honey (divided)
- 1 teaspoon vanilla extract (divided)
- 1 ½ cups plain Greek yogurt (full-fat or 2%)
- 3 tablespoons honey
- 1 teaspoon vanilla extract
- 1 packet unflavored gelatin (dissolved in ¼ cup cold water)
- ¼ cup unsweetened shredded coconut (optional)
- Edible glitter or sanding sugar
- Fresh pomegranate arils or raspberries (for garnish)
Instructions
- Bloom the gelatin for the red layer: In a small bowl, sprinkle 2 packets of unflavored gelatin over ½ cup of cold cranberry juice. Let it sit for 5-10 minutes until it looks like a spongy, solid mass.
- Heat the cranberry juice mixture: Pour the remaining 1 ½ cups of cranberry juice into a small saucepan. Add 1 tablespoon of honey and heat over medium heat until warm but not boiling (about 2-3 minutes). Remove from heat.
- Combine the bloomed gelatin with the warm juice: Whisk the bloomed gelatin into the warm cranberry juice until completely dissolved. Add ½ teaspoon of vanilla extract and whisk again. Skim off any foam.
- Pour the first layer: Divide the red gelatin mixture evenly among cups, filling each about one-third full. Place cups on a baking sheet and refrigerate for at least 1 hour until firm.
- Repeat steps 1-4 for the green layer: Use white grape juice instead of cranberry, following the same process. Pour on top of the set red layer and refrigerate for another hour.
- Make the creamy yogurt layer: While the green layer sets, bloom the last packet of gelatin in ¼ cup of cold water. Gently warm the bloomed gelatin over low heat until liquid. In a separate bowl, whisk together Greek yogurt, 3 tablespoons honey, and 1 teaspoon vanilla extract. Slowly pour the warm gelatin into the yogurt mixture while whisking constantly.
- Add the creamy layer: Once the green gelatin layer is fully set, carefully spoon the yogurt mixture on top, filling each cup to about ¼ inch from the top. Refrigerate for at least 2 more hours until firm.
- Add the sparkle topping: Just before serving, sprinkle a pinch of shredded coconut on top, add a few pomegranate arils or a raspberry in the center, and finish with a light dusting of edible glitter.
Notes
Make sure each layer is fully set before adding the next. Use a thermometer to keep juice around 130-140°F for best gelatin setting. For dairy-free, use thick coconut yogurt. For sugar-free, use liquid stevia instead of honey.
Nutrition
- Serving Size: 1 cup
- Calories: 135
- Sugar: 16
- Sodium: 45
- Fat: 3
- Saturated Fat: 1.5
- Carbohydrates: 22
- Fiber: 1
- Protein: 9
Keywords: Christmas, Jello cups, kids dessert, healthy holiday treat, gelatin cups, yogurt dessert, fruit juice gelatin


