Love this? Save it for later!
Share the inspiration with your friends
The preschool holiday party was in four hours and I’d completely forgotten. Every other parent was probably showing up with Pinterest-perfect gingerbread houses or those elaborate character cupcakes that take three days to decorate. I had a stick of butter that was starting to soften on the counter, a bag of powdered sugar with a tear in the corner, and a very grumpy toddler who refused to nap. Honestly, I was ready to just grab a bag of store-bought cookies and call it a day.
But then I remembered my grandmother’s Russian Tea Cake recipe. Not the fancy version with the expensive nuts and imported vanilla, but her “make-do” version she’d whip up when company was coming and the pantry was bare. It used stuff I almost always had—flour, butter, sugar, and whatever nuts were kicking around. I found half a bag of chopped walnuts behind the baking soda and figured, why not? The worst that could happen was I’d show up with mediocre cookies, which was still better than showing up empty-handed.
Let me tell you, the kitchen was a disaster. Powdered sugar ended up on the dog, I burned my finger on the cookie sheet, and I’m pretty sure there’s still a dusting of flour on the ceiling fan. But those little snowball cookies? They disappeared faster than anything else on the dessert table. Another mom actually asked me for the recipe, and I had to admit they were a last-minute panic bake. Maybe you’ve been there—that moment when you need something good, fast, and cheap, and you just have to trust the process. These cookies became my go-to for that exact reason.
Why You’ll Love This Recipe
These aren’t just any cookies. They’re the kind that make people close their eyes when they take a bite, and then open them with that look of happy surprise. Here’s why this recipe works so well for real families:
- Budget-Friendly Ingredients: You probably have most of this stuff already. No fancy extracts, no specialty flours, no imported anything. Just good, honest pantry staples that won’t wreck your grocery budget.
- Kid-Approved and Parent-Praised: My kids call them “snowball cookies” and fight over who gets to roll them in the powdered sugar. They’re not too sweet, not too plain—just right for little hands and picky palates.
- Comes Together in Under 30 Minutes: From start to finish, you’re looking at about 25 minutes of active time. The dough comes together in one bowl, no electric mixer required if your arm’s feeling strong.
- Perfect for Holiday Baking or Anytime: These look fancy enough for Christmas cookie exchanges but simple enough for a Tuesday afternoon snack. I’ve brought them to potlucks, school events, and book club, and they always get the same reaction.
- Freezes Beautifully: Make a double batch and stash some in the freezer. They thaw in about ten minutes and taste just as fresh as the day you baked them—if they last that long.
What makes this version different from other Russian Tea Cake recipes? It’s the ratio. I’ve tested this about a dozen times to get that perfect melt-in-your-mouth texture without using expensive European butter or hard-to-find ingredients. The cookies hold their shape, don’t spread too much, and get that signature crumbly-but-not-dry texture that makes them so addictive. Plus, I’ve swapped in budget-friendly walnuts instead of pricier pecans or almonds, and honestly? They taste just as good.
What Ingredients You Will Need
This recipe uses simple, everyday ingredients to create something that tastes surprisingly special. Most of these are pantry staples you probably already have, which is exactly what I love about it.
For the Cookies
- 1 cup (226g) unsalted butter, softened – If you only have salted butter, just reduce the added salt to 1/4 teaspoon. I usually use whatever brand is on sale, honestly.
- 1/2 cup (60g) powdered sugar, plus more for rolling – The powdered sugar is what gives these cookies that delicate, crumbly texture. Don’t substitute granulated sugar here, it won’t work the same way.
- 1 teaspoon vanilla extract – Pure vanilla is nice if you have it, but imitation works fine for this recipe. I’ve used both and honestly can’t tell the difference once they’re baked.
- 2 cups (250g) all-purpose flour – Spoon and level your flour for the best results. Scooping straight from the bag can pack in too much and make the cookies dry.
- 1/4 teaspoon salt – Just regular table salt is fine. It balances the sweetness and brings out the nutty flavor.
- 3/4 cup (90g) finely chopped walnuts – Pecans work great too, but walnuts are usually cheaper. Toast them lightly for extra flavor, but it’s not required. I’ve also used almonds in a pinch.
Substitution Notes
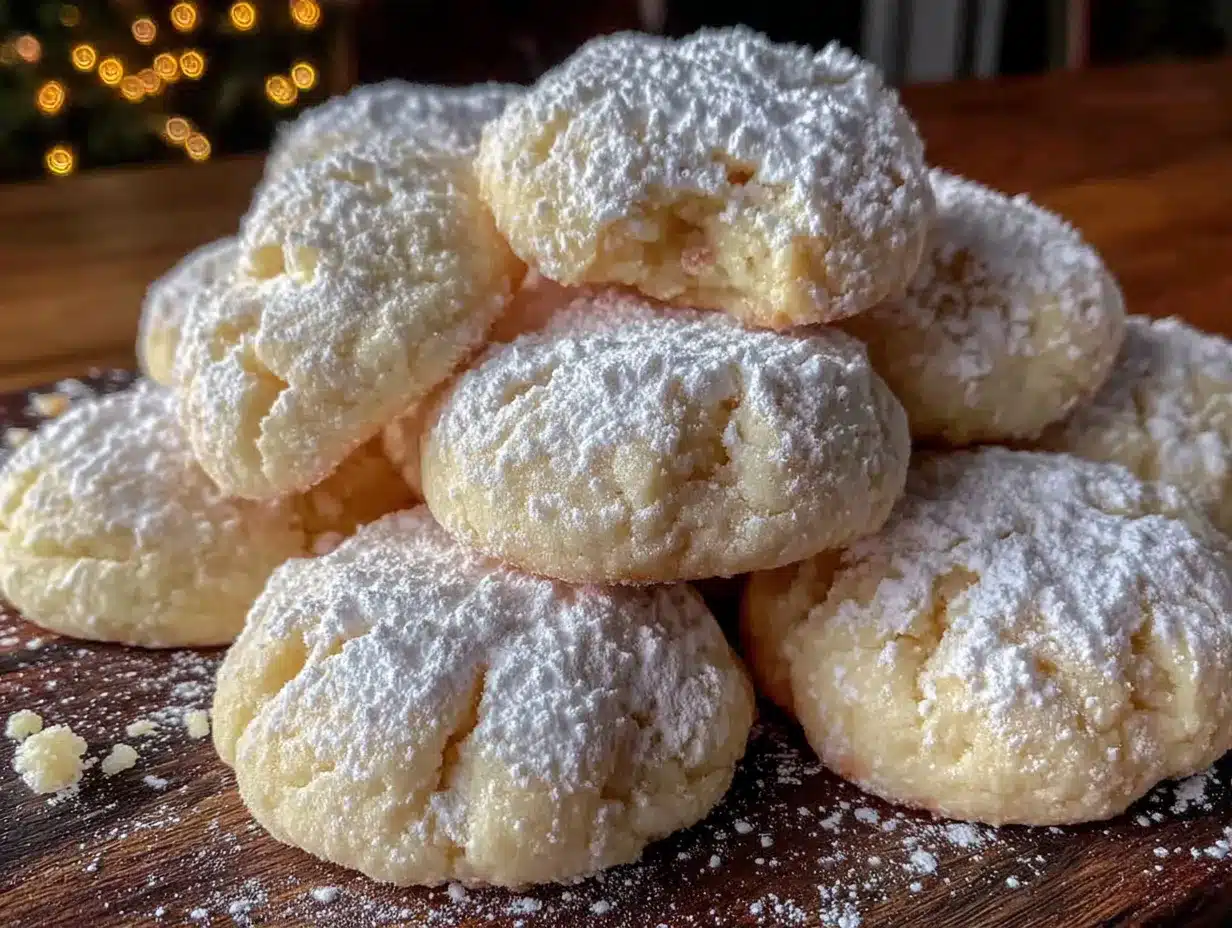
If someone in your family has a nut allergy, you can leave the nuts out entirely. The cookies will be a little less textured but still delicious. I’ve also made these with finely chopped sunflower seeds for a nut-free version that actually works well. For a gluten-free option, use a 1:1 gluten-free baking flour blend—I like the one from King Arthur or Bob’s Red Mill. Just note the texture will be slightly more delicate.
Equipment Needed
You don’t need any fancy equipment for these cookies, which is part of why I make them so often. Here’s what you’ll need:
- Large mixing bowl – Any bowl will do, but a wider one makes creaming the butter easier.
- Hand mixer or stand mixer – A wooden spoon works too, but your arm might get tired. I’ve done it both ways.
- Measuring cups and spoons – For accuracy, especially with the flour.
- Baking sheet – A light-colored metal sheet works best. Dark sheets can brown the bottoms too quickly.
- Parchment paper or silicone baking mat – Not strictly necessary, but makes cleanup so much easier.
- Cooling rack – Helps the cookies cool evenly before you roll them in sugar.
- Small bowl for powdered sugar – For that final coating.
If you don’t have a mixer, just soften the butter really well—like, leave it out for an hour—and cream it with a sturdy spatula. It takes a little elbow grease but works fine.
Preparation Method
Let me walk you through this step by step. I’ve made these cookies more times than I can count, so I’ve got all the little tricks figured out.
- Preheat your oven to 350°F (175°C). Line a baking sheet with parchment paper. Don’t skip this—the parchment really helps the cookies release cleanly.
- Cream the butter and powdered sugar together. In your large mixing bowl, beat the softened butter with 1/2 cup of powdered sugar until it’s light and fluffy, about 2-3 minutes with an electric mixer. It should look pale and almost whipped. If you’re doing this by hand, give it a good 5 minutes of enthusiastic stirring. The butter needs to be really soft for this to work well—if it’s still cold, the mixture will be lumpy.
- Add the vanilla. Pour in the vanilla extract and mix until it’s fully incorporated. Scrape down the sides of the bowl with a spatula to make sure everything’s combined evenly.
- Mix the dry ingredients. In a separate small bowl, whisk together the flour and salt. Yes, you can just dump them into the butter mixture, but whisking them first ensures the salt is distributed evenly. Nobody wants a bite with a pocket of salt.
- Combine wet and dry. Gradually add the flour mixture to the butter mixture, mixing on low speed or stirring gently. The dough will look crumbly at first—don’t panic, this is normal. Keep mixing until it just comes together. Overmixing will make the cookies tough.
- Fold in the walnuts. Add the finely chopped walnuts and stir until they’re evenly distributed. The dough should be soft but not sticky. If it feels too sticky, add a tablespoon more flour. If it’s too dry, add a teaspoon of milk.
- Shape the cookies. Scoop out rounded teaspoons of dough and roll them into 1-inch balls. I use a small cookie scoop for consistency, but your hands work fine. Place them about 2 inches apart on the prepared baking sheet. They don’t spread much, so you can fit about 15 on a standard sheet.
- Bake for 12-15 minutes. The cookies should be set but not browned on top. The bottoms will be lightly golden. Check at 12 minutes—if they’re still soft and pale, give them another minute or two. They’ll continue to set as they cool.
- Cool slightly, then roll in sugar. Let the cookies cool on the baking sheet for about 5 minutes. They need to be warm but not hot. Then roll each cookie in a bowl of powdered sugar. This first coating will melt into the cookie a bit, which is actually what you want.
- Roll again when completely cool. Once the cookies are fully cooled—about 20 minutes—roll them in powdered sugar one more time. This second coating gives them that classic snowy look. Don’t skip this step, it makes them look so pretty.
Cooking Tips & Techniques
I’ve learned a few things the hard way so you don’t have to. Here are my best tips for perfect Russian Tea Cake cookies every time.
Don’t overbake them. This is the number one mistake I see. The cookies should look pale when they come out of the oven—if they’re brown on top, they’re overdone. They’ll be dry instead of tender. Trust the timer and the bottom color, not the top.
Let them cool enough before the first sugar roll. If you roll them when they’re too hot, the sugar will just melt into a sticky mess. Too cold, and it won’t stick at all. Wait about 5 minutes after they come out of the oven. The cookie should feel warm but not hot to the touch.
Toast your nuts for extra flavor. Spread the walnuts on a baking sheet and toast them at 350°F for 5-7 minutes until they smell fragrant. Let them cool completely before chopping and adding to the dough. This little step makes a huge difference in flavor.
Keep the dough chilled if it gets too soft. If your kitchen is warm, the dough can get sticky and hard to shape. Just pop the bowl in the fridge for 15-20 minutes and it’ll be much easier to handle.
Double the batch. Seriously, these cookies disappear fast. I always make at least a double batch, especially during the holidays. The dough freezes well too—just shape into balls, freeze on a baking sheet, then transfer to a freezer bag. Bake straight from frozen, adding 2-3 minutes to the baking time.
Variations & Adaptations
One of the best things about this recipe is how easy it is to change up. Here are some of my favorite variations:
- Chocolate Lover’s Version: Add 2 tablespoons of cocoa powder with the flour and use mini chocolate chips instead of nuts. My kids call these “chocolate snowballs” and they’re gone in minutes.
- Citrus Twist: Add 1 teaspoon of orange or lemon zest to the butter mixture. It brightens up the flavor and makes them feel more special for spring or summer gatherings.
- Spiced Holiday Version: Add 1/2 teaspoon of cinnamon and 1/4 teaspoon of nutmeg with the flour. Roll the finished cookies in a mix of powdered sugar and cinnamon for extra warmth.
- Vegan Adaptation: Use vegan butter sticks (not the spreadable kind) and replace the egg with 1 tablespoon of flaxseed meal mixed with 3 tablespoons of water. The texture is slightly different but still delicious.
- Gluten-Free Option: As I mentioned earlier, a 1:1 gluten-free flour blend works well. I’ve also had success with almond flour, but the cookies spread more and are more delicate.
Serving & Storage Suggestions
These cookies are wonderful at room temperature, served with a glass of cold milk or a hot cup of coffee. They’re perfect for cookie platters, holiday gift boxes, or just as an after-school treat.
Storage: Keep the cookies in an airtight container at room temperature for up to a week. Layer them between sheets of wax paper to prevent the powdered sugar from rubbing off. I use a cookie tin lined with parchment paper and they stay perfect.
Freezing: These freeze beautifully. Place the baked and cooled cookies in a single layer in a freezer-safe container, with wax paper between layers. They’ll keep for up to 3 months. Thaw at room temperature for about 10-15 minutes before serving. You might want to re-roll them in powdered sugar after thawing since some of the coating may have settled.
Reheating: Honestly, these are best at room temperature. If you want to warm them slightly, pop them in a 300°F oven for 3-4 minutes. But don’t microwave them—the powdered sugar will get sticky and weird.
Nutritional Information & Benefits
Per cookie (based on 24 cookies per batch):
- Calories: 145
- Fat: 10g
- Saturated Fat: 5g
- Carbohydrates: 13g
- Sugar: 5g
- Fiber: 0.5g
- Protein: 2g
While these are definitely a treat, the walnuts provide a good source of omega-3 fatty acids and antioxidants. The butter gives you vitamin A, and honestly? Sometimes we just need a cookie that makes us happy. I believe in balance—enjoy these in moderation and don’t feel guilty about it.
If you’re watching your sugar intake, you can reduce the powdered sugar in the dough slightly, but keep the rolling sugar as is for that signature look. For a lower-fat version, you can replace half the butter with applesauce, but the texture will be more cake-like.
Conclusion
These Kid-Approved Russian Tea Cake Cookies have saved me more times than I can count. They’ve been my last-minute potluck hero, my holiday baking staple, and my go-to when I just need something simple and satisfying to make with my kids. They’re proof that you don’t need fancy ingredients or hours of time to create something truly special.
I hope you give these a try, and I’d love to hear how they turn out for you. Did your kids love rolling them in sugar? Did you try one of the variations? Drop a comment below and share your experience—I read every single one and I love seeing your photos. And if you’re looking for more budget-friendly family recipes, check out my easy no-knead bread recipe for another simple staple, or my one-pot macaroni and cheese for a weeknight dinner that always pleases the kids.
Happy baking, friends. May your kitchen be warm, your cookies be snowy, and your powdered sugar mess be worth it.
Frequently Asked Questions
Can I use margarine instead of butter?
I wouldn’t recommend it. Butter gives these cookies their signature flavor and texture. Margarine has a higher water content, which can make the cookies spread too much and turn out flat. Stick with real butter for the best results.
Why did my cookies turn out dry?
Most likely they were overbaked or the flour was measured too heavily. Remember to spoon the flour into your measuring cup and level it off. Also, check your oven temperature—it might run hot. Try reducing the bake time by a minute or two next time.
Can I make the dough ahead of time?
Absolutely! You can refrigerate the dough for up to 3 days or freeze it for up to 3 months. Just shape it into balls first, then freeze them on a baking sheet before transferring to a freezer bag. Bake straight from frozen, adding a couple extra minutes.
How do I get the powdered sugar to stick better?
The key is rolling the cookies while they’re still warm for the first coat, then again when they’re completely cool. Don’t skip the second roll—that’s what gives them that beautiful snowy appearance. If the sugar still isn’t sticking, your cookies might be too cool.
Can I use different nuts?
Yes! Pecans, almonds, or even pistachios work great. Just make sure they’re finely chopped so they incorporate evenly into the dough. For a nut-free version, try finely chopped sunflower seeds or leave the nuts out entirely.
Pin This Recipe!
Kid-Approved Russian Tea Cake Cookies: Easy Budget Recipe

These melt-in-your-mouth Russian Tea Cake cookies are made with simple pantry staples and come together in under 30 minutes. Perfect for holiday baking, last-minute potlucks, or a cozy afternoon treat, they’re budget-friendly and kid-approved.
- Prep Time: 15 minutes
- Cook Time: 12-15 minutes
- Total Time: 30 minutes
- Yield: 24 cookies 1x
- Category: Dessert
- Cuisine: Russian
Ingredients
- 1 cup (226g) unsalted butter, softened
- 1/2 cup (60g) powdered sugar, plus more for rolling
- 1 teaspoon vanilla extract
- 2 cups (250g) all-purpose flour
- 1/4 teaspoon salt
- 3/4 cup (90g) finely chopped walnuts
Instructions
- Preheat your oven to 350°F (175°C). Line a baking sheet with parchment paper.
- In a large mixing bowl, cream the softened butter with 1/2 cup of powdered sugar until light and fluffy, about 2-3 minutes with an electric mixer.
- Add the vanilla extract and mix until fully incorporated. Scrape down the sides of the bowl.
- In a separate small bowl, whisk together the flour and salt.
- Gradually add the flour mixture to the butter mixture, mixing on low speed or stirring gently until just combined. Do not overmix.
- Fold in the finely chopped walnuts until evenly distributed.
- Scoop rounded teaspoons of dough and roll into 1-inch balls. Place them about 2 inches apart on the prepared baking sheet.
- Bake for 12-15 minutes, until set but not browned on top. The bottoms should be lightly golden.
- Let the cookies cool on the baking sheet for about 5 minutes, then roll each cookie in a bowl of powdered sugar.
- Once the cookies are completely cool (about 20 minutes), roll them in powdered sugar one more time for a snowy appearance.
Notes
Don’t overbake the cookies; they should look pale when done. Roll in powdered sugar while warm for the first coat, then again when cool for the best snowy look. Toast walnuts for extra flavor. Dough can be refrigerated for up to 3 days or frozen for up to 3 months. For nut-free version, omit nuts or use finely chopped sunflower seeds. For gluten-free, use a 1:1 gluten-free flour blend.
Nutrition
- Serving Size: 1 cookie
- Calories: 145
- Sugar: 5
- Sodium: 35
- Fat: 10
- Saturated Fat: 5
- Carbohydrates: 13
- Fiber: 0.5
- Protein: 2
Keywords: Russian tea cake cookies, snowball cookies, budget-friendly cookies, easy cookie recipe, kid-approved cookies, holiday cookies, walnut cookies


