Love this? Save it for later!
Share the inspiration with your friends
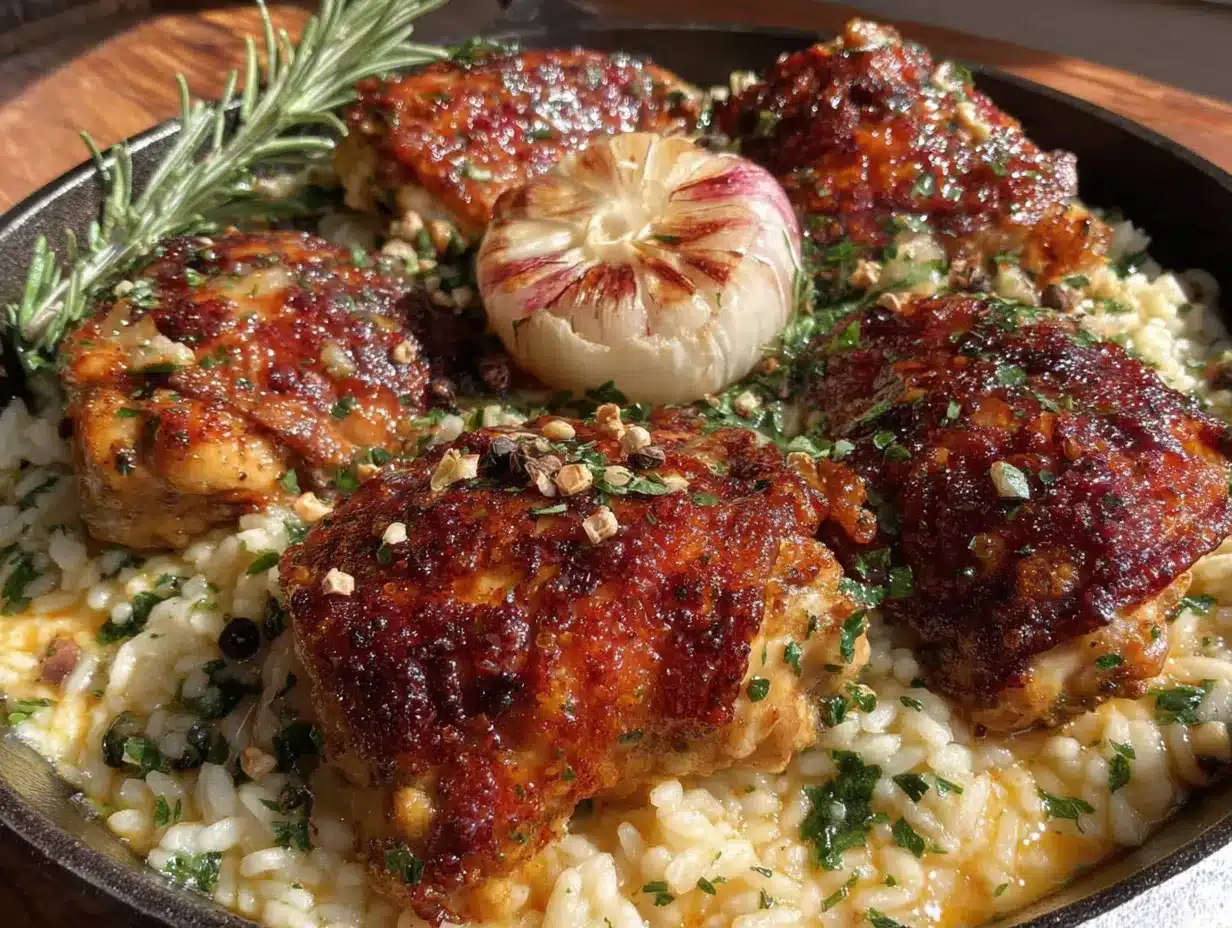
There used to be a tiny cafe on Main Street, tucked between a dusty bookstore and a laundromat, that made the most incredible garlic butter chicken and rice. When they closed after fifteen years — the owner retired to be with her grandkids — I genuinely felt a little lost. That buttery, garlicky aroma was my Thursday night ritual. After seven tries — the first one was so greasy my husband politely asked if we could order pizza — I finally got it. And honestly, this version is even better because I made it simpler. It’s the kind of meal that makes you close your eyes after the first bite, and the best part? It all comes together in one pan. No mountains of dishes, no fussy steps, just pure comfort food that tastes like a hug. I mean, isn’t that what a weeknight dinner should be?
Let me tell you, recreating that cafe magic was a labor of love. The original version had a secret blend of herbs that I could never quite nail down. But after burning through a few heads of garlic and way too much butter, I stumbled onto something even better — a simple, foolproof method that delivers incredible flavor without the stress. The rice soaks up all that savory garlic butter, and the chicken stays so tender it practically falls apart. Maybe you’ve been there, chasing a restaurant memory that felt impossible to recreate. Well, this is the recipe that finally let me stop chasing and start enjoying.
Why You’ll Love This Recipe
This isn’t just another chicken and rice recipe. This is the one you’ll make on a Tuesday when you’re tired, the one the kids actually eat without complaint, and the one that makes you look like a hero with almost zero effort. I’ve tested this recipe more times than I can count, and every single time, it delivers.
- Quick & Easy: From start to table in under 45 minutes. One pan, minimal prep, and zero complicated techniques. Perfect for those nights when you need dinner on autopilot.
- Simple Ingredients: You probably already have everything in your kitchen. Chicken, rice, butter, garlic, a few pantry spices. No fancy grocery trips required.
- Perfect for Family Dinners: This is the ultimate kid-approved meal. The flavors are mild but satisfying, and the rice is just the right texture for little ones. Even my picky eater asks for seconds.
- Crowd-Pleaser: I’ve served this at potlucks, to in-laws, and to my book club. It gets rave reviews every single time. Adults love the garlic butter richness, and kids love the familiar, comforting taste.
- Unbelievably Delicious: The secret is in the layering. You sear the chicken first to get that golden crust, then build the rice right in the same pan, soaking up all those browned bits and garlicky juices. The result is next-level comfort food.
What makes this recipe different from all the others? It’s the technique. Most one-pan chicken and rice recipes end up with mushy rice or dry chicken. This one uses a specific ratio of liquid and a clever method to ensure the rice is fluffy and the chicken stays juicy. Plus, the garlic butter isn’t just an afterthought — it’s the star of the show, infused into every single grain of rice.
This recipe is the kind that makes you close your eyes after the first bite. It’s comfort food reimagined — faster, simpler, but with the same soul-soothing satisfaction. Perfect for impressing guests without stress, or turning a simple Tuesday into something memorable.
What Ingredients You Will Need
This recipe uses simple, wholesome ingredients that come together to create something truly special. The beauty is in the simplicity — each ingredient plays a crucial role, and you can find everything at your local grocery store without breaking the bank.
For the Chicken
- 4 boneless, skinless chicken thighs (about 1.5 lbs / 680g) — Thighs stay juicier than breasts, which is key for one-pan cooking. If you prefer breasts, use them, but reduce cooking time slightly. I recommend getting organic if your budget allows, but conventional works just fine.
- 1 teaspoon salt — Kosher salt is best for even seasoning. Don’t skip this — it’s the foundation of flavor.
- ½ teaspoon black pepper — Freshly ground is always better, but pre-ground works in a pinch.
- 1 teaspoon garlic powder — This adds an extra layer of garlic flavor that complements the fresh garlic. I use Spice Islands brand for consistent quality.
- ½ teaspoon paprika — Smoked paprika adds a lovely depth, but sweet paprika works beautifully too.
For the Rice
- 1 ½ cups (300g) long-grain white rice — Basmati or jasmine work perfectly. Avoid short-grain rice, which can turn gummy. Rinse the rice in a fine-mesh strainer until the water runs clear — this removes excess starch and prevents clumping.
- 2 ½ cups (590ml) low-sodium chicken broth — The broth adds so much flavor. If you only have water, add an extra teaspoon of salt and a splash of soy sauce for depth. I love Better Than Bouillon paste for making quick broth.
- 3 tablespoons (42g) unsalted butter — Salted butter works too, just reduce the added salt by a quarter teaspoon. The butter is non-negotiable — it’s what makes this dish so luscious.
- 5 cloves garlic, minced — Fresh garlic is a must here. Pre-minced jarred garlic won’t give you the same aromatic punch. Use a microplane for the finest mince.
- 1 small yellow onion, finely diced (about 1 cup / 150g) — The onion melts into the rice, adding sweetness and depth. If you’re short on time, you can skip it, but you’ll miss that flavor foundation.
- 1 cup (150g) frozen peas and carrots — These add color, nutrition, and a touch of sweetness. Fresh vegetables work too, but frozen are more convenient and just as nutritious. Add them straight from the freezer.
- ¼ cup (15g) fresh parsley, chopped — For garnish and a fresh finish. Flat-leaf parsley is best, but curly works too. If you don’t have parsley, a sprinkle of green onions works beautifully.
Equipment Needed
You don’t need a fancy kitchen to make this recipe. A few basic tools will get the job done beautifully. Here’s what you’ll need:
- Large, deep skillet or Dutch oven (12-inch / 30cm with a lid) — This is the star of the show. A heavy-bottomed pan distributes heat evenly and prevents burning. I use my trusty Lodge cast iron Dutch oven, but any oven-safe skillet with a tight-fitting lid works. If you don’t have a lid, use aluminum foil.
- Wooden spoon or silicone spatula — For stirring the rice and scraping up those delicious browned bits from the bottom of the pan. A wooden spoon is gentle on non-stick surfaces.
- Sharp chef’s knife — For dicing the onion and mincing the garlic. A dull knife makes prep frustrating and can be dangerous. Keep your knives sharp!
- Cutting board — Any sturdy board will do. I prefer a large wooden board because it’s gentle on knives and easy to clean.
- Measuring cups and spoons — Accurate measurements matter for the rice-to-liquid ratio. Use dry measuring cups for the rice and liquid measuring cups for the broth.
- Fine-mesh strainer — For rinsing the rice. This is a small step that makes a big difference in texture. If you don’t have one, rinse the rice in a bowl and drain carefully.
Budget-friendly tip: You don’t need to spend a fortune on cookware. A good-quality non-stick skillet with a lid from a discount store works perfectly. I used a $20 skillet for years before upgrading, and it made excellent one-pan dinners.
Preparation Method
This recipe comes together in a few simple steps. The key is to give each step the time it needs — don’t rush the searing, and don’t peek at the rice while it’s cooking. Trust the process, and you’ll be rewarded with a perfect meal.
Step 1: Prep the Chicken (5 minutes)
Pat the chicken thighs dry with paper towels. This is important — dry chicken sears better and creates that beautiful golden crust. Season both sides generously with salt, pepper, garlic powder, and paprika. Let them sit at room temperature while you prep the other ingredients. This helps the seasoning absorb and ensures even cooking.
Step 2: Sear the Chicken (8-10 minutes)
Place your large skillet over medium-high heat and add 1 tablespoon of the butter. Once the butter sizzles and stops foaming, carefully place the chicken thighs in the pan, skin-side down if they have skin. Don’t crowd the pan — work in batches if needed. Cook for 4-5 minutes until the bottom is deep golden brown. Flip and cook for another 3-4 minutes. The chicken won’t be fully cooked yet, and that’s okay. Transfer the chicken to a plate and set aside. The browned bits left in the pan are pure gold — don’t clean the pan!
Step 3: Sauté the Aromatics (3-4 minutes)
Reduce the heat to medium. Add the remaining 2 tablespoons of butter to the same pan. Once melted, add the diced onion and cook for 2-3 minutes until softened and translucent. Add the minced garlic and cook for 30 seconds, stirring constantly. The garlic should be fragrant but not browned — burnt garlic turns bitter. If the pan looks dry, add a splash of broth.
Step 4: Toast the Rice (2 minutes)
Add the rinsed and drained rice to the pan. Stir it into the onion and garlic mixture, coating every grain. Cook for 1-2 minutes, stirring constantly. The rice will start to smell nutty and toast slightly. This step adds incredible flavor and helps prevent the rice from becoming mushy later.
Step 5: Add the Broth and Simmer (20 minutes)
Pour in the chicken broth and scrape up any browned bits from the bottom of the pan with your wooden spoon. This is called deglazing, and it’s where all the flavor lives. Bring the broth to a gentle boil. Nestle the seared chicken thighs back into the pan, pushing them slightly into the rice. Any juices that collected on the plate go in too. Reduce the heat to low, cover the pan with a tight-fitting lid, and let it simmer for 20 minutes. Do not lift the lid during this time — the steam is what cooks the rice perfectly.
Step 6: Add the Vegetables and Rest (5 minutes)
After 20 minutes, remove the pan from the heat. Sprinkle the frozen peas and carrots over the top. Don’t stir them in yet. Cover the pan again and let it rest for 5 minutes. This allows the residual heat to finish cooking the rice and warm the vegetables without turning them mushy. The rice should be tender and have absorbed all the liquid.
Step 7: Fluff and Serve (2 minutes)
Remove the lid and fluff the rice gently with a fork. Stir in the peas and carrots, breaking up any clumps. Taste the rice and adjust seasoning if needed — sometimes a pinch more salt makes everything pop. Sprinkle with fresh parsley and serve immediately. The chicken should be fork-tender and the rice light and fluffy.
Cooking Tips & Techniques
After making this recipe more times than I can count, I’ve learned a few tricks that make a real difference. Let me share them so you can avoid my mistakes.
Don’t skip the rice rinsing. I know it’s an extra step, but it’s crucial. Unrinsed rice has excess starch that turns the dish gummy and sticky. Rinse until the water runs clear — usually about 30 seconds under cold water. This one step separates good one-pan rice from great one-pan rice.
Patience with the sear. The first time I made this, I moved the chicken too soon and ended up with pale, sad-looking thighs. Let the chicken cook undisturbed until it releases easily from the pan. If it sticks, it’s not ready. That golden crust is where so much flavor comes from.
Resist the urge to peek. I know it’s tempting to lift the lid and check on the rice, but every time you do, you release precious steam. That steam is what cooks the rice evenly. Trust the 20 minutes. Set a timer and walk away.
Low and slow is the way to go. Once you add the broth and cover the pan, keep the heat on low. If the heat is too high, the liquid will evaporate before the rice is cooked, leaving you with crunchy rice and burnt chicken. A gentle simmer is all you need.
Let it rest. The 5-minute rest after cooking is non-negotiable. It allows the rice to absorb any remaining liquid and the flavors to meld together. I once skipped this step because I was hungry, and the rice was noticeably wetter. Patience pays off.
Variations & Adaptations
This recipe is wonderfully versatile. Here are some ways to make it your own, based on what you have on hand or what your family loves.
Dietary Variations
- Gluten-Free: This recipe is naturally gluten-free as long as you use certified gluten-free chicken broth. Double-check your spice blends too — some contain hidden gluten.
- Dairy-Free: Swap the butter for a high-quality dairy-free butter or use olive oil. The flavor will be slightly different but still delicious. I’ve used Miyoko’s vegan butter with great results.
- Lower Carb: Replace the white rice with cauliflower rice. Sauté the cauliflower rice in the pan with the garlic and onion for 3-4 minutes before adding the broth. Reduce the broth to 1 cup and cook for only 10 minutes instead of 20.
Flavor Twists
- Lemon Herb: Add the zest of one lemon and a teaspoon of dried thyme along with the garlic. Squeeze fresh lemon juice over the finished dish for brightness.
- Spicy Kick: Add ¼ teaspoon of cayenne pepper or red pepper flakes with the garlic. My husband loves this version, though the kids prefer the original.
- Cheesy Delight: Stir in ½ cup of grated Parmesan cheese after the rice is cooked. The cheese melts into the rice, creating an incredibly creamy texture. It’s indulgent but so worth it.
Different Proteins
- Chicken Breasts: Use boneless, skinless chicken breasts. Reduce the searing time to 2-3 minutes per side, and check for doneness after 18 minutes of simmering. Breasts cook faster and can dry out easily.
- Turkey or Pork: Thin turkey cutlets or pork chops work beautifully. Adjust cooking time based on thickness. Pork chops need about 20-25 minutes of simmering.
- Vegetarian Option: Skip the chicken and add a can of drained chickpeas or white beans along with the broth. The beans soak up all that garlic butter flavor and add protein.
Serving & Storage Suggestions
This dish is a complete meal in one pan, but a few thoughtful sides can round it out beautifully.
Serving: Serve the chicken and rice hot, straight from the pan. I like to place a chicken thigh on top of a generous scoop of rice and sprinkle with fresh parsley. A side of steamed green beans or a simple cucumber salad adds freshness and crunch. For a truly cozy dinner, pair it with crusty bread to soak up any remaining garlic butter sauce.
Storage: Leftovers keep beautifully in the refrigerator for up to 4 days. Store in an airtight container. The flavors actually meld and deepen overnight, making it even more delicious the next day. I often make a double batch on purpose just for leftovers.
Reheating: The best way to reheat is on the stovetop. Add a splash of broth or water to the pan, cover, and warm over medium-low heat for 5-7 minutes, stirring occasionally. The microwave works in a pinch — cover the dish with a damp paper towel and heat in 30-second bursts, stirring between each. Add a pat of butter before microwaving to restore some moisture.
Freezing: This recipe freezes well for up to 3 months. Let it cool completely, then transfer to freezer-safe containers. To reheat, thaw overnight in the refrigerator and reheat on the stovetop. The rice might be slightly softer after freezing, but the flavor remains excellent.
Nutritional Information & Benefits
This recipe is not just delicious — it’s also packed with nutrients that make it a smart choice for family dinners. Here’s an approximate breakdown per serving (1 chicken thigh + 1 cup of rice and vegetables):
| Nutrient | Amount |
|---|---|
| Calories | 485 |
| Protein | 32g |
| Fat | 18g |
| Saturated Fat | 8g |
| Carbohydrates | 48g |
| Fiber | 3g |
| Sugar | 4g |
| Sodium | 720mg |
Health Benefits: Chicken thighs are rich in protein, iron, and B vitamins, which support energy levels and muscle health. The garlic is a powerhouse — it contains compounds that support immune function and heart health. Peas and carrots add fiber, vitamin A, and antioxidants. Using low-sodium broth helps control salt levels, making this a balanced meal that fits into a healthy lifestyle.
Dietary Considerations: This recipe is naturally gluten-free and can be made dairy-free with a simple swap. It’s also nut-free and egg-free, making it safe for common food allergies. If you’re watching your sodium, use no-salt-added broth and reduce the added salt.
Conclusion
This Kid-Approved One-Pan Garlic Butter Chicken and Rice is more than just a recipe — it’s a solution to the eternal question of what to make for dinner that everyone will actually eat. It’s the meal I turn to when I’m tired, when the kitchen is a mess, and when I just need something comforting and reliable. The garlic butter aroma that fills the house is pure magic, and the way the rice soaks up all that flavor is nothing short of wonderful.
I hope you make this recipe your own. Add your favorite vegetables, swap in different herbs, or double the garlic if you’re feeling bold. The beauty of this dish is that it welcomes adaptation. And when you make it, I’d love to hear how it turned out. Drop a comment below and let me know if your family loved it as much as mine does. Did you add a twist? Did your kids ask for seconds? Share your story — I read every single comment, and your feedback helps me create even better recipes for you.
Happy cooking, and remember — the best meals are the ones shared with the people you love.
Frequently Asked Questions
Can I use chicken breasts instead of thighs?
Absolutely! Chicken breasts work well, but they cook faster and can dry out more easily. Reduce the searing time to 2-3 minutes per side and check for doneness after 18 minutes of simmering. Use an instant-read thermometer — chicken breasts are done at 165°F (74°C).
Why is my rice still crunchy after 20 minutes?
This usually happens for one of two reasons: the heat was too high and the liquid evaporated too quickly, or the lid didn’t seal properly. Next time, make sure your lid is tight-fitting (use aluminum foil if needed) and keep the heat on low. If the rice is still crunchy, add ¼ cup of broth, cover, and cook for another 5 minutes.
Can I make this in a slow cooker or Instant Pot?
Yes! For the Instant Pot, use the sauté function to sear the chicken and cook the aromatics, then add the rice and broth. Pressure cook on high for 6 minutes, then do a natural release for 10 minutes. For a slow cooker, sear the chicken and aromatics on the stovetop first, then transfer everything to the slow cooker. Cook on low for 4-5 hours or high for 2-3 hours. The rice will be softer than the stovetop version.
How do I prevent the rice from burning on the bottom?
Burning usually happens when the heat is too high or the pan isn’t heavy enough. Use a heavy-bottomed pan that distributes heat evenly, and keep the heat on low once you add the broth. If you notice the rice sticking, you can add a splash of broth and gently scrape the bottom, but it’s better to prevent it by controlling the heat.
Can I add other vegetables to this dish?
Definitely! This recipe is a great canvas for whatever vegetables you have on hand. Diced bell peppers, chopped zucchini, or sliced mushrooms all work beautifully. Add heartier vegetables like carrots or bell peppers along with the onion, and add quicker-cooking vegetables like zucchini or spinach during the last 5 minutes of cooking. Just keep the total volume of vegetables to about 1 ½ cups to avoid throwing off the liquid ratio.
Pin This Recipe!
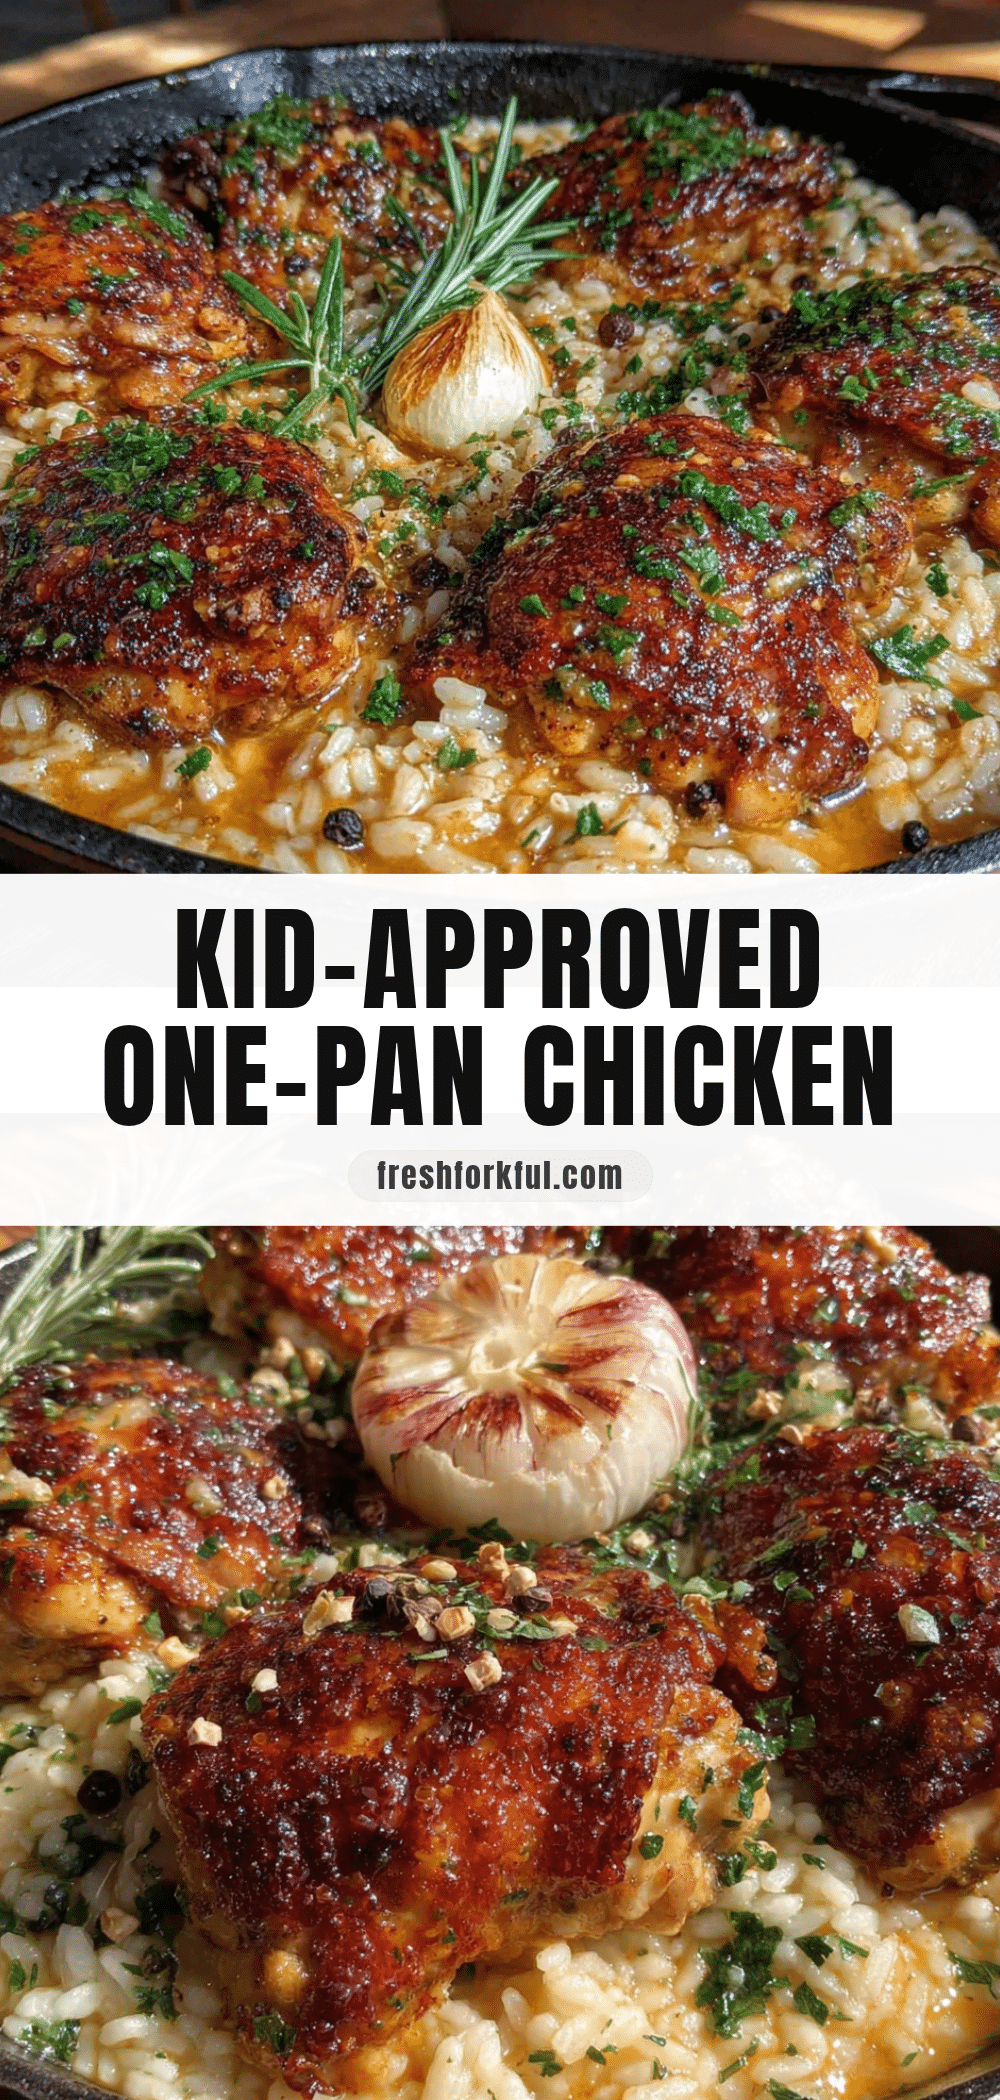
Kid-Approved One-Pan Garlic Butter Chicken and Rice: Easy Dinner
A simple, one-pan meal featuring tender chicken and fluffy rice infused with garlic butter. Perfect for busy weeknights, this kid-approved recipe delivers comfort food with minimal cleanup.
- Prep Time: 10 minutes
- Cook Time: 30 minutes
- Total Time: 40 minutes
- Yield: 4 servings 1x
- Category: Main Course
- Cuisine: American
Ingredients
- 4 boneless, skinless chicken thighs (about 1.5 lbs / 680g)
- 1 teaspoon salt
- ½ teaspoon black pepper
- 1 teaspoon garlic powder
- ½ teaspoon paprika
- 1 ½ cups (300g) long-grain white rice
- 2 ½ cups (590ml) low-sodium chicken broth
- 3 tablespoons (42g) unsalted butter
- 5 cloves garlic, minced
- 1 small yellow onion, finely diced (about 1 cup / 150g)
- 1 cup (150g) frozen peas and carrots
- ¼ cup (15g) fresh parsley, chopped
Instructions
- Pat the chicken thighs dry with paper towels. Season both sides with salt, pepper, garlic powder, and paprika. Let sit at room temperature.
- Place a large skillet over medium-high heat and add 1 tablespoon of butter. Once sizzling, sear chicken thighs for 4-5 minutes per side until golden brown. Transfer to a plate and set aside.
- Reduce heat to medium. Add remaining 2 tablespoons of butter. Sauté diced onion for 2-3 minutes until softened. Add minced garlic and cook for 30 seconds, stirring constantly.
- Add rinsed and drained rice to the pan. Stir to coat and cook for 1-2 minutes until the rice smells nutty.
- Pour in chicken broth and scrape up browned bits from the pan. Bring to a gentle boil. Nestle the seared chicken thighs back into the pan, including any juices. Reduce heat to low, cover, and simmer for 20 minutes. Do not lift the lid.
- Remove pan from heat. Sprinkle frozen peas and carrots over the top without stirring. Cover and let rest for 5 minutes.
- Remove lid, fluff rice with a fork, and stir in peas and carrots. Adjust seasoning if needed. Sprinkle with fresh parsley and serve immediately.
Notes
Don’t skip rinsing the rice to prevent gumminess. Resist lifting the lid during simmering to ensure even cooking. Let the chicken sear undisturbed for a golden crust. For dairy-free, use vegan butter or olive oil. For lower carb, substitute cauliflower rice and reduce broth to 1 cup, cooking for 10 minutes.
Nutrition
- Serving Size: 1 chicken thigh + 1
- Calories: 485
- Sugar: 4
- Sodium: 720
- Fat: 18
- Saturated Fat: 8
- Carbohydrates: 48
- Fiber: 3
- Protein: 32
Keywords: one-pan chicken and rice, garlic butter chicken, easy dinner, kid-friendly, weeknight meal, comfort food


