Love this? Save it for later!
Share the inspiration with your friends
My mother-in-law had sworn off turkey for twenty years. Twenty years. Every Thanksgiving, she’d load her plate with ham, green beans, and three kinds of pie while the bird sat untouched in the middle of the table. “Too dry,” she’d say with a little shrug. “Always has been. Always will be.” I let her have her conviction. I mean, honestly, who was I to argue with two decades of experience? Then last November, I showed up at her house with a spatchcocked turkey tucked under my arm. I told her it was “just something new I was trying” and that she didn’t have to eat it. She didn’t have to. But around 4 p.m., I caught her standing at the kitchen counter, picking a sliver of crispy skin off the carving board when she thought no one was looking. By dinner, her plate told the real story. And maybe you’ve been there—stuck with a turkey that looks perfect but tastes like disappointment. This Juicy Herb-Butter Spatchcock Turkey with Light Pan Gravy is the recipe that changed her mind. It’s the one that keeps me coming back, year after year, because it actually works.
Why You’ll Love This Recipe
Let’s be real for a second. Roasting a whole turkey can feel like a gamble. You cross your fingers, hope for the best, and sometimes end up with dry breast meat and undercooked thighs. This spatchcock method changes everything. It’s not just another turkey recipe—it’s the one that delivers every single time.
- Incredibly Juicy Meat: By butterflying the bird, the dark and white meat cook at the same rate. No more dried-out breast meat while you wait for the thighs to catch up. The herb butter seeps into every crevice, locking in moisture.
- Faster Cooking Time: A traditional bird can take hours. A spatchcock turkey roasts in about 60–90 minutes depending on size. That’s a game-changer for busy holiday cooking.
- Crispy Skin, Every Time: The flattened shape means more surface area hits the heat. The skin gets shatteringly crisp, golden, and seasoned to perfection. It’s the part everyone fights over.
- Simple, Wholesome Ingredients: No weird additives or hard-to-find items. Butter, fresh herbs, garlic, and a little stock create a gravy that’s light but still packed with flavor.
- Perfect for Health-Minded Cooks: This recipe focuses on real, fresh ingredients. The gravy uses pan drippings and a light hand with flour. You get all the indulgence without feeling weighed down.
This isn’t just a turkey. It’s the kind of meal that makes you close your eyes after that first bite. It’s comfort food reimagined—faster, juicier, and with the same soul-soothing satisfaction you crave on a special occasion.
What Ingredients You Will Need
This recipe uses simple, wholesome ingredients to deliver bold flavor and satisfying texture without the fuss. Most of these are pantry staples or easy to find at any grocery store. Here’s what you’ll need:
For the Turkey & Herb Butter
- 1 whole turkey (10–12 pounds / 4.5–5.5 kg), thawed if frozen (neck and giblets removed, patted very dry inside and out)
- 1/2 cup (1 stick / 113 g) unsalted butter, softened to room temperature
- 3 tablespoons fresh parsley, finely chopped
- 2 tablespoons fresh rosemary, finely chopped
- 2 tablespoons fresh thyme leaves
- 4 cloves garlic, minced (I like to use a microplane for a paste-like consistency)
- 1 tablespoon kosher salt (use less if using table salt)
- 1 teaspoon black pepper, freshly ground
- 1 teaspoon lemon zest (from about 1 lemon—adds brightness)
For the Roasting Pan
- 1 large yellow onion, quartered
- 2 carrots, cut into 2-inch chunks
- 2 celery stalks, cut into 2-inch chunks
- 1 cup (240 ml) low-sodium chicken or turkey stock (I prefer Kitchen Basics brand for clean flavor)
For the Light Pan Gravy
- Pan drippings from the roasted turkey
- 2 tablespoons unsalted butter
- 2 tablespoons all-purpose flour (or use gluten-free all-purpose blend if needed)
- 2 cups (480 ml) low-sodium chicken or turkey stock
- Salt and pepper to taste
- Optional: 1 teaspoon fresh thyme leaves for garnish
For the best texture, make sure your butter is truly softened—leave it out for at least 30 minutes. If you’re short on time, you can gently microwave it in 5-second bursts, but don’t let it melt. The herb butter needs to be spreadable, not runny.
Equipment Needed
You don’t need a fancy kitchen to pull this off. Here’s what you’ll need:
- Sharp kitchen shears or poultry shears: This is the most important tool. A good pair makes spatchcocking safe and easy. I’ve used my trusty OXO shears for years—they’re sharp and comfortable to hold.
- Large cutting board: Get one with a groove around the edge to catch juices. It makes cleanup so much easier.
- Rimmed baking sheet or roasting pan: A half-sheet pan works perfectly. If using a roasting pan, skip the rack—the vegetables will act as a natural roasting rack.
- Instant-read thermometer: Don’t skip this. It’s the only way to guarantee perfectly cooked meat. I love my Thermapen—it reads in seconds.
- Chef’s knife and cutting board for the vegetables
- Small bowl for mixing the herb butter
- Large measuring cup or fat separator for the gravy drippings
- Whisk for a lump-free gravy
- Aluminum foil for tenting the turkey while it rests
If you don’t have poultry shears, a sharp chef’s knife can work, but be careful. The rib bones can be tough to cut through. And if you’re really nervous, ask your butcher to spatchcock the turkey for you—most will do it for free.
Preparation Method
This might look like a lot of steps, but I promise it’s straightforward. Take it one step at a time, and you’ll have a gorgeous turkey on the table.
Step 1: Spatchcock the Turkey (10 minutes)
Place the turkey breast-side down on your cutting board. Using your sharp shears, cut along one side of the backbone, from the tail to the neck. Repeat on the other side to remove the backbone entirely. Save it for stock if you like—I freeze mine for soup later. Flip the turkey over and press down firmly on the breastbone with the heels of your hands until you hear a crack. The bird should lie flat. Tuck the wing tips under the shoulders to prevent burning.
Step 2: Make the Herb Butter (5 minutes)
In a small bowl, combine the softened butter, parsley, rosemary, thyme, garlic, salt, pepper, and lemon zest. Mash it together with a fork until everything is evenly distributed. Set it aside at room temperature. Don’t refrigerate it—cold butter won’t spread.
Step 3: Season the Turkey (10 minutes)
Pat the spatchcocked turkey dry with paper towels. This is crucial for crispy skin. Using your fingers, gently loosen the skin over the breast and thighs, being careful not to tear it. Slide about half of the herb butter under the skin, spreading it evenly. Rub the remaining butter all over the outside of the turkey. Don’t forget the legs and wings. Season the outside with a little extra salt and pepper if desired.
Step 4: Prep the Pan (5 minutes)
Preheat your oven to 425°F (220°C). Scatter the quartered onion, carrot chunks, and celery pieces across your rimmed baking sheet or roasting pan. These will add flavor to the drippings and keep the turkey elevated. Place the seasoned turkey on top of the vegetables, breast-side up. Pour 1 cup of stock into the pan, being careful not to wash the butter off the turkey.
Step 5: Roast the Turkey (60–90 minutes)
Roast the turkey in the preheated oven. Start checking for doneness at the 50-minute mark. The turkey is done when an instant-read thermometer inserted into the thickest part of the thigh (without touching bone) registers 165°F (74°C). The breast should read 160°F (71°C)—it will carry over to 165°F while resting. If the skin is browning too quickly, loosely tent the turkey with foil for the last 15–20 minutes.
Step 6: Rest the Turkey (20 minutes)
Carefully transfer the turkey to a clean cutting board. Tent it loosely with foil and let it rest for at least 20 minutes. This is not optional—resting allows the juices to redistribute throughout the meat. If you skip it, all those precious juices will run out onto your cutting board instead of staying in the meat.
Step 7: Make the Light Pan Gravy (10 minutes)
While the turkey rests, make the gravy. Pour the pan drippings through a fine-mesh strainer into a large measuring cup or fat separator. Press on the vegetables to extract all their flavor. Let the liquid settle for a minute, then spoon off the excess fat, leaving about 2 tablespoons in the cup. If you have less than 2 cups of liquid, add enough stock to reach 2 cups total.
In a medium saucepan, melt 2 tablespoons of butter over medium heat. Whisk in the flour and cook for 1 minute, stirring constantly. Slowly pour in the reserved drippings and the remaining 2 cups of stock, whisking continuously to prevent lumps. Bring the gravy to a simmer and cook for 3–4 minutes until it thickens slightly. Season with salt and pepper to taste. If you want a thinner gravy, add a splash more stock. For a thicker gravy, let it simmer an extra minute or two. Stir in fresh thyme if using.
Step 8: Carve and Serve
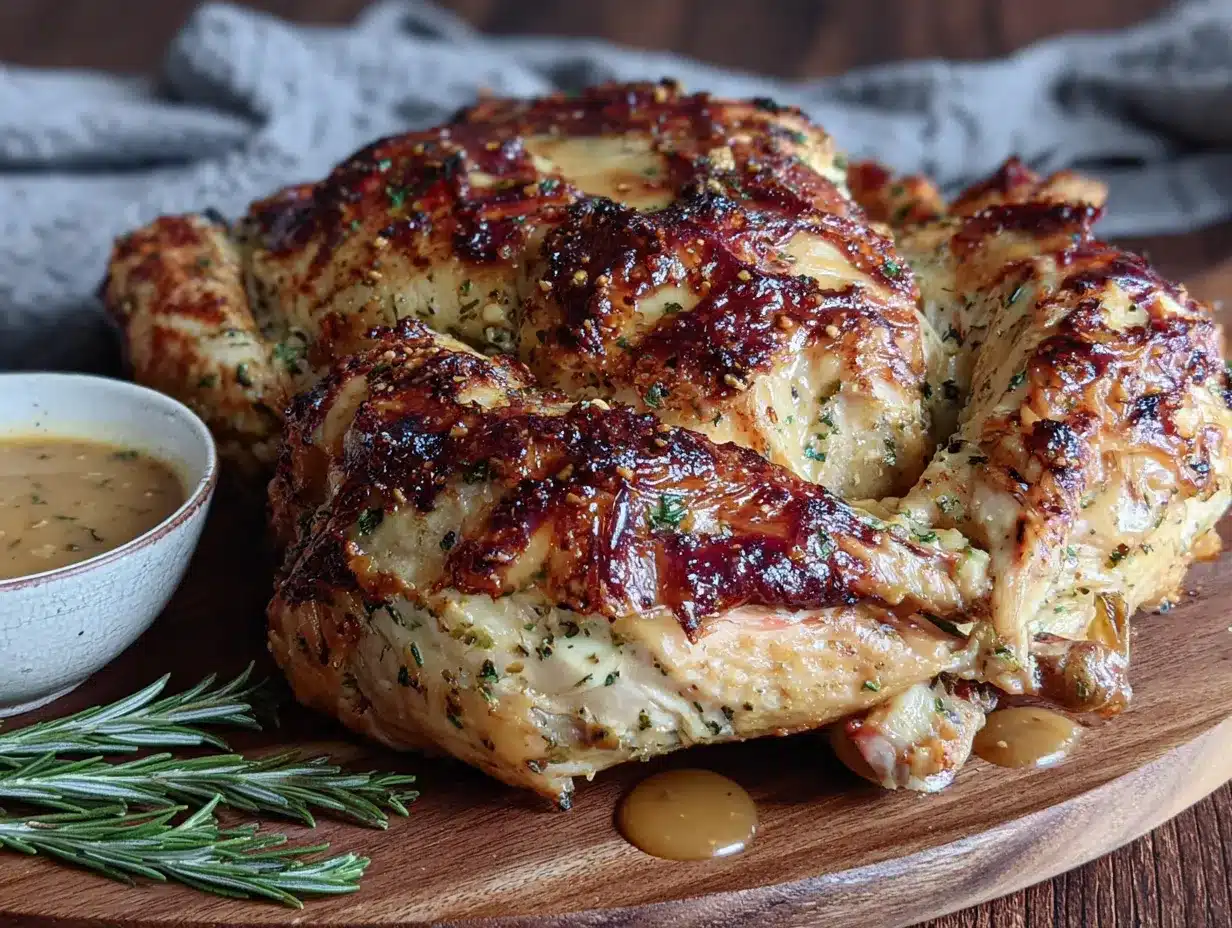
Carve the rested turkey by removing the legs and thighs first, then slicing the breast meat against the grain. Arrange on a platter and pour a little gravy over the top. Serve the remaining gravy on the side.
Cooking Tips & Techniques
I’ve learned a few things the hard way so you don’t have to. Here are my best tips:
- Dry the turkey thoroughly. Moisture is the enemy of crispy skin. Pat it dry with paper towels, then let it sit uncovered in the fridge for an hour or two if you have time. This dries out the skin even more.
- Don’t skip the rest. I once carved a turkey immediately because everyone was hungry. The meat was dry and the cutting board looked like a puddle. Trust me—20 minutes makes all the difference.
- Use a thermometer, not a timer. Ovens vary wildly. A 12-pound bird might be done in 60 minutes in my oven but take 80 in yours. The thermometer never lies.
- Watch the wing tips. They burn easily because they’re thin. Tucking them under the bird helps, but if they start to look dark, cover them with small pieces of foil.
- Make gravy while the turkey rests. This is the perfect timing. The drippings are hot and flavorful, and the turkey gets to rest undisturbed. Multitasking at its finest.
- For extra golden skin, brush the turkey with a little melted butter halfway through roasting. It adds another layer of color and flavor.
Variations & Adaptations
This recipe is flexible. Here are some ways to make it your own:
- Herb Swap: Not a fan of rosemary? Use tarragon or sage instead. Both work beautifully with the butter. I’ve made it with sage for a more traditional Thanksgiving flavor, and it was a hit.
- Citrus Twist: Add the zest of an orange along with the lemon zest. Or stuff a halved lemon and orange under the skin before roasting. The citrus cuts through the richness.
- Spicy Kick: Mix 1/2 teaspoon of smoked paprika or cayenne pepper into the herb butter. It adds warmth without overpowering the turkey.
- Gluten-Free Gravy: Swap the all-purpose flour for a gluten-free all-purpose blend or use cornstarch. For cornstarch, mix 1 tablespoon with 2 tablespoons cold water, then whisk into the simmering drippings.
- Dairy-Free Version: Use a high-quality vegan butter or olive oil in place of the butter. The flavor will be slightly different, but still delicious. I’ve tried it with a good olive oil and the herb flavor really shines.
- Smoked Turkey: This spatchcock method also works on a grill or smoker. Cook at 350°F (175°C) with indirect heat, adding wood chips for a smoky flavor. The cooking time will be similar.
Serving & Storage Suggestions
This turkey is best served fresh out of the oven, but leftovers are a close second. Here’s how to handle both:
- Serving Temperature: Serve the turkey warm, not piping hot. Letting it rest brings it to the perfect serving temperature. The gravy should be hot and served on the side.
- Presentation: Arrange the carved meat on a large platter. Garnish with fresh thyme sprigs and a few lemon wedges for color. It looks beautiful and inviting.
- Complementary Sides: This turkey pairs beautifully with roasted root vegetables, a simple green salad with vinaigrette, or creamy mashed potatoes. The light gravy is amazing over everything.
- Storage: Store leftover turkey in an airtight container in the refrigerator for up to 4 days. Keep the gravy in a separate container. The turkey will stay moist if you don’t let it dry out.
- Reheating: To reheat, place slices of turkey in a baking dish with a splash of stock. Cover with foil and warm in a 300°F (150°C) oven for 10–15 minutes. The gravy can be reheated gently on the stovetop, adding a splash of water if it’s too thick.
- Freezing: Shredded or sliced turkey freezes well for up to 3 months. Wrap it tightly in plastic wrap and then foil. Thaw overnight in the fridge before reheating. The gravy also freezes well in a sealed container.
The flavor actually deepens overnight. Leftover turkey sandwiches the next day are something I genuinely look forward to.
Nutritional Information & Benefits
This recipe is all about wholesome enjoyment. Here’s a rough estimate per serving (based on 6 ounces of turkey with 2 tablespoons of gravy):
- Calories: ~350
- Protein: ~40g
- Fat: ~18g (mostly from butter, but you can control the amount)
- Carbohydrates: ~6g (from the flour in the gravy)
- Sodium: ~500mg (varies based on salt used)
Turkey is an excellent source of lean protein, which helps keep you full and supports muscle health. The fresh herbs in the butter—parsley, rosemary, and thyme—are packed with antioxidants and anti-inflammatory properties. Garlic adds a boost to your immune system, and the lemon zest provides a touch of vitamin C. This dish fits beautifully into a balanced, health-conscious lifestyle. It’s indulgent enough for a celebration but light enough that you won’t feel sluggish afterward.
If you’re watching your sodium, use unsalted butter and low-sodium stock. You can also reduce the added salt in the herb butter slightly.
Conclusion
This Juicy Herb-Butter Spatchcock Turkey with Light Pan Gravy is more than just a recipe—it’s a solution to the dry turkey problem that has plagued holiday tables for generations. It’s faster, easier, and delivers consistently moist, flavorful meat with crispy skin that everyone will rave about. Whether you’re cooking for a crowd or just want a special Sunday dinner, this method will never let you down.
I love this recipe because it takes the stress out of holiday cooking. No more checking the oven every ten minutes or worrying about timing. Just great food that brings people together. And honestly, watching someone who swore off turkey take a second helping? That’s the best part.
I’d love to hear how yours turns out. Leave a comment below and let me know if you tried any variations. Share this post with a friend who needs a foolproof turkey recipe. And don’t forget to pin it for later! Happy roasting, friend.
Frequently Asked Questions
Can I spatchcock a turkey the night before?
Absolutely. Spatchcock the turkey, season it with the herb butter, and keep it uncovered in the fridge overnight. This dries out the skin even more, which means extra crispiness. Just take it out of the fridge 30 minutes before roasting to take the chill off.
What size turkey works best for spatchcocking?
A 10- to 12-pound turkey is the sweet spot. Anything larger might be too big for a standard baking sheet, and the cooking time becomes less predictable. If you have a bigger bird, you may need to cut it in half and roast each half separately.
How do I know when the turkey is done without a thermometer?
Honestly, I really recommend using a thermometer. But if you don’t have one, pierce the thigh with a knife. The juices should run clear, not pink. The meat should also feel firm but not hard when pressed. It’s not as reliable, but it’s a good backup.
Can I use dried herbs instead of fresh?
You can, but the flavor won’t be as bright. If using dried herbs, use about one-third of the amount. So instead of 3 tablespoons of fresh parsley, use 1 tablespoon of dried. Fresh really does make a difference here.
What can I do with the leftover backbone?
Don’t throw it away! The backbone is perfect for making turkey stock. Just roast it with some onion and carrot, then simmer in water for an hour or two. You can freeze the stock for soups, stews, or even cooking rice. It’s a little bonus from your main dish.
Pin This Recipe!
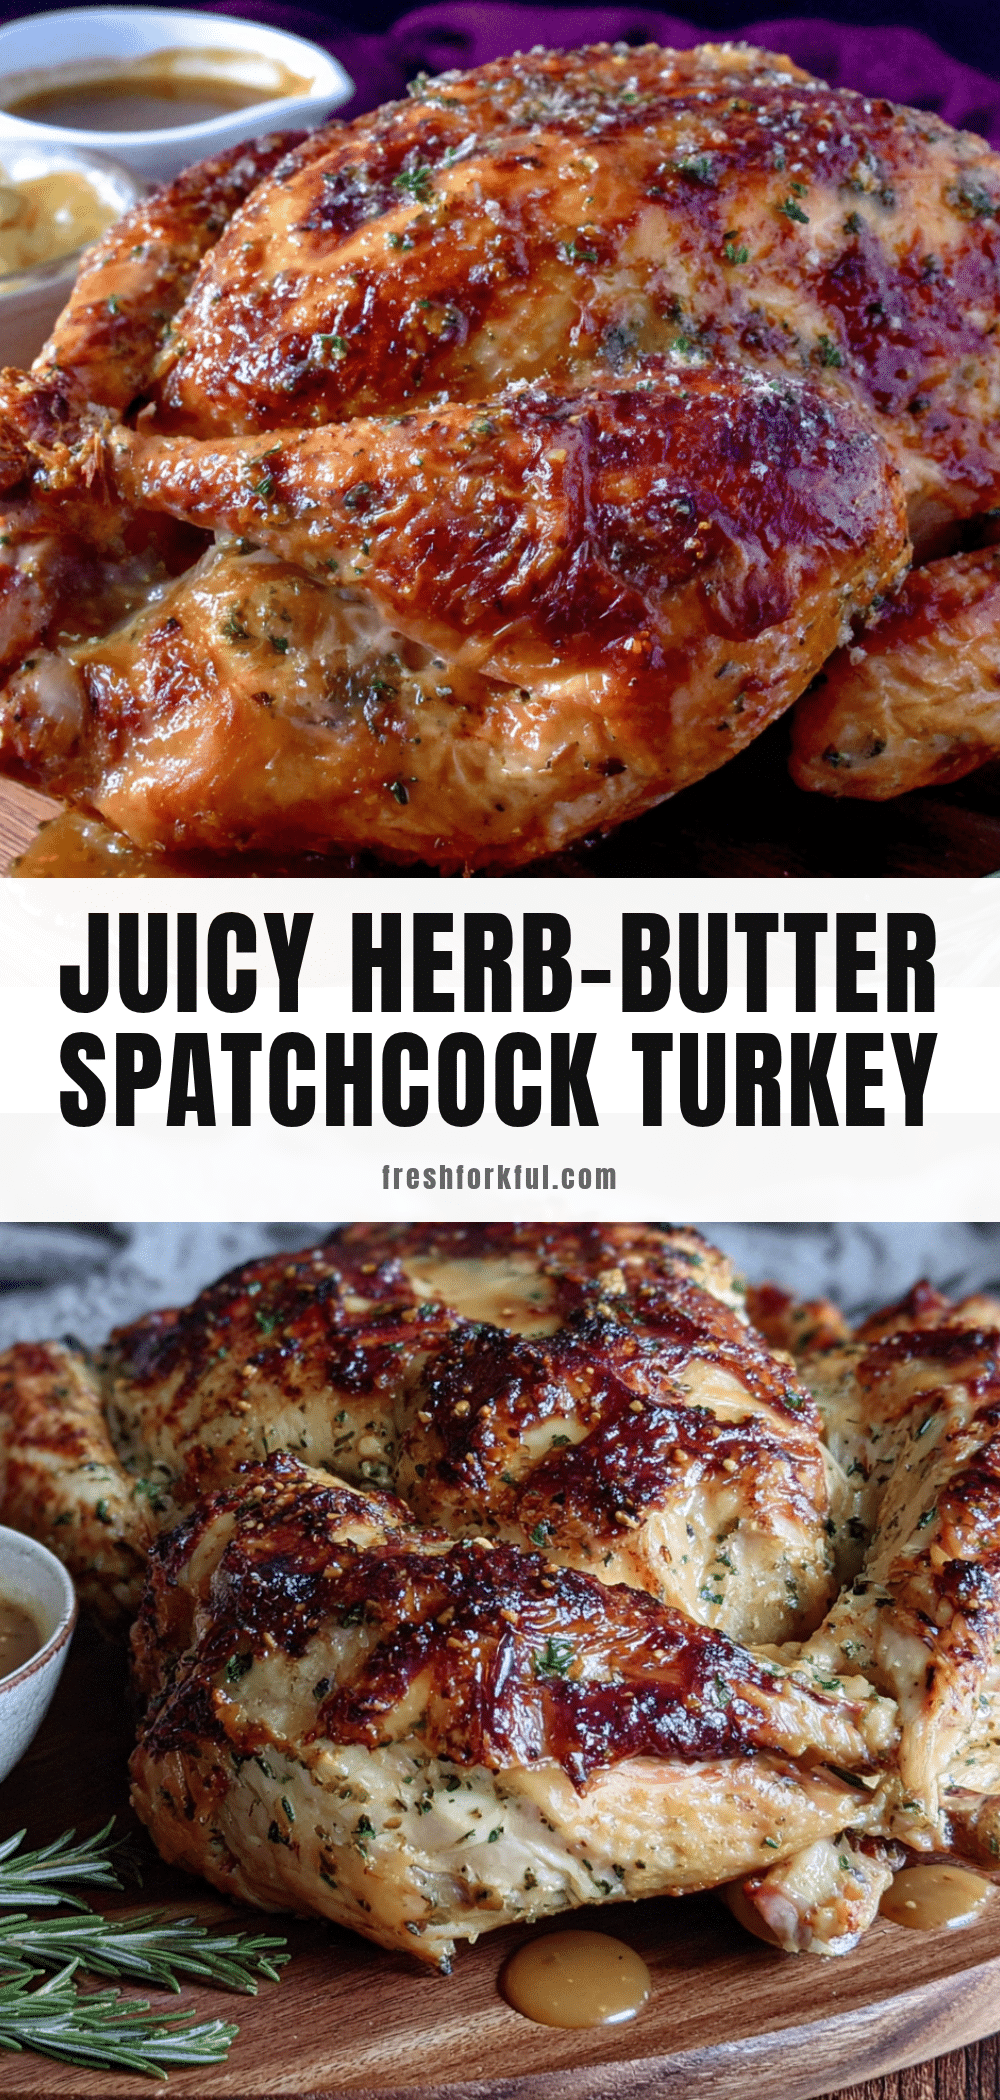
Juicy Herb-Butter Spatchcock Turkey with Easy Light Gravy
This spatchcock turkey is incredibly juicy, cooks faster than a traditional bird, and has shatteringly crispy skin. The herb butter seeps into every crevice, locking in moisture, while the light pan gravy is packed with flavor. It’s the foolproof turkey recipe that will change even the most skeptical minds.
- Prep Time: 30 minutes
- Cook Time: 60-90 minutes
- Total Time: 1 hour 30 minutes to 2 hours
- Yield: 8-10 servings 1x
- Category: Main Course
- Cuisine: American
Ingredients
- 1 whole turkey (10–12 pounds / 4.5–5.5 kg), thawed if frozen (neck and giblets removed, patted very dry inside and out)
- 1/2 cup (1 stick / 113 g) unsalted butter, softened to room temperature
- 3 tablespoons fresh parsley, finely chopped
- 2 tablespoons fresh rosemary, finely chopped
- 2 tablespoons fresh thyme leaves
- 4 cloves garlic, minced (I like to use a microplane for a paste-like consistency)
- 1 tablespoon kosher salt (use less if using table salt)
- 1 teaspoon black pepper, freshly ground
- 1 teaspoon lemon zest (from about 1 lemon—adds brightness)
- 1 large yellow onion, quartered
- 2 carrots, cut into 2-inch chunks
- 2 celery stalks, cut into 2-inch chunks
- 1 cup (240 ml) low-sodium chicken or turkey stock
- Pan drippings from the roasted turkey
- 2 tablespoons unsalted butter
- 2 tablespoons all-purpose flour (or use gluten-free all-purpose blend if needed)
- 2 cups (480 ml) low-sodium chicken or turkey stock
- Salt and pepper to taste
- Optional: 1 teaspoon fresh thyme leaves for garnish
Instructions
- Spatchcock the Turkey: Place the turkey breast-side down on your cutting board. Using your sharp shears, cut along one side of the backbone, from the tail to the neck. Repeat on the other side to remove the backbone entirely. Save it for stock if you like. Flip the turkey over and press down firmly on the breastbone with the heels of your hands until you hear a crack. The bird should lie flat. Tuck the wing tips under the shoulders to prevent burning.
- Make the Herb Butter: In a small bowl, combine the softened butter, parsley, rosemary, thyme, garlic, salt, pepper, and lemon zest. Mash it together with a fork until everything is evenly distributed. Set it aside at room temperature.
- Season the Turkey: Pat the spatchcocked turkey dry with paper towels. Using your fingers, gently loosen the skin over the breast and thighs, being careful not to tear it. Slide about half of the herb butter under the skin, spreading it evenly. Rub the remaining butter all over the outside of the turkey. Season the outside with a little extra salt and pepper if desired.
- Prep the Pan: Preheat your oven to 425°F (220°C). Scatter the quartered onion, carrot chunks, and celery pieces across your rimmed baking sheet or roasting pan. Place the seasoned turkey on top of the vegetables, breast-side up. Pour 1 cup of stock into the pan, being careful not to wash the butter off the turkey.
- Roast the Turkey: Roast the turkey in the preheated oven. Start checking for doneness at the 50-minute mark. The turkey is done when an instant-read thermometer inserted into the thickest part of the thigh (without touching bone) registers 165°F (74°C). The breast should read 160°F (71°C)—it will carry over to 165°F while resting. If the skin is browning too quickly, loosely tent the turkey with foil for the last 15–20 minutes.
- Rest the Turkey: Carefully transfer the turkey to a clean cutting board. Tent it loosely with foil and let it rest for at least 20 minutes.
- Make the Light Pan Gravy: While the turkey rests, pour the pan drippings through a fine-mesh strainer into a large measuring cup or fat separator. Press on the vegetables to extract all their flavor. Let the liquid settle for a minute, then spoon off the excess fat, leaving about 2 tablespoons in the cup. If you have less than 2 cups of liquid, add enough stock to reach 2 cups total. In a medium saucepan, melt 2 tablespoons of butter over medium heat. Whisk in the flour and cook for 1 minute, st…
- Carve and Serve: Carve the rested turkey by removing the legs and thighs first, then slicing the breast meat against the grain. Arrange on a platter and pour a little gravy over the top. Serve the remaining gravy on the side.
Notes
Dry the turkey thoroughly for crispy skin. Don’t skip the rest—20 minutes makes all the difference. Use a thermometer, not a timer. Watch the wing tips—they burn easily. Make gravy while the turkey rests. For extra golden skin, brush with melted butter halfway through roasting.
Nutrition
- Serving Size: 6 ounces turkey with
- Calories: 350
- Sugar: 1
- Sodium: 500
- Fat: 18
- Saturated Fat: 8
- Carbohydrates: 6
- Protein: 40
Keywords: spatchcock turkey, herb butter turkey, juicy turkey, Thanksgiving turkey, roasted turkey, light gravy, turkey recipe


