Love this? Save it for later!
Share the inspiration with your friends
My neighbor swore she hated Sun Butter. For years. Every time the topic of nut-free alternatives came up at our kids’ playdates, she’d scrunch her nose and launch into a mini-rant about the texture being “weird” and the taste being “too earthy.” I just nodded along, honestly, because I was busy making my own peace with the stuff. Then last Tuesday, I found her standing at my kitchen counter, halfway through a Sun Butter and jelly Uncrustable copycat I’d made for my son’s lunch. She had this look on her face, you know—the one where someone’s caught red-handed enjoying something they publicly swore off. “This is actually really good,” she mumbled, mouth still half-full. I just smiled and handed her the other half.
Look, I get the skepticism. The first time I tried Sun Butter, I was pretty underwhelmed. It was fine, but fine doesn’t cut it when you’re making lunch for a picky kid who’s used to the real deal. But necessity is a funny thing. My son’s school went completely nut-free after a few allergy scares, and suddenly I was staring at a pantry full of sunflower seed butter wondering what to do. I mean, a PB&J without the PB feels like a betrayal of childhood itself, right? So I started experimenting, determined to create something that actually tasted good, not just “good for a nut-free alternative.”
The first batch was a disaster, honestly. The bread got soggy, the Sun Butter separated weirdly, and my son took one bite and put it back on the plate like I’d insulted his entire existence. But I’m stubborn. Three more attempts later, I cracked the code. The key, I discovered, was a simple trick that most people overlook. And now? These Sun Butter and jelly Uncrustable copycats are the only lunch item my kid actually requests. No negotiation, no pleading, no traded-away sandwiches at the cafeteria table. That’s why I keep making them—because sometimes the best recipes come from solving a problem you didn’t want to have.
Why You’ll Love This Recipe
Listen, I’ve made a lot of sandwiches in my life. Hundreds, probably thousands at this point. But these Sun Butter and jelly Uncrustable copycats have earned a permanent spot in my weekly rotation, and here’s why they’ll do the same for you:
- Quick & Easy : We’re talking 10 minutes of active prep time, tops. These come together faster than you can argue with a toddler about why they can’t have cookies for lunch.
- Simple Ingredients : You probably already have everything in your kitchen right now. No fancy grocery store runs, no obscure ingredients you’ll use once and forget about.
- Perfect for Lunchboxes : These freeze beautifully, thaw by lunchtime, and don’t get soggy. It’s basically a meal prep dream come true for busy parents.
- Crowd-Pleaser : I’ve served these at playdates, school parties, and even a few adult gatherings (don’t judge). They disappear every single time, regardless of age.
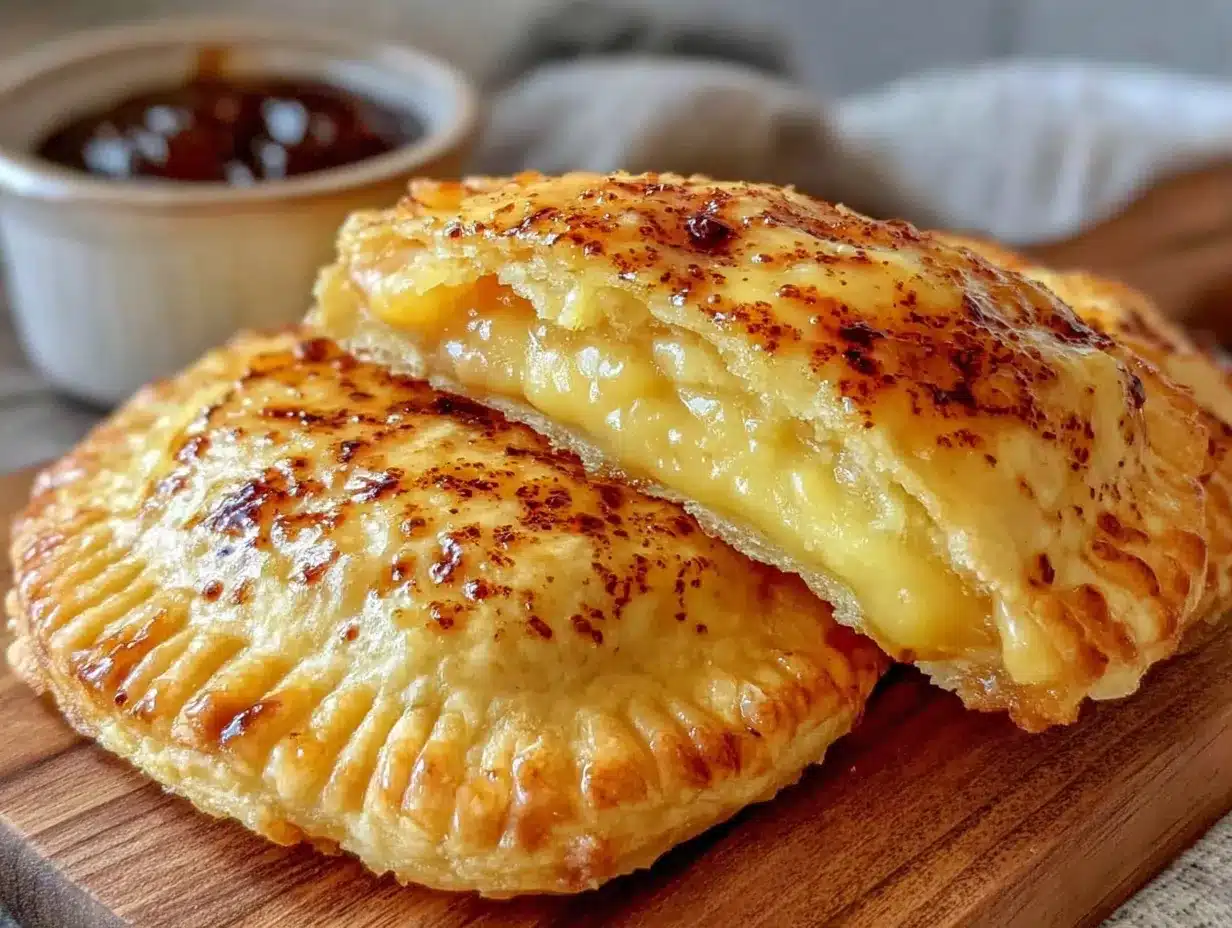
- Unbelievably Delicious : The texture is spot-on—crispy on the outside, soft and gooey on the inside. You won’t feel like you’re settling for a “nut-free version.”
What makes these different from every other Sun Butter sandwich you’ve tried? It’s the toasting method. Instead of just slapping the filling between two slices of bread, I use a panini press or skillet to create that sealed, golden-brown crust that keeps everything inside. No more leaking jelly, no more soggy bread, no more disappointment. Plus, I’ve figured out the perfect ratio of Sun Butter to jelly so neither one overpowers the other. It took some trial and error, but let me tell you—when you nail that balance, it’s pure magic.
This recipe isn’t just good; it’s the kind that makes you close your eyes after the first bite. It’s comfort food reimagined—nut-free, but with the same soul-soothing satisfaction as the original. Perfect for impressing other parents at the school drop-off, or turning a simple lunch into something you actually look forward to eating yourself.
What Ingredients You Will Need
This recipe uses simple, wholesome ingredients to deliver that classic Uncrustable experience without any of the preservatives or additives. Most of these are pantry staples, which makes this perfect for those mornings when you realize you forgot to pack lunch the night before. Again.
For the Sandwiches
- 8 slices of bread (white, whole wheat, or your favorite sandwich bread—I prefer a sturdy brand like Dave’s Killer Bread for best texture)
- ½ cup Sun Butter (creamy style works best; I recommend the original SunButter brand for consistent results)
- ¼ cup jelly or jam (grape, strawberry, or raspberry—use your favorite; Bonne Maman is my go-to for its fruit-forward flavor)
For the Sealing and Toasting
- 2 tablespoons unsalted butter (softened, for spreading on the outside of the bread; use dairy-free butter if needed)
- Pinch of salt (optional, but it really helps balance the sweetness and brings out the sunflower seed flavor)
A few notes on ingredient selection. For the Sun Butter, make sure you give it a really good stir before using. I can’t stress this enough. Sunflower seed butter tends to separate more than peanut butter, and if you don’t mix it thoroughly, your first few sandwiches will be dry while the last ones are oily. I learned this the hard way, trust me. Also, look for Sun Butter that doesn’t have added sugar if you’re trying to keep things on the healthier side—the original version is plenty sweet on its own.
For the bread, avoid anything too thin or flimsy. You need something that can hold up to the toasting process without falling apart. I’ve had good luck with sourdough and brioche, but honestly, even basic white bread works if you’re careful. Just don’t use the super thin sandwich slices—they’ll tear when you try to seal the edges.
As for the jelly, go with whatever makes you happy. Grape is the classic choice, obviously, but I’ve had amazing results with seedless raspberry and even fig jam. The key is to use a jelly or jam that’s not too runny. If it’s too liquid, it’ll seep out during toasting and make a mess. Look for something with a good, thick consistency.
Equipment Needed
You don’t need anything fancy for these Sun Butter and jelly Uncrustable copycats, which is part of the beauty. Here’s what you’ll need:
- Panini press or skillet (a panini press gives you the best results with even heat and that perfect grid pattern, but a regular non-stick skillet works great too)
- Round cookie cutter or glass (about 4 inches in diameter—this is what gives you that classic Uncrustable shape; a wide-mouth mason jar lid works in a pinch)
- Butter knife (for spreading the Sun Butter and jelly evenly)
- Pastry brush (optional, but helpful for spreading butter on the bread without tearing it)
- Spatula (for flipping if you’re using a skillet)
- Cutting board (for assembling and cutting)
If you don’t have a round cookie cutter, don’t stress. I’ve used a drinking glass before, and it works fine. Just make sure the edges are thin enough to cut through the bread cleanly. Also, if you’re using a skillet, you’ll want to press the sandwich down gently with another skillet or a heavy pot to get that sealed edge. It’s not as convenient as a panini press, but it gets the job done.
Preparation Method
Alright, let’s get into the nitty-gritty. I’ve broken this down step by step so you can nail it on your first try. Trust me, if I can do this while half-asleep at 6 AM, you can too.
- Prep your Sun Butter. Open your jar of Sun Butter and give it a really good stir. I mean, stir it like you mean it. Scrape the bottom and sides until it’s completely smooth and uniform. This takes about a minute, but it’s the most important step. If you skip this, your sandwiches will be uneven and disappointing. (Time: 1 minute)
- Butter the bread. Take your 8 slices of bread and lay them out on a cutting board. Using a pastry brush or butter knife, spread a thin, even layer of softened butter on one side of each slice. Don’t go too heavy—you just want enough to create that golden, crispy exterior. Make sure you get all the way to the edges. (Time: 2 minutes)
- Assemble the sandwiches. Flip 4 of the bread slices over so the buttered side is facing down. Spread about 2 tablespoons of Sun Butter on each of these slices, leaving a ½-inch border around the edges. On the remaining 4 slices (buttered side up), spread about 1 tablespoon of jelly in the center. Don’t spread the jelly all the way to the edges—it’ll squeeze out when you press the sandwich together. (Time: 2 minutes)
- Seal the sandwiches. Place the jelly-topped slices on top of the Sun Butter slices, buttered side up. Press down gently around the edges to seal them together. This is where the magic starts to happen. You want the two slices to stick together so the filling doesn’t leak out during toasting. (Time: 30 seconds)
- Cut out the rounds. Take your round cookie cutter or glass and press it down firmly in the center of each sandwich. Cut all the way through the bread and crust. You’ll have a perfectly round sandwich with sealed edges. Save the crust scraps for breadcrumbs or just snack on them while you work—no judgment here. (Time: 1 minute)
- Preheat your panini press or skillet. Set your panini press to medium-high heat. If using a skillet, place it over medium heat and let it warm up for about 2 minutes. You want it hot enough to create a good sear but not so hot that the butter burns. (Time: 2 minutes)
- Toast the sandwiches. Place 2 to 3 sandwiches on the panini press (don’t overcrowd) and close the lid. Cook for 3 to 4 minutes, until the bread is golden brown and crispy. If using a skillet, cook for 2 minutes per side, pressing down gently with a spatula or another skillet. You’ll know they’re done when the bread is beautifully browned and the filling is warm and slightly gooey. (Time: 4 minutes per batch)
- Cool slightly before serving. Transfer the toasted sandwiches to a wire rack or cutting board and let them sit for 2 to 3 minutes. This is crucial—the filling inside is molten hot straight out of the press, and biting into it too soon will result in a burnt tongue. Trust me on this one. (Time: 3 minutes)
- Serve or freeze. Serve warm for an immediate treat, or let them cool completely before storing. If you’re meal prepping, place the cooled sandwiches in a single layer on a baking sheet and freeze for 1 hour, then transfer to a freezer bag. They’ll keep for up to 3 months. (Time: varies)
A quick note on the toasting process: you should hear a satisfying sizzle when the buttered bread hits the hot surface. If you don’t, your press or skillet isn’t hot enough. Also, keep an eye on the edges—if you see jelly starting to leak out, your sandwiches aren’t sealed properly. Don’t panic, just wipe it up quickly and adjust your technique for the next batch.
Cooking Tips & Techniques
I’ve made these Sun Butter and jelly Uncrustable copycats more times than I care to count, and I’ve picked up a few tricks along the way. Here’s what I wish someone had told me before I started.
The biggest mistake people make is using too much jelly. I know, I know—more jelly sounds better. But trust me, less is more here. If you overload the sandwich, the jelly will seep out during toasting and create a sticky mess on your panini press. Plus, it makes the bread soggy. Stick to about 1 tablespoon per sandwich, and keep it centered away from the edges.
Another common issue is the Sun Butter separating during toasting. This happens when you don’t stir it well enough before assembling. Sunflower seed butter is naturally oily, and if it’s not properly emulsified, the oil will separate and make your sandwiches greasy. The fix is simple: stir, stir, stir. And if your Sun Butter has been sitting in the pantry for a while, try storing it upside down. The oil will redistribute more evenly, making it easier to mix.
Here’s a pro tip for perfect golden-brown crust every time: Don’t move the sandwiches around once they’re on the press or skillet. Let them sit and develop that beautiful color. If you’re using a skillet, resist the urge to flip them too early. Wait until the first side is deeply golden before turning. Patience is the secret ingredient here.
For the best texture, let the sandwiches cool completely before freezing. If you put warm sandwiches in the freezer, they’ll develop condensation, which leads to ice crystals and soggy bread. Trust me, I learned this the hard way after pulling out a bag of freezer-burned sandwiches that looked more like science experiments than lunch. Let them cool on a wire rack for at least 30 minutes before freezing.
One more thing—if you’re making these for a crowd, you can assemble all the sandwiches ahead of time and keep them in the fridge for up to 24 hours before toasting. Just don’t butter the bread until right before you cook them, or the butter will soak in and you’ll lose that crispy exterior. I’ve done this for school events and birthday parties, and it’s a total game-changer.
Variations & Adaptations
One of the best things about this recipe is how easily it adapts to different tastes and dietary needs. Here are some variations I’ve tried and loved:
Dietary Variations
- Vegan version: Use dairy-free butter or coconut oil instead of regular butter. I’ve tried both, and coconut oil gives a really nice subtle flavor that pairs well with the Sun Butter.
- Gluten-free option: Swap the regular bread for your favorite gluten-free bread. Just be extra careful when sealing the edges, as gluten-free bread tends to be more fragile. I’ve had good luck with Canyon Bakehouse brand.
- Low-sugar version: Use sugar-free jelly and unsweetened Sun Butter. The texture is the same, and you won’t miss the extra sweetness.
Flavor Twists
- Honey and banana: Replace the jelly with sliced banana and a drizzle of honey. This combo is incredible and feels more like a dessert than a lunch.
- Chocolate Sun Butter: Mix a tablespoon of cocoa powder into the Sun Butter before spreading. It creates a Nutella-like experience without the nuts. My kids go crazy for this version.
- Spiced apple: Use apple butter instead of jelly and add a pinch of cinnamon to the Sun Butter. It tastes like fall in sandwich form.
Different Cooking Methods
- Oven method: Place the assembled sandwiches on a baking sheet and bake at 375°F for 8 to 10 minutes, flipping halfway through. This works well if you’re making a large batch.
- Air fryer method: Cook at 350°F for 5 to 6 minutes, no need to flip. The air fryer gives an incredibly crispy exterior that’s almost like fried bread.
- No-toast option: Skip the toasting entirely and just serve them cold. They won’t be as crispy, but they’re still delicious and perfect for packed lunches.
I personally love the chocolate Sun Butter version. I made it one rainy afternoon when we were out of jelly, and it’s been a staple ever since. It feels indulgent, but it’s still made with simple, wholesome ingredients. That’s my favorite kind of recipe—one that feels like a treat without actually being unhealthy.
Serving & Storage Suggestions
These Sun Butter and jelly Uncrustable copycats are incredibly versatile when it comes to serving and storing. Here’s everything you need to know.
Serving temperature: I prefer these warm, straight off the press, when the outside is still crispy and the inside is warm and gooey. But they’re also delicious at room temperature, which makes them perfect for lunchboxes. If you’re serving them at a party or playdate, cut them in half so they’re easier to handle.
What to serve with them: These sandwiches pair beautifully with fresh fruit, carrot sticks, or a simple salad. For a more indulgent treat, serve them with a side of apple slices and a drizzle of honey. They also go great with a cold glass of milk or a warm cup of tea—yes, even for the adults.
Refrigerator storage: Store leftover sandwiches in an airtight container in the fridge for up to 5 days. To reheat, pop them in a toaster oven or panini press for 2 to 3 minutes until warm and crispy again. The microwave works in a pinch, but the bread will be soft rather than crispy.
Freezer storage: As I mentioned earlier, these freeze beautifully. Place the cooled, uncut sandwiches in a single layer on a baking sheet and freeze for 1 hour. Then transfer them to a freezer-safe bag or container. They’ll keep for up to 3 months. To thaw, just pull one out in the morning and it’ll be ready by lunchtime. No need to reheat—they’re delicious cold.
Flavor development: Here’s something interesting—these sandwiches actually taste better after they’ve been frozen and thawed. I’m not sure why, but the flavors seem to meld together more. The Sun Butter gets a little more intense, and the jelly seeps into the bread just enough to make every bite perfect. So don’t be afraid to make a big batch and freeze most of them.
Nutritional Information & Benefits
Here’s a rough nutritional breakdown for one Sun Butter and jelly Uncrustable copycat (using white bread, regular Sun Butter, and grape jelly):
| Nutrient | Amount per Serving |
|---|---|
| Calories | 310 |
| Total Fat | 16g |
| Saturated Fat | 4g |
| Carbohydrates | 36g |
| Fiber | 3g |
| Sugar | 12g |
| Protein | 8g |
| Sodium | 220mg |
Sunflower seed butter is actually a nutritional powerhouse. It’s packed with vitamin E, which is great for your skin and immune system, and it’s a good source of magnesium and healthy fats. Unlike peanut butter, it’s completely nut-free, making it safe for school lunchboxes and anyone with nut allergies. Plus, it has a bit more fiber than peanut butter, which helps keep you fuller longer.
This recipe is naturally dairy-free if you use a plant-based butter, and it’s easy to make gluten-free with the right bread. The only potential allergen to watch out for is sesame, as some Sun Butter brands are processed in facilities that also handle sesame. Always check the label if you have concerns.
From a wellness perspective, I love that this recipe lets me give my kids something they actually enjoy eating without worrying about allergens or artificial ingredients. It’s real food, made from real ingredients, and that makes me feel good about packing it in their lunchboxes every single day.
Conclusion
Look, I’m not saying these Sun Butter and jelly Uncrustable copycats will change your life. But they might change your lunch routine. They’re quick, they’re simple, and they actually taste like something you’d want to eat—not just something you tolerate because you have to. Whether you’re packing school lunches, meal prepping for the week, or just craving a nostalgic treat without the nuts, this recipe delivers.
What I love most about this recipe is how forgiving it is. You can customize it a hundred different ways, and it’ll still turn out great. Use different bread, switch up the jelly, add some sliced fruit—make it your own. That’s the beauty of cooking, honestly. It’s not about following rules; it’s about finding what works for you and the people you’re feeding.
So go ahead, give these a try. Make a batch on Sunday, freeze them for the week, and thank yourself on Wednesday morning when you’re running late and lunch is already done. And if you come up with your own variation, I’d love to hear about it. Drop a comment below and share your creation—I’m always looking for new ideas to try. Happy cooking, friends!
Frequently Asked Questions
Can I use regular peanut butter instead of Sun Butter?
Absolutely! If nut allergies aren’t a concern, you can use any nut or seed butter you like. Just keep in mind that different butters have different consistencies, so you might need to adjust the amount slightly. Peanut butter is usually thicker than Sun Butter, so you might want to use a little less.
Why did my Sun Butter separate during toasting?
This usually happens when the Sun Butter wasn’t stirred well enough before assembling. Sunflower seed butter naturally separates more than other nut butters, so you need to mix it thoroughly until it’s completely smooth. Storing the jar upside down can also help redistribute the oils more evenly.
Can I make these without a panini press?
Yes, definitely! A regular non-stick skillet works perfectly. Just cook the sandwiches over medium heat for about 2 minutes per side, pressing down gently with a spatula. You can also use a second skillet placed on top to weigh them down and create that sealed edge.
How long do these last in the freezer?
Properly stored, these Sun Butter and jelly Uncrustable copycats will keep in the freezer for up to 3 months. Just make sure they’re completely cool before freezing, and store them in a single layer in a freezer-safe bag or container. They thaw perfectly by lunchtime if you pull one out in the morning.
Can I use homemade bread for this recipe?
Absolutely! Homemade bread works great, especially if it’s a sturdy sandwich loaf. Just make sure the slices are about ½ inch thick—too thin and they’ll tear when you cut out the rounds, too thick and they won’t toast evenly. I’ve used my favorite sourdough recipe with excellent results.
Pin This Recipe!
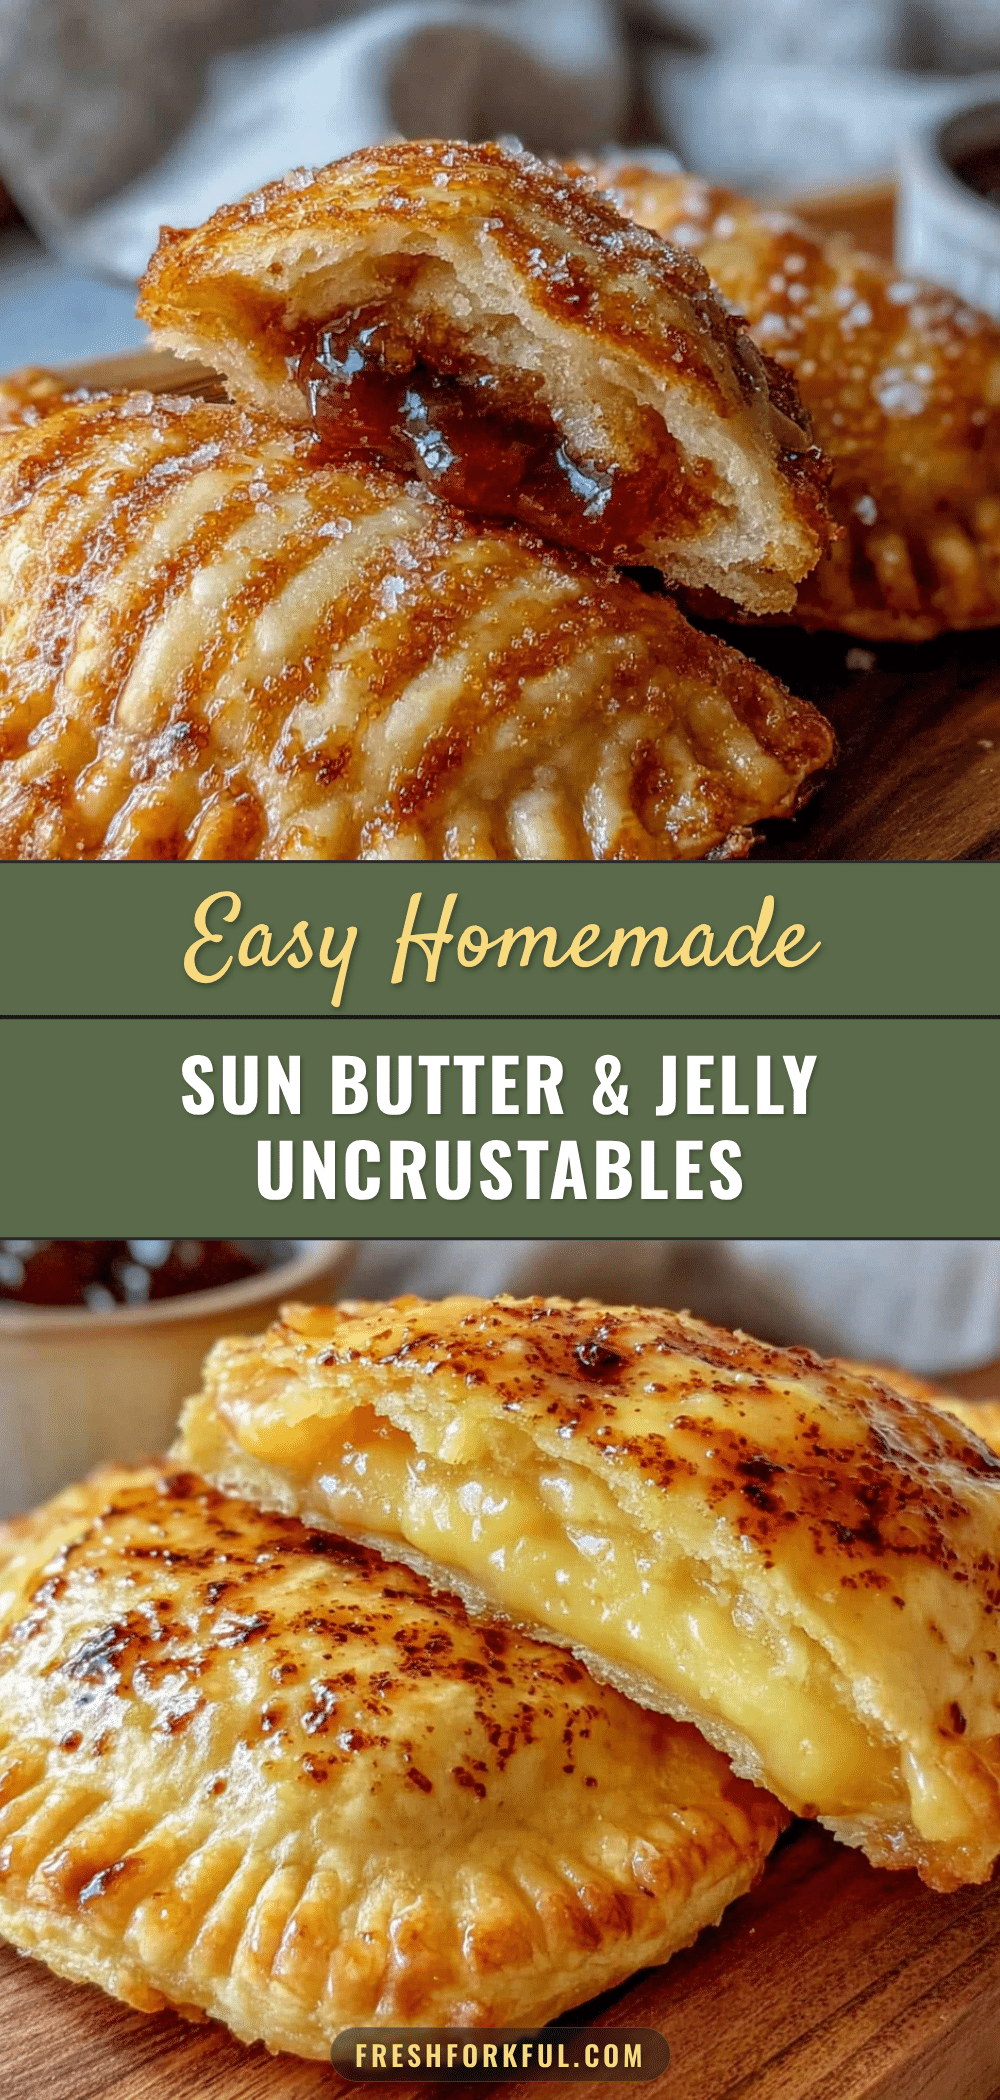
Easy Sun Butter and Jelly Uncrustable Copycats

These Sun Butter and jelly Uncrustable copycats are quick, nut-free, and perfect for lunchboxes. They freeze beautifully and taste just like the classic, with a crispy golden crust and gooey center.
- Prep Time: 10 minutes
- Cook Time: 8 minutes
- Total Time: 18 minutes
- Yield: 4 servings 1x
- Category: Lunch
- Cuisine: American
Ingredients
- 8 slices of bread (white, whole wheat, or sturdy sandwich bread)
- ½ cup Sun Butter (creamy style, stirred well)
- ¼ cup jelly or jam (grape, strawberry, or raspberry)
- 2 tablespoons unsalted butter (softened)
- Pinch of salt (optional)
Instructions
- Prep your Sun Butter: Open the jar and stir thoroughly until smooth and uniform. (1 minute)
- Butter the bread: Lay out 8 slices of bread. Spread a thin, even layer of softened butter on one side of each slice. (2 minutes)
- Assemble the sandwiches: Flip 4 slices so the buttered side is down. Spread about 2 tablespoons of Sun Butter on each, leaving a ½-inch border. On the remaining 4 slices (buttered side up), spread about 1 tablespoon of jelly in the center. (2 minutes)
- Seal the sandwiches: Place the jelly-topped slices on top of the Sun Butter slices, buttered side up. Press down gently around the edges to seal. (30 seconds)
- Cut out the rounds: Use a round cookie cutter or glass (about 4 inches in diameter) to cut out rounds from each sandwich. (1 minute)
- Preheat your panini press or skillet: Set panini press to medium-high heat. If using a skillet, warm over medium heat for 2 minutes. (2 minutes)
- Toast the sandwiches: Place 2-3 sandwiches on the panini press and cook for 3-4 minutes until golden brown and crispy. If using a skillet, cook 2 minutes per side, pressing down gently. (4 minutes per batch)
- Cool slightly before serving: Transfer to a wire rack or cutting board and let sit for 2-3 minutes. (3 minutes)
- Serve or freeze: Serve warm, or let cool completely before storing. For freezing, place cooled sandwiches in a single layer on a baking sheet and freeze for 1 hour, then transfer to a freezer bag.
Notes
Stir Sun Butter thoroughly before using to prevent separation. Use sturdy bread to avoid tearing. Let sandwiches cool completely before freezing to prevent condensation. For best results, don’t move sandwiches while toasting.
Nutrition
- Serving Size: 1 sandwich
- Calories: 310
- Sugar: 12
- Sodium: 220
- Fat: 16
- Saturated Fat: 4
- Carbohydrates: 36
- Fiber: 3
- Protein: 8
Keywords: sun butter, jelly, uncrustable, nut-free, lunchbox, sandwich, copycat


