Love this? Save it for later!
Share the inspiration with your friends
I used to think themed party food was a little… silly. Honestly. The kind of thing you see on Pinterest and scroll past, thinking, “cute, but I’d never actually make that.” For years, I stuck to the basics for Halloween parties—chips and salsa, a veggie tray, maybe some store-bought cookies shaped like pumpkins. It was fine. Functional. But then my best friend, Sarah, threw her annual Halloween bash last October, and I got assigned “the appetizer.” No pressure, right? Just a dish that needed to feed twenty people, look festive, and not take three hours to make. I remember standing in the grocery aisle on a Tuesday night, tired and a little annoyed, when a container of sour cream caught my eye. That’s when the idea hit me—a cold, creamy dip that looks like a spiderweb. It felt like a gamble. Would people actually eat it, or just stare at it? I made it anyway, and let me tell you, I caught Sarah sneaking a third scoop with a tortilla chip before the party even officially started. That moment—seeing her caught in the act—was when I knew this recipe was something special. It stayed in my rotation because it’s the kind of thing that looks like you tried really hard, but honestly, it comes together in ten minutes. Maybe you’ve been there—wanting to bring something impressive without the stress. This dip is your answer.
Why You’ll Love This Recipe
This Easy Spiderweb Dip isn’t just another Halloween appetizer—it’s the one that disappears first every single time. Here’s why it works so well:
- Quick & Easy : Comes together in under 10 minutes, with zero cooking required. Perfect for last-minute party prep or when you’re short on time.
- Simple Ingredients : You probably already have most of these in your fridge. No fancy grocery runs or obscure spices needed—just classic, crowd-pleasing flavors.
- Perfect for Halloween Parties : The spiderweb design is a showstopper on any appetizer table. It fits right in with spooky decor and gets people talking before they even taste it.
- Crowd-Pleaser : Kids love the fun design, and adults love the creamy, savory flavor. I’ve seen it disappear at parties full of picky eaters and foodies alike.
- Unbelievably Delicious : The combination of creamy base, zesty seasoning, and cool sour cream topping is next-level comfort food. It’s the kind of dip you keep going back to.
What makes this version different from the rest? It’s all about the technique. Instead of a complicated piping bag situation, I use a simple squeeze bottle or even a zip-top bag with a tiny corner snipped off. This method gives you perfect, clean lines every single time—no artistic skills required. Plus, I’ve tested the seasoning ratio to make sure every bite is balanced, not too salty or bland.
This recipe isn’t just good—it’s the kind that makes you close your eyes after the first bite. It’s comfort food reimagined for a party: fun, festive, and full of flavor. Perfect for impressing guests without the stress, or turning a simple snack into something memorable.
What Ingredients You Will Need
This recipe uses simple, wholesome ingredients to deliver bold flavor and a satisfying creamy texture without the fuss. Most of these are pantry staples, which makes this dip a last-minute lifesaver.
- Sour cream (16 oz, full-fat works best for thick consistency) — (adds creamy tang and forms the white “web” design)
- Cream cheese (8 oz, softened to room temperature) — (creates a rich, smooth base; I recommend Philadelphia for best texture)
- Ranch seasoning mix (1 packet, about 1 oz) — (provides that classic savory, herby flavor everyone loves; store-brand works fine)
- Shredded cheddar cheese (1 cup, sharp or mild) — (adds cheesy depth and a slight saltiness; pre-shredded is okay, but freshly shredded melts better into the dip)
- Green onions (2-3 stalks, thinly sliced) — (adds a mild onion bite and a pop of green color)
- Black olives (¼ cup, sliced, for the spider decoration) — (optional but highly recommended for the full spider effect)
- Tortilla chips or crackers (for serving) — (sturdy chips work best for scooping; I love scoop-shaped tortilla chips)
Ingredient Selection Tips: Look for a block of cream cheese rather than the spreadable tub version—it holds the dip’s structure better. If you want a lighter version, swap the sour cream for plain Greek yogurt (full-fat is best to avoid a thin consistency). For a gluten-free option, double-check your ranch seasoning mix label, as some brands contain wheat.
Substitution Guidance: No ranch seasoning? Use a mix of dried dill, garlic powder, onion powder, and a pinch of salt. Want more heat? Add a teaspoon of hot sauce or a pinch of cayenne to the base. You can also swap the cheddar for pepper jack cheese for a spicy twist.
Equipment Needed
You don’t need any fancy gadgets for this recipe, which is part of its charm. Here’s what you’ll need:
- Mixing bowl (medium-sized, for combining the dip base)
- Hand mixer or stand mixer (makes blending the cream cheese smooth and easy; a sturdy spatula and some elbow grease also work)
- Spatula (for scraping the bowl and spreading the dip evenly)
- Squeeze bottle or small zip-top bag (for creating the spiderweb design; a piping bag with a small round tip also works)
- Serving platter or pie dish (a round dish works best for the web design; I use a 9-inch glass pie plate)
- Small knife or toothpick (for dragging the web lines outward)
Personal Experience: I’ve tried this with both a squeeze bottle and a zip-top bag. The squeeze bottle gives you more control, but a zip-top bag with a tiny corner snipped off works just fine. Just don’t cut the corner too big, or the sour cream will come out in a blob instead of a thin line!
Budget-Friendly Options: No hand mixer? Soften the cream cheese by letting it sit on the counter for an hour, then mash it with a fork before stirring in the other ingredients. It takes a little more effort, but the result is the same.
Preparation Method
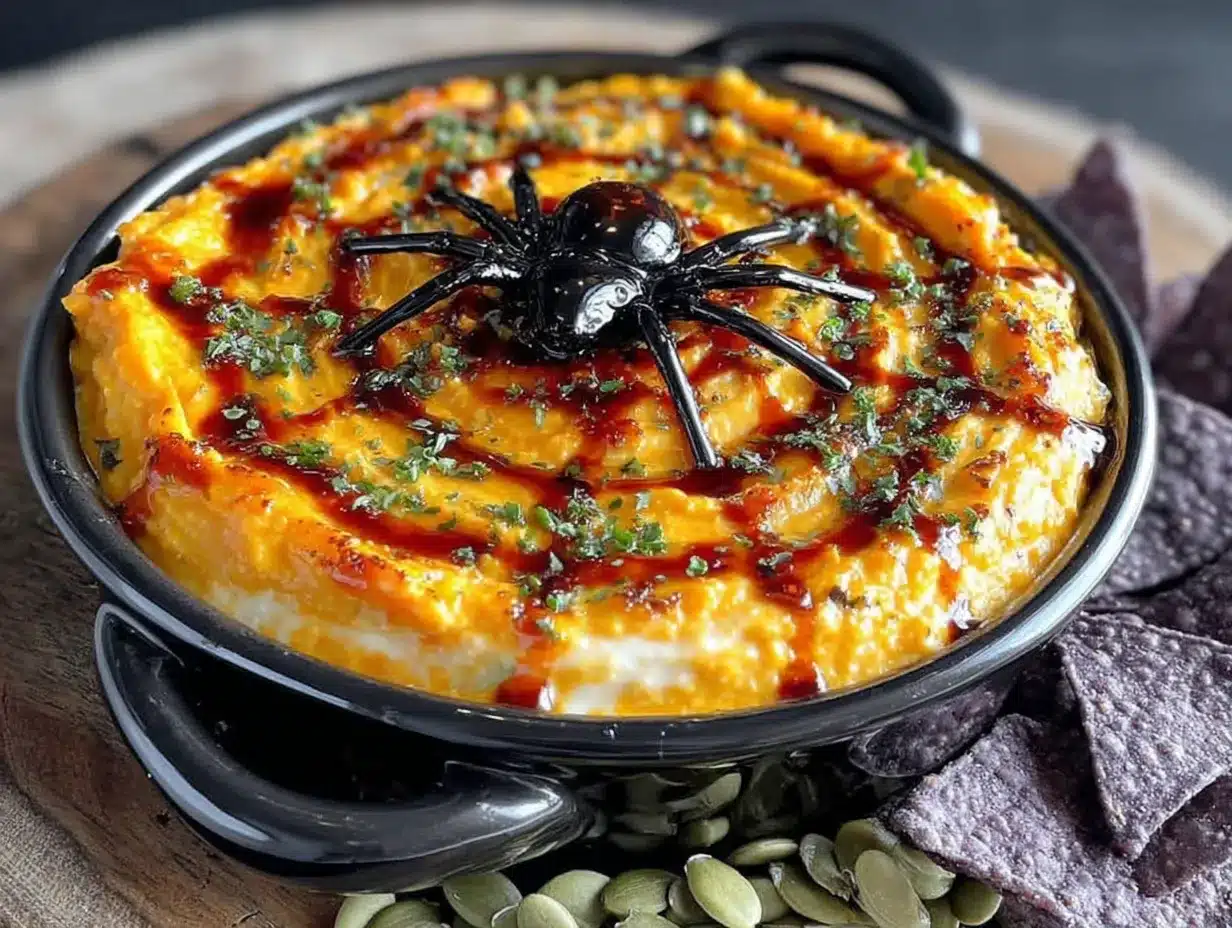
- Soften the cream cheese. Take the cream cheese out of the fridge about 30 minutes before you start. It should be soft to the touch but not melted. If you’re in a hurry, microwave it in 10-second bursts until just softened—don’t overdo it, or it’ll get lumpy.
- Mix the dip base. In a medium mixing bowl, combine the softened cream cheese, ½ cup of the sour cream (reserve the rest for the web), the ranch seasoning mix, and the shredded cheddar cheese. Beat with a hand mixer on medium speed until smooth and well combined. Scrape down the sides of the bowl with a spatula halfway through. The mixture should be thick, creamy, and uniform in color.
- Fold in the green onions. Stir in the sliced green onions with a spatula until evenly distributed. Reserve a few slices for garnish on top. The green onions add little flecks of color and a fresh bite.
- Spread the dip into the dish. Transfer the dip mixture to your serving platter or pie dish. Use the spatula to spread it into an even, smooth layer. Aim for about ½-inch thickness so the web design shows up clearly. Don’t worry if it’s not perfectly smooth—the top will be covered with sour cream anyway.
- Prepare the sour cream for the web. Spoon the remaining sour cream into your squeeze bottle or zip-top bag. If using a bag, squeeze the sour cream into one corner, then snip off a tiny piece of the corner—start small, you can always cut more. The opening should be about ⅛-inch wide.
- Create the spiderweb. Starting from the center of the dip, squeeze a small circle of sour cream. Then, squeeze a larger circle around it, leaving about 1 inch of space between the circles. Repeat until you reach the edge of the dip. You should have 4-5 concentric circles total. Don’t worry if the lines aren’t perfectly round—the next step fixes that.
- Drag the web lines. Take a toothpick or small knife. Starting from the center, gently drag the toothpick through the sour cream circles outward toward the edge of the dish. Wipe the toothpick clean after each line. Repeat this every 1-2 inches around the entire dip, creating a sunburst pattern. You’ll see the sour cream pull into a perfect web shape as you go. This is where the magic happens!
- Add the spider decoration. Place a whole black olive in the center of the web for the spider’s body. Arrange sliced olives around it to form the legs—four on each side. If you want a more realistic look, use a knife to cut thin strips from the olives for the legs. Don’t stress about perfection; even a wonky spider looks cute.
- Chill before serving. Cover the dish with plastic wrap and refrigerate for at least 30 minutes before serving. This helps the flavors meld together and makes the dip easier to scoop. You can make this up to 24 hours in advance—just add the spider decoration right before serving so the olives don’t dry out.
- Garnish and serve. Sprinkle the reserved green onions over the top just before serving. Arrange tortilla chips or crackers around the dip on the platter. Watch it disappear!
Cooking Tips & Techniques
Making a spiderweb dip sounds fancy, but honestly, it’s one of the easiest things you’ll ever do. Still, a few pro tips can make the difference between “good” and “wow.”
The Toothpick Trick: This is the most important part of the whole recipe. When you drag the toothpick through the sour cream circles, wipe it clean after every single line. If you don’t, the sour cream builds up on the toothpick and drags messy blobs across your web. I learned this the hard way at my first Halloween party—my web looked more like a muddy puddle than a spiderweb. Now I keep a paper towel next to the dish and wipe after each drag. It takes an extra 30 seconds, and the result is so much cleaner.
Consistency is Key: If your dip base is too thick, it’ll be hard to spread and the sour cream lines won’t sit evenly on top. If it’s too thin, the dip will run and the web will look blurry. The perfect consistency is like thick frosting—smooth and spreadable but not runny. If your mixture seems too thick, add a tablespoon of milk or water and mix again. If it’s too thin, add a little more shredded cheese to thicken it up.
Timing and Multitasking: This dip is perfect for making ahead of time. I usually make the base and spread it in the dish the night before, then add the sour cream web and spider decoration just before the party starts. This way, the dip has time to chill and the flavors develop, but the web design stays sharp and fresh. If you add the web too early, the sour cream can soak into the dip and the lines will blur.
Common Mistake to Avoid: Don’t use low-fat or non-fat sour cream for the web design. It’s too thin and runny, so the lines will spread and lose their shape. Full-fat sour cream is thick enough to hold the web pattern until you’re ready to serve. Same goes for the cream cheese—full-fat gives you the best texture and flavor.
Personal Failure: One year, I tried to make the web using a piping bag with a star tip because I thought it would look fancier. Big mistake. The ridges in the star tip made the sour cream lines uneven, and when I dragged the toothpick through, it looked like a mess. Stick with a plain round tip or just a snipped corner of a bag. Simple really is better here.
Variations & Adaptations
This spiderweb dip is incredibly versatile. Here are some of my favorite ways to switch it up:
- Spicy Southwest Version: Add ½ cup of drained canned corn, ¼ cup of diced pickled jalapeños, and a teaspoon of cumin to the dip base. Swap the ranch seasoning for taco seasoning. The web design works the same way, but the flavor gets a smoky, spicy kick. I made this version for a Halloween potluck last year, and it was gone in 20 minutes.
- Buffalo Chicken Version: Stir in 1 cup of shredded cooked chicken and ¼ cup of buffalo sauce to the dip base. Reduce the sour cream by ¼ cup to keep the consistency right. The spicy, tangy flavor pairs perfectly with the cool sour cream web. Serve with celery sticks and carrot chips for a healthier twist.
- Vegan Adaptation: Use vegan cream cheese, vegan sour cream, and dairy-free cheddar shreds. Most brands work well, but I’ve had the best luck with Kite Hill or Miyoko’s for the cream cheese. The rest of the recipe stays exactly the same. The texture is slightly less firm, but the flavor is still fantastic.
- Loaded Baked Potato Version: Add ½ cup of cooked, crumbled bacon and ¼ cup of finely chopped chives to the dip base. Top the finished dip with extra bacon bits and chives. It tastes exactly like a loaded baked potato, but in dip form. This one is dangerously addictive.
- Low-Carb/Keto Version: This recipe is already fairly low in carbs, but you can reduce it further by serving with cucumber slices, bell pepper strips, or pork rinds instead of tortilla chips. The dip itself has about 3 grams of carbs per serving without the chips.
Serving & Storage Suggestions
Serving Temperature: This dip is best served cold, straight from the fridge. The cool, creamy texture is part of its appeal. If you’re serving it at a party, keep the platter on a bed of ice or use a chilled serving dish to keep it cold for longer. I’ve left it out for about two hours at room temperature, and it was still safe to eat, but it does get softer as it warms up.
Presentation Tips: Arrange the tortilla chips or crackers in a ring around the dip, slightly overlapping for a polished look. You can also place a few chips directly in the dip for a more casual, “dig in” vibe. For extra Halloween flair, add some plastic spiders around the platter or use a black serving dish to make the white web pop.
Complementary Dishes: This dip pairs beautifully with other cold appetizers like a veggie tray with ranch dip, deviled eggs, or a simple cheese platter. For a full Halloween spread, serve it alongside mini sliders, mummy hot dogs, or pumpkin-shaped cookies for dessert. It also goes great with a crisp white wine or a cold beer.
Storage Instructions: Leftover dip can be stored in an airtight container in the refrigerator for up to 3 days. The sour cream web will blur and soak into the dip after a day, so don’t expect it to look as pretty on day two. The flavor, however, gets even better as the ingredients meld together. Stir the leftovers before serving to redistribute the sour cream.
Reheating: I don’t recommend reheating this dip—it’s meant to be served cold. If you have leftovers, use them as a spread for sandwiches or wraps, or thin it out with a little milk and use it as a salad dressing. It’s also great as a topping for baked potatoes.
Flavor Development: Honestly, this dip tastes even better the next day. The ranch seasoning has time to fully infuse the cream cheese and sour cream, and the green onions mellow out a bit. If you’re making this for a party, I highly recommend making it a day ahead—just add the spiderweb decoration right before serving.
Nutritional Information & Benefits
Here’s the estimated nutritional breakdown for one serving (about ¼ cup of dip, without chips):
| Nutrient | Amount per Serving |
|---|---|
| Calories | 180 |
| Total Fat | 15g |
| Saturated Fat | 9g |
| Cholesterol | 45mg |
| Sodium | 380mg |
| Total Carbohydrates | 5g |
| Dietary Fiber | 0g |
| Sugars | 2g |
| Protein | 5g |
Health Benefits: While this is definitely a treat, it does have some redeeming qualities. The cream cheese and sour cream provide calcium for bone health, and the cheddar cheese adds a small amount of protein. The green onions offer a tiny dose of vitamin K and antioxidants. If you use Greek yogurt instead of sour cream, you’ll boost the protein content and add probiotics for gut health.
Dietary Considerations: This recipe is vegetarian and can be made gluten-free with careful label reading. It’s not suitable for vegans unless you use plant-based substitutes. The dip is low in carbohydrates, making it a good option for low-carb or keto diets when served with vegetable dippers.
Personal Wellness Perspective: I believe in balance—this dip is a fun, indulgent treat for special occasions, not an everyday snack. It’s the kind of food that brings people together and makes memories, and that has its own kind of nutritional value. Enjoy it without guilt, and pair it with plenty of fresh veggies to round out the snack table.
Conclusion
This Easy Spiderweb Dip is proof that you don’t need to spend hours in the kitchen to make something spectacular for Halloween. It’s creamy, savory, and so simple to put together that you’ll wonder why you ever stressed about party appetizers. The spiderweb design looks impressive, but the real magic is in the flavor—cool, tangy, and packed with cheesy goodness that keeps people coming back for more.
I love this recipe because it’s forgiving. You can tweak the seasonings, swap the cheese, or change up the decorations, and it still turns out great. It’s the kind of recipe that makes you look like a party planning pro, even if you’re just having fun in your kitchen on a Tuesday night.
So go ahead—give it a try. Make it for your Halloween party, a football game, or just because you’re craving something delicious. And when you do, come back and let me know how it turned out. Did you add your own twist? Did the kids love the spider decoration? I’d love to hear about it in the comments below. Don’t forget to share this recipe with your friends—it’s too good to keep to yourself!
Happy Halloween, and happy dipping!
Frequently Asked Questions
Can I make this spiderweb dip ahead of time?
Yes! You can prepare the dip base up to 24 hours in advance. Just spread it in the dish, cover it, and refrigerate. Add the sour cream web and spider decoration right before serving to keep the design looking fresh and sharp.
What can I use instead of a squeeze bottle for the web?
A small zip-top bag works perfectly. Spoon the sour cream into one corner of the bag, then snip off a tiny piece of the corner. Start with a very small opening—you can always cut more if the line is too thin.
Can I use low-fat ingredients?
You can, but the texture won’t be as rich and thick. Low-fat sour cream is especially runny, which makes the web lines blur and spread. If you want a lighter version, use full-fat Greek yogurt instead of sour cream—it’s thicker and has more protein.
How long does this dip last in the fridge?
Leftover dip can be stored in an airtight container in the refrigerator for up to 3 days. The spiderweb design will fade after the first day, but the flavor actually improves as the ingredients meld together. Stir before serving.
What should I serve with this dip?
Tortilla chips are the classic choice, but this dip also works great with crackers, pretzels, pita chips, or fresh vegetable sticks like cucumber, bell pepper, and carrot. For a low-carb option, try serving with pork rinds or celery sticks.
Pin This Recipe!
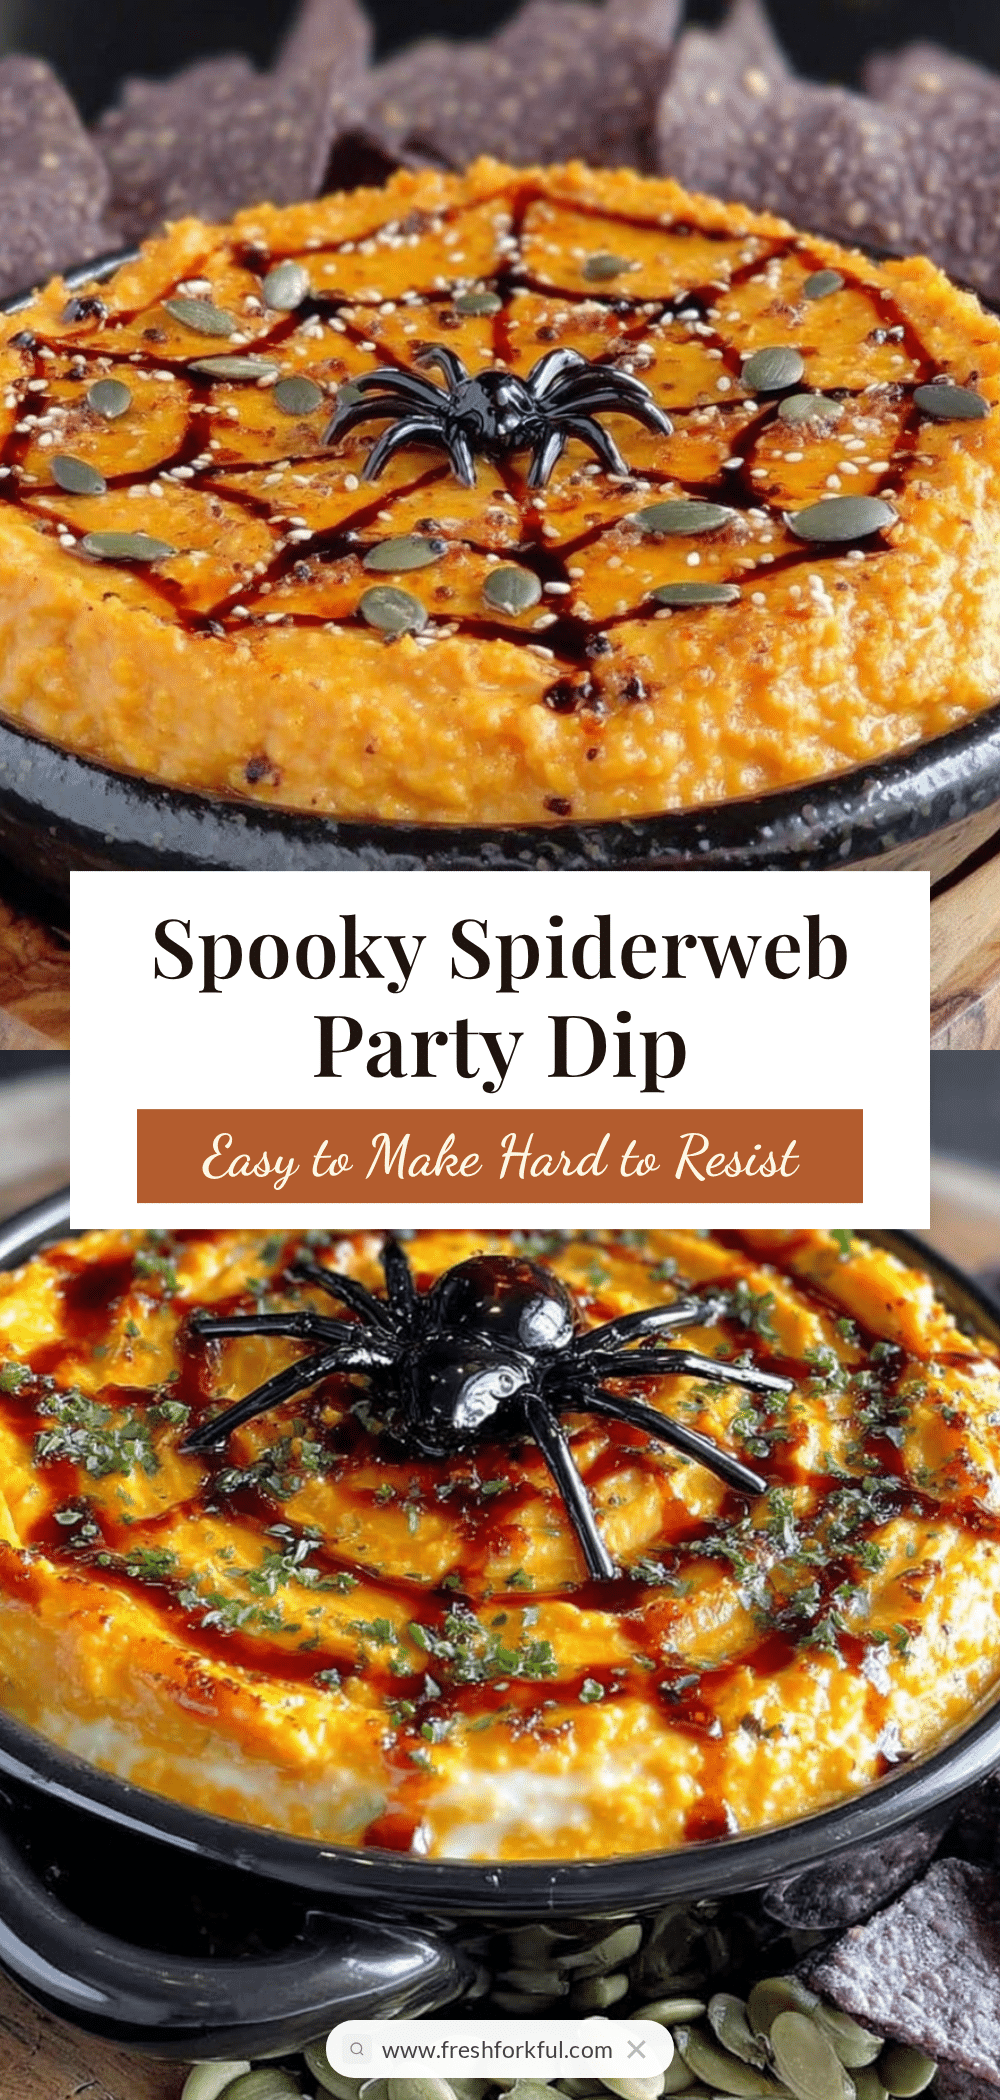
Easy Spiderweb Dip: Best Halloween Party Appetizer
This Easy Spiderweb Dip is a creamy, savory Halloween appetizer that comes together in under 10 minutes with zero cooking. The spiderweb design looks impressive, but the real magic is in the flavor—cool, tangy, and packed with cheesy goodness that keeps people coming back for more.
- Prep Time: 10 minutes
- Cook Time: 0 minutes
- Total Time: 10 minutes (plus 30 minutes chilling)
- Yield: 8 servings 1x
- Category: Appetizer
- Cuisine: American
Ingredients
- 16 oz sour cream (full-fat)
- 8 oz cream cheese, softened
- 1 packet (about 1 oz) ranch seasoning mix
- 1 cup shredded cheddar cheese (sharp or mild)
- 2–3 stalks green onions, thinly sliced
- ¼ cup sliced black olives (for spider decoration)
- Tortilla chips or crackers (for serving)
Instructions
- Soften the cream cheese: Take the cream cheese out of the fridge about 30 minutes before you start. It should be soft to the touch but not melted. If in a hurry, microwave in 10-second bursts until just softened.
- Mix the dip base: In a medium mixing bowl, combine the softened cream cheese, ½ cup of the sour cream (reserve the rest for the web), the ranch seasoning mix, and the shredded cheddar cheese. Beat with a hand mixer on medium speed until smooth and well combined. Scrape down the sides of the bowl with a spatula halfway through.
- Fold in the green onions: Stir in the sliced green onions with a spatula until evenly distributed. Reserve a few slices for garnish.
- Spread the dip into the dish: Transfer the dip mixture to your serving platter or pie dish. Use the spatula to spread it into an even, smooth layer, about ½-inch thick.
- Prepare the sour cream for the web: Spoon the remaining sour cream into a squeeze bottle or small zip-top bag. If using a bag, squeeze the sour cream into one corner, then snip off a tiny piece of the corner (about ⅛-inch wide).
- Create the spiderweb: Starting from the center of the dip, squeeze a small circle of sour cream. Then, squeeze a larger circle around it, leaving about 1 inch of space between the circles. Repeat until you reach the edge of the dip (4-5 concentric circles total).
- Drag the web lines: Take a toothpick or small knife. Starting from the center, gently drag the toothpick through the sour cream circles outward toward the edge of the dish. Wipe the toothpick clean after each line. Repeat every 1-2 inches around the entire dip, creating a sunburst pattern.
- Add the spider decoration: Place a whole black olive in the center of the web for the spider’s body. Arrange sliced olives around it to form the legs—four on each side.
- Chill before serving: Cover the dish with plastic wrap and refrigerate for at least 30 minutes before serving. Can be made up to 24 hours in advance—add the spider decoration right before serving.
- Garnish and serve: Sprinkle the reserved green onions over the top just before serving. Arrange tortilla chips or crackers around the dip on the platter.
Notes
For best results, use full-fat sour cream and cream cheese. The toothpick trick is key: wipe it clean after every line to avoid messy blobs. The dip can be made a day ahead, but add the spiderweb decoration just before serving to keep the design sharp. For a gluten-free option, check the ranch seasoning label. For a lighter version, swap sour cream for full-fat Greek yogurt.
Nutrition
- Serving Size: ¼ cup (without chips
- Calories: 180
- Sugar: 2
- Sodium: 380
- Fat: 15
- Saturated Fat: 9
- Carbohydrates: 5
- Protein: 5
Keywords: Halloween appetizer, spiderweb dip, easy dip, cold dip, party dip, no-bake appetizer


