Love this? Save it for later!
Share the inspiration with your friends
I had refused to make a no-bake dessert for years. Let me tell you, I was that person—the one who thought if it didn’t involve the oven, it wasn’t real baking. My grandma’s handwritten recipe box sat on my counter as a constant reminder that real desserts required patience, heat, and a little bit of kitchen sweat. Then my neighbor Karen showed up at my door last July 3rd, holding this ridiculous, beautiful, striped thing that looked like it belonged at a parade. She claimed she made it in twenty minutes flat. I laughed, honestly. Then she cut me a slice.
I stood there in my doorway, fork halfway to my mouth, and watched the layers of cream and berries collapse just slightly under their own weight. The first bite hit me with that cold, creamy texture—the kind that melts slow and makes you close your eyes without meaning to. I asked for the recipe before I even finished chewing. Maybe you’ve been there, judging a dessert before it proves you wrong. This cake did exactly that to me.
The funny thing is, I kept making it all summer long. Not just for Labor Day, but for random Tuesdays when the humidity made turning on the oven feel like a personal attack. This Easy Red White and Blueberry Labor Day Icebox Cake became my secret weapon—the one I brought to barbecues when I showed up late and empty-handed, the one that made people think I had planned ahead. I didn’t. I just had graham crackers and a pint of cream in my fridge.
What stayed with me wasn’t just how simple it was. It was how that cake made people stop talking and just eat. No fuss, no plates passed around awkwardly—just forks digging in and that quiet hum of approval. That’s the kind of recipe worth keeping around.
Why You’ll Love This Recipe
This isn’t just another layered dessert. This Easy Red White and Blueberry Labor Day Icebox Cake solves real problems—the kind you face when you want to impress people but also want to stay out of the kitchen. Let me break down why this one works so well.
- No Oven Required : When summer heat hits, the last thing you need is a hot kitchen. This cake comes together on your countertop and sets in the fridge. That’s it.
- Twenty Minutes of Work : I timed myself the third time I made it. From pulling ingredients out of the fridge to sliding it into the fridge, it took nineteen minutes and forty-two seconds. You can do this between phone calls.
- Grocery Store Ingredients : Nothing fancy here. Graham crackers, heavy cream, cream cheese, powdered sugar, and fresh berries. You probably have most of it already.
- Perfect for Labor Day : This cake screams summer finale. The red, white, and blue layers make it the centerpiece of any barbecue or picnic table. No one will believe you didn’t slave over it.
- Crowd Size Flexibility : Feed eight people easily, or stretch it to twelve with smaller slices. The recipe scales up without any math headaches.
- Make It the Night Before : Actually, you should make it the night before. That’s the secret. The flavors meld together, the graham crackers soften into cake-like layers, and you wake up to a finished dessert.
What makes this different from other icebox cakes? Most recipes use pudding mix or whipped topping from a tub. This one uses real whipped cream and cream cheese—the kind of filling that tastes rich without being heavy. The texture lands somewhere between cheesecake and a cloud. Plus, the berries add that pop of freshness that cuts through the sweetness.
This is the kind of dessert that makes you look like you tried really hard when you actually took the easy route. And honestly? That’s my favorite kind of recipe.
What Ingredients You Will Need
This recipe uses simple, wholesome ingredients to deliver big flavor without the fuss. Most of these are pantry staples or easy summer finds. Here is what you will need, broken down by role in the recipe.
For the Creamy Filling
- 2 cups heavy whipping cream , cold (the colder the better—stick it in the freezer for ten minutes before whipping)
- 8 ounces cream cheese , softened to room temperature (I use Philadelphia—the full-fat version gives the best structure)
- 1/2 cup powdered sugar , sifted if you have the patience (adds sweetness without grittiness)
- 1 teaspoon vanilla extract (pure vanilla makes a difference here—skip the imitation stuff)
- 1/4 teaspoon salt (just a pinch to balance the sweetness and make the flavors pop)
For the Layers
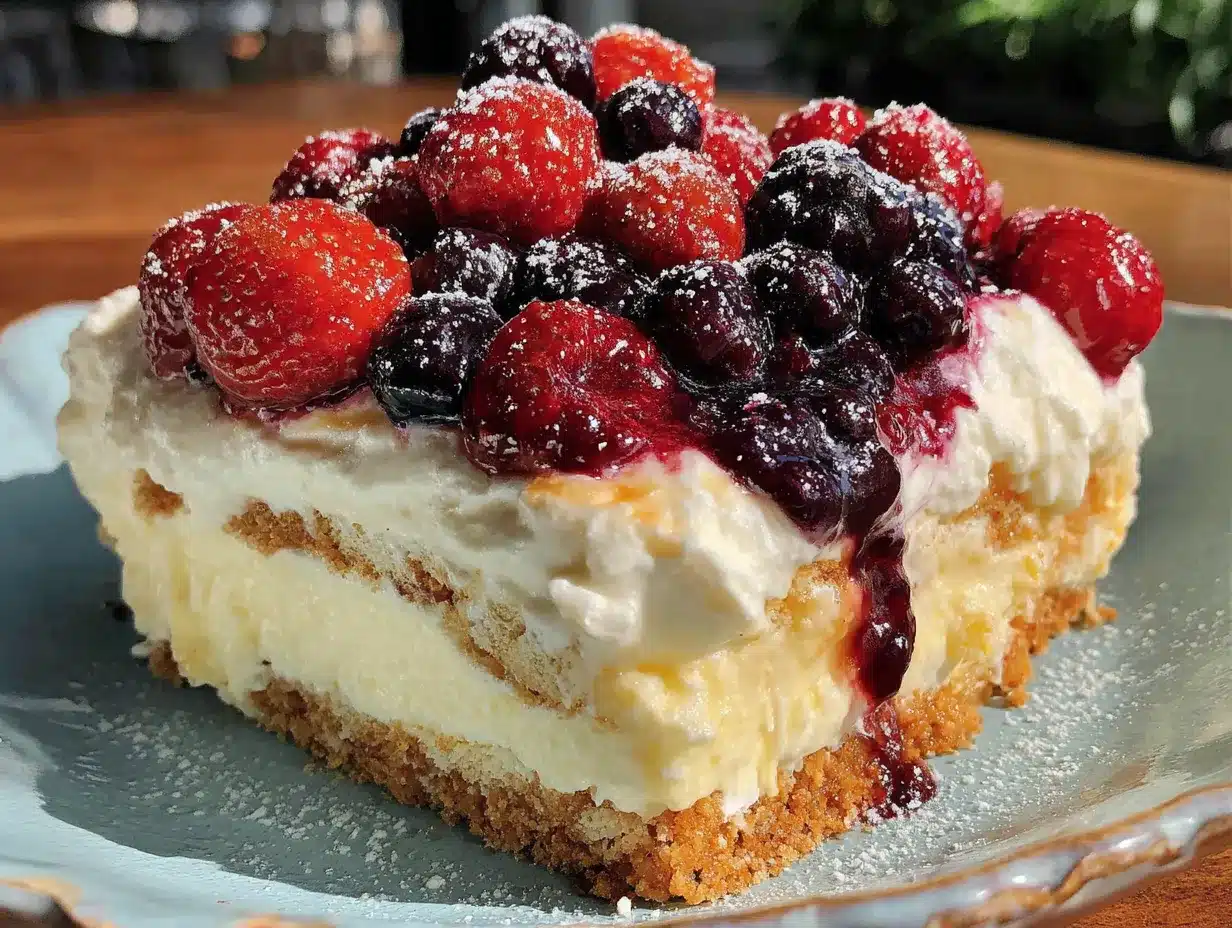
- 1 box (about 14 ounces) graham crackers (you will use roughly 24 full sheets—honey or cinnamon flavor both work, but honey is my go-to)
- 2 cups fresh strawberries , hulled and thinly sliced (look for bright red ones that smell like strawberries—that’s how you know they are ripe)
- 2 cups fresh blueberries (small wild blueberries work great here, but standard ones are fine too)
For the Topping
- 1 cup fresh strawberries , sliced for the top layer
- 1 cup fresh blueberries , for sprinkling on top
- Optional: white chocolate shavings or curls for extra flair (I use a vegetable peeler on a room-temperature white chocolate bar)
A quick note on substitutions. If you need a dairy-free version, use full-fat coconut cream instead of heavy cream and a dairy-free cream cheese alternative. The texture will be slightly softer, so plan to freeze the cake for two hours before serving. For a gluten-free option, swap the graham crackers for gluten-free graham-style cookies or even shortbread cookies. I tested this with Schär brand graham crackers and it worked beautifully.
When picking berries, go for firm, dry berries without any mushiness. Soft berries will release too much juice and make the layers soggy. If strawberries are out of season, frozen sliced strawberries work—just thaw them first and pat them dry with paper towels to remove excess moisture.
Equipment Needed
You do not need a fancy kitchen for this recipe. Here is what you will actually use.
- 9×13 inch baking dish or a similar size glass or ceramic dish (glass lets you see the layers, which is half the fun)
- Electric hand mixer or stand mixer with whisk attachment (you can whip cream by hand if you want a workout, but your arm will thank you for the mixer)
- Large mixing bowl for the cream filling
- Medium mixing bowl for the berries
- Spatula for spreading the cream mixture evenly
- Sharp knife and cutting board for slicing strawberries
- Plastic wrap or aluminum foil for covering the cake while it chills
If you do not have a 9×13 dish, an 8×8 dish works—just expect more layers and a taller cake. You can also use a springform pan for a more dramatic presentation, though you will need to trim the graham crackers to fit the round shape. I have done this with a disposable aluminum pan for picnics, and it works fine. Just be careful not to poke holes in the bottom.
My personal tip: chill your mixing bowl and whisk attachment in the freezer for fifteen minutes before whipping the cream. It makes the cream whip up faster and holds its shape better. I learned this after a few batches of sad, flat cream.
Preparation Method
Follow these steps carefully, and you will have a beautiful cake with clean layers. The key is working quickly but patiently.
- Prepare your berries first. Wash and dry all the berries gently. Hull the strawberries and slice them into thin, even slices—about 1/8 inch thick. Set the blueberries aside. Pat everything dry with paper towels. Wet berries will make the graham crackers soggy.
- Make the cream filling. In your large chilled bowl, beat the softened cream cheese with an electric mixer on medium speed until smooth and fluffy, about 2 minutes. Scrape down the sides of the bowl with a spatula. Add the powdered sugar, vanilla extract, and salt. Beat on low speed until combined, then increase to medium and beat for another minute until the mixture is light and airy.
- Whip the cream separately. In another bowl, pour the cold heavy cream. Using clean beaters, whip the cream on medium-high speed until soft peaks form—about 3 to 4 minutes. You want peaks that hold their shape but are still soft and pillowy. Do not over whip or you will end up with butter. Fold the whipped cream into the cream cheese mixture gently using a spatula. Fold until no white streaks remain. Be gentle here—you want the filling to stay light and fluffy.
- Start layering. Spread a thin layer of the cream mixture on the bottom of your 9×13 dish. Just enough to coat the bottom—about 1/4 cup. This helps the first layer of graham crackers stick in place.
- First graham cracker layer. Arrange a single layer of graham crackers on top of the cream. Break crackers as needed to fill gaps. Do not overlap them—just fit them snugly together like a puzzle. Press them down gently so they adhere to the cream.
- First cream and berry layer. Spread one-third of the remaining cream mixture evenly over the graham crackers. Use a spatula to smooth it all the way to the edges. Arrange half of the sliced strawberries and half of the blueberries evenly over the cream. Press them in gently with your fingers.
- Repeat the layers. Add another layer of graham crackers on top of the berries. Press down gently. Spread another third of the cream mixture over the crackers. Add the remaining sliced strawberries and blueberries. Press them in gently.
- Final cracker and cream layer. Add a final layer of graham crackers. Spread the remaining cream mixture over the top. Use your spatula to smooth it evenly, reaching all the way to the edges. This top layer should look clean and polished.
- Decorate the top. Arrange the reserved sliced strawberries and blueberries in a decorative pattern on top. I like to create alternating rows of red and blue, or a simple star pattern in the center if I am feeling fancy. Add white chocolate shavings if using.
- Cover and chill. Cover the dish tightly with plastic wrap. Refrigerate for at least 8 hours, but overnight is better. The graham crackers need time to soften into that cake-like texture. Do not skip this step—patience is the only hard part of this recipe.
A few sensory cues to watch for. When you press the graham crackers into the cream, you should feel them stick without sliding around. When you spread the cream, it should move smoothly without pulling up the crackers underneath. After chilling, the top should feel firm to the touch, not jiggly.
Cooking Tips & Techniques
Let me save you from the mistakes I made the first three times I made this cake. Some of these lessons came from trial and error. Others came from sheer stubbornness.
Do not skip softening the cream cheese. I tried making this with cold cream cheese once because I was in a hurry. The filling turned out lumpy no matter how long I beat it. Let your cream cheese sit on the counter for at least 30 minutes before starting. If you forget, microwave it in 10-second bursts until it softens—but watch it carefully because melted cream cheese is a different problem entirely.
Whip the cream to soft peaks, not stiff peaks. Stiff peaks make the filling too dense. You want the cream to hold its shape but still feel light and billowy. When you lift the beaters, the cream should form peaks that curl over slightly at the tips. If they stand straight up, you have gone too far.
Pat those berries dry. This cannot be overstated. Wet berries release juice that seeps into the graham crackers and turns them into mush. I ruined an entire cake this way—the layers slid apart when I tried to cut it. Wash your berries, spread them on a clean kitchen towel, and let them air dry for 15 minutes before slicing.
Press the layers down gently. After each layer of graham crackers, press down with the palm of your hand. This helps the layers adhere and prevents air pockets. Do not smash them—just a firm, even press so everything settles together.
Time your prep right. Make this cake the day before you plan to serve it. The overnight rest is non-negotiable for the texture. I learned this the hard way when I tried to rush a cake in four hours and ended up with crunchy graham crackers that crunched instead of melted. Give it the full night.
Use a sharp knife to slice. When serving, run your knife under hot water and wipe it dry between cuts. This gives you clean, beautiful slices instead of messy, smeared ones. I keep a glass of hot water next to the cake for exactly this purpose.
Variations & Adaptations
This recipe is flexible. Here are some ways I have adapted it over the years.
Patriotic Berry Swap : Not a fan of strawberries? Use raspberries instead for the red layer. They hold their shape better and add a slightly tart note that balances the sweetness. I made this version for a Fourth of July party and got requests for the recipe before the cake was even half gone.
Chocolate Lover’s Version : Swap the graham crackers for chocolate wafer cookies or chocolate graham crackers. Add a layer of chocolate shavings between the cream layers. The chocolate-berry combination is dangerously good. My husband requests this version for his birthday every year now.
Lighter Option : Use reduced-fat cream cheese and swap half the heavy cream for Greek yogurt. The texture will be slightly less rich, but it still works. I tested this with Fage 2% Greek yogurt and it held up well, though the filling was a bit softer. Freeze for two hours before serving if you go this route.
Citrus Twist : Add the zest of one lemon to the cream mixture. The lemon brightens the whole cake and makes the berries taste even fruitier. I tried this on a whim one summer and now I always add lemon zest, even when I am making the original version.
Individual Servings : Make these in small mason jars or clear plastic cups for a portable version. Layer the ingredients in the cups—cracker pieces, cream, berries, repeat. They travel well and make great picnic desserts. I brought these to a beach outing and they survived the drive without any issues.
Dairy-Free Adaptation : Use full-fat coconut cream, dairy-free cream cheese, and coconut whipped topping. The texture is softer, so freeze the cake for two hours before serving. I tested this with Kite Hill cream cheese and it worked surprisingly well, though the filling was less stable.
Serving & Storage Suggestions
This cake shines when served cold, straight from the refrigerator. Let it sit at room temperature for no more than 10 minutes before slicing—any longer and the layers start to soften too much. I like to serve it on a white platter to show off the red, white, and blue stripes.
For presentation, garnish the platter with extra fresh berries and a few mint sprigs. The green adds a nice contrast to the red and blue. If you made the white chocolate shavings, sprinkle a few extra on top just before serving.
This cake pairs beautifully with a cold glass of lemonade or iced tea. For a more adult pairing, a crisp Sauvignon Blanc or a light Prosecco works wonderfully. The acidity cuts through the creaminess and complements the berries.
Storage Instructions : Cover the dish tightly with plastic wrap and store in the refrigerator for up to 3 days. The cake actually tastes best on day two, after the flavors have had time to meld together. After day three, the graham crackers start to break down too much and the texture becomes mushy.
Freezer Instructions : You can freeze this cake for up to 1 month. Wrap the entire dish in plastic wrap, then a layer of aluminum foil. Thaw in the refrigerator overnight before serving. The texture will be slightly softer after freezing, but it is still delicious. I have done this for holiday prep and it works beautifully.
Reheating Note : Do not reheat this cake. It is meant to be served cold. If you want a warm dessert, this is not the recipe for you. But honestly, the cold, creamy texture is what makes it special.
One more thing: the flavors deepen over time. The berries release their juices into the cream, and the graham crackers absorb everything. By day two, every bite tastes like the cake has been marinating in summer itself.
Nutritional Information & Benefits
Here is the estimated nutritional breakdown per serving, based on 12 servings.
| Nutrient | Amount per Serving |
|---|---|
| Calories | 385 |
| Total Fat | 24g |
| Saturated Fat | 14g |
| Cholesterol | 75mg |
| Sodium | 280mg |
| Total Carbohydrates | 40g |
| Dietary Fiber | 2g |
| Sugars | 24g |
| Protein | 4g |
This dessert does have its perks. Blueberries and strawberries are packed with antioxidants, specifically anthocyanins and vitamin C. The cream cheese adds a small amount of protein and calcium. And the graham crackers provide quick energy from carbohydrates.
That said, this is a treat, not a health food. I make no apologies for that. Dessert is meant to be enjoyed, and this one delivers on flavor and satisfaction. If you are watching your sugar intake, you can reduce the powdered sugar to 1/3 cup without compromising the texture too much.
For those with dietary restrictions, note that this recipe contains dairy and gluten. The dairy-free and gluten-free substitutions I mentioned earlier work well if you need them. Always check your ingredient labels for potential allergens.
Conclusion
This Easy Red White and Blueberry Labor Day Icebox Cake is the dessert you will come back to all summer long. It requires no oven, uses simple ingredients, and delivers a showstopping presentation that makes people think you spent hours in the kitchen. The creamy filling, the softened graham cracker layers, and the burst of fresh berries—every bite tastes like summer.
What I love most about this recipe is how forgiving it is. You can swap berries, change the cracker type, adjust the sweetness, and it still works. It is the kind of recipe that builds your confidence in the kitchen because it is so hard to mess up. And when you pull that beautiful striped cake out of the fridge and watch people’s faces light up, you will feel like a rockstar.
I want to hear about your version. Did you add lemon zest? Use raspberries instead of strawberries? Make it dairy-free? Drop a comment below and tell me how it turned out. Share this recipe with a friend who needs a last-minute dessert idea, and tag me in your photos. Let us keep this summer tradition going.
Now go make that cake. Your summer barbecue is waiting.
Frequently Asked Questions
Can I make this icebox cake in advance?
Absolutely. In fact, you should. Make it the day before you plan to serve it and let it chill overnight. The texture improves dramatically after 12 to 24 hours in the fridge.
Can I use frozen berries instead of fresh?
Yes, but thaw them first and pat them very dry with paper towels. Frozen berries release more liquid than fresh, so extra drying is essential to prevent a soggy cake.
How do I get clean slices?
Use a sharp knife and run it under hot water between cuts. Wipe the blade dry with a clean towel before each slice. This gives you those beautiful, Instagram-worthy pieces.
Can I use whipped topping from a tub instead of making whipped cream?
You can, but the texture will be different. Homemade whipped cream gives a lighter, fluffier filling. Store-bought whipped topping is denser and sweeter. If you are in a pinch, it works, but I recommend making your own.
How long does this cake last in the fridge?
Up to 3 days, tightly covered. The texture is best on days one and two. By day three, the graham crackers start to break down and the cake becomes softer. It is still edible, just not as picture-perfect.
Pin This Recipe!
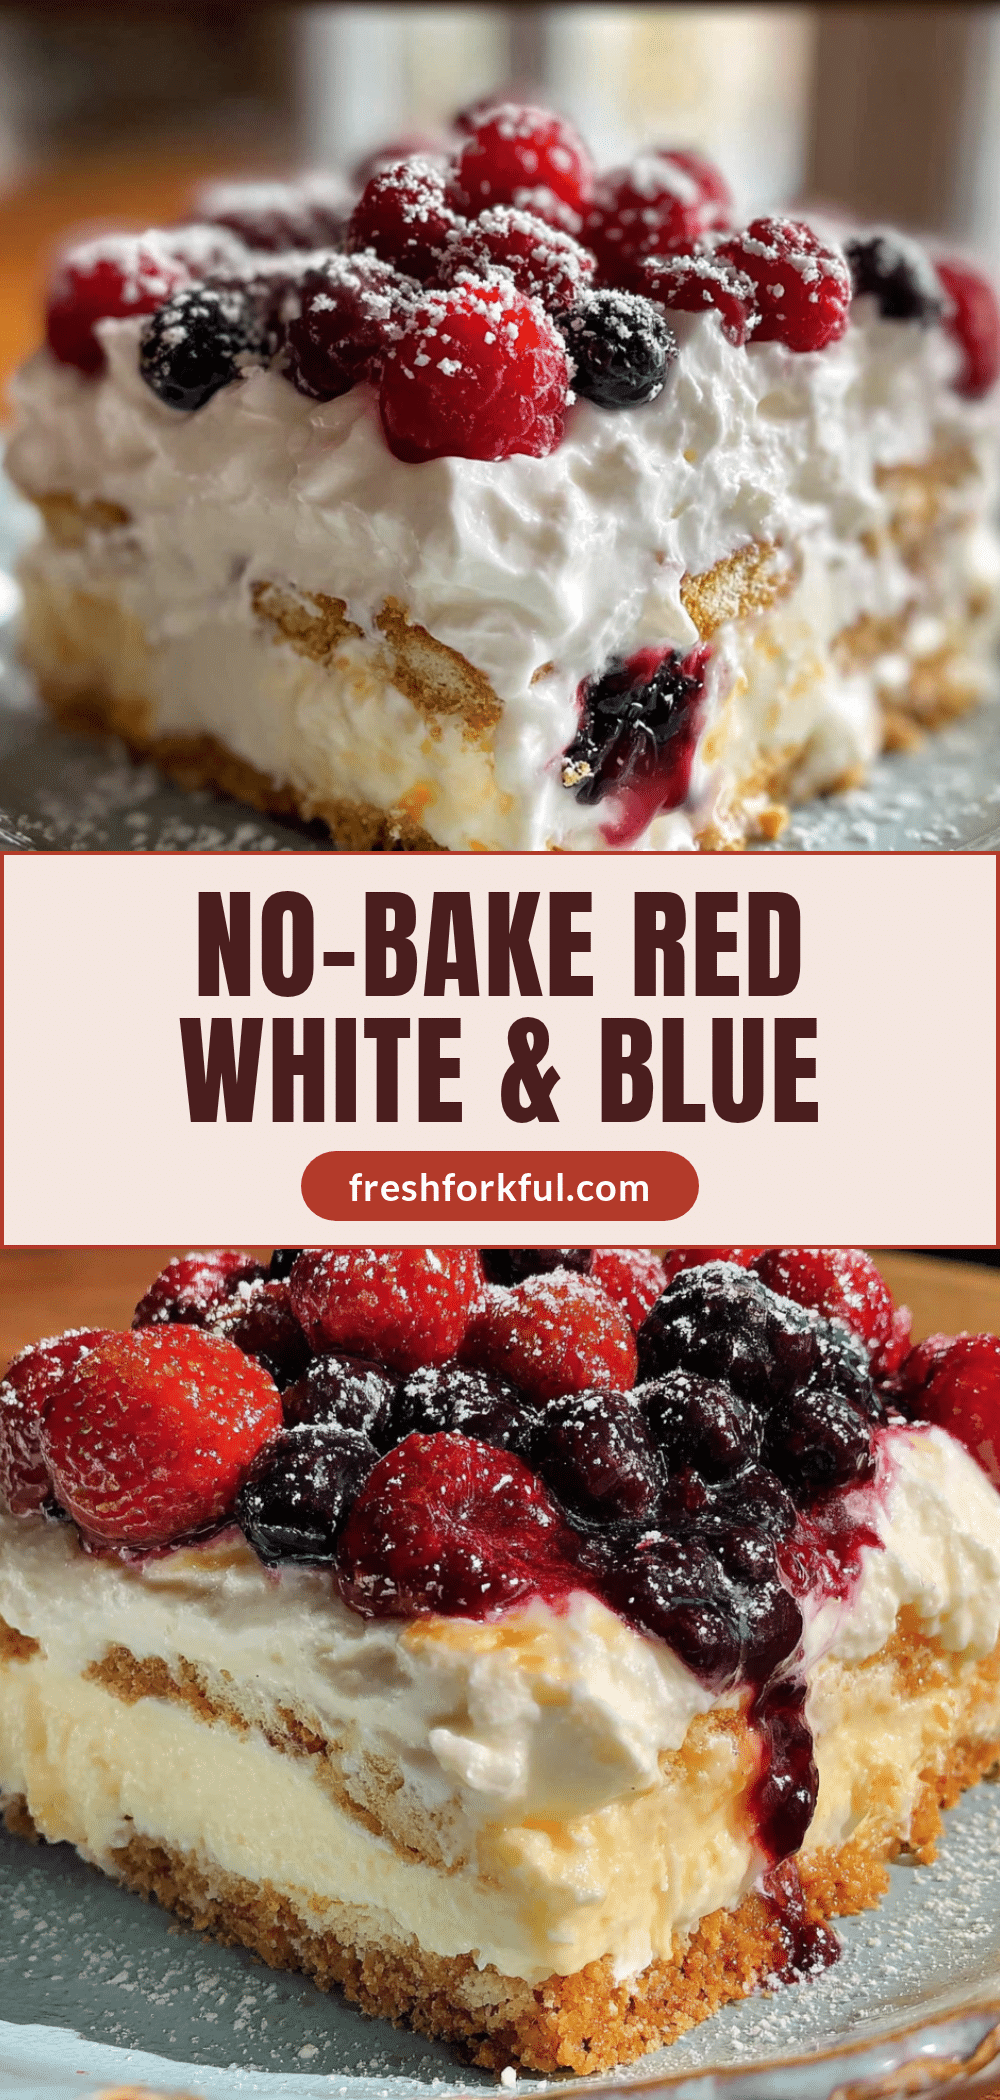
Easy Red White and Blueberry Labor Day Icebox Cake

A no-bake icebox cake with layers of graham crackers, creamy filling, and fresh strawberries and blueberries. Perfect for summer gatherings and requires only 20 minutes of prep.
- Prep Time: 20 minutes
- Cook Time: 0 minutes
- Total Time: 8 hours 20 minutes (includes chilling)
- Yield: 12 servings 1x
- Category: Dessert
- Cuisine: American
Ingredients
- 2 cups heavy whipping cream, cold
- 8 ounces cream cheese, softened to room temperature
- 1/2 cup powdered sugar, sifted
- 1 teaspoon vanilla extract
- 1/4 teaspoon salt
- 1 box (about 14 ounces) graham crackers (about 24 full sheets)
- 2 cups fresh strawberries, hulled and thinly sliced
- 2 cups fresh blueberries
- 1 cup fresh strawberries, sliced for topping
- 1 cup fresh blueberries, for topping
- Optional: white chocolate shavings or curls
Instructions
- Prepare your berries first. Wash and dry all the berries gently. Hull the strawberries and slice them into thin, even slices—about 1/8 inch thick. Set the blueberries aside. Pat everything dry with paper towels.
- Make the cream filling. In your large chilled bowl, beat the softened cream cheese with an electric mixer on medium speed until smooth and fluffy, about 2 minutes. Scrape down the sides of the bowl with a spatula. Add the powdered sugar, vanilla extract, and salt. Beat on low speed until combined, then increase to medium and beat for another minute until the mixture is light and airy.
- Whip the cream separately. In another bowl, pour the cold heavy cream. Using clean beaters, whip the cream on medium-high speed until soft peaks form—about 3 to 4 minutes. Fold the whipped cream into the cream cheese mixture gently using a spatula. Fold until no white streaks remain.
- Start layering. Spread a thin layer of the cream mixture on the bottom of your 9×13 dish. Just enough to coat the bottom—about 1/4 cup.
- First graham cracker layer. Arrange a single layer of graham crackers on top of the cream. Break crackers as needed to fill gaps. Do not overlap them—just fit them snugly together like a puzzle. Press them down gently so they adhere to the cream.
- First cream and berry layer. Spread one-third of the remaining cream mixture evenly over the graham crackers. Use a spatula to smooth it all the way to the edges. Arrange half of the sliced strawberries and half of the blueberries evenly over the cream. Press them in gently with your fingers.
- Repeat the layers. Add another layer of graham crackers on top of the berries. Press down gently. Spread another third of the cream mixture over the crackers. Add the remaining sliced strawberries and blueberries. Press them in gently.
- Final cracker and cream layer. Add a final layer of graham crackers. Spread the remaining cream mixture over the top. Use your spatula to smooth it evenly, reaching all the way to the edges.
- Decorate the top. Arrange the reserved sliced strawberries and blueberries in a decorative pattern on top. Add white chocolate shavings if using.
- Cover and chill. Cover the dish tightly with plastic wrap. Refrigerate for at least 8 hours, but overnight is better.
Notes
Make the cake the day before for best texture. Pat berries dry to prevent sogginess. Chill the mixing bowl and whisk attachment for 15 minutes before whipping cream for best results. Use a sharp knife run under hot water for clean slices.
Nutrition
- Serving Size: 1 slice (1/12 of cak
- Calories: 385
- Sugar: 24
- Sodium: 280
- Fat: 24
- Saturated Fat: 14
- Carbohydrates: 40
- Fiber: 2
- Protein: 4
Keywords: icebox cake, no-bake dessert, Labor Day, red white and blue, summer dessert, berry dessert, graham cracker cake


