Love this? Save it for later!
Share the inspiration with your friends
I was standing in the dairy aisle last November, staring at a can of pumpkin puree like it held the secrets to the universe. My phone was buzzing with texts from my sister—she needed a dessert for her Friendsgiving, something impressive but not complicated, and she needed it yesterday. I’d already promised her I’d help, but my brain was drawing a complete blank. That’s when a woman walked past me, her cart piled high with graham crackers and cream cheese, and I caught a whiff of something—cinnamon, maybe, or nutmeg. It hit me so fast I almost laughed out loud. I was eight years old again, sitting on a cold kitchen counter in my aunt’s tiny apartment, watching her stir a bowl of something thick and golden while she hummed along to the radio. She wasn’t making pumpkin pie. She was making something better—something that didn’t require the oven to be on for an hour, something she could whip up while I licked the beaters clean. That moment, right there in the grocery store, I knew exactly what I was making.
My aunt never wrote her recipes down. She was the kind of cook who measured with her heart and a handful of this and a splash of that. But the feeling of that dessert—creamy, spiced, effortless—stayed with me. I’ve spent years trying to recreate that magic, and honestly, I think I’ve finally nailed it. This easy no-bake pumpkin cheesecake pie is the result of all those attempts, all those slightly-too-runny fillings and crusts that wouldn’t hold. It’s the dessert my aunt would have made if she’d had a food processor and a little more patience for cream cheese. And the best part? You don’t need a single degree in pastry arts to pull it off. Maybe you’ve been there—staring at a complicated recipe, wondering if you should just buy something from the store. Let me tell you, this one changes everything.
Why You’ll Love This Recipe
Let’s be real for a second. We’re all busy, and the holidays (or really, any random Tuesday) can feel like a race against the clock. This easy no-bake pumpkin cheesecake pie is my secret weapon for those moments. It’s not just good—it’s the kind of dessert that makes people close their eyes after the first bite, and you get to look like a hero without breaking a sweat.
- Quick & Easy: Comes together in about 10 minutes of active prep. No oven, no fuss, no waiting for water to boil. Just mix, pour, and chill.
- Simple Ingredients: You probably have most of these in your pantry right now. No weird extracts or hard-to-find spices.
- Perfect for Any Occasion: Thanksgiving, potlucks, birthday parties, or a random Wednesday when you need a little pumpkin in your life. It’s a showstopper every time.
- Crowd-Pleaser: I’ve served this to kids, grandparents, and that one friend who “doesn’t like pumpkin.” They all asked for seconds. Seriously.
- Unbelievably Delicious: The texture is what gets everyone. It’s silky and rich, but somehow light at the same time. The no-bake method keeps it from being too dense, and the pumpkin flavor is perfectly balanced with warm spices.
What makes this different from every other pumpkin pie out there? It’s the method. By blending the cream cheese and pumpkin together just right—and using a little trick with cold heavy cream—you get a filling that sets up beautifully without any gelatin or cornstarch. It’s a game-changer, honestly. This isn’t just another version of pumpkin cheesecake. It’s the best version.
What Ingredients You Will Need
This recipe uses simple, wholesome ingredients to deliver that bold pumpkin flavor and creamy texture without any fuss. Most of these are pantry staples, so you’re probably already halfway there.
- For the Crust:
- 1 ½ cups graham cracker crumbs (about 12 full sheets, crushed finely)
- ¼ cup granulated sugar
- 6 tablespoons unsalted butter, melted (I use Land O’Lakes for consistent results)
- Pinch of salt (balances the sweetness)
For the crust, you can absolutely use store-bought graham cracker crumbs if you’re in a hurry. I’ve done it plenty of times. But if you crush your own, you get a fresher, more buttery flavor. Just pulse them in a food processor until they’re fine, like sand.
- For the Cheesecake Filling:
- 16 ounces (two blocks) full-fat cream cheese, softened to room temperature (Philadelphia is my go-to for that reliable creaminess)
- 1 cup canned pumpkin puree (not pumpkin pie filling—get the 100% pure pumpkin. Libby’s is solid)
- ¾ cup packed light brown sugar
- 1 teaspoon vanilla extract
- 1 ½ teaspoons pumpkin pie spice (or make your own: 1 tsp cinnamon, ½ tsp ginger, ¼ tsp nutmeg, ¼ tsp cloves)
- ¼ teaspoon salt
- 1 cup cold heavy cream (very important—it needs to be cold for proper whipping)
Let me talk about cream cheese for a second. It needs to be truly softened—like, leave it on the counter for an hour softened. Cold cream cheese will give you lumps, and nobody wants a lumpy cheesecake. Also, don’t skimp on the full-fat version. Low-fat cream cheese has more water, which can make your filling runny. Trust me on this one; I learned the hard way.
For the pumpkin, make sure you’re buying pure pumpkin puree, not the pre-sweetened pie filling. They look almost identical in the can, but the pie filling has added sugar and spices that will throw off the whole balance. Look for the words “100% pure pumpkin” on the label.
Equipment Needed
You don’t need a fancy kitchen to make this easy no-bake pumpkin cheesecake pie. Here’s what you’ll actually use:
- 9-inch pie dish (glass or ceramic works best—metal can sometimes affect the crust’s browning)
- Electric hand mixer or stand mixer (a whisk and some elbow grease will work, but your arm will thank you for the mixer)
- Large mixing bowls (at least two)
- Food processor or zip-top bag and rolling pin (for crushing graham crackers)
- Rubber spatula (for scraping every last bit of filling)
- Measuring cups and spoons
- Plastic wrap (for covering the pie while it chills)
If you don’t have a food processor, no worries. Put your graham crackers in a sturdy zip-top bag, seal it, and go to town with a rolling pin. It’s a little therapeutic, honestly. And if you don’t have a pie dish, a 9-inch springform pan works beautifully—it just makes for a taller pie. Just make sure whatever you use fits in your fridge.
Preparation Method
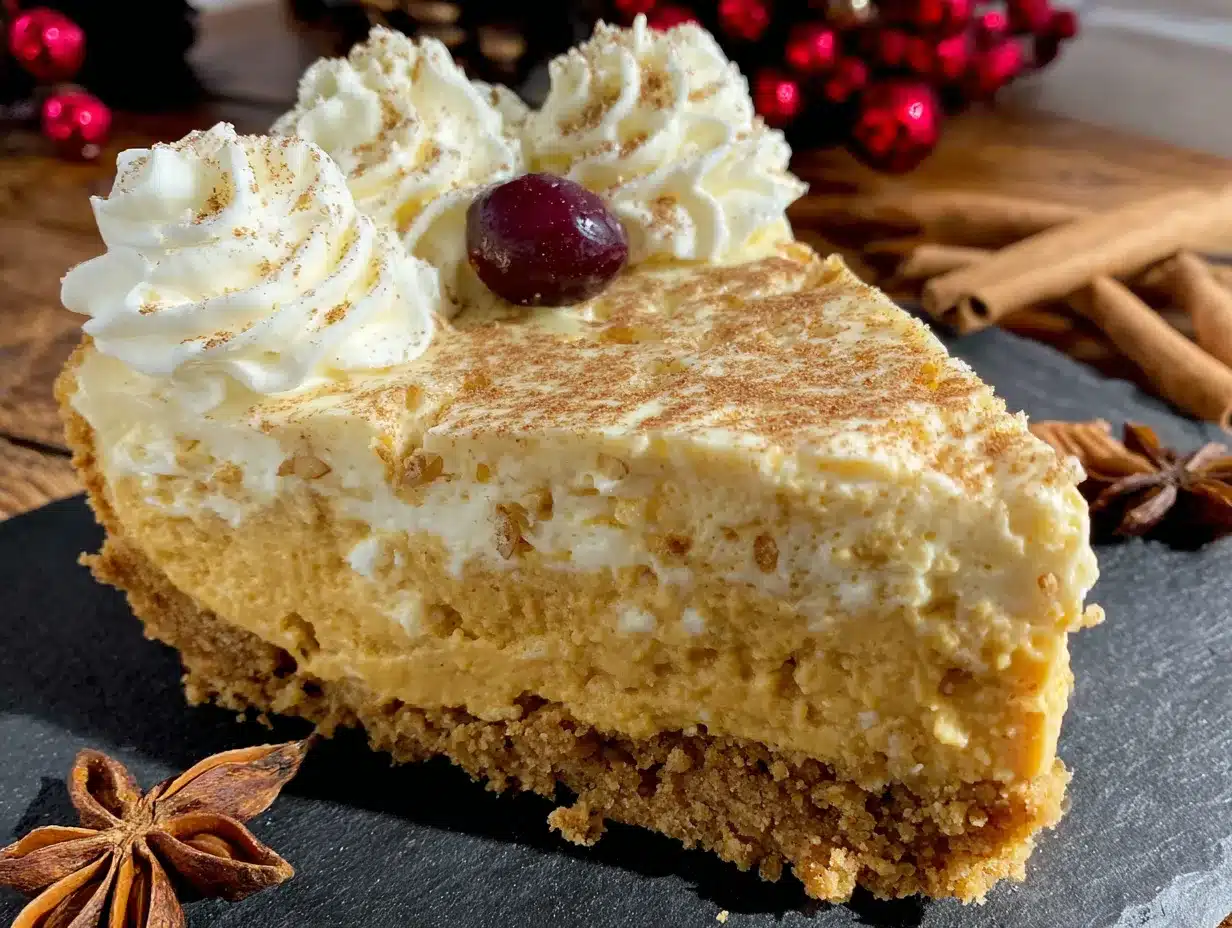
Let’s get to the good part. This easy no-bake pumpkin cheesecake pie comes together in about 10 minutes of active work, but it needs at least 4 hours to set in the fridge. Plan ahead, and you’ll be golden.
- Make the crust: In a medium bowl, combine the graham cracker crumbs, ¼ cup sugar, and a pinch of salt. Pour in the melted butter and stir with a fork until every crumb is moistened. It should look like wet sand. Press this mixture firmly into the bottom and up the sides of your 9-inch pie dish. Use the bottom of a measuring cup to really pack it down—this prevents a crumbly crust later. Place the crust in the fridge to set while you make the filling.
- Whip the cream: In a large bowl (or the bowl of your stand mixer), pour the cold heavy cream. Using the whisk attachment, beat on medium-high speed until stiff peaks form. This usually takes about 3-4 minutes. You’re looking for peaks that stand up straight when you lift the whisk. Don’t overbeat, or you’ll end up with butter. Set this bowl aside.
- Beat the cream cheese: In another large bowl, beat the softened cream cheese with an electric mixer on medium speed until it’s completely smooth and fluffy—about 2 minutes. Scrape down the sides of the bowl with your spatula. Add the brown sugar, vanilla extract, pumpkin pie spice, and salt. Beat for another minute until everything is well combined and looks like a thick paste.
- Add the pumpkin: Pour in the canned pumpkin puree and beat on low speed until it’s fully incorporated. The mixture will look a little looser now, and that’s exactly right. Scrape the bowl again to make sure there are no hidden streaks of cream cheese.
- Fold in the whipped cream: Here’s where the magic happens. Take about a third of the whipped cream and fold it into the pumpkin mixture with your rubber spatula. Use a gentle cutting motion—don’t stir vigorously. You want to lighten the mixture without deflating all that air you worked so hard to create. Once the first third is mostly incorporated, add the rest and fold until you can’t see any white streaks. The filling should be light, airy, and a gorgeous pale orange.
- Assemble the pie: Spoon the filling into your chilled crust. Spread it evenly with the spatula, making sure it reaches the edges. Give the pie dish a few gentle taps on the counter to release any air bubbles. Smooth the top as best you can.
- Chill: Cover the pie loosely with plastic wrap and refrigerate for at least 4 hours, but overnight is even better. The longer it sits, the cleaner your slices will be. If you’re in a rush, 3 hours will work, but the texture won’t be quite as firm.
A quick note: Don’t skip the step of whipping the cream separately. I tried making this once by just mixing everything together, and it turned out dense and heavy. The whipped cream is what gives this no-bake pie its light, mousse-like texture. It’s non-negotiable, honestly.
Cooking Tips & Techniques
I’ve made this easy no-bake pumpkin cheesecake pie more times than I can count, and I’ve definitely learned a few things the hard way. Here are some tips to make sure yours turns out perfect every time.
Room temperature cream cheese is crucial. I cannot stress this enough. If your cream cheese is cold, you’ll end up with little lumps in your filling that no amount of beating will fix. Leave it on the counter for at least an hour before you start. If you forgot to take it out, you can microwave it in 10-second bursts on low power, but be careful—you don’t want it to start melting.
Don’t overmix the filling. Once you add the whipped cream, you want to fold gently. Overmixing can deflate the air bubbles and make your pie dense instead of light and airy. Fold just until you don’t see any white streaks, then stop.
Chill time matters. I know it’s tempting to dig in after an hour, but trust the process. The filling needs time to firm up properly. I once served this after only 2 hours, and it was a soupy mess. Beautiful flavor, but it slid right off the fork. Give it the full 4 hours, and you’ll get clean, beautiful slices.
Use a metal spatula for serving. Run it under hot water, dry it off, and then slice. The heat helps the knife glide through the cold filling without dragging. Wipe the blade clean between slices for picture-perfect pieces.
Blind bake if you want a crunchier crust. This recipe is no-bake, but if you prefer a firmer, crunchier crust, you can bake the crust at 350°F for 8-10 minutes before filling. Let it cool completely before adding the filling. I do this sometimes when I want a sturdier base for transporting the pie.
Variations & Adaptations
One of the best things about this easy no-bake pumpkin cheesecake pie is how flexible it is. Here are some ways to make it your own.
- Gluten-Free Option: Swap the graham crackers for gluten-free graham crackers or crushed gluten-free cookies. I’ve used gluten-free ginger snaps before, and the spicy kick was amazing.
- Dairy-Free Version: Use dairy-free cream cheese (I like Kite Hill’s version) and coconut cream in place of the heavy cream. Just chill the can of coconut cream overnight and scoop out the solid part. The texture will be slightly different, but still delicious.
- Spice It Up: Add a pinch of cayenne pepper or black pepper to the filling for a warm, surprising kick. It sounds weird, but trust me—it works. The heat brings out the sweetness of the pumpkin.
- Chocolate Twist: Drizzle melted dark chocolate over the top before serving, or mix mini chocolate chips into the filling before chilling. Pumpkin and chocolate are an underrated combo.
- Gingersnap Crust: Instead of graham crackers, use crushed gingersnap cookies for a spicy, molasses-flavored crust. It pairs beautifully with the pumpkin filling.
I once tried a maple pecan variation where I added 2 tablespoons of maple syrup to the filling and topped the finished pie with candied pecans. It was gone in about 10 minutes at a family gathering. Just saying—definitely worth experimenting.
Serving & Storage Suggestions
This easy no-bake pumpkin cheesecake pie is best served cold, straight from the fridge. I like to let it sit at room temperature for about 5-10 minutes before slicing—it softens just enough to make cutting easier, but it’s still nice and firm.
Topping ideas: A dollop of freshly whipped cream is classic, but don’t stop there. A drizzle of caramel sauce, a sprinkle of cinnamon, or some toasted pecans take it to the next level. For a festive touch, add some candied cranberries or a dusting of powdered sugar.
What to serve with it: This pie is rich enough to stand on its own, but it pairs beautifully with a hot cup of coffee or spiced apple cider. If you’re serving it after a big meal, keep the portions modest—it’s decadent.
Storage: Cover the pie tightly with plastic wrap or transfer it to an airtight container. It will keep in the refrigerator for up to 5 days. The crust will soften a little over time, but the flavor actually gets better after a day or two as the spices meld together.
Freezing instructions: This pie freezes beautifully. Wrap the entire pie (or individual slices) tightly in plastic wrap, then in a layer of aluminum foil. Freeze for up to 3 months. To serve, thaw in the refrigerator overnight. Don’t thaw at room temperature, or the texture can get watery.
Reheating: You don’t need to reheat this pie—it’s meant to be served cold. But if you prefer a slightly softer texture, let it sit at room temperature for 15-20 minutes before serving.
Nutritional Information & Benefits
Here’s the estimated nutritional breakdown for one slice of this easy no-bake pumpkin cheesecake pie (based on 10 servings). Keep in mind that these are rough estimates and can vary based on specific brands and any modifications you make.
| Nutrient | Amount Per Serving |
|---|---|
| Calories | 345 |
| Total Fat | 24g |
| Saturated Fat | 14g |
| Cholesterol | 85mg |
| Sodium | 280mg |
| Total Carbohydrates | 30g |
| Dietary Fiber | 2g |
| Sugars | 21g |
| Protein | 5g |
Pumpkin is packed with vitamin A (great for your eyes and immune system) and fiber, which helps with digestion. The cream cheese adds calcium and protein, so it’s not all indulgence. That said, this is definitely a treat, not a health food. I like to think of it as a dessert that happens to have some redeeming qualities—sort of like a vegetable that tastes like cake.
If you’re watching your sugar intake, you can reduce the brown sugar to ½ cup. The filling will be slightly less sweet, but the pumpkin and spices will still shine. For a lower-fat version, use Neufchâtel cream cheese (it has about a third less fat) but keep the heavy cream as is—you need it for structure.
Conclusion
This easy no-bake pumpkin cheesecake pie has become my go-to dessert for pretty much every occasion. It’s the recipe I bring to Thanksgiving when I want to contribute something special without hogging the oven. It’s the dessert I make on a lazy Sunday when I’m craving fall flavors but don’t want to deal with a complicated bake. And it’s the one I turn to when I need a guaranteed crowd-pleaser—because honestly, it never fails.
What I love most about this recipe is how forgiving it is. You can tweak the spices, swap the crust, or play with the toppings, and it still turns out amazing. It’s the kind of dessert that makes you look like you spent hours in the kitchen when really, you just mixed a few things together and let the fridge do the work. And that, my friends, is the kind of recipe worth holding onto.
I’d love to hear how yours turns out. Did you try a fun variation? Did your family devour it in record time? Drop a comment below and let me know—I read every single one. And if you loved this recipe, share it with a friend who needs a no-fuss dessert in their life. Happy baking (or rather, happy no-baking)!
Frequently Asked Questions
Can I use homemade pumpkin puree instead of canned?
Absolutely. Just make sure you strain it well. Homemade pumpkin puree tends to be more watery than canned, so line a fine-mesh strainer with cheesecloth, add the puree, and let it drain for at least an hour. Squeeze out any excess liquid before using it in the recipe. Otherwise, your filling might be too loose to set properly.
How long does this pie need to set in the fridge?
At least 4 hours, but overnight is ideal. The longer it chills, the firmer and cleaner your slices will be. If you’re in a real pinch, 3 hours will work, but the texture will be softer—more like a mousse than a cheesecake. Still delicious, just less sliceable.
Can I use a store-bought graham cracker crust?
You sure can. It’s a great shortcut. Just keep in mind that store-bought crusts are usually smaller and thinner than homemade ones, so you might have a little extra filling. You can either make a second mini pie or just eat the leftover filling with a spoon (no judgment here).
Why did my filling turn out runny?
This usually happens for one of three reasons: the cream cheese wasn’t softened enough and created lumps, the heavy cream wasn’t whipped to stiff peaks, or the pie didn’t chill long enough. Make sure your cream cheese is at room temperature, whip that cream until it’s really stiff, and give the pie the full chilling time. Also, check that you’re using pure pumpkin puree, not pumpkin pie filling, which has added liquids.
Can I make this pie ahead of time for a party?
Yes, and I actually recommend it. This pie tastes even better after a day or two in the fridge—the flavors meld together and get deeper. You can make it up to 2 days in advance. Just keep it covered in the fridge, and add any toppings (like whipped cream or nuts) right before serving so they stay fresh and pretty.
Pin This Recipe!
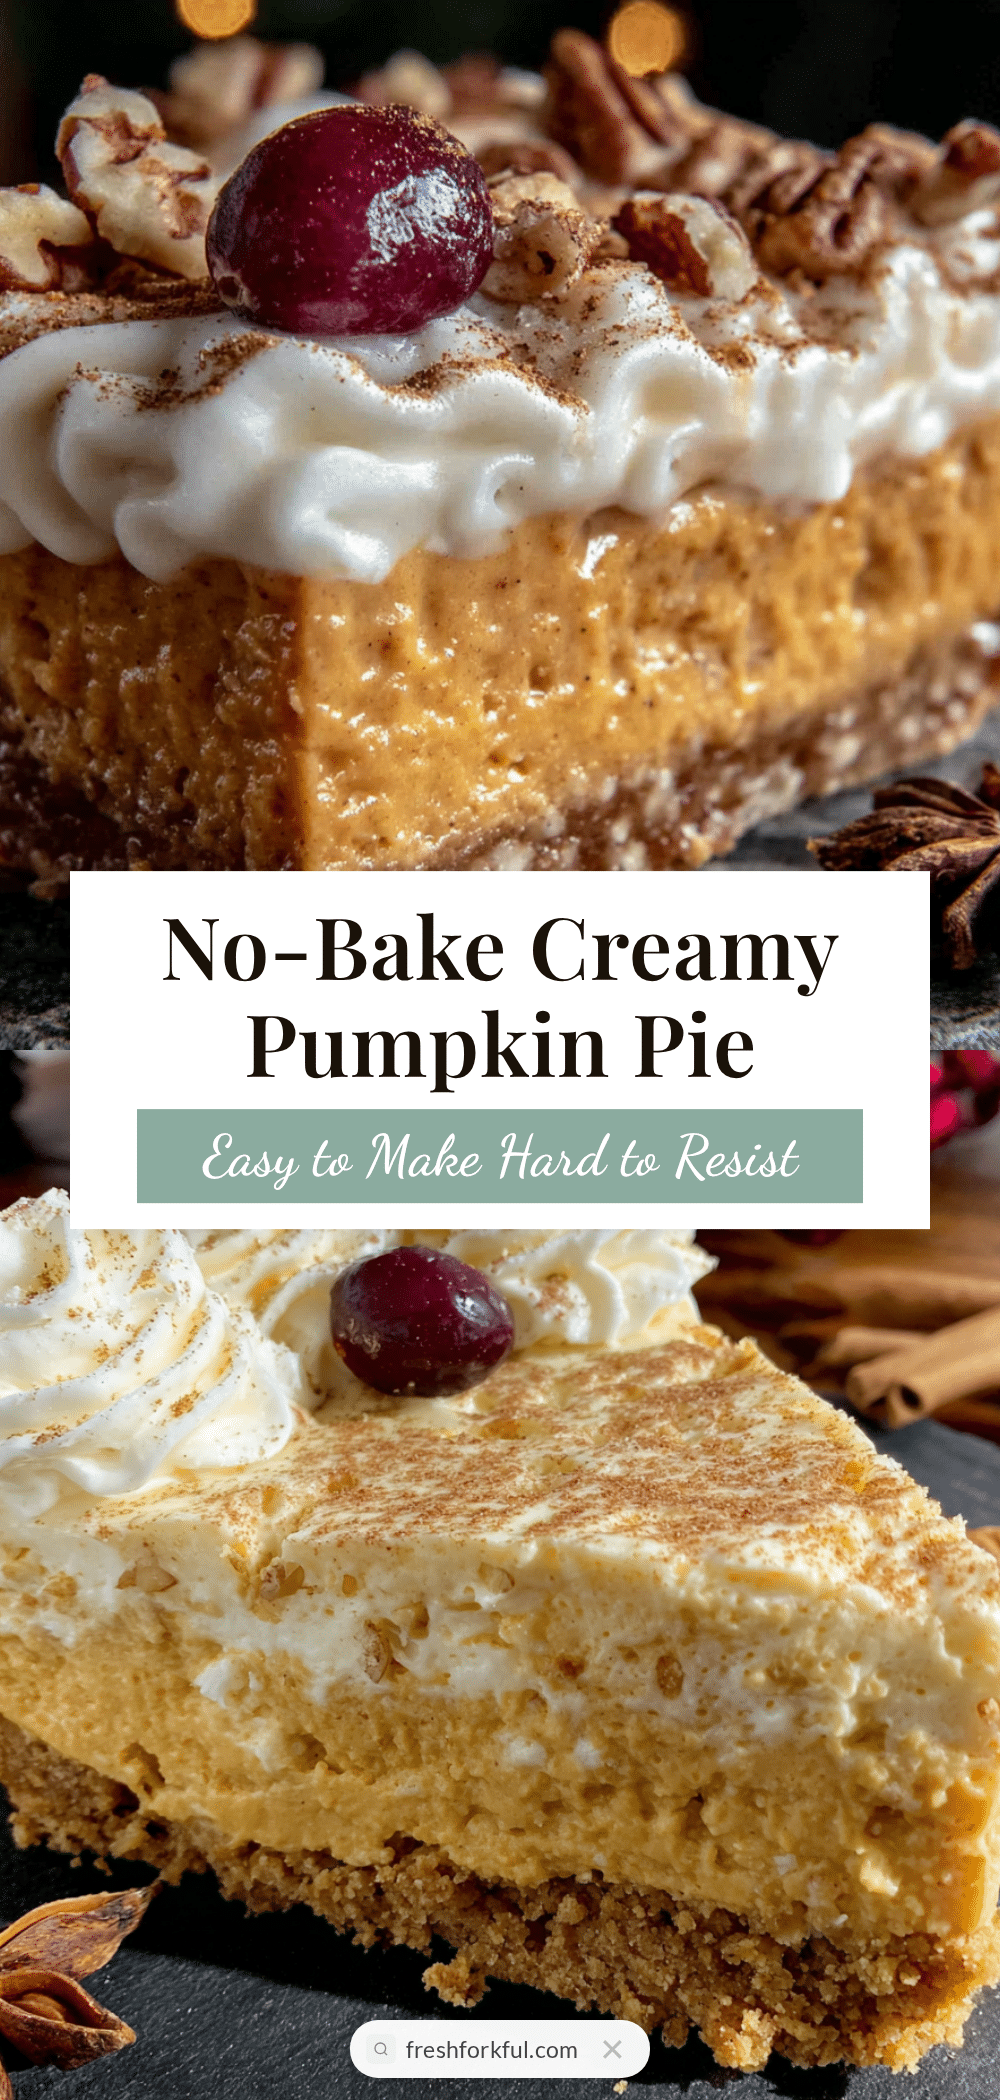
Easy No-Bake Pumpkin Cheesecake Pie: Best 10-Minute Dessert
This easy no-bake pumpkin cheesecake pie is a creamy, spiced, and effortless dessert that comes together in just 10 minutes of active prep. Perfect for any occasion, it features a silky pumpkin filling with a buttery graham cracker crust, no oven required.
- Prep Time: 10 minutes
- Cook Time: 0 minutes
- Total Time: 4 hours 10 minutes (includes chilling)
- Yield: 10 servings 1x
- Category: Dessert
- Cuisine: American
Ingredients
- 1 ½ cups graham cracker crumbs (about 12 full sheets, crushed finely)
- ¼ cup granulated sugar
- 6 tablespoons unsalted butter, melted
- Pinch of salt
- 16 ounces (two blocks) full-fat cream cheese, softened to room temperature
- 1 cup canned pumpkin puree (100% pure pumpkin)
- ¾ cup packed light brown sugar
- 1 teaspoon vanilla extract
- 1 ½ teaspoons pumpkin pie spice (or 1 tsp cinnamon, ½ tsp ginger, ¼ tsp nutmeg, ¼ tsp cloves)
- ¼ teaspoon salt
- 1 cup cold heavy cream
Instructions
- Make the crust: In a medium bowl, combine the graham cracker crumbs, ¼ cup sugar, and a pinch of salt. Pour in the melted butter and stir with a fork until every crumb is moistened. Press this mixture firmly into the bottom and up the sides of your 9-inch pie dish. Use the bottom of a measuring cup to pack it down. Place the crust in the fridge to set while you make the filling.
- Whip the cream: In a large bowl, pour the cold heavy cream. Using the whisk attachment, beat on medium-high speed until stiff peaks form, about 3-4 minutes. Set aside.
- Beat the cream cheese: In another large bowl, beat the softened cream cheese with an electric mixer on medium speed until smooth and fluffy, about 2 minutes. Scrape down the sides. Add the brown sugar, vanilla extract, pumpkin pie spice, and salt. Beat for another minute until well combined.
- Add the pumpkin: Pour in the canned pumpkin puree and beat on low speed until fully incorporated. Scrape the bowl again.
- Fold in the whipped cream: Take about a third of the whipped cream and fold it into the pumpkin mixture with a rubber spatula using a gentle cutting motion. Add the rest and fold until no white streaks remain.
- Assemble the pie: Spoon the filling into the chilled crust. Spread evenly with the spatula. Give the pie dish a few gentle taps on the counter to release air bubbles. Smooth the top.
- Chill: Cover the pie loosely with plastic wrap and refrigerate for at least 4 hours, but overnight is even better.
Notes
Room temperature cream cheese is crucial to avoid lumps. Don’t overmix the filling once the whipped cream is added. Chill for at least 4 hours for clean slices. For a crunchier crust, blind bake at 350°F for 8-10 minutes and cool completely before filling. The pie can be made up to 2 days in advance and freezes well for up to 3 months.
Nutrition
- Serving Size: 1 slice (1/10 of pie
- Calories: 345
- Sugar: 21
- Sodium: 280
- Fat: 24
- Saturated Fat: 14
- Carbohydrates: 30
- Fiber: 2
- Protein: 5
Keywords: no-bake pumpkin cheesecake, pumpkin pie, easy dessert, no-bake dessert, pumpkin cheesecake pie, fall dessert, Thanksgiving dessert


