Love this? Save it for later!
Share the inspiration with your friends
I’m not supposed to play favorites with recipes, but if I’m being honest, this one started as a total act of desperation. It was the middle of finals week, my fridge was down to a jar of pickles, half a bag of frozen corn, and some ground beef I’d defrosted two days earlier. I needed food that could survive the chaos of exam season—something I could make once, forget about, and still have something decent to eat when I resurfaced from the library at midnight.
The original plan was just regular burrito bowls. Nothing special. I’d made them a hundred times before. But I was so tired I grabbed the wrong container of rice (brown instead of white), dumped in way too much cumin, and accidentally doubled the lime juice. I stood there staring at this overly tangy, slightly mushy mess thinking I’d ruined dinner for the whole week. Honestly, I almost threw it in the trash.
But I didn’t. I portioned it out anyway, shoved it in the freezer, and forgot about it for two weeks. When I finally reheated one of those bowls, something weird happened—it was better than the original. Way better. The flavors had melded together in the freezer, the rice had soaked up all that extra lime, and it tasted like something I’d actually planned. You know that feeling when you accidentally create something amazing? That was this recipe. And I’ve been making it on purpose ever since.
These easy freezer-friendly college meal prep burrito bowls saved my sanity during finals, and honestly, they’ve become my go-to for busy weeks ever since. They’re forgiving, adaptable, and somehow get better the longer they sit in your freezer—which is exactly what you need when life gets hectic.
Why You’ll Love This Recipe
Let me tell you why these burrito bowls have earned a permanent spot in my freezer rotation. I’ve tested this recipe through three different apartments, two different freezers, and countless late-night study sessions. It’s been through the wringer, and it keeps coming out on top.
- Budget-Friendly: We’re talking about $2-3 per serving, depending on what’s on sale. As a college student, that kind of math makes my wallet happy.
- Zero Cooking Skills Required: If you can brown meat and boil rice, you’ve got this. I taught my roommate who once burned water how to make these.
- Freezer Life of 3 Months: Make them once, eat them for weeks. They actually taste better after a week in the freezer—the flavors just meld together somehow.
- Customizable for Any Diet: Go vegetarian with black beans, swap in quinoa, or load up on extra veggies. I’ve made versions for vegan friends and gluten-sensitive roommates.
- No Sad, Soggy Leftovers: The trick is how we layer and store these bowls. When you reheat them, the rice stays fluffy, the beans stay creamy, and nothing gets that weird freezer texture.
What makes these different from every other burrito bowl recipe out there? It’s the layering technique, honestly. Most people just throw everything in a container and call it done. But I figured out that if you separate certain ingredients and use a specific reheating method, your freezer burrito bowls taste almost as good as fresh. Almost.
This isn’t just another meal prep recipe—it’s the one that got me through organic chemistry, a part-time job, and still eating real food instead of instant noodles. It’s comfort food that works on your schedule, not the other way around.
What Ingredients You Will Need
This recipe uses simple, pantry-friendly ingredients that won’t break your grocery budget. Most of these are staples you probably already have, and everything is easy to find at any regular grocery store.
- For the Rice Base:
- 2 cups long-grain white rice (brown rice works too, but adjust cooking time)
- 4 cups water or low-sodium chicken broth (broth adds more flavor)
- 1 teaspoon salt
- 1 tablespoon olive oil
- Juice of 2 limes (about 3 tablespoons)
- 1/4 cup chopped fresh cilantro (optional, but highly recommended)
- For the Protein:
- 1.5 pounds ground beef (80/20 works great, or use ground turkey for leaner option)
- 1 medium onion, diced (about 1 cup)
- 4 cloves garlic, minced
- 1 tablespoon chili powder
- 2 teaspoons ground cumin
- 1 teaspoon smoked paprika
- 1/2 teaspoon black pepper
- 1 teaspoon salt
- 1/4 cup water or beef broth
- For the Beans and Corn:
- 1 can (15 oz) black beans, drained and rinsed
- 1 can (15 oz) pinto beans, drained and rinsed (or use all black beans)
- 1 cup frozen corn kernels (no need to thaw)
- 1 can (4 oz) diced green chiles (mild or medium heat)
- For the Toppings (add after reheating):
- 1 cup shredded Mexican blend cheese or cheddar
- 1/2 cup sour cream or Greek yogurt
- 1/2 cup salsa or pico de gallo
- 1 avocado, sliced (add fresh, not frozen)
- Hot sauce to taste
A few ingredient notes from personal experience: I’ve tried making this with minute rice, and honestly, it gets mushy after freezing. Stick with regular long-grain rice for the best texture. For the meat, I prefer 80/20 ground beef because the extra fat keeps it moist after freezing. If you use ground turkey, add a tablespoon of olive oil when cooking to prevent it from drying out.
For the beans, rinsing them is crucial—that canned liquid gets weird in the freezer. And don’t skip the lime juice in the rice! It’s not just for flavor; the acidity actually helps preserve the rice’s texture during freezing. I learned that one the hard way after pulling out a brick of sad, flavorless rice.
Equipment Needed
You don’t need fancy kitchen gear for this recipe, which is exactly what you want when you’re cooking in a dorm or small apartment kitchen.
- Large skillet or frying pan (12-inch is ideal)
- Medium saucepan with lid (for rice)
- Cutting board and sharp knife
- Measuring cups and spoons
- Wooden spoon or spatula
- Freezer-safe containers (I use 2-cup glass meal prep containers)
- Freezer-safe zip-top bags (quart or gallon size)
- Permanent marker for labeling
- Colander for rinsing beans
- Can opener
If you don’t have freezer-safe containers, you can use zip-top bags laid flat in the freezer—they stack beautifully and save space. I actually prefer this method when my freezer is packed because I can fit way more bags than containers. Just make sure to squeeze out as much air as possible before sealing to prevent freezer burn.
A tip from someone who learned the hard way: label everything with the date and contents. I once found a mystery container in the back of my freezer that was three months old. It was chili, I think. Maybe. Don’t be that person.
Preparation Method
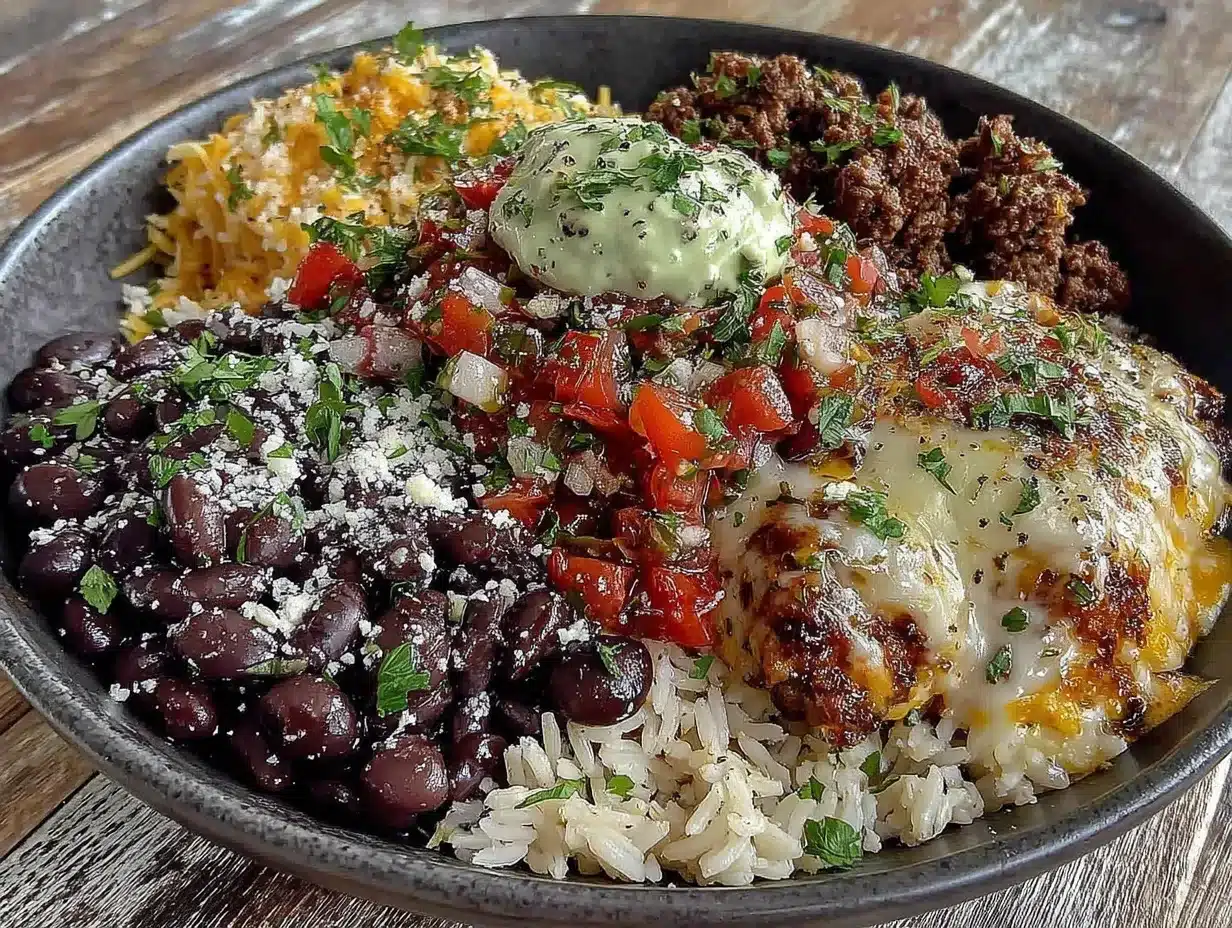
Let’s walk through this step by step. The whole process takes about 45 minutes from start to finish, and you’ll end up with 6-8 servings ready for the freezer.
- Cook the rice (about 20 minutes): Rinse the rice in a fine-mesh strainer until the water runs clear. This removes excess starch and keeps the rice from getting gummy. In a medium saucepan, combine rinsed rice, water or broth, salt, and olive oil. Bring to a boil over high heat, then reduce heat to low, cover, and simmer for 15-18 minutes. Remove from heat and let it sit covered for 5 minutes. Fluff with a fork, then stir in lime juice and cilantro. Let it cool completely—this is important because hot rice creates condensation in the freezer that leads to ice crystals.
- Cook the meat (about 10 minutes): While the rice is cooking, heat a large skillet over medium-high heat. Add the ground beef and cook, breaking it apart with a wooden spoon, until browned (about 5-7 minutes). If there’s excess fat, drain it off, leaving about 1 tablespoon in the pan. Add the diced onion and cook for 2-3 minutes until softened. Add the minced garlic, chili powder, cumin, smoked paprika, salt, and pepper. Stir and cook for 1 minute until fragrant. Add the water or broth and scrape up any browned bits from the bottom of the pan. Let it simmer for 2 minutes, then remove from heat and let cool.
- Prepare the beans and corn (about 5 minutes): In a medium bowl, combine the drained and rinsed black beans, pinto beans, frozen corn, and diced green chiles. Stir to mix everything together. That’s it—no cooking needed since everything will heat up when you reheat the bowls.
- Assemble the bowls for freezing: This is where the magic happens. You have two options for freezing: container method or bag method.
Container Method: In each freezer-safe container, layer in this order: 1/2 cup rice on the bottom, 1/2 cup meat mixture, 1/3 cup bean and corn mixture. Do not add cheese, sour cream, salsa, or avocado yet—those go on after reheating. Leave about 1/2 inch of space at the top for expansion. Seal the container, label with the date and contents, and freeze.
Bag Method: Lay a quart-size freezer bag flat. Add 1/2 cup rice, then 1/2 cup meat, then 1/3 cup bean mixture in a single layer. Squeeze out as much air as possible, seal, and lay flat in the freezer. This method saves tons of space and the bags thaw faster.
- Cool completely before freezing: This is non-negotiable. If you put warm food in the freezer, you’ll get ice crystals and soggy textures. Let everything cool to room temperature, about 30 minutes, before assembling and freezing.
A sensory cue here: when the rice is perfectly cooked, you should be able to separate each grain with your fork and they should hold their shape without being crunchy. The meat should be deeply browned with some crispy bits—that’s where the flavor lives. And when you add the spices, your kitchen should smell like a taqueria. If it doesn’t, you might need to toast your spices a little longer in the pan.
Cooking Tips & Techniques
I’ve made this recipe probably fifty times by now, and I’ve learned a few things the hard way so you don’t have to.
Don’t skip the cooling step. I know it’s tempting to rush and get everything in the freezer, but warm food creates condensation, which turns into ice crystals, which turns into sad, watery burrito bowls. Trust me, I learned this after pulling out a container that was basically soup. Let everything cool completely—spread it out on baking sheets if you need to speed things up.
The layering order matters. Rice on the bottom creates a barrier that keeps the beans from making everything soggy. I tried mixing everything together once and ended up with a mushy mess. Keep them separated in layers and your reheated bowls will taste so much better.
Season aggressively. Flavors dull in the freezer, so you want to go a little heavier on the spices than you normally would. That extra cumin and chili powder will taste perfectly balanced after freezing. I add about 25% more seasoning than I would for a fresh meal.
Use the right containers. Glass containers are great because they don’t absorb smells and they reheat evenly in the microwave. But if you’re on a budget, those plastic deli containers from takeout work perfectly—just make sure they’re labeled as freezer-safe. I’ve reused the same plastic containers for over a year without issues.
Label everything. I cannot stress this enough. You think you’ll remember what’s in that container, but two weeks later, you won’t. I write the date, contents, and reheating instructions right on the container with a permanent marker. It takes two seconds and saves so much guesswork.
Variations & Adaptations
One of the best things about this recipe is how customizable it is. Here are some variations I’ve tried and loved.
Vegetarian Version: Skip the meat and double up on the beans. Add a can of drained and rinsed chickpeas or some crumbled tofu seasoned with the same spice blend. I’ve also used frozen soy crumbles (like Beyond Meat) with great results—just cook them the same way as the ground beef.
Low-Carb Option: Swap the rice for cauliflower rice. Cook it in the microwave or a skillet until tender, then squeeze out as much moisture as possible before assembling. It freezes well but needs a slightly different reheating method—microwave for 2 minutes, then drain any excess water before adding toppings.
Spicy Version: Add 1-2 minced jalapeños to the meat while cooking, use hot green chiles instead of mild, and stir in 1 teaspoon of cayenne pepper with the other spices. I made this version for a friend who loves heat and she said it was perfect—not blow-your-head-off spicy, but definitely got your attention.
Breakfast Burrito Bowl: Use the same base but add scrambled eggs when reheating. I’ve done this on busy mornings and it’s amazing—just reheat the rice, beans, and meat, then top with freshly scrambled eggs and cheese.
Rice Swap: Try cilantro-lime brown rice, quinoa, or even cauliflower rice. Each changes the texture slightly but all work well. Quinoa actually freezes beautifully and adds extra protein.
One personal variation I love: adding roasted sweet potatoes. I cube one sweet potato, toss it with olive oil, salt, and chili powder, and roast at 400°F for 25 minutes. I add a layer of roasted sweet potato on top of the rice before the meat. It adds sweetness and makes the bowls feel more substantial.
Serving & Storage Suggestions
When you’re ready to eat, here’s exactly how to reheat these burrito bowls for the best results.
Microwave Method (fastest): Remove the container from the freezer and take off the lid. Microwave on high for 2-3 minutes, then stir everything together. Microwave for another 1-2 minutes until heated through (internal temperature should reach 165°F). Let it sit for 1 minute before adding fresh toppings. If the rice seems dry, add a tablespoon of water before microwaving.
Stovetop Method (best texture): Transfer the frozen contents to a skillet. Add 2 tablespoons of water, cover, and cook over medium heat for 5-7 minutes, stirring occasionally, until heated through. This method gives you slightly crispy edges on the meat and fluffier rice.
Oven Method (for batch reheating): Preheat oven to 350°F. Transfer frozen contents to an oven-safe dish, cover with foil, and bake for 20-25 minutes. Uncover for the last 5 minutes if you want some crispy bits.
Storage Guidelines:
- Freezer: Up to 3 months for best quality (safe indefinitely but texture declines)
- Refrigerator after thawing: 3-4 days
- Do not refreeze after thawing
Toppings to Add Fresh: Always add cheese, sour cream, salsa, avocado, and hot sauce after reheating. These don’t freeze well and will make your bowls sad and watery if frozen. Trust me on this—I tried freezing cheese once and it turned into a weird rubbery mess.
Serving Suggestions: These bowls are a complete meal on their own, but if you want to stretch them further, serve with tortilla chips and a simple side salad. A squeeze of fresh lime right before eating brightens everything up.
A note on flavor development: These bowls actually taste better after a week in the freezer. The flavors meld together and deepen, especially the spices and lime. I’ve done taste tests (yes, I’m that person) and the frozen-for-a-week version consistently wins over the fresh version. Something about the freezer doing its magic on the cumin and chili powder just works.
Nutritional Information & Benefits
Here’s the approximate nutritional breakdown for one serving (based on 8 servings, using ground beef and white rice, without added toppings):
| Nutrient | Amount Per Serving |
|---|---|
| Calories | 385 |
| Protein | 28g |
| Carbohydrates | 42g |
| Fiber | 8g |
| Fat | 12g |
| Saturated Fat | 4g |
| Sodium | 680mg |
| Iron | 4.5mg (25% DV) |
These burrito bowls are packed with protein from the beef and beans, which helps keep you full and focused during long study sessions. The fiber from the beans and corn supports digestive health and steady energy levels—no sugar crashes here. The black beans are also rich in antioxidants and folate, which is great for brain function.
For a lower-sodium version, use no-salt-added canned beans and reduce the added salt in the meat seasoning. You can also use low-sodium broth for the rice. If you’re watching your carbs, swap the rice for cauliflower rice and you’ll cut the carbs by about 30g per serving.
From a personal wellness perspective, these bowls have been a lifesaver for me during stressful periods. Having healthy, homemade food ready to go means I’m less likely to order expensive takeout or grab processed snacks. It’s not just about the nutrition—it’s about having a system that supports your well-being when you’re busy.
Conclusion
These easy freezer-friendly college meal prep burrito bowls have honestly changed how I approach busy weeks. What started as a happy accident—over-seasoned meat, too-limey rice, and a desperate freezer gamble—turned into my most reliable recipe. They’re forgiving, adaptable, and somehow taste better after a month in the freezer than they did fresh.
I love that this recipe meets you where you are. Whether you’re a college student surviving on ramen, a busy parent trying to get dinner on the table, or just someone who wants to eat well without cooking every single day, these bowls work. They don’t require fancy ingredients, complicated techniques, or hours in the kitchen. Just one hour of cooking and you’ve got meals for two weeks.
My favorite part? The moment you pull one of these out of the freezer after a long day, microwave it, add fresh avocado and hot sauce, and take that first bite. It tastes like you actually planned ahead and took care of yourself. And that feeling, honestly, is better than any takeout.
I’d love to hear how these turn out for you! Try swapping in different proteins or adding your favorite veggies. What variations do you come up with? Drop a comment below and let me know—your version might just become someone else’s new favorite. Happy cooking, and may your freezer always be stocked with good food!
Frequently Asked Questions
Can I use ground turkey instead of beef?
Absolutely! Ground turkey works great, but add a tablespoon of olive oil when cooking because turkey is leaner and can dry out in the freezer. The same seasoning blend works perfectly with turkey.
How long do these burrito bowls last in the freezer?
They’re best within 3 months for optimal texture and flavor, but they’ll stay safe to eat indefinitely if kept at 0°F or below. After 3 months, the rice might get a bit drier, but they’re still perfectly edible.
Can I freeze these with cheese already added?
I don’t recommend it. Cheese gets a weird texture when frozen and reheated—it becomes rubbery and separates. Always add fresh cheese after reheating for the best experience.
Do I need to thaw these before reheating?
Nope! You can reheat them straight from frozen. Just add an extra minute or two to your reheating time. If you’re using the stovetop method, you might want to thaw in the fridge overnight for more even heating.
Can I make these vegan?
Yes! Skip the meat and use double the beans (try adding chickpeas or lentils for extra protein). Use vegetable broth for the rice and add nutritional yeast for a cheesy flavor. All the other ingredients are naturally vegan-friendly.
Pin This Recipe!
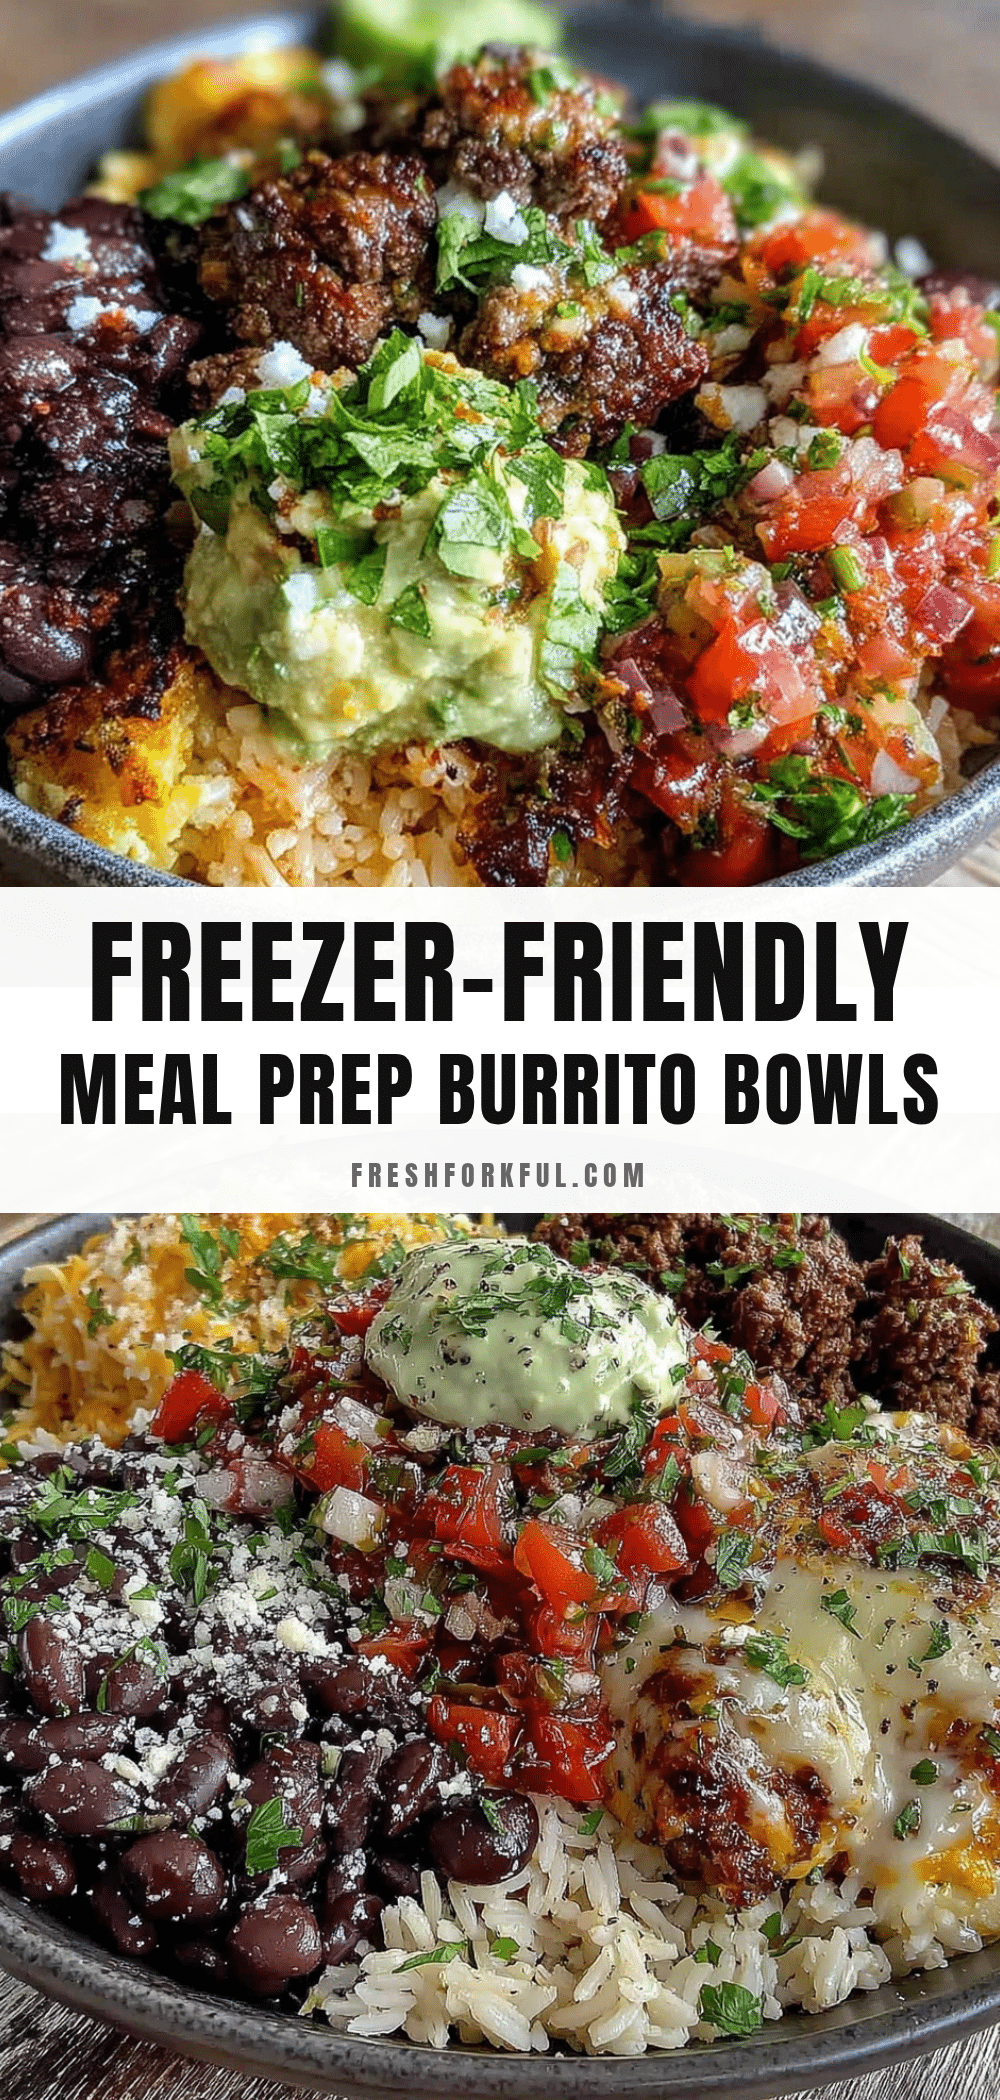
Easy Freezer-Friendly College Meal Prep Burrito Bowls
These easy freezer-friendly college meal prep burrito bowls are forgiving, adaptable, and somehow get better the longer they sit in your freezer—perfect for busy weeks and late-night study sessions.
- Prep Time: 15 minutes
- Cook Time: 30 minutes
- Total Time: 45 minutes
- Yield: 8 servings 1x
- Category: Main Course
- Cuisine: Mexican
Ingredients
- 2 cups long-grain white rice
- 4 cups water or low-sodium chicken broth
- 1 teaspoon salt
- 1 tablespoon olive oil
- Juice of 2 limes (about 3 tablespoons)
- 1/4 cup chopped fresh cilantro (optional)
- 1.5 pounds ground beef (80/20)
- 1 medium onion, diced (about 1 cup)
- 4 cloves garlic, minced
- 1 tablespoon chili powder
- 2 teaspoons ground cumin
- 1 teaspoon smoked paprika
- 1/2 teaspoon black pepper
- 1 teaspoon salt
- 1/4 cup water or beef broth
- 1 can (15 oz) black beans, drained and rinsed
- 1 can (15 oz) pinto beans, drained and rinsed
- 1 cup frozen corn kernels
- 1 can (4 oz) diced green chiles
- 1 cup shredded Mexican blend cheese or cheddar
- 1/2 cup sour cream or Greek yogurt
- 1/2 cup salsa or pico de gallo
- 1 avocado, sliced
- Hot sauce to taste
Instructions
- Cook the rice: Rinse the rice in a fine-mesh strainer until the water runs clear. In a medium saucepan, combine rinsed rice, water or broth, salt, and olive oil. Bring to a boil over high heat, then reduce heat to low, cover, and simmer for 15-18 minutes. Remove from heat and let it sit covered for 5 minutes. Fluff with a fork, then stir in lime juice and cilantro. Let it cool completely.
- Cook the meat: While the rice is cooking, heat a large skillet over medium-high heat. Add the ground beef and cook, breaking it apart with a wooden spoon, until browned (about 5-7 minutes). Drain excess fat, leaving about 1 tablespoon in the pan. Add the diced onion and cook for 2-3 minutes until softened. Add the minced garlic, chili powder, cumin, smoked paprika, salt, and pepper. Stir and cook for 1 minute until fragrant. Add the water or broth and scrape up any browned bits from the bottom o…
- Prepare the beans and corn: In a medium bowl, combine the drained and rinsed black beans, pinto beans, frozen corn, and diced green chiles. Stir to mix everything together.
- Assemble the bowls for freezing: In each freezer-safe container, layer in this order: 1/2 cup rice on the bottom, 1/2 cup meat mixture, 1/3 cup bean and corn mixture. Do not add cheese, sour cream, salsa, or avocado yet. Leave about 1/2 inch of space at the top for expansion. Seal the container, label with the date and contents, and freeze. Alternatively, use the bag method: Lay a quart-size freezer bag flat. Add 1/2 cup rice, then 1/2 cup meat, then 1/3 cup bean mixture in a single layer. Squee…
- Cool completely before freezing: Let everything cool to room temperature, about 30 minutes, before assembling and freezing.
- To reheat: Microwave on high for 2-3 minutes, then stir. Microwave for another 1-2 minutes until heated through (internal temperature should reach 165°F). Let it sit for 1 minute before adding fresh toppings. Alternatively, use stovetop or oven methods as described in the blog.
Notes
Don’t skip the cooling step—warm food creates condensation and ice crystals. The layering order matters: rice on the bottom prevents sogginess. Season aggressively because flavors dull in the freezer. Label everything with date and contents. For best results, add fresh toppings (cheese, sour cream, salsa, avocado, hot sauce) after reheating.
Nutrition
- Serving Size: 1 bowl (without adde
- Calories: 385
- Sodium: 680
- Fat: 12
- Saturated Fat: 4
- Carbohydrates: 42
- Fiber: 8
- Protein: 28
Keywords: burrito bowls, meal prep, freezer-friendly, college meals, ground beef, black beans, rice, easy dinner


