Love this? Save it for later!
Share the inspiration with your friends
It was 11:47 PM on a random Wednesday, and I was hit with a craving so specific it felt almost embarrassing. I wanted that perfect, golden-brown chicken—the kind with a crust that shatters when you bite into it, revealing juicy, tender meat underneath. The problem? I didn’t have the ingredients for a proper fried chicken setup, but I had chicken breasts, a block of Parmesan, and a jar of garlic that was staring at me from the pantry. The idea that arrived was simple, almost too simple: what if I skipped the deep fryer entirely and let the oven do the heavy lifting?
I mean, honestly, I’ve made a lot of chicken in my day. I’ve brined it, I’ve pounded it flat, I’ve even tried those viral air fryer recipes that promise the world but deliver soggy disappointment. But this particular late-night experiment felt different. Maybe it was the quiet of the kitchen, or maybe I was just too tired to overthink it. I grabbed a bowl, cracked an egg, and started mixing. The result was so good I actually texted my sister a photo at midnight, which she did not appreciate. But you know that feeling when you stumble onto something magical? That was this chicken.
The best part? This isn’t one of those recipes that requires a culinary degree or a trip to three different grocery stores. It uses simple ingredients you probably already have, and it comes together in under an hour. The crispy garlic Parmesan crusted baked chicken breast is the kind of recipe that makes you wonder why you ever bothered with takeout. Maybe you’ve been there, standing in front of your open fridge, hungry and uninspired. This is the recipe that answers that moment. It stayed with me because it proved that you don’t need complicated techniques to create something genuinely unforgettable.
Why You’ll Love This Recipe
Let me tell you why this crispy garlic Parmesan crusted baked chicken breast has become a staple in my kitchen. I’ve tested this recipe at least a dozen times, tweaking the breading ratio and adjusting the baking time until it was absolutely perfect. Trust me, I’ve made the mistakes so you don’t have to.
- Quick & Easy: From start to finish, this comes together in about 40 minutes. Perfect for those busy weeknights when you need dinner on the table without a fuss.
- Simple Ingredients: No fancy grocery trips needed. You likely already have chicken breasts, Parmesan cheese, breadcrumbs, and garlic in your kitchen right now.
- Perfect for Meal Prep: This chicken reheats beautifully, making it ideal for Sunday meal prep or quick lunches throughout the week.
- Crowd-Pleaser: I’ve served this to picky eaters, health-conscious friends, and kids alike. Everyone goes back for seconds.
- Unbelievably Delicious: The texture is what gets me every time. That crispy, cheesy crust combined with juicy, tender chicken is pure comfort food magic.
What makes this recipe different from the rest? It’s the technique. Instead of a simple breadcrumb coating, I’ve developed a method that uses a Parmesan-garlic mixture that creates an almost crust-like barrier. This locks in moisture while building that irresistible golden exterior. It’s not just another baked chicken recipe—it’s your new go-to.
This recipe isn’t just good—it’s the kind that makes you close your eyes after the first bite. It’s comfort food reimagined: healthier than fried chicken, faster than a complicated casserole, but with the same soul-soothing satisfaction. Perfect for impressing guests without stress, or turning a simple Tuesday dinner into something memorable.
What Ingredients You Will Need
This recipe uses simple, wholesome ingredients to deliver bold flavor and satisfying texture without the fuss. Most of these are pantry staples, so you probably won’t need to make a special trip to the store.
For the Chicken
- 4 boneless, skinless chicken breasts (about 6 ounces each, pounded to even thickness)
- 1/2 cup all-purpose flour (helps the egg wash stick)
- 2 large eggs (room temperature works best)
- 1 tablespoon water (to thin the egg wash slightly)
- 1 teaspoon salt (I prefer kosher salt for better flavor distribution)
- 1/2 teaspoon black pepper (freshly ground if possible)
For the Crispy Garlic Parmesan Crust
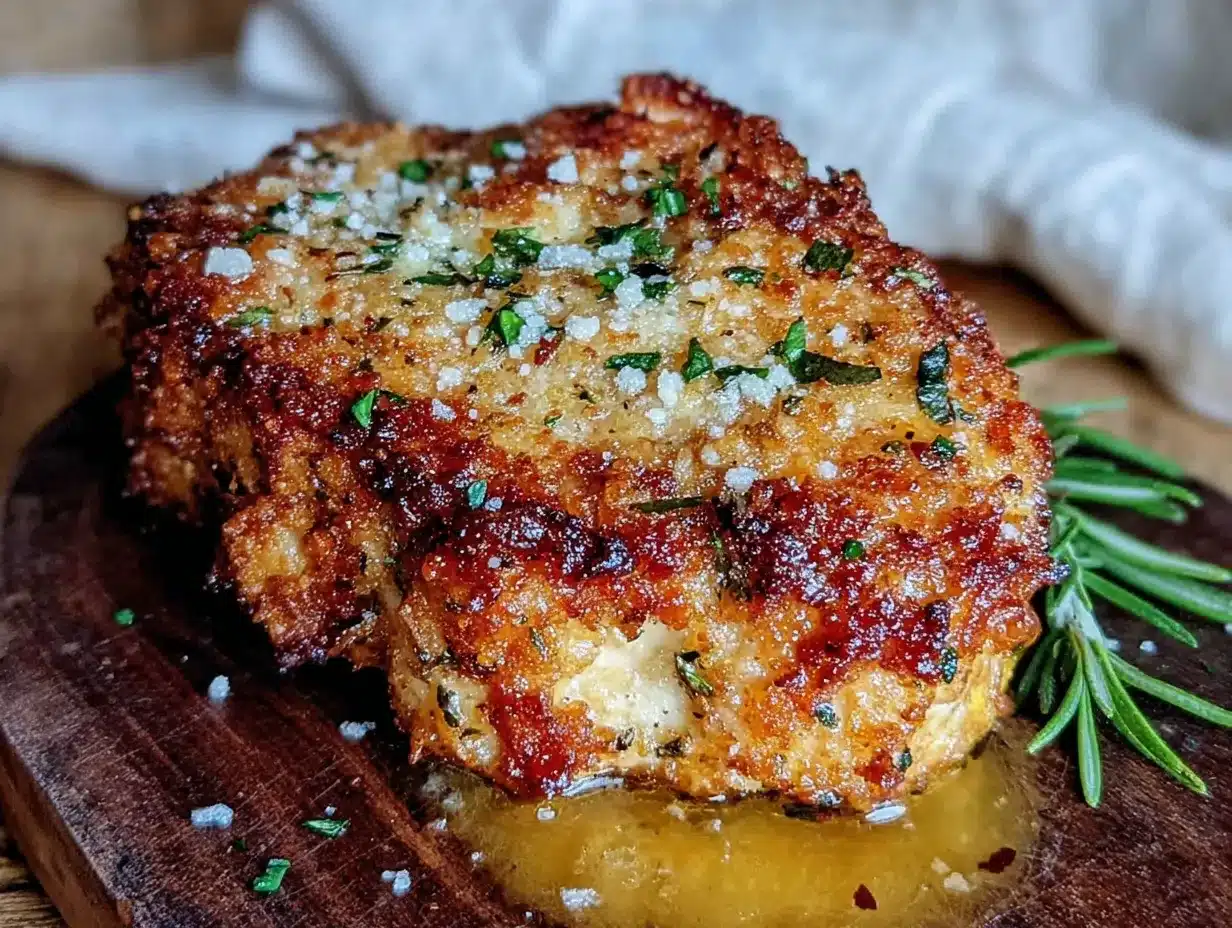
- 1 cup panko breadcrumbs (these give the best crunch—trust me on this)
- 1/2 cup grated Parmesan cheese (the real stuff, not the green can; I recommend Parmigiano-Reggiano for best texture)
- 3 cloves garlic (minced finely, or use 1 teaspoon garlic powder if you’re in a pinch)
- 2 tablespoons unsalted butter (melted, for drizzling over the top)
- 1 teaspoon dried Italian seasoning (or a mix of oregano, basil, and thyme)
- 1/2 teaspoon paprika (adds color and a subtle smoky flavor)
- 1/4 teaspoon red pepper flakes (optional, for a tiny kick)
For Serving (Optional but Recommended)
- Fresh parsley (chopped, for garnish)
- Lemon wedges (a squeeze of lemon brightens everything up)
I recommend using freshly grated Parmesan from a block—it melts better and has a richer flavor than pre-shredded varieties. For the breadcrumbs, panko is non-negotiable here. Regular breadcrumbs will work in a pinch, but you won’t get that same shatteringly crispy texture. If you need a gluten-free option, use gluten-free panko breadcrumbs and almond flour instead of all-purpose flour.
Equipment Needed
You don’t need a professional kitchen to make this crispy garlic Parmesan crusted baked chicken breast. Here’s what you’ll need:
- Baking sheet (a rimmed baking sheet works best to catch any drips)
- Wire rack (optional but highly recommended—it allows air to circulate under the chicken for even crisping)
- Three shallow bowls (for the breading station: flour, egg wash, and crust mixture)
- Meat mallet or rolling pin (for pounding the chicken to even thickness)
- Plastic wrap (to cover the chicken while pounding, preventing splatters)
- Chef’s knife and cutting board
- Measuring cups and spoons
- Garlic press or microplane (if you want finely minced garlic without the hassle)
If you don’t have a wire rack, don’t worry. You can place the chicken directly on a parchment-lined baking sheet. The bottom won’t be quite as crispy, but it’ll still be delicious. I’ve done it both ways, and honestly, the wire rack method is worth the extra minute of setup. You can find inexpensive wire racks at most kitchen supply stores or online.
Preparation Method
Let’s get cooking! Follow these steps carefully, and you’ll have the most incredible crispy garlic Parmesan crusted baked chicken breast on your table.
- Preheat your oven to 400°F (200°C). Place a wire rack on a rimmed baking sheet and spray it lightly with cooking spray. This prevents sticking and helps the crust get crispy all around.
- Prepare the chicken. Place each chicken breast between two sheets of plastic wrap. Using a meat mallet or rolling pin, pound them to an even thickness of about 1/2 inch (1.25 cm). This is crucial for even cooking—no one wants a dry, thin end and a raw, thick middle. Season both sides with salt and pepper.
- Set up your breading station. In the first shallow bowl, place the all-purpose flour. In the second bowl, whisk together the eggs and water until well combined. In the third bowl, mix the panko breadcrumbs, grated Parmesan cheese, minced garlic, Italian seasoning, paprika, and red pepper flakes if using. The mixture should look like a golden, fragrant crumble.
- Coat the chicken. Working with one piece at a time, dredge the chicken in the flour, shaking off any excess. Then dip it into the egg wash, letting any excess drip off. Finally, press it firmly into the breadcrumb mixture, making sure both sides are well coated. I like to use my hands to really press the crust into the chicken—it helps it stick better.
- Place on the prepared rack. Transfer the coated chicken breasts to the wire rack, leaving a little space between each piece. Don’t let them touch, or they’ll steam instead of getting crispy.
- Drizzle with melted butter. Using a spoon or a small brush, drizzle the melted butter evenly over the top of each chicken breast. This is the secret to that golden, restaurant-quality crust. Don’t skip this step!
- Bake for 20-25 minutes. Place the baking sheet in the preheated oven and bake until the chicken is golden brown and cooked through. The internal temperature should reach 165°F (74°C) when measured with an instant-read thermometer. At the 15-minute mark, check the chicken—if the top is browning too quickly, tent loosely with foil.
- Rest before serving. Remove the chicken from the oven and let it rest on the rack for 5 minutes. This allows the juices to redistribute, ensuring every bite is moist and tender. Garnish with fresh parsley and serve with lemon wedges.
A quick tip from experience: if your chicken breasts are particularly thick, you might need to add 5-7 minutes to the baking time. Always rely on your meat thermometer rather than the clock. I learned this the hard way when I served undercooked chicken to guests—not my finest moment!
Cooking Tips & Techniques
After making this recipe more times than I can count, I’ve picked up a few tricks that make a real difference. Here’s what I’ve learned:
Don’t skip the pounding step. I know it seems like extra work, but uneven chicken breasts will cook unevenly. The thin parts will be dry and overcooked while the thick parts remain undercooked. Take the extra two minutes to pound them flat. Your future self will thank you.
Use a meat thermometer. This is non-negotiable in my kitchen. Chicken is perfectly safe at 165°F (74°C), but if you pull it out at 160°F (71°C) and let it rest, the carryover cooking will bring it to the right temperature. This prevents that dry, stringy texture nobody likes.
Toast the panko first for extra crunch. If you have an extra few minutes, spread the panko breadcrumbs on a baking sheet and toast them in the oven at 350°F (175°C) for 3-4 minutes until golden. This adds another layer of crunch that’s absolutely worth it.
One mistake I made early on: I used pre-shredded Parmesan cheese once because I was in a hurry. The crust didn’t stick well, and it didn’t brown properly. Freshly grated Parmesan from a block melts better and creates a more cohesive crust. Trust me on this one.
Timing strategy: While the chicken is baking, prepare your side dishes. Roasted vegetables or a simple salad work perfectly. This way, everything is ready at the same time, and you’re not scrambling at the last minute.
Variations & Adaptations
One of the best things about this crispy garlic Parmesan crusted baked chicken breast is how adaptable it is. Here are some variations I’ve tried and loved:
Dietary Adaptations
- Gluten-Free: Substitute the all-purpose flour with almond flour or a gluten-free all-purpose blend. Use gluten-free panko breadcrumbs for the crust. The texture will be slightly different, but it’s still delicious.
- Low-Carb/Keto: Skip the flour and panko entirely. Use crushed pork rinds mixed with Parmesan and garlic for a zero-carb crust that’s surprisingly crunchy.
- Dairy-Free: Use nutritional yeast instead of Parmesan, and substitute the butter with olive oil or a dairy-free butter alternative.
Flavor Variations
- Spicy Cajun: Add 1 tablespoon of Cajun seasoning to the breadcrumb mixture and reduce the salt slightly. Serve with a cool ranch dip.
- Lemon Herb: Add the zest of one lemon and 2 tablespoons of fresh chopped herbs (rosemary, thyme, parsley) to the crust mixture. Squeeze fresh lemon juice over the finished chicken.
- Everything Bagel: Mix 2 tablespoons of everything bagel seasoning into the breadcrumb mixture. It adds a wonderful savory, sesame flavor.
Cooking Method Adaptations
- Air Fryer: Cook at 375°F (190°C) for 12-15 minutes, flipping halfway through. The air fryer creates an incredibly crispy exterior in less time.
- Pan-Seared then Baked: For an extra-crispy crust, sear the breaded chicken in a hot skillet with oil for 2 minutes per side, then transfer to the oven to finish cooking.
My personal favorite variation? The lemon herb version. I made it last spring when I had an abundance of fresh herbs from my garden, and it was absolutely glorious. The bright citrus cuts through the richness of the cheese perfectly.
Serving & Storage Suggestions
This chicken is incredibly versatile when it comes to serving. Here’s how to make the most of it:
Serving Temperature: Serve the chicken hot, right after resting. The crust is at its crispiest within the first 15 minutes out of the oven. If you’re serving a crowd, keep it warm on the wire rack in a low oven (200°F/95°C) for up to 30 minutes.
What to Serve With It: This chicken pairs beautifully with so many sides. I love it with roasted asparagus or green beans, a simple Caesar salad, or creamy mashed potatoes. For a lighter option, serve it over a bed of mixed greens with a lemon vinaigrette. It also works great sliced on top of pasta or in a sandwich.
Storage Instructions: Store leftover chicken in an airtight container in the refrigerator for up to 4 days. The crust will soften slightly, but the flavor remains excellent. For best results, place a paper towel in the container to absorb any excess moisture.
Reheating Methods: To restore some of that crispy texture, reheat in a 375°F (190°C) oven for 10-12 minutes. You can also use an air fryer at 350°F (175°C) for 5-7 minutes. Avoid the microwave—it will make the crust soggy and the chicken rubbery.
Freezer Instructions: You can freeze the baked chicken for up to 3 months. Wrap each piece individually in plastic wrap, then place in a freezer bag. Thaw overnight in the refrigerator before reheating. The texture won’t be quite as perfect as fresh, but it’s still a fantastic option for busy nights.
One thing I’ve noticed: the flavors actually meld together beautifully overnight. Leftover chicken, sliced cold over a salad, is a lunch I genuinely look forward to.
Nutritional Information & Benefits
Here’s the estimated nutritional breakdown for one serving (one chicken breast, using the recipe as written):
| Nutrient | Amount |
|---|---|
| Calories | 385 |
| Protein | 42g |
| Carbohydrates | 18g |
| Fat | 16g |
| Saturated Fat | 7g |
| Fiber | 1g |
| Sodium | 680mg |
This chicken is an excellent source of lean protein, which is essential for muscle repair and keeping you full and satisfied. Parmesan cheese adds calcium and a good amount of protein too. The garlic isn’t just for flavor—it contains compounds that may support immune health and reduce inflammation.
For those watching their carb intake, this recipe is relatively low in carbohydrates, especially if you use the almond flour and pork rind variation. It’s also naturally nut-free and can be made gluten-free with simple substitutions. The main allergen to be aware of is dairy from the Parmesan and butter, but as mentioned, those can be swapped out.
From a wellness perspective, I love that this recipe feels indulgent without actually being unhealthy. You get that satisfying crunch and cheesy flavor without the excessive oil and calories of fried chicken. It’s a win-win in my book.
Conclusion
This crispy garlic Parmesan crusted baked chicken breast has become one of those recipes I turn to again and again. It’s reliable, it’s delicious, and it makes me look like a kitchen rockstar with minimal effort. Whether you’re cooking for a family dinner, meal prepping for the week, or just treating yourself to something special, this recipe delivers every single time.
I encourage you to make this recipe your own. Adjust the seasoning, try different cheese combinations, or experiment with the cooking method. That’s the beauty of a good base recipe—it’s a starting point for your own culinary adventures. Maybe you’ll discover a variation that becomes your signature dish.
Honestly, I still think about that late-night kitchen experiment that led to this recipe. It’s a reminder that sometimes the best things happen when you stop overthinking and just go with your gut. If you try this recipe, I’d love to hear how it turns out. Did you make any changes? Did it become a family favorite? Drop a comment below and share your experience. And if you’re looking for more easy, delicious chicken recipes, don’t forget to browse the archives. Happy cooking!
Frequently Asked Questions
Can I use chicken thighs instead of chicken breasts?
Absolutely! Boneless, skinless chicken thighs work wonderfully in this recipe. They have a higher fat content, which means they stay even juicier. Adjust the baking time to about 22-28 minutes, or until the internal temperature reaches 175°F (80°C) for thighs.
Why did my breading fall off?
This usually happens for one of three reasons: the chicken was too wet when you applied the breading, you didn’t press the crust firmly enough, or the chicken wasn’t patted dry before starting. Make sure to shake off excess egg wash and really press that breadcrumb mixture into the chicken with your hands.
Can I prepare this recipe ahead of time?
You can bread the chicken up to 4 hours ahead and keep it refrigerated on the wire rack. However, I recommend baking it fresh for the best texture. If you need to prep further ahead, bake the chicken completely, then reheat as directed.
How do I know when the chicken is fully cooked?
The most reliable method is using an instant-read meat thermometer. Insert it into the thickest part of the chicken breast. It should read 165°F (74°C). If you don’t have a thermometer, cut into the thickest part—the juices should run clear, and there should be no pinkness.
Can I freeze the unbreaded chicken?
Yes! You can freeze the raw, pounded chicken breasts in a single layer on a baking sheet, then transfer them to a freezer bag. Thaw in the refrigerator overnight before breading and baking. This is a great time-saving trick for busy weeks.
Pin This Recipe!
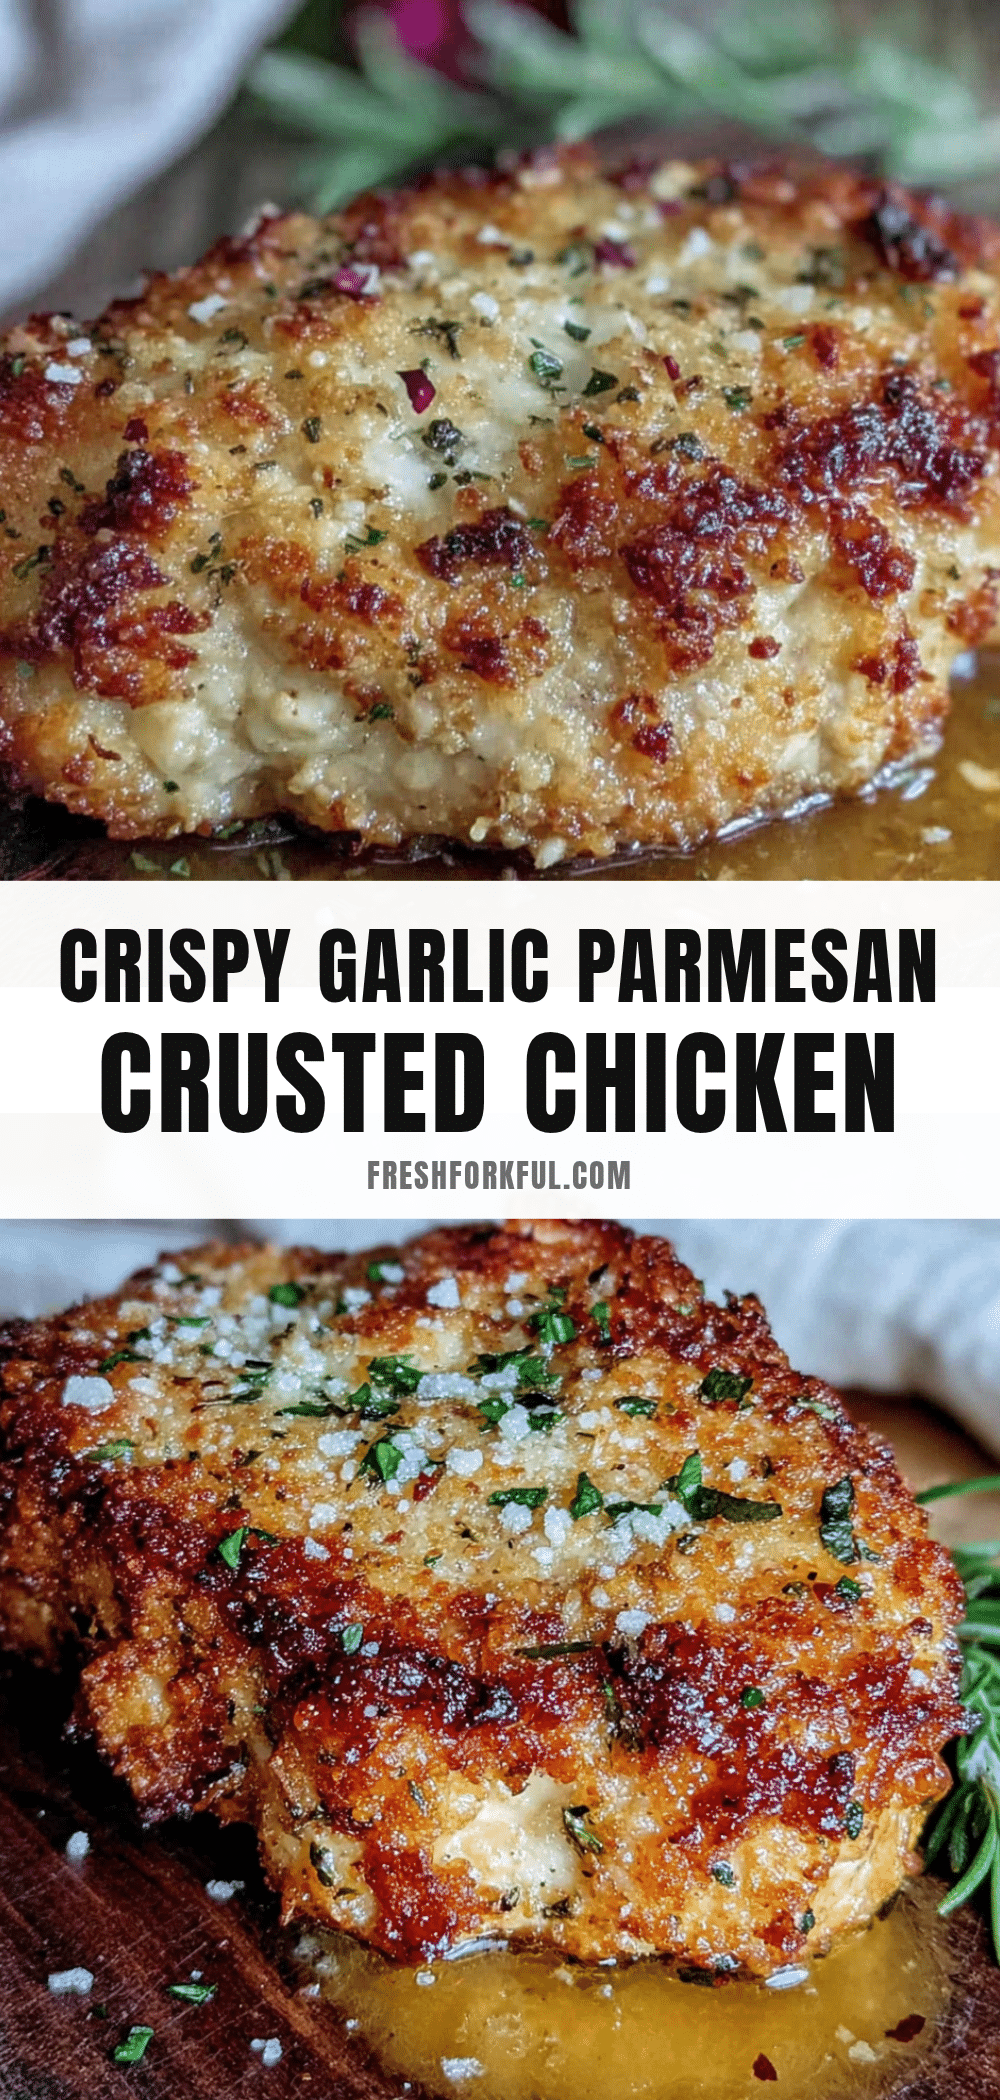
Easy Crispy Garlic Parmesan Crusted Baked Chicken Breast Recipe

This crispy garlic Parmesan crusted baked chicken breast is a quick and easy weeknight dinner that delivers a shatteringly crunchy crust with juicy, tender meat inside. Made with simple ingredients and ready in under an hour, it’s a healthier alternative to fried chicken that the whole family will love.
- Prep Time: 15 minutes
- Cook Time: 25 minutes
- Total Time: 40 minutes
- Yield: 4 servings 1x
- Category: Main Course
- Cuisine: American
Ingredients
- 4 boneless, skinless chicken breasts (about 6 ounces each, pounded to even thickness)
- 1/2 cup all-purpose flour
- 2 large eggs (room temperature)
- 1 tablespoon water
- 1 teaspoon kosher salt
- 1/2 teaspoon black pepper (freshly ground)
- 1 cup panko breadcrumbs
- 1/2 cup grated Parmesan cheese (Parmigiano-Reggiano recommended)
- 3 cloves garlic (minced) or 1 teaspoon garlic powder
- 2 tablespoons unsalted butter (melted)
- 1 teaspoon dried Italian seasoning
- 1/2 teaspoon paprika
- 1/4 teaspoon red pepper flakes (optional)
- Fresh parsley (chopped, for garnish)
- Lemon wedges (for serving)
Instructions
- Preheat your oven to 400°F (200°C). Place a wire rack on a rimmed baking sheet and spray it lightly with cooking spray.
- Prepare the chicken: Place each chicken breast between two sheets of plastic wrap. Using a meat mallet or rolling pin, pound them to an even thickness of about 1/2 inch (1.25 cm). Season both sides with salt and pepper.
- Set up your breading station: In the first shallow bowl, place the all-purpose flour. In the second bowl, whisk together the eggs and water until well combined. In the third bowl, mix the panko breadcrumbs, grated Parmesan cheese, minced garlic, Italian seasoning, paprika, and red pepper flakes if using.
- Coat the chicken: Working with one piece at a time, dredge the chicken in the flour, shaking off any excess. Then dip it into the egg wash, letting any excess drip off. Finally, press it firmly into the breadcrumb mixture, making sure both sides are well coated.
- Place on the prepared rack: Transfer the coated chicken breasts to the wire rack, leaving a little space between each piece.
- Drizzle with melted butter: Using a spoon or a small brush, drizzle the melted butter evenly over the top of each chicken breast.
- Bake for 20-25 minutes, until the chicken is golden brown and cooked through. The internal temperature should reach 165°F (74°C) when measured with an instant-read thermometer. At the 15-minute mark, check the chicken—if the top is browning too quickly, tent loosely with foil.
- Rest before serving: Remove the chicken from the oven and let it rest on the rack for 5 minutes. Garnish with fresh parsley and serve with lemon wedges.
Notes
For extra crunch, toast the panko breadcrumbs in the oven at 350°F (175°C) for 3-4 minutes before using. If chicken breasts are particularly thick, add 5-7 minutes to the baking time. Always rely on a meat thermometer for doneness. Leftovers can be stored in an airtight container in the refrigerator for up to 4 days; reheat in a 375°F (190°C) oven for 10-12 minutes to restore crispiness.
Nutrition
- Serving Size: 1 chicken breast
- Calories: 385
- Sugar: 1
- Sodium: 680
- Fat: 16
- Saturated Fat: 7
- Carbohydrates: 18
- Fiber: 1
- Protein: 42
Keywords: crispy garlic parmesan chicken, baked chicken breast, easy chicken recipe, garlic parmesan crusted chicken, weeknight dinner, healthy chicken recipe


