Love this? Save it for later!
Share the inspiration with your friends
My sister asked why I couldn’t just use candy corn instead of trying to make those little orange and yellow layers from scratch. I started to explain why that wouldn’t work — then stopped. Honestly? I had no good reason. I was so caught up in being the “experienced baker” that I forgot the simplest answer was probably the right one.
It was a Tuesday afternoon, and my kitchen looked like a sugar bomb went off. I had bags of marshmallows, butter, and about four different types of cereal spread across the counter. My original plan involved melting different colors of white chocolate and painstakingly layering them. My sister, who was supposed to be my helper, just wanted to dump everything in one bowl and call it a day.
I laughed it off at first, but then I got curious. Could you actually make candy corn rice krispie treats that tasted good? Would the texture work? I mean, candy corn gets that weird chewy-hard thing going on if you leave it out too long. But the more I thought about it, the more I realized she was onto something. These are supposed to be fun, not a project for a culinary school exam, you know?
So I grabbed a bag of candy corn, tossed it in with the marshmallows, and held my breath. The candy melted into this gorgeous, glossy, sunset-colored syrup that swirled through the cereal like stained glass. The first bite was a total shock. That sweet, almost honey-like flavor from the candy corn mixed with the buttery marshmallow — it was like fall in a single bite. Maybe you’ve had that moment where a recipe you doubted becomes the one you can’t stop thinking about. That’s this one.
Why You’ll Love This Recipe
Let me tell you why these candy corn rice krispie treats have become my go-to for every Halloween party and fall gathering. They solve so many problems at once, and they do it with style.
- Quick & Easy: You are looking at about 15 minutes from start to finish. No oven required, no complicated steps. Perfect for those “I need a treat for the school party tomorrow” moments.
- Simple Ingredients: If you have a box of Rice Krispies cereal, marshmallows, butter, and a bag of candy corn, you are already halfway there. No fancy grocery store runs needed.
- Perfect for Fall Celebrations: These little bars are the life of the party at Halloween parties, Thanksgiving dessert tables, or just a cozy movie night in October.
- Crowd-Pleaser: I have watched kids and adults alike reach for these over fancy cupcakes. There is something about the combination of textures that just works.
- Unbelievably Delicious: The candy corn melts into the marshmallow mixture, creating a subtle honey-vanilla flavor that is way more sophisticated than you’d expect from a box of cereal.
What makes this recipe different from the hundreds of other rice krispie treat variations out there? It is the way the candy corn transforms. Instead of being those little striped candies you pick out of a mix, they become part of the treat itself. The colors bleed together into this beautiful autumn palette that looks like you spent hours on it. But you didn’t. That is the magic.
This recipe isnt just good — it is the kind that makes you close your eyes after the first bite. It is comfort food reimagined for the season, with that same soul-soothing satisfaction you remember from childhood but with a festive twist that feels new.
What Ingredients You Will Need
This recipe uses simple, pantry-friendly ingredients to deliver that nostalgic flavor with a festive fall twist. You probably already have most of these in your kitchen right now.
- 6 cups Rice Krispies cereal (or any crispy rice cereal — I prefer the name brand for consistent texture)
- 4 tablespoons unsalted butter (adds richness and helps prevent the treats from getting rock hard)
- 1 package (10 oz) marshmallows (standard size, not mini — they melt more evenly)
- 1 ½ cups candy corn (Bracha’s brand has the best melt, in my opinion)
- ½ teaspoon vanilla extract (pure, not imitation — it makes a difference)
- ¼ teaspoon salt (balances the sweetness — trust me on this one)
- Optional: ½ cup white chocolate chips (for drizzling on top if you want to get fancy)
- Optional: Orange and yellow food coloring (if you want to layer colors for a striped effect)
When picking your candy corn, look for a fresh bag. Old candy corn gets hard and doesn’t melt as smoothly. If you are making these for a party with dietary restrictions, you can use vegan butter and marshmallows — just note the texture will be slightly different. For a gluten-free option, make sure your cereal is certified gluten-free, as some brands have cross-contamination risks.
One thing I learned the hard way: do not use the “harvest” mix that has those little pumpkins and other shapes. They have a different sugar composition and don’t melt the same way. Stick with classic candy corn for the best results.
Equipment Needed
You do not need a professional kitchen for this recipe. Here is what you will need:
- Large pot or Dutch oven (at least 5-quart — you need room to stir everything together)
- 9×13 inch baking dish (glass or metal both work fine)
- Parchment paper or wax paper (for lining the pan — absolute lifesaver for cleanup)
- Rubber spatula or wooden spoon (silicone spatulas are great because nothing sticks to them)
- Measuring cups and spoons
- Sharp knife (for cutting clean squares — run it under hot water first for best results)
If you don’t have a 9×13 pan, you can use a larger sheet pan for thinner treats or an 8×8 for thicker, chunkier bars. Just adjust the cooking time slightly. I once used a cast iron skillet because my baking dish was in the sink, and honestly? The edges got extra crispy and were amazing. Don’t be afraid to improvise a little.
Parchment paper is non-negotiable here. I learned that lesson when I spent 20 minutes scrubbing hardened marshmallow off a pan. Just let the paper hang over the edges so you can lift the whole block out when it is set.
Preparation Method
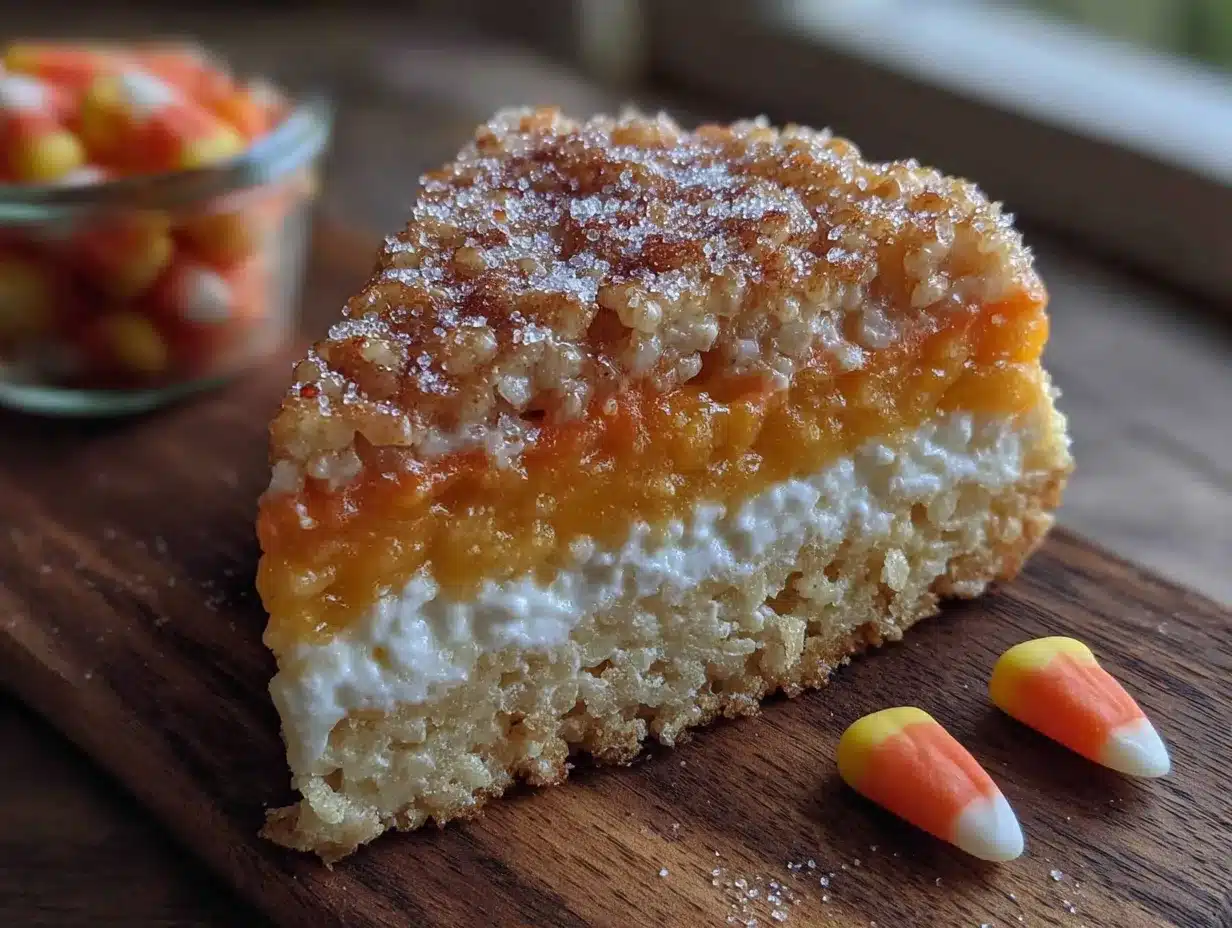
Let me walk you through this step by step. It is easier than you think, and I will tell you exactly what to look for at each stage.
- Prep your pan. Line your 9×13 baking dish with parchment paper, leaving about 2 inches of overhang on two sides. Lightly spray the parchment with non-stick cooking spray. This is your insurance policy against stuck treats.
- Melt the butter. Place your large pot over medium-low heat and add the butter. Let it melt slowly — do not rush this. You want it fully melted but not bubbling or browning. About 2-3 minutes.
- Add the marshmallows. Pour in the entire bag of marshmallows. Stir constantly with your rubber spatula until they are about halfway melted. This takes about 3-4 minutes. You will see them getting puffy and starting to lose their shape.
- Add the candy corn. Here is where the magic happens. Dump in the 1 ½ cups of candy corn and keep stirring. The candy will start to melt into the marshmallow mixture, creating this beautiful golden-orange swirl. Do not walk away — candy corn can scorch if you leave it too long. Stir for about 2-3 minutes until it is mostly incorporated. You want some small bits of candy corn still visible for texture.
- Add vanilla and salt. Remove the pot from the heat. Stir in the vanilla extract and salt. The mixture will smell amazing at this point — like buttered popcorn and honey mixed together.
- Fold in the cereal. Add the Rice Krispies cereal one cup at a time, folding gently with your spatula. Do not stir vigorously — you want to coat the cereal without crushing it. This takes about 2 minutes of gentle folding. You should see the cereal evenly coated in that gorgeous orange-tinted marshmallow mixture.
- Press into the pan. Transfer the mixture to your prepared pan. Here is a pro tip: spray your hands with cooking spray or rub a little butter on them, then press the mixture down evenly. Do not smash it flat — you want some air pockets for that perfect crunch. A light, even pressure is all you need.
- Let it set. Allow the treats to cool at room temperature for at least 30 minutes. Do not put them in the fridge — that can make them hard and chewy in a bad way. They should be firm to the touch but still slightly warm in the center.
- Cut and serve. Lift the whole block out using the parchment paper overhang. Use a sharp knife to cut into squares. For clean cuts, run the knife under hot water and wipe it dry between each cut. I usually get about 12-16 squares depending on how big you want them.
One thing to watch for: if your mixture seems too dry, you probably cooked the marshmallows too long. Next time, take it off the heat a little earlier. If it is too sticky, add a tiny bit more cereal. You will get a feel for the right consistency after one batch.
Cooking Tips & Techniques
I have made these candy corn rice krispie treats about a dozen times now, and I have learned a few things the hard way. Here are my best tips for getting it right every time.
Low and slow is the way to go. The biggest mistake people make is cranking up the heat to melt things faster. Do not do it. Medium-low heat gives you control and prevents that burnt sugar taste that ruins a batch. I speak from experience — my first attempt had a smoky kitchen and a very sad outcome.
Use fresh marshmallows. Stale marshmallows don’t melt as smoothly and can leave you with lumpy treats. If your bag has been open for more than a week, buy a new one. Same goes for the candy corn — fresh candy melts into a smooth sauce, while old candy gets grainy.
Work quickly but gently. Once you add the cereal, you have about 3-4 minutes before the mixture starts to set. Do not rush and crush the cereal, but do not dawdle either. Find a rhythm that feels natural.
Butter your knife. For the cleanest cuts, rub a little butter on both sides of your knife. This prevents the sticky marshmallow from grabbing onto the blade and tearing your beautiful squares. I learned this from a pastry chef friend, and it changed my life.
Double the batch for parties. These disappear fast. I made a single batch for a Halloween potluck last year and regretted it within 20 minutes. Now I always double the recipe and use a half-sheet pan.
Variations & Adaptations
One of the best things about this recipe is how easy it is to change up. Here are some variations I have tried and loved.
Chocolate Drizzle Version: After the treats set, melt ½ cup of chocolate chips with a teaspoon of coconut oil and drizzle it over the top. The chocolate pairs beautifully with the honey-candy corn flavor. I did this for a Thanksgiving dessert table and got asked for the recipe four times.
Peanut Butter Twist: Add ¼ cup of creamy peanut butter to the marshmallow mixture right after you remove it from the heat. Stir until smooth before adding the cereal. The salty peanut flavor cuts through the sweetness perfectly. My nephew calls these “the best things I have ever eaten.”
Vegan Version: Use vegan butter and vegan marshmallows (Dandies brand works great). The texture will be slightly chewier, but the flavor is still spot-on. Make sure your cereal is vegan-friendly too.
Spiced Fall Version: Add ½ teaspoon of pumpkin pie spice and ¼ teaspoon of cinnamon to the marshmallow mixture along with the vanilla. It gives the treats a warm, cozy flavor that screams autumn. I made these for a bonfire night, and they were a hit with mulled cider.
Layered Color Version: If you want that classic candy corn look, divide the mixture into three bowls after step 5. Dye one portion yellow, one orange, and leave one white. Layer them in the pan one at a time, pressing gently between each layer. It takes a little more effort, but the visual effect is stunning.
Serving & Storage Suggestions
These treats are best served at room temperature, right after they have set. The texture is perfect — crispy on the outside, slightly chewy in the middle, with that subtle candy corn sweetness throughout.
For serving at a party, I like to arrange them on a wooden board or a festive platter. They look beautiful next to caramel apples or pumpkin-shaped cookies. If you are feeling fancy, you can cut them into triangles or use a cookie cutter to make pumpkin shapes.
For storage, keep them in an airtight container at room temperature. Do not refrigerate — the cold makes them hard and changes the texture. They will stay fresh for about 3-4 days, though honestly, they never last that long in my house.
If you want to freeze them, wrap each square individually in plastic wrap, then place them in a freezer-safe bag. They will keep for up to 2 months. To thaw, just leave them on the counter for about 30 minutes. Do not microwave them to thaw — it makes them rubbery.
One thing I have noticed: the flavor actually gets better after a day. The candy corn flavor mellows out and blends with the marshmallow in a really pleasant way. So if you can wait a day, you will be rewarded.
Nutritional Information & Benefits
Let’s be real — these are a treat, not a health food. But here is the nutritional breakdown for one square (based on 16 servings):
| Nutrient | Amount Per Serving |
|---|---|
| Calories | 185 |
| Total Fat | 5g |
| Saturated Fat | 3g |
| Carbohydrates | 35g |
| Sugar | 22g |
| Protein | 1g |
| Sodium | 115mg |
On the plus side, Rice Krispies are fortified with iron and B vitamins, so there is a tiny nutritional silver lining. The butter provides some vitamin A, and if you use the chocolate drizzle version, you get a little antioxidant boost from the cocoa.
This recipe is naturally nut-free (check your cereal label to be sure) and can be made gluten-free with the right cereal choice. It is not suitable for vegan diets unless you use substitutions, and it is definitely not low-sugar. But honestly? Sometimes you just need a treat that tastes like childhood and fall wrapped up together.
Conclusion
These candy corn rice krispie treats have become my secret weapon for fall gatherings. They are quick, they are fun, and they always bring a smile to people’s faces. There is something about that familiar cereal texture combined with the unexpected candy corn flavor that just works.
I love that this recipe came from my sister’s simple question. It reminded me that sometimes the best ideas are the ones right in front of us, hidden in plain sight. We do not always need complicated techniques or fancy ingredients. Sometimes we just need to listen to the person next to us and give their crazy idea a chance.
I would love to hear how these turn out for you. Did you add chocolate? Try the peanut butter version? Or maybe you came up with your own twist? Drop a comment below and let me know. And if you share them on social media, tag me — I love seeing your creations. Happy fall baking, friends!
Frequently Asked Questions
Can I use mini marshmallows instead of regular ones?
Yes, you can. Mini marshmallows melt faster, so you will need to stir them constantly to prevent scorching. Use 10 ounces, which is about 4 cups of mini marshmallows.
Why did my treats turn out hard?
This usually happens when the marshmallow mixture is cooked too long or at too high a heat. Keep the heat on medium-low and remove the pot from the burner as soon as the marshmallows are melted. Overcooking evaporates moisture and leaves you with rock-hard treats.
Can I use a different cereal?
Absolutely. Cocoa Pebbles make a fun chocolate version, Fruity Pebbles give a bright color, and even crushed cornflakes can work. Just keep in mind that different cereals have different textures, so the final result will vary.
How do I prevent the treats from sticking to the knife when cutting?
Run your knife under hot water and wipe it dry between each cut. You can also rub a little butter on both sides of the blade. This creates a non-stick surface that glides through the marshmallow mixture.
Can I make these ahead of time for a party?
Yes! They actually taste better the next day. Make them the day before your event, store them in an airtight container at room temperature, and they will be perfect. Just do not refrigerate them.
Pin This Recipe!
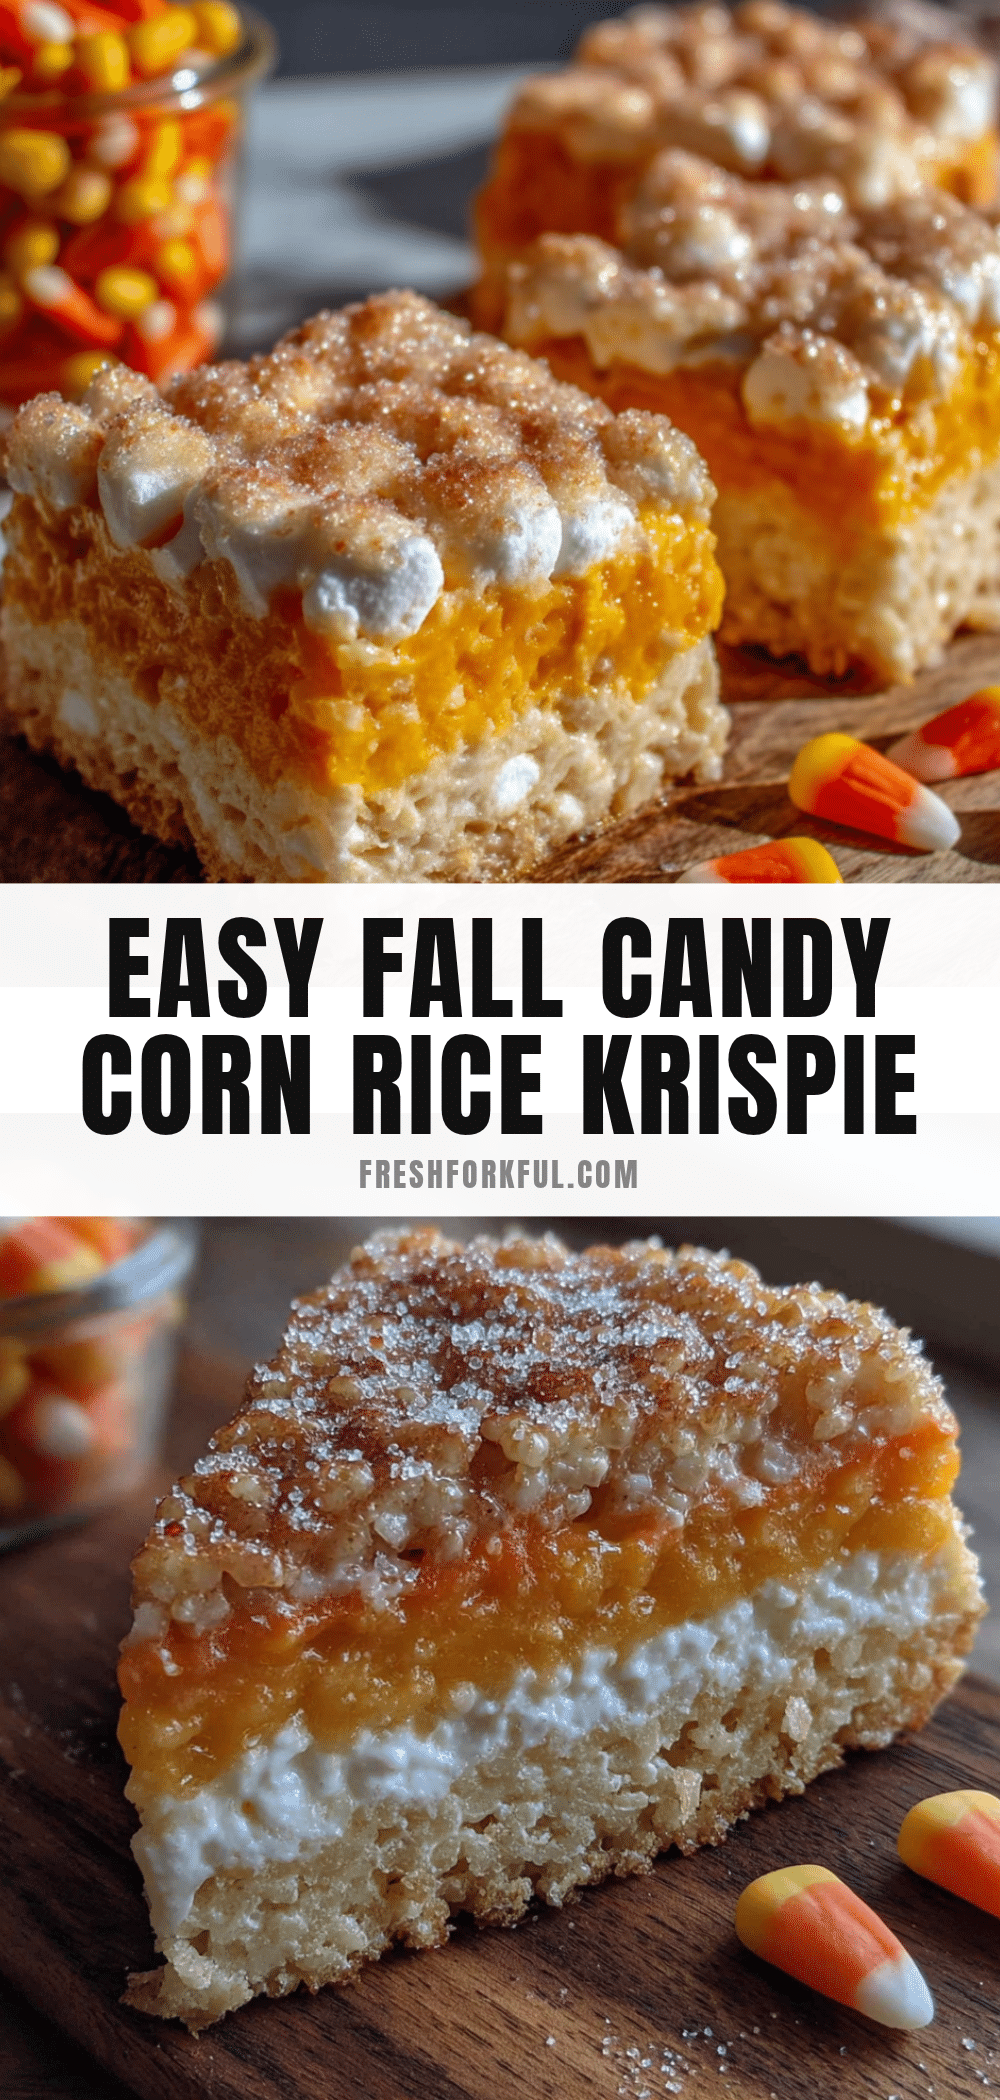
Easy Candy Corn Rice Krispie Treats: A Festive Fall Dessert
These quick and easy candy corn rice krispie treats combine the nostalgic crunch of Rice Krispies with the sweet, honey-like flavor of melted candy corn for a festive fall dessert that comes together in just 15 minutes.
- Prep Time: 15 minutes
- Cook Time: 10 minutes
- Total Time: 25 minutes
- Yield: 16 servings 1x
- Category: Dessert
- Cuisine: American
Ingredients
- 6 cups Rice Krispies cereal
- 4 tablespoons unsalted butter
- 1 package (10 oz) marshmallows
- 1 ½ cups candy corn
- ½ teaspoon vanilla extract
- ¼ teaspoon salt
- ½ cup white chocolate chips (optional, for drizzling)
- Orange and yellow food coloring (optional, for layered effect)
Instructions
- Line a 9×13 inch baking dish with parchment paper, leaving about 2 inches of overhang on two sides. Lightly spray the parchment with non-stick cooking spray.
- Place a large pot over medium-low heat and add the butter. Let it melt slowly until fully melted but not bubbling or browning, about 2-3 minutes.
- Pour in the entire bag of marshmallows. Stir constantly until they are about halfway melted, about 3-4 minutes.
- Add 1 ½ cups of candy corn and keep stirring for about 2-3 minutes until mostly incorporated, with some small bits of candy corn still visible for texture.
- Remove the pot from the heat. Stir in the vanilla extract and salt.
- Add the Rice Krispies cereal one cup at a time, folding gently with a rubber spatula until evenly coated, about 2 minutes.
- Transfer the mixture to the prepared pan. Spray your hands with cooking spray or rub a little butter on them, then press the mixture down evenly with light pressure.
- Allow the treats to cool at room temperature for at least 30 minutes until firm to the touch.
- Lift the whole block out using the parchment paper overhang. Use a sharp knife to cut into squares. For clean cuts, run the knife under hot water and wipe it dry between each cut.
Notes
Use fresh candy corn for best melting results. Do not use the ‘harvest’ mix with pumpkins as they have a different sugar composition. For clean cuts, run the knife under hot water and wipe dry between each cut. The flavor actually improves after a day. Store in an airtight container at room temperature for 3-4 days. Do not refrigerate as it makes them hard. Can be frozen for up to 2 months.
Nutrition
- Serving Size: 1 square
- Calories: 185
- Sugar: 22
- Sodium: 115
- Fat: 5
- Saturated Fat: 3
- Carbohydrates: 35
- Protein: 1
Keywords: candy corn, rice krispie treats, fall dessert, Halloween treats, easy dessert, no-bake dessert


