Love this? Save it for later!
Share the inspiration with your friends
This was supposed to be a fancy French meringue for a friend’s birthday party. I had it all planned out—a beautiful layered pavlova with fresh berries and cream. But somewhere between the third egg white and my phone ringing off the hook with a work emergency, things went sideways. I grabbed the wrong measuring spoon, the mixer speed was way too high, and I was already ten minutes behind schedule. What came out of that oven was nothing like the plan—and better.
Honestly, I almost threw the whole thing in the trash. The meringue was too stiff, the peaks were all wrong, and I was convinced I’d ruined an expensive carton of eggs. But I piped them onto the tray anyway, figuring I’d at least get a laugh out of my disaster. When I pulled them out, they looked like tiny ghosts—perfect little puffs with these adorable peaks that curled over like little ghost tails. I mean, talk about a happy accident.
That’s how these Quick Halloween Ghost Meringue Cookies were born. They’re not fancy, they’re not French, and they definitely weren’t planned. But they’re the easiest, most forgiving Halloween treat you’ll ever make. Maybe you’ve been there—staring at a kitchen disaster, wondering if you should just order pizza instead. Trust me, I get it. But this recipe? It’s the kind of accident you’ll be grateful for.
Why You’ll Love This Recipe
Let me tell you why these ghost meringue cookies have become my go-to Halloween recipe. I’ve tested this at least a dozen times, tweaking the sugar ratio, the baking temperature, and the piping technique. What I landed on is foolproof—even for someone who’s never made meringue before.
- Quick & Easy: Comes together in under 30 minutes, perfect for busy weeknights or last-minute Halloween parties. No chilling, no complicated steps.
- Simple Ingredients: You likely already have everything in your kitchen. Eggs, sugar, vanilla, and a pinch of cream of tartar. That’s it.
- Perfect for Halloween: Great for classroom treats, office parties, or just a fun activity with the kids. They look spooky but taste sweet.
- Crowd-Pleaser: Always gets rave reviews from kids and adults alike. Plus, they’re naturally gluten-free and low-fat.
- Unbelievably Delicious: The texture is light and airy, with a slight chew in the center. They melt in your mouth like little clouds.
What makes this recipe different from the rest? It’s the technique. Most meringue recipes tell you to bake low and slow for hours. Not this one. I’ve figured out the perfect balance of temperature and time that gives you crisp outside, soft inside, and those perfect ghost shapes—all in 30 minutes flat. This isn’t just another version of Halloween cookies. It’s your best version.
This recipe is the kind that makes you close your eyes after the first bite. It’s comfort food reimagined—lighter, faster, but with the same soul-soothing satisfaction. Perfect for impressing guests without stress, or turning a simple weeknight into something memorable.
What Ingredients You Will Need
This recipe uses simple, wholesome ingredients to deliver that perfect meringue texture without the fuss. Most of these are pantry staples, so you probably don’t even need a grocery run.
For the Meringue Base
- 3 large egg whites, at room temperature (cold eggs don’t whip as well—trust me on this one)
- ¾ cup granulated sugar (180g—I prefer C&H or Domino for consistent results)
- ¼ teaspoon cream of tartar (stabilizes the meringue and prevents weeping)
- 1 teaspoon vanilla extract (pure, not imitation—it makes a difference in flavor)
- Pinch of salt (balances the sweetness)
For Decoration
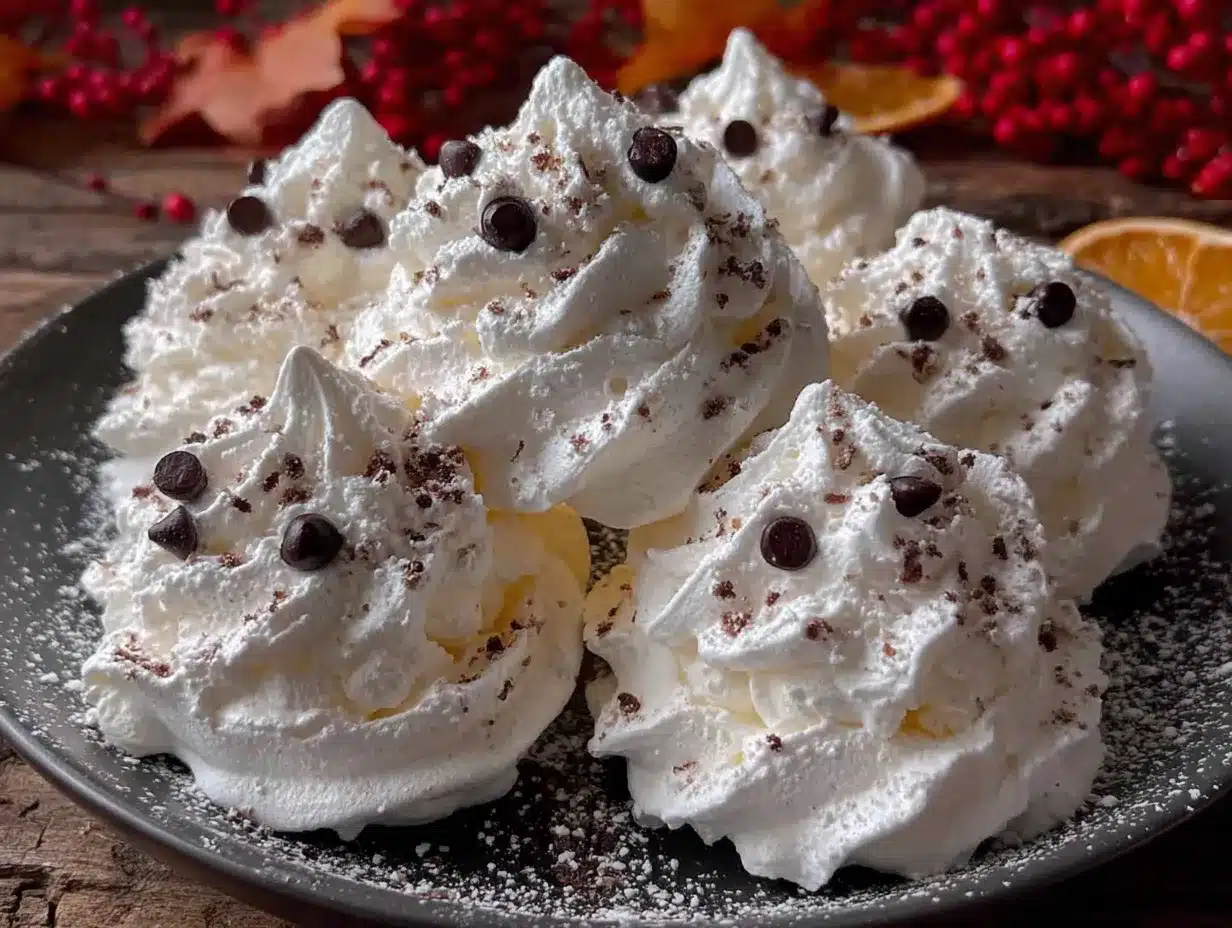
- Mini chocolate chips for eyes (about 2 tablespoons—use dairy-free if needed)
- Optional: Orange or black gel food coloring for piped faces (I like Wilton brand)
- Optional: Edible glitter dust for a spooky shimmer (totally optional but fun)
Ingredient Selection Tips: Look for eggs that are at least a week old—fresh egg whites actually don’t whip as well. I know it sounds backwards, but older eggs produce more stable meringue. If you’re using farm-fresh eggs, let them sit in the fridge for a few days first.
Substitution Guidance: Need a vegan option? Use aquafaba (the liquid from a can of chickpeas) instead of egg whites. Three tablespoons of aquafaba equals one egg white. It whips up beautifully, though it takes a minute or two longer. For a sugar-free version, try powdered erythritol, but note that the texture will be slightly less crisp.
Sourcing Note: Cream of tartar is found in the spice aisle and costs about two dollars. If you don’t have it, you can substitute with ½ teaspoon lemon juice or white vinegar per egg white. But honestly, just buy the cream of tartar—it’s worth it for the stability.
Equipment Needed
You don’t need fancy equipment for these ghost meringue cookies. Here’s what I use:
- Electric mixer (stand mixer or hand mixer both work—I use my KitchenAid, but a hand mixer is actually easier for small batches)
- Large mixing bowl (glass or metal—plastic can hold grease residue that ruins meringue)
- Baking sheet (a standard half-sheet pan is perfect)
- Parchment paper (silicone baking mats work too, but parchment gives better browning)
- Piping bag (or a zip-top bag with the corner snipped off—I’ve done both)
- Large round piping tip (A1 or similar—or just snip the bag directly)
- Rubber spatula (for folding in any additions)
- Cooling rack (optional but helpful)
Budget-Friendly Options: If you don’t have a piping bag, a sturdy zip-top bag works perfectly. Just fill it, seal it, and snip a ½-inch corner. For the mixer, a whisk and some elbow grease will work, but it’ll take about 10 minutes of vigorous whisking. I’ve done it—it’s a great arm workout, but not exactly efficient on a busy weeknight.
Maintenance Tip: Make sure your bowl and beaters are completely clean and dry. Any trace of grease or yolk will prevent your egg whites from whipping properly. I wipe mine down with a little lemon juice and paper towel before starting—old baker’s trick.
Preparation Method
Follow these steps carefully, and you’ll have perfect ghost meringue cookies in 30 minutes flat. I’ve included time estimates and sensory cues so you know exactly what to look for.
- Preheat and Prep (5 minutes): Preheat your oven to 200°F (93°C). Line a baking sheet with parchment paper. Make sure your bowl and beaters are spotless—wipe them with a bit of lemon juice if you’re worried about grease.
- Start Whipping (2 minutes): Add the egg whites and cream of tartar to your clean bowl. Beat on medium speed until foamy—about 1-2 minutes. You’re looking for small, uniform bubbles, like the top of a latte. If your eggs are cold, they’ll take longer to foam, so let them sit out for 15 minutes first.
- Add Sugar Slowly (4 minutes): With the mixer running on medium-high, add the sugar one tablespoon at a time. I know it’s tedious, but rushing this step is the number one mistake. Each addition should be fully dissolved before you add the next. The mixture should look thick and glossy after about 3-4 minutes. Here’s a tip: rub a little between your fingers—if it feels gritty, keep beating.
- Add Flavorings (1 minute): Add the vanilla extract and pinch of salt. Beat on high for another 30-60 seconds until stiff peaks form. You’ll know it’s ready when you lift the beater and the meringue stands up straight without drooping. If it flops over, keep beating—but don’t overdo it or it’ll turn grainy.
- Pipe the Ghosts (5 minutes): Transfer the meringue to your piping bag fitted with a large round tip. Pipe small mounds onto the parchment paper, about 1.5 inches wide and 2 inches tall. To get the ghost shape, pipe a tall, fat teardrop, then quickly pull up to create a little peak. Don’t worry if they look uneven—ghosts are supposed to be a little wonky!
- Add Faces (2 minutes): Gently press two mini chocolate chips into each ghost for eyes. If you’re using gel food coloring, you can pipe little mouths now or wait until they’re baked. I prefer doing the eyes before baking—they set into the meringue and don’t fall off.
- Bake (15 minutes): Bake at 200°F for 15 minutes. The meringues should be firm to the touch but not browned. They’ll look matte and dry on the outside. If they start browning, your oven runs hot—open the door for 30 seconds to cool it down.
- Cool in Oven (10 minutes): Turn off the oven and leave the meringues inside with the door cracked open for 10 minutes. This gradual cooling prevents cracking. After 10 minutes, transfer them to a cooling rack to cool completely.
- Final Touch (Optional): If you waited to pipe mouths, do it now with black gel food coloring. Dust with edible glitter if you’re feeling fancy. Let them sit for 5 minutes to set.
Warning: Don’t open the oven during baking! The steam will ruin your meringues. I learned this the hard way—opened the door to check on them, and they deflated like sad little balloons.
Cooking Tips & Techniques
After making these ghost meringue cookies more times than I can count, I’ve collected some hard-earned wisdom. Here’s what I wish someone had told me.
The Humidity Problem: Meringue hates humidity. If it’s a rainy day, your cookies might turn out sticky or weepy. The fix? Bake them a few minutes longer, and store them in an airtight container with a silica gel packet. Yes, those little packets from shoe boxes actually work!
My Biggest Failure: The first time I tried to make these, I used a plastic bowl that had a tiny bit of olive oil residue. The egg whites never whipped past foamy. I stood there for 15 minutes, whisking furiously, getting nowhere. Finally, I realized the problem, washed everything with hot soapy water, dried it with a paper towel, and started over. Worked perfectly. So yeah—cleanliness is next to meringue-ness.
Timing Strategy: On a busy weeknight, I prep the egg whites while dinner is cooking. By the time we’re done eating, the meringues are in the oven. While they bake, I clean up the kitchen. By the time the dishes are done, the cookies are ready. Multitasking at its finest.
Consistency Check: If your meringue starts looking grainy or separates, you’ve overbeaten it. Unfortunately, there’s no fixing this—you have to start over. But this rarely happens if you add sugar slowly and stop at stiff peaks. When in doubt, stop early. Soft peaks are better than grainy meringue.
Professional Trick: Add a teaspoon of cornstarch to the sugar before you start. It absorbs any excess moisture and gives you a more stable meringue. I learned this from a pastry chef friend, and it’s been a game-changer for humid days.
Variations & Adaptations
These ghost meringue cookies are incredibly adaptable. Here are some variations I’ve tried and loved:
Dietary Variations
- Vegan Ghosts: Replace egg whites with aquafaba (chickpea liquid). Use 6 tablespoons for 3 egg whites. The texture is slightly less crisp but still delicious. Add an extra ¼ teaspoon cream of tartar for stability.
- Sugar-Free: Use powdered monk fruit sweetener or erythritol. Note that they won’t get as crisp, and they’ll brown faster, so check them at 12 minutes.
- Nut-Free: These are naturally nut-free, but check your chocolate chips for cross-contamination warnings if you have allergies.
Flavor Twists
- Peppermint Ghosts: Replace vanilla with ½ teaspoon peppermint extract. Crush a candy cane and sprinkle on top before baking.
- Chocolate Ghosts: Sift 1 tablespoon cocoa powder with the sugar for a subtle chocolate flavor. Pipe faces with white chocolate instead of dark.
- Lemon Ghosts: Add 1 teaspoon lemon zest and replace vanilla with lemon extract. The citrus cuts through the sweetness beautifully.
Seasonal Adaptations
- Christmas Snowmen: Pipe round meringues instead of ghosts, stack three per cookie, and decorate with mini chocolate chips for buttons.
- Spring Bunnies: Pipe oval shapes with little ears, use pink gel for noses, and skip the chocolate eyes for a pastel look.
My Personal Favorite: I once made a batch with lavender extract and a drop of purple food coloring. They looked like tiny ghosts from a magical forest. Weirdly specific, but my kids still talk about “the purple ghosts.”
Serving & Storage Suggestions
These ghost meringue cookies are best served at room temperature. They’re delicate but hold their shape well for a few hours on a dessert table.
Serving Temperature: Room temperature is ideal. If you’ve stored them in the fridge, let them sit out for 10 minutes before serving. Cold meringue can be a bit chewy.
Presentation Ideas: Arrange them on a black platter for maximum spooky effect. Add some fake spiderwebs or plastic spiders around them for a Halloween vibe. For a party, I put them in a glass jar with a “Boo!” label—they look adorable and stay fresh.
Complementary Dishes: Serve alongside hot cocoa, coffee, or a glass of cold milk. They also pair beautifully with fresh fruit—the sweetness of the meringue balances tart berries or sliced oranges.
Storage Instructions: Store in an airtight container at room temperature for up to 5 days. Do not refrigerate—the moisture will make them sticky. For longer storage, freeze them in a single layer in a freezer-safe container for up to 3 months. Thaw at room temperature for 15 minutes before serving.
Reheating Tips: If your meringues have softened (which can happen in humid weather), pop them in a 200°F oven for 5 minutes to crisp them back up. Let them cool completely before storing again.
Flavor Development: These actually taste better the next day! The flavors meld together, and the texture becomes perfectly balanced—crisp outside, slightly chewy inside. If you can resist eating them all, they’re even better on day two.
Nutritional Information & Benefits
Per ghost meringue cookie (based on 24 cookies):
- Calories: 35
- Fat: 0g
- Carbohydrates: 8g
- Protein: 1g
- Sugar: 8g
- Sodium: 10mg
Health Benefits: These cookies are naturally low-fat and gluten-free. Egg whites are a great source of protein without the fat of the yolk. They’re also cholesterol-free since we’re only using the whites. The sugar content is moderate for a dessert, and you can easily reduce it by 2 tablespoons without affecting the texture much.
Dietary Considerations: These are naturally gluten-free, low-fat, and nut-free (check your chocolate chips). For a vegan version, use aquafaba. For sugar-free, substitute with monk fruit sweetener. They contain eggs, so they’re not suitable for those with egg allergies.
Personal Wellness Perspective: I love that these cookies let me enjoy a treat without feeling weighed down. They’re light, airy, and satisfying in a way that a heavy cookie isn’t. On a busy weeknight when I’m craving something sweet but don’t want to undo my healthy eating, these are my go-to.
Conclusion
These Quick Halloween Ghost Meringue Cookies are proof that sometimes the best recipes come from happy accidents. They’re quick, easy, and ridiculously fun to make. Whether you’re a seasoned baker or someone who burns toast on the regular, you can pull these off.
I love that this recipe saves my sanity on busy weeknights. No chilling dough, no complicated steps, no fancy ingredients. Just 30 minutes and you’ve got a tray of adorable ghosts that look like you spent hours on them. The kids love helping pipe the ghosts and add the chocolate eyes—it’s become our Halloween tradition.
Don’t be afraid to make them your own. Add different flavors, change up the decorations, or experiment with colors. The beauty of this recipe is how forgiving it is. Even if your ghosts look a little lopsided, they’ll still taste amazing. And honestly, wonky ghosts are way spookier anyway.
I’d love to hear how yours turn out! Drop a comment below with your favorite variation or tag me in your photos. Happy Halloween, and happy baking!
Frequently Asked Questions
Can I make these ghost meringue cookies ahead of time?
Absolutely! These cookies store beautifully for up to 5 days in an airtight container at room temperature. You can also freeze them for up to 3 months. Just make sure they’re completely cool before storing, and don’t refrigerate them—the moisture will ruin the texture.
Why did my meringue turn out sticky?
Sticky meringue usually means humidity or underbaking. If it’s a rainy day, bake them a few minutes longer and store with a silica gel packet. Also, make sure your oven is at the right temperature—an oven thermometer helps if yours runs hot or cold.
Can I use liquid egg whites from a carton?
You can, but I don’t recommend it. Carton egg whites are pasteurized at high temperatures, which affects their ability to whip into stiff peaks. If you must use them, add an extra ¼ teaspoon cream of tartar and expect a slightly less stable meringue.
How do I know when the meringue is whipped enough?
You’re looking for stiff peaks—when you lift the beater, the meringue should stand straight up without drooping. Also, rub a little between your fingers. If it feels smooth and not gritty, the sugar is fully dissolved and you’re good to go.
Can I double this recipe?
Yes, but don’t try to whip more than 6 egg whites at once in a standard mixer. If you need a larger batch, make the recipe twice. Also, your baking time might increase by a few minutes since you’ll have more cookies on the tray.
Pin This Recipe!
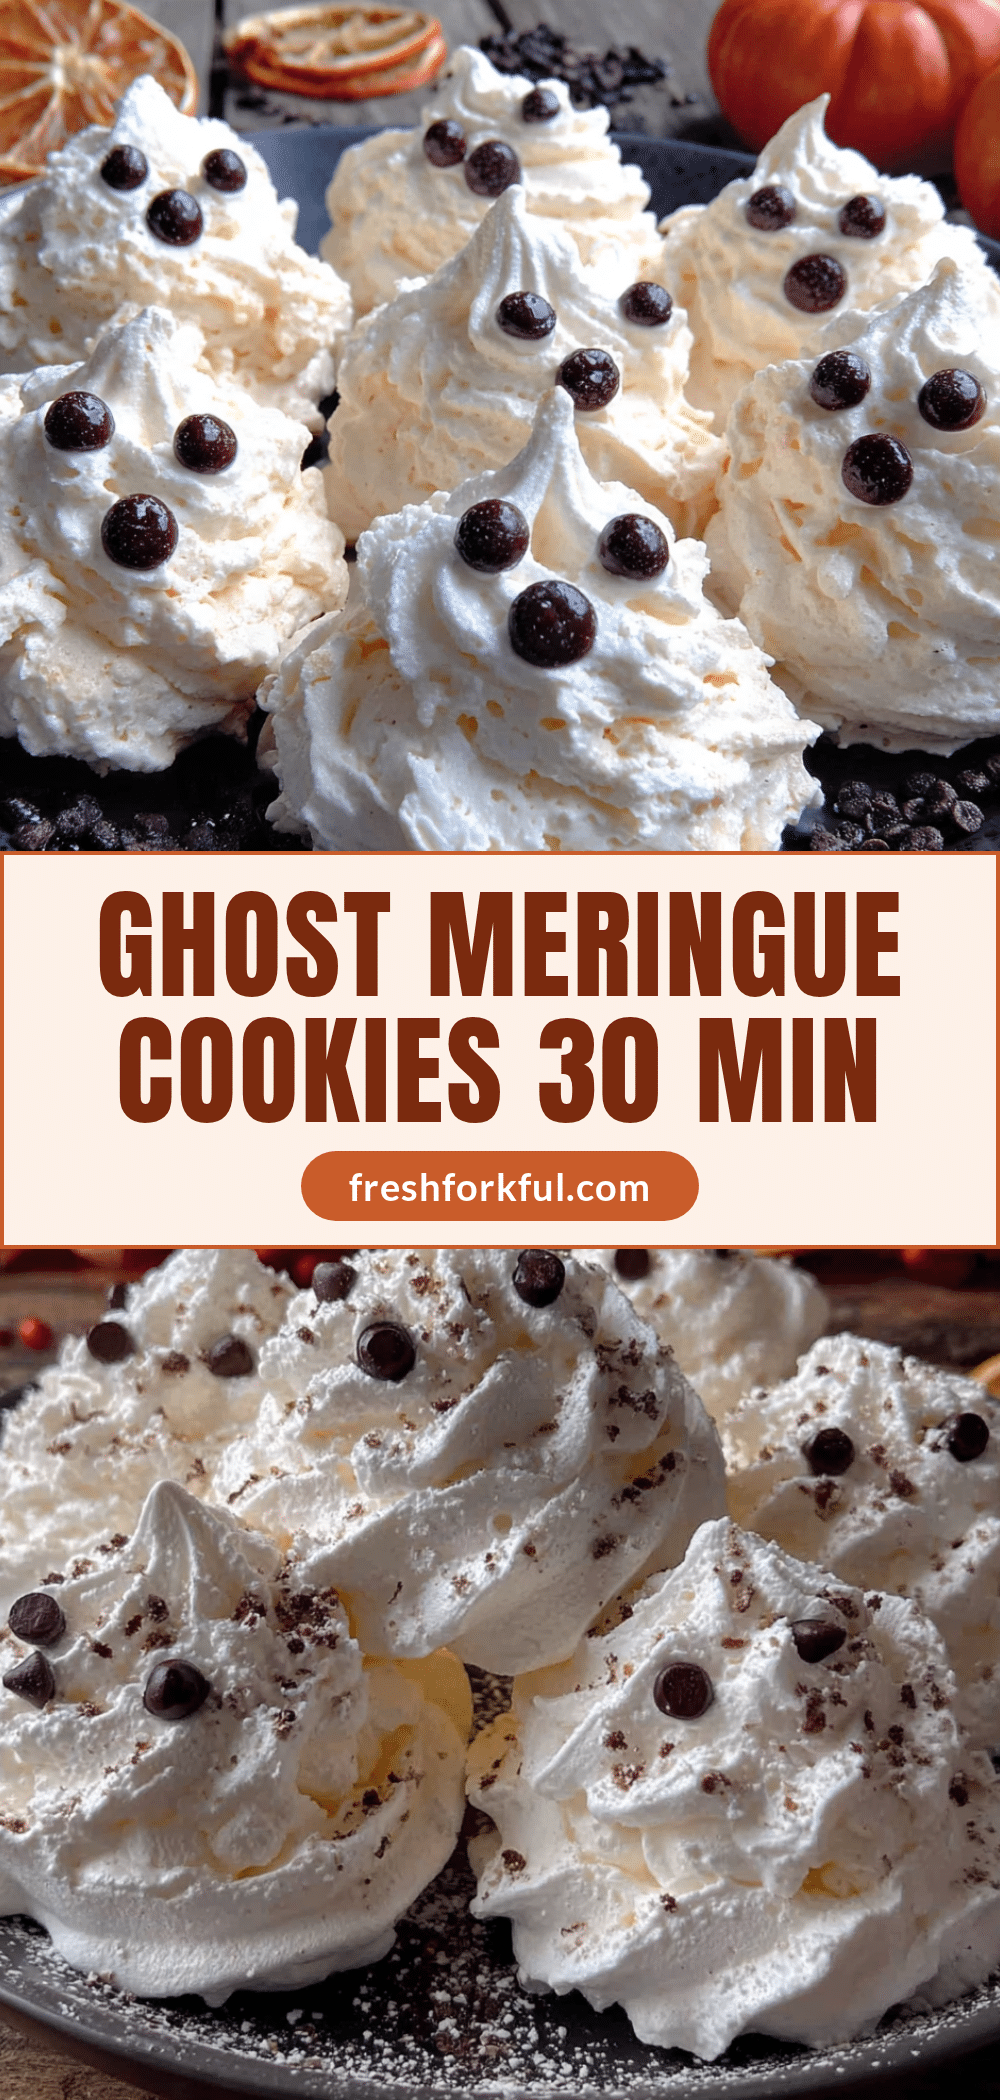
Easy 30-Minute Ghost Meringue Cookies: Perfect Halloween Treat
These quick and easy ghost meringue cookies are a happy accident turned Halloween tradition. Made with simple ingredients in under 30 minutes, they’re light, airy, and perfect for spooky celebrations.
- Prep Time: 15 minutes
- Cook Time: 15 minutes
- Total Time: 30 minutes
- Yield: 24 cookies 1x
- Category: Dessert
- Cuisine: American
Ingredients
- 3 large egg whites, at room temperature
- ¾ cup granulated sugar (180g)
- ¼ teaspoon cream of tartar
- 1 teaspoon vanilla extract (pure)
- Pinch of salt
- 2 tablespoons mini chocolate chips (for eyes)
- Optional: Orange or black gel food coloring (for piped faces)
- Optional: Edible glitter dust (for decoration)
Instructions
- Preheat oven to 200°F (93°C). Line a baking sheet with parchment paper. Ensure bowl and beaters are clean and grease-free.
- Add egg whites and cream of tartar to a clean bowl. Beat on medium speed until foamy, about 1-2 minutes, until small uniform bubbles form.
- With mixer running on medium-high, add sugar one tablespoon at a time, allowing each addition to dissolve fully before adding the next. Beat until thick and glossy, about 3-4 minutes. Test by rubbing a bit between fingers—it should feel smooth, not gritty.
- Add vanilla extract and pinch of salt. Beat on high for 30-60 seconds until stiff peaks form (meringue stands straight up when beater is lifted).
- Transfer meringue to a piping bag fitted with a large round tip. Pipe small mounds onto parchment, about 1.5 inches wide and 2 inches tall, forming tall teardrop shapes with a peak on top.
- Gently press two mini chocolate chips into each ghost for eyes. Optionally pipe mouths with gel food coloring now or after baking.
- Bake at 200°F for 15 minutes. Meringues should be firm to the touch and matte, not browned.
- Turn off oven and leave meringues inside with door cracked open for 10 minutes to cool gradually and prevent cracking.
- Transfer to a cooling rack to cool completely. If desired, pipe mouths with black gel food coloring and dust with edible glitter. Let sit 5 minutes to set.
Notes
Ensure all equipment is completely clean and grease-free. Avoid making meringue on humid days. For vegan version, use aquafaba (6 tablespoons for 3 egg whites). Store in airtight container at room temperature for up to 5 days; do not refrigerate. For longer storage, freeze up to 3 months. If meringues soften, re-crisp in 200°F oven for 5 minutes.
Nutrition
- Serving Size: 1 cookie
- Calories: 35
- Sugar: 8
- Sodium: 10
- Carbohydrates: 8
- Protein: 1
Keywords: Halloween cookies, ghost meringue, easy meringue cookies, quick dessert, gluten-free Halloween treat, low-fat cookies


