Love this? Save it for later!
Share the inspiration with your friends
I was standing in the grocery store produce aisle last October, staring at a pile of clementines, when a specific memory hit me—and suddenly I was seven years old at my Aunt Louise’s kitchen table. She had this way of making ordinary things feel magical, and I remember her sliding a platter toward me that looked like a glowing pumpkin made entirely of fruit. I thought she was some kind of kitchen wizard. Honestly, I didn’t even know you could do that with fruit. I mean, fruit was for eating, not for making art, right?
Let me tell you, I spent a good five minutes just staring at that platter before I even touched a grape. Aunt Louise is gone now, and I don’t have that platter either—it was just a cheap white one from the dollar store. But that moment? That feeling of pure, simple delight? I’ve been chasing it ever since. Maybe you’ve been there, standing in an aisle or opening a pantry door, and a random smell or color just yanks you back to a specific time and place. That’s exactly what happened to me with those clementines.
So I bought a bag of them. And some grapes. And a few other things. I went home, cleared off my counter, and tried to recreate what Aunt Louise had made all those years ago. I messed up the first time—the “stem” kept falling off, and I used too many blueberries so the shape looked more like a lumpy potato. But the second time? It worked. And honestly, it tasted exactly like fall feels. This is that recipe. It’s not fancy, and it doesn’t need to be. It’s just a cozy, beautiful way to bring a little bit of that childhood magic back to your table.
Why You’ll Love This Recipe
This isn’t just another fruit platter. I’ve tested this a few times (and eaten the evidence), and here’s why it’s become my go-to for fall gatherings:
- Quick & Easy: You can put this together in about 15 minutes. No baking, no cooking, no stress. Just wash, arrange, and serve.
- Simple Ingredients: You don’t need to hunt down exotic fruit. Everything on this platter is something you can grab at your regular grocery store. No fancy trips required.
- Perfect for Fall Gatherings: Whether it’s a Halloween party, a Thanksgiving appetizer, or just a cozy Sunday afternoon, this platter fits right in. It’s festive without being over-the-top.
- Crowd-Pleaser: Kids love the fun shape, and adults appreciate the fresh, healthy option. I’ve watched people pick at it all evening, and it always disappears.
- Unbelievably Delicious: The combination of sweet clementines, crisp apples, and juicy grapes is simple but perfect. It’s like a bite of autumn.
What makes this different from other fruit trays? It’s the presentation. Instead of just throwing fruit on a plate, you’re creating a centerpiece. It’s the kind of thing that makes people say, “Wait, you made that?” And the best part? It’s actually easier than it looks. I’m not a professional food stylist—I’m just someone who wanted to make a fun snack for my family. This recipe is proof that you don’t need special skills to create something beautiful.
This platter is comfort food in its purest form. It’s the kind of snack that makes you feel taken care of, even if you’re the one who made it. It’s perfect for those slow fall evenings when all you want is something warm and cozy—but with fruit instead of pie. Trust me, your future self will thank you.
What Ingredients You Will Need
This recipe uses simple, wholesome ingredients to create a stunning visual effect. Most of these are pantry staples during the fall season, and they’re all easy to find. Here’s what you’ll need to build your pumpkin-shaped platter:
- Clementines or Mandarin Oranges (about 10-12): These form the base of your pumpkin shape. Look for ones that are bright orange and firm. I personally prefer the Cuties brand for their consistent size and sweetness. (Pro tip: if you can’t find clementines, small tangerines work just as well.)
- Green Grapes (about 2 cups): These create the “lines” of the pumpkin and add a pop of color. Make sure they’re seedless and firm. I recommend washing them right before you arrange them so they stay crisp.
- Red or Black Grapes (about 1 cup): These add depth and contrast. I like using black grapes for a richer look, but red grapes work great too. Just make sure they’re firm and not too soft.
- Green Apple (1 large): This becomes the “stem” of your pumpkin. A Granny Smith apple works best because of its bright green color and firm texture. (You could also use a cucumber slice if you want a different look.)
- Blueberries (about ½ cup): These fill in any gaps and add a burst of color. I’ve used frozen blueberries in a pinch, but fresh ones hold up better on the platter.
- Strawberries (about 1 cup, optional): These aren’t strictly necessary, but they add a lovely red accent around the edges. I like to slice them in half for a more decorative look.
- Pomegranate Seeds (about ¼ cup, optional): These are like little jewels scattered around the platter. They add a tart pop that balances the sweetness. (If you’re short on time, you can skip these entirely.)
For the base, you’ll need a large round platter or a cutting board. I use a white platter because it makes the colors pop, but any large surface will work. If you don’t have a round platter, you can use a rectangular one and just arrange the fruit in a pumpkin shape in the center.
One thing I’ve learned: don’t stress about the exact amounts. This recipe is forgiving. If you have a few extra clementines, just eat them while you’re arranging. If you run out of grapes, use more blueberries. The goal is to create a shape that looks like a pumpkin, not to follow exact measurements.
Equipment Needed
You don’t need a lot of fancy tools for this recipe, which is part of why I love it. Here’s what you’ll need:
- Large Round Platter or Cutting Board (at least 12 inches in diameter): This is your canvas. I use a plain white ceramic platter because it contrasts nicely with the fruit colors. If you don’t have a round one, a large rectangular cutting board works too—just arrange the fruit in the center.
- Sharp Knife: You’ll need this to slice the apple for the stem and to cut any strawberries. A paring knife works best for precision.
- Cutting Board: For slicing the apple and strawberries. I use a small one to keep things tidy.
- Small Bowl (optional): If you’re using pomegranate seeds, a small bowl makes it easier to sprinkle them without making a mess.
- Paper Towels: For drying the fruit after washing. Wet fruit can make the platter slippery, so pat everything dry before arranging.
I’ve made this platter with just a cutting board and a knife, so don’t worry if you don’t have a fancy platter. I once used a large pizza pan in a pinch, and it worked fine. The key is to have enough surface area to create your pumpkin shape. If you’re using a smaller board, just make a smaller pumpkin—it’s that simple.
Preparation Method
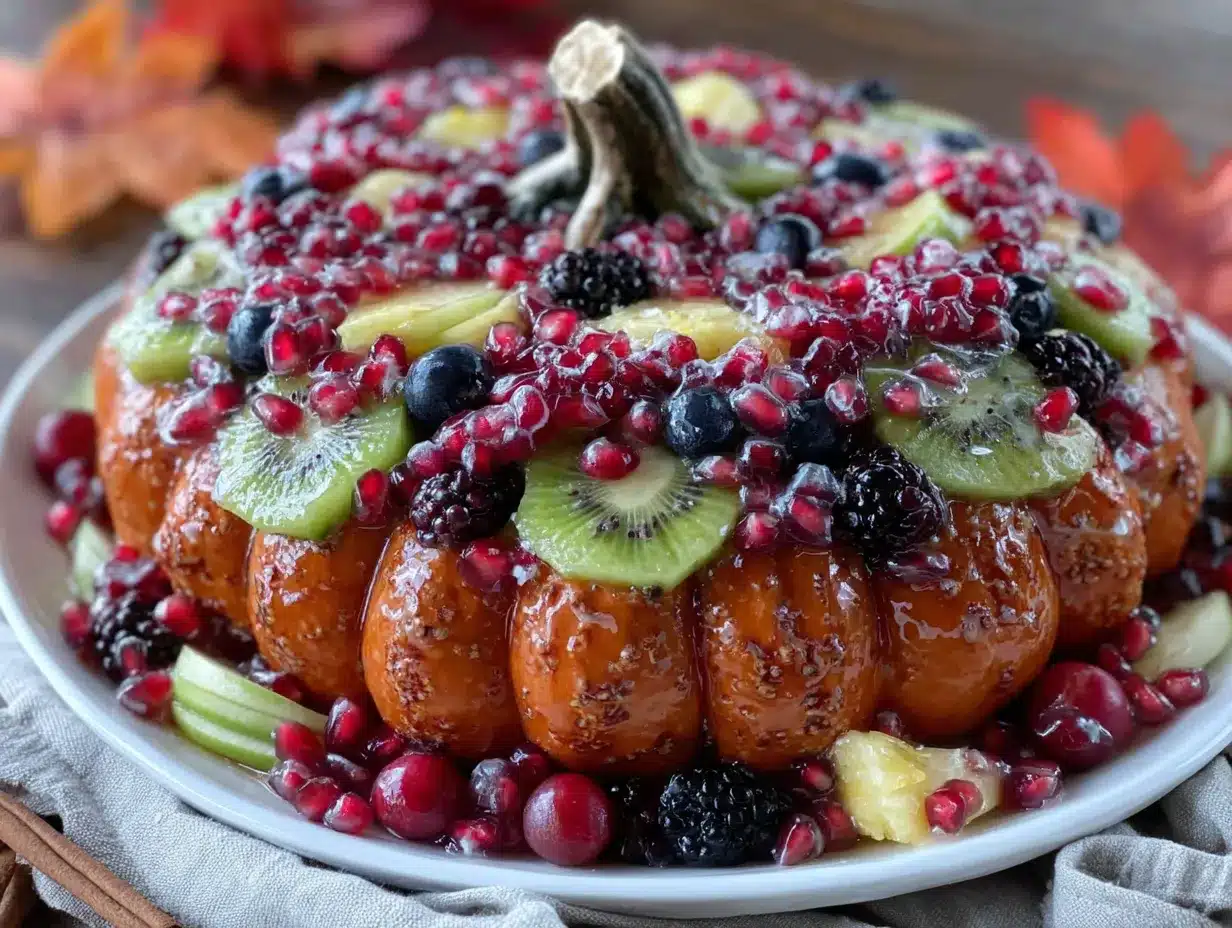
Here’s how to bring your pumpkin-shaped fruit tray to life. Take your time with this—it’s more about arranging than cooking, and that’s the fun part.
- Wash and dry all your fruit (5 minutes): This is the most important step. Rinse the clementines, grapes, apple, blueberries, and strawberries under cool water. Pat them dry with paper towels. Wet fruit doesn’t hold its shape well, and it can make the platter look messy. I learned this the hard way when my first attempt ended up sliding around like a slip ‘n slide.
- Prepare the apple stem (2 minutes): Take your green apple and cut a thin slice from the top, about ¼ inch thick. Then, cut that slice into a stem shape—think of a short, thick rectangle with a slight curve. Set it aside. You’ll place this at the top of your pumpkin later. (Don’t throw away the rest of the apple—eat it while you work!)
- Arrange the clementines as the base (5 minutes): Place your large round platter on the counter. Start arranging the clementines in a circle in the center of the platter, leaving a small gap in the middle. The goal is to create a round, pumpkin-like shape. Don’t worry if it’s not perfect—you’ll fill in the gaps later. I like to start with the largest clementines in the center and work my way out.
- Create the pumpkin “lines” with green grapes (5 minutes): Take your green grapes and place them in rows between the clementines. Imagine the lines of a pumpkin—they should curve slightly from the top to the bottom of the shape. You don’t need to cover every gap; just create a few distinct lines that suggest the pumpkin’s ridges. I usually do 4-5 lines, depending on the size of the platter.
- Fill in gaps with red or black grapes (3 minutes): Now, take your red or black grapes and fill in any remaining spaces between the clementines and the green grape lines. This adds depth and makes the pumpkin look more dimensional. Don’t press the grapes in too hard—just nestle them gently.
- Add the apple stem (1 minute): Place your apple stem slice at the top center of the pumpkin shape. Press it down gently so it stays in place. If it doesn’t stay, you can use a toothpick to secure it—but I’ve found that if you push it into a clementine, it usually holds on its own.
- Decorate with blueberries and strawberries (3 minutes): Sprinkle the blueberries around the edges of the platter, creating a border. If you’re using strawberries, slice them in half and place them cut-side down around the perimeter. This frames the pumpkin and makes it look like a finished centerpiece. I like to add a few pomegranate seeds scattered around for a pop of red.
- Final adjustments (2 minutes): Step back and look at your platter. Are there any obvious gaps? Fill them with extra grapes or blueberries. Is the pumpkin shape clear? If not, gently rearrange the fruit. This is your chance to perfect it. Once you’re happy, it’s ready to serve.
The whole process takes about 15-20 minutes, and honestly, it’s kind of relaxing. I usually put on some music and take my time. The best part is when you step back and see the finished pumpkin—it’s so satisfying.
Cooking Tips & Techniques
I’ve made this platter enough times that I’ve learned a few things the hard way. Here are my best tips for getting it right every time:
- Don’t overcrowd the platter: It’s tempting to use every piece of fruit you bought, but a cluttered platter loses the pumpkin shape. Leave some space between the fruit so the design is clear. Trust me, less is more here.
- Use fruit of similar size: For the clementines, try to pick ones that are roughly the same size. This makes the pumpkin shape more uniform. If you end up with a mix of sizes, use the larger ones in the center and the smaller ones around the edges.
- Dry the fruit thoroughly: I cannot stress this enough. Wet fruit slides around, and it can make the platter look messy. Pat everything dry with paper towels before you start arranging. I once skipped this step, and my pumpkin turned into a fruit avalanche.
- Work from the center out: Start with the clementines in the middle and work your way outward. This helps you maintain the round shape. If you start from the edges, you might end up with a lopsided pumpkin.
- Use a toothpick for the stem if needed: If your apple stem won’t stay in place, use a toothpick to secure it to a clementine. Just break the toothpick in half so it’s not visible. I’ve done this a few times, and it works like a charm.
- Prep everything before you start: Wash and dry all the fruit, slice the apple, and have everything ready to go before you begin arranging. This makes the process smoother and less stressful. I learned this after a few frantic moments of searching for a knife while fruit was rolling off the counter.
One mistake I made early on was using too many grapes. I thought more fruit would look better, but it actually made the pumpkin shape disappear. Now I use just enough grapes to suggest the lines of the pumpkin, and it looks much cleaner. Remember, you’re creating a visual impression, not a literal pumpkin.
Variations & Adaptations
This platter is incredibly versatile, and I’ve tried a few different versions over the years. Here are some ideas to make it your own:
- Seasonal Fruit Swap: In the summer, I’ve used peaches and nectarines instead of clementines. The shape is a bit different, but it’s still beautiful. In the winter, you can use kiwis and pears for a different color palette. The key is to use fruit that’s in season for the best flavor and appearance.
- Dairy-Free Option: This recipe is naturally dairy-free, so no changes needed there. But if you want to add a dip, make sure it’s dairy-free too. I’ve served this with a simple honey-yogurt dip (using coconut yogurt) and it was a hit.
- Gluten-Free Friendly: This platter is naturally gluten-free, so it’s perfect for guests with dietary restrictions. Just make sure any dips or additions are also gluten-free.
- Halloween-Themed Version: For a spooky twist, I’ve added a few “spider” decorations using black grapes and pretzel sticks. You can also use a small knife to carve a jack-o’-lantern face into one of the clementines (just the peel, not the fruit). It’s a fun activity to do with kids.
- Mini Pumpkin Platters: If you’re serving a crowd, make several small pumpkin platters on individual plates. This is great for parties where people can grab their own. I did this for a Halloween potluck, and everyone loved having their own mini pumpkin.
- Sweet and Savory Combo: Add a small bowl of cheese cubes or nuts in the center of the platter for a sweet and savory combination. I’ve used sharp cheddar and almonds, and it pairs beautifully with the fruit.
My personal favorite variation is the fall-themed version where I add a few cinnamon sticks around the edges and a small bowl of caramel dip in the center. It turns the platter into a full dessert experience. Just be careful not to overpower the fruit—the pumpkin shape should still be the star.
Serving & Storage Suggestions
This platter is best served fresh, but with a few tips, you can make it ahead of time. Here’s what I’ve learned:
- Serve at room temperature: Fruit tastes best when it’s not straight out of the fridge. Let the platter sit at room temperature for about 15 minutes before serving. This brings out the natural sweetness of the fruit.
- Presentation matters: Place the platter in the center of your table or buffet. It’s a centerpiece, so give it some space. I like to surround it with a few fall leaves or small pumpkins for extra decoration.
- Complementary dishes: This platter pairs beautifully with a warm apple cider or a pumpkin spice latte. For a savory option, serve it alongside a cheese board or a bowl of spiced nuts. The sweetness of the fruit balances the saltiness of the cheese.
- Storage instructions: If you have leftovers, transfer the fruit to an airtight container and store it in the refrigerator. The platter itself won’t hold up well because the fruit will start to dry out. I usually store the fruit separately and reassemble it the next day if needed.
- Reheating tips: You don’t need to reheat this—it’s served cold or at room temperature. But if you want to refresh the fruit, you can give the grapes and apples a quick rinse in cold water and pat them dry.
- How flavors develop: The fruit will release some juices as it sits, which can make the platter look a bit messy after a few hours. That’s why I recommend assembling it no more than 2 hours before serving. The flavors are best when the fruit is fresh and crisp.
One thing I love about this platter is that it’s forgiving. Even if it sits out for a while, the fruit is still delicious. Just don’t leave it out for more than 2 hours at room temperature, especially if you’re using cut fruit like apples or strawberries.
Nutritional Information & Benefits
This platter is packed with vitamins and antioxidants, making it a healthy choice for any gathering. Here’s a rough estimate of the nutritional value per serving (about 1 cup of fruit):
- Calories: Approximately 80-100 calories per serving
- Carbohydrates: 20-25 grams (mostly natural sugars from the fruit)
- Fiber: 3-4 grams (from the clementines, apples, and grapes)
- Vitamin C: 50-60% of the daily recommended intake (from the clementines and strawberries)
- Potassium: 200-300 mg (from the bananas and grapes)
- Antioxidants: High levels from the blueberries and pomegranate seeds
The health benefits of this platter are impressive. Clementines are packed with vitamin C, which supports your immune system—perfect for the fall season. Blueberries are rich in antioxidants that help fight inflammation. Grapes contain resveratrol, which is great for heart health. And apples provide fiber that aids digestion.
This platter is also naturally low in fat and sodium, making it a guilt-free snack. If you’re watching your sugar intake, you can swap the sweeter fruits for more tart options like green apples or kiwi. It’s a versatile, healthy option that fits into most dietary plans.
From a wellness perspective, I love that this platter encourages mindful eating. The beautiful presentation makes you slow down and enjoy each bite, rather than mindlessly snacking. It’s a small way to bring more intention to your meals.
Conclusion
This cozy pumpkin-shaped fruit tray platter is more than just a snack—it’s a little piece of fall magic. It’s the kind of thing that makes people smile when they see it, and that’s exactly why I love making it. Whether you’re serving it at a Halloween party, a Thanksgiving dinner, or just a quiet evening at home, it brings a sense of warmth and joy that’s hard to beat.
I encourage you to make this your own. Change up the fruit, add a dip, or try a different shape. The beauty of this recipe is that it’s a canvas for your creativity. And honestly, even if it doesn’t look perfect, it will still taste amazing. That’s the thing about fruit—it’s always delicious.
I’d love to hear how your platter turns out. Did you try a different fruit combination? Did your kids help you arrange it? Share your experience in the comments below—I read every single one. And if you loved this recipe, don’t forget to pin it for later or share it with a friend who needs a little fall inspiration.
Until next time, happy snacking!
Frequently Asked Questions
Can I make this platter ahead of time?
Yes, but I recommend assembling it no more than 2 hours before serving. If you need to prep ahead, wash and dry all the fruit and store it in the refrigerator. Then arrange the platter just before your guests arrive. The fruit stays fresher this way, and the presentation looks better.
What if I can’t find clementines?
No problem! You can use small tangerines, mandarin oranges, or even cuties. The key is to use fruit that’s roughly the same size and shape. If you use larger oranges, just adjust the size of your pumpkin accordingly. I’ve even used halved kiwis in a pinch, and it looked great.
How do I keep the apple stem from falling off?
If the stem doesn’t stay in place on its own, use a toothpick to secure it. Break the toothpick in half so it’s not visible, and gently push it through the apple slice into a clementine. This holds it firmly in place. Just remember to remove the toothpick before serving if you’re worried about it.
Can I use frozen fruit?
I don’t recommend it. Frozen fruit releases water as it thaws, which can make the platter soggy and messy. Fresh fruit holds its shape better and looks more vibrant. If you’re in a pinch, you can use frozen blueberries that have been fully thawed and patted dry, but fresh is always best.
How many people does this platter serve?
This depends on the size of your platter and how much fruit you use. A standard 12-inch platter with the amounts listed above serves about 8-10 people as a snack. If you’re serving it as a dessert or alongside other dishes, it might serve more. I usually make one large platter for a party of 10-12, and there are rarely leftovers.
Pin This Recipe!
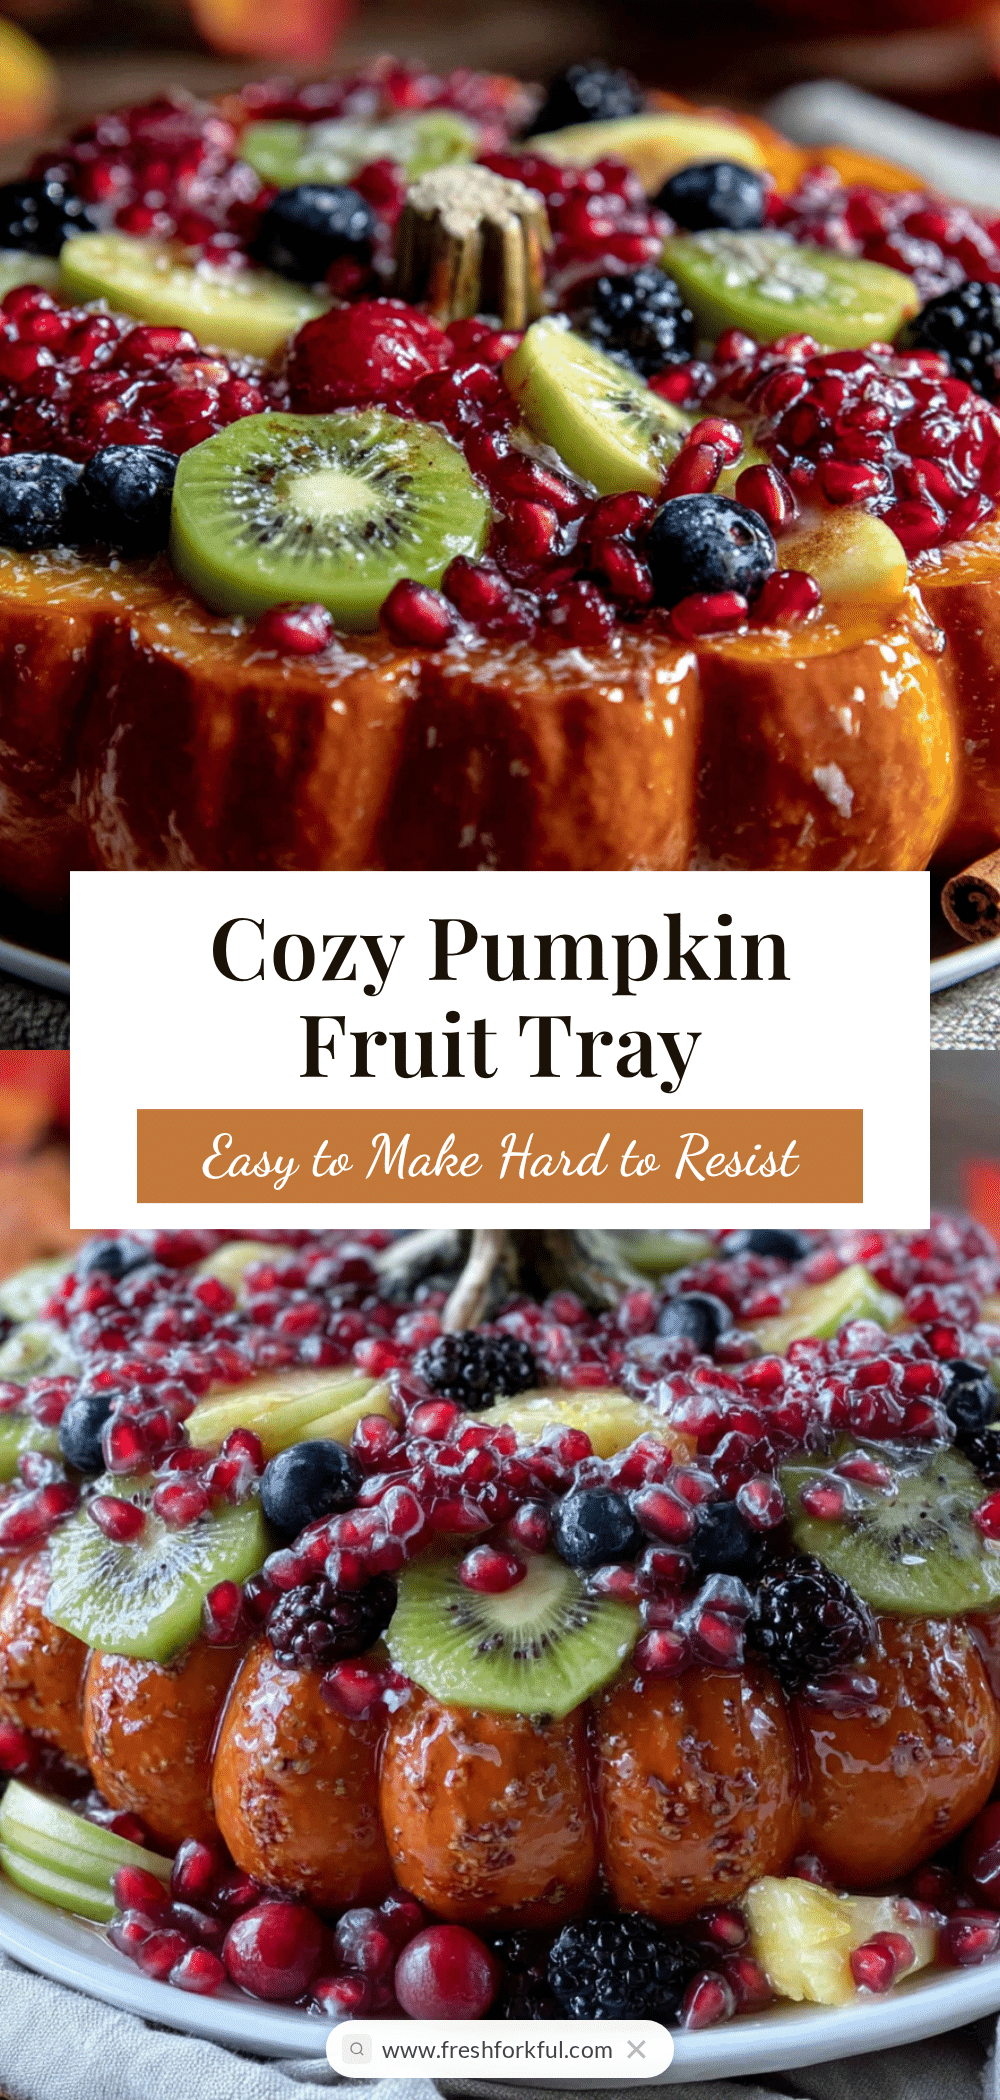
Cozy Pumpkin-Shaped Fruit Tray Platter: Easy Fall Snack
Create a stunning pumpkin-shaped fruit platter that’s perfect for fall gatherings. This easy, no-cook recipe uses simple ingredients to make a beautiful centerpiece that kids and adults will love.
- Prep Time: 15 minutes
- Cook Time: 0 minutes
- Total Time: 15 minutes
- Yield: 8-10 servings 1x
- Category: Appetizer
- Cuisine: American
Ingredients
- 10–12 clementines or mandarin oranges
- 2 cups green grapes
- 1 cup red or black grapes
- 1 large green apple (Granny Smith recommended)
- ½ cup blueberries
- 1 cup strawberries (optional)
- ¼ cup pomegranate seeds (optional)
Instructions
- Wash and dry all fruit thoroughly with paper towels.
- Cut a thin slice from the top of the green apple, about ¼ inch thick, and shape it into a stem-like rectangle with a slight curve. Set aside.
- Place a large round platter on the counter. Arrange clementines in a circle in the center, leaving a small gap in the middle to create a pumpkin-like shape.
- Place green grapes in rows between the clementines, curving slightly from top to bottom to create 4-5 pumpkin ridge lines.
- Fill remaining gaps with red or black grapes, nesting them gently.
- Place the apple stem slice at the top center of the pumpkin shape, pressing gently to secure.
- Sprinkle blueberries around the edges of the platter. If using strawberries, slice them in half and place cut-side down around the perimeter.
- Optionally scatter pomegranate seeds around the platter for added color. Step back and adjust any gaps or shape issues before serving.
Notes
Don’t overcrowd the platter; leave space for the pumpkin shape to be clear. Use fruit of similar size for uniformity. Dry fruit thoroughly to prevent sliding. Work from the center outward. If the apple stem won’t stay, use a toothpick to secure it. Prep all ingredients before arranging. Best assembled no more than 2 hours before serving.
Nutrition
- Serving Size: 1 cup of fruit
- Calories: 80100
- Sugar: 1520
- Carbohydrates: 2025
- Fiber: 34
- Protein: 1
Keywords: pumpkin fruit platter, fall snack, fruit tray, Halloween appetizer, Thanksgiving fruit platter, easy fruit arrangement, healthy snack


