Love this? Save it for later!
Share the inspiration with your friends
It was 11:47 PM on a rainy Tuesday in late September, and I had that specific kind of hunger that only hits when the air turns cold and the house is quiet. I didn’t have the energy for a proper grocery run, but I had a pack of bone-in chicken thighs in the fridge and a bottle of honey that was almost empty. The idea that arrived was simple, maybe too simple — honey, garlic, soy sauce, and a hot skillet. I figured I’d throw it together, eat it standing over the counter, and go to bed. What I didn’t expect was that this late-night experiment would become my most-requested fall dinner.
The thing about cooking at odd hours is that you stop overthinking. You don’t worry about whether something is fancy enough or whether the flavors are “balanced.” You just go with your gut. And my gut was screaming for something sweet, savory, and deeply comforting. So I let the chicken thighs sizzle in a hot pan until the skin turned that impossible shade of golden brown, then I poured in a sticky mixture of honey, garlic, and soy sauce. The smell that filled my kitchen was honestly ridiculous — like a warm hug you can taste.
Maybe you’ve been there, standing in front of your fridge at night, wondering what to make with the odds and ends you have on hand. This recipe was born from exactly that kind of moment. And let me tell you, it’s the kind of dish that makes you wonder why you ever bother with complicated recipes in the first place. The honey caramelizes into a glaze that coats every inch of the chicken, the garlic gets soft and sweet, and the soy sauce adds just enough salt to keep everything in check. It’s fall on a plate, and it only takes about 30 minutes from start to finish.
I’ve made this recipe at least a dozen times since that rainy Tuesday night, and it never gets old. It’s become my go-to for those evenings when I need something that feels like a hug without spending hours in the kitchen. And honestly, it’s the kind of dish that tastes even better the next day — if you have any left, that is.
Why You’ll Love This Recipe
Let me be honest with you — I’ve tested this recipe more times than I can count, and each time I’m surprised by how something so simple can be so satisfying. As someone who’s spent years in the kitchen developing recipes, I can tell you that this one checks every box for a perfect fall dinner.
- Quick & Easy: From start to finish, you’re looking at about 30 minutes. The active prep time is maybe 10 minutes, and then you just let the oven or stovetop do the work. Perfect for those busy weeknights when you want something homemade but don’t have hours to spare.
- Simple Ingredients: You probably have most of these in your pantry right now. Honey, garlic, soy sauce, chicken thighs — that’s it. No fancy grocery trips required, and no obscure ingredients that you’ll use once and forget about.
- Perfect for Fall: This dish was made for those crisp autumn evenings when you want something warm and comforting. The honey and garlic combination is pure seasonal magic — sweet enough to feel indulgent but savory enough to be a proper dinner.
- Crowd-Pleaser: I’ve served this to picky eaters, foodie friends, and everyone in between. The response is always the same — people go back for seconds, and they always ask for the recipe.
- Unbelievably Delicious: The texture is what gets me every time. The skin gets crispy and crackly, while the meat underneath stays juicy and tender. And that glaze? It’s sticky, sweet, savory, and absolutely irresistible.
What makes this recipe different from all the other honey garlic chicken recipes out there? It’s the technique. Most recipes rush the browning step, but I take the time to get that skin perfectly crispy before adding the glaze. That extra few minutes makes all the difference between good chicken and unforgettable chicken. Plus, I’ve dialed in the honey-to-garlic ratio through countless tests — it’s the perfect balance of sweet and savory without being cloying.
This is the kind of recipe that makes you close your eyes after the first bite. It’s comfort food reimagined — faster, simpler, but with the same soul-soothing satisfaction that you expect from a fall dinner. Whether you’re cooking for your family or just for yourself, this dish delivers every single time.
What Ingredients You Will Need
This recipe uses simple, wholesome ingredients that come together to create something truly special. Most of these are pantry staples, which means you can whip up this dish anytime the craving strikes without a special trip to the store.
For the Chicken
- 4 bone-in, skin-on chicken thighs (about 1.5 lbs total) — The bone keeps the meat juicy, and the skin gets beautifully crispy. I prefer organic chicken from a local farm when I can get it, but any good-quality chicken works fine.
- 1 teaspoon salt — I use kosher salt for its clean flavor and easy handling. Diamond Crystal is my go-to brand.
- ½ teaspoon black pepper — Freshly ground is always better, but pre-ground works in a pinch.
- 1 tablespoon olive oil — For searing the chicken. Avocado oil works too, but I like the subtle flavor of olive oil here.
For the Honey Garlic Glaze
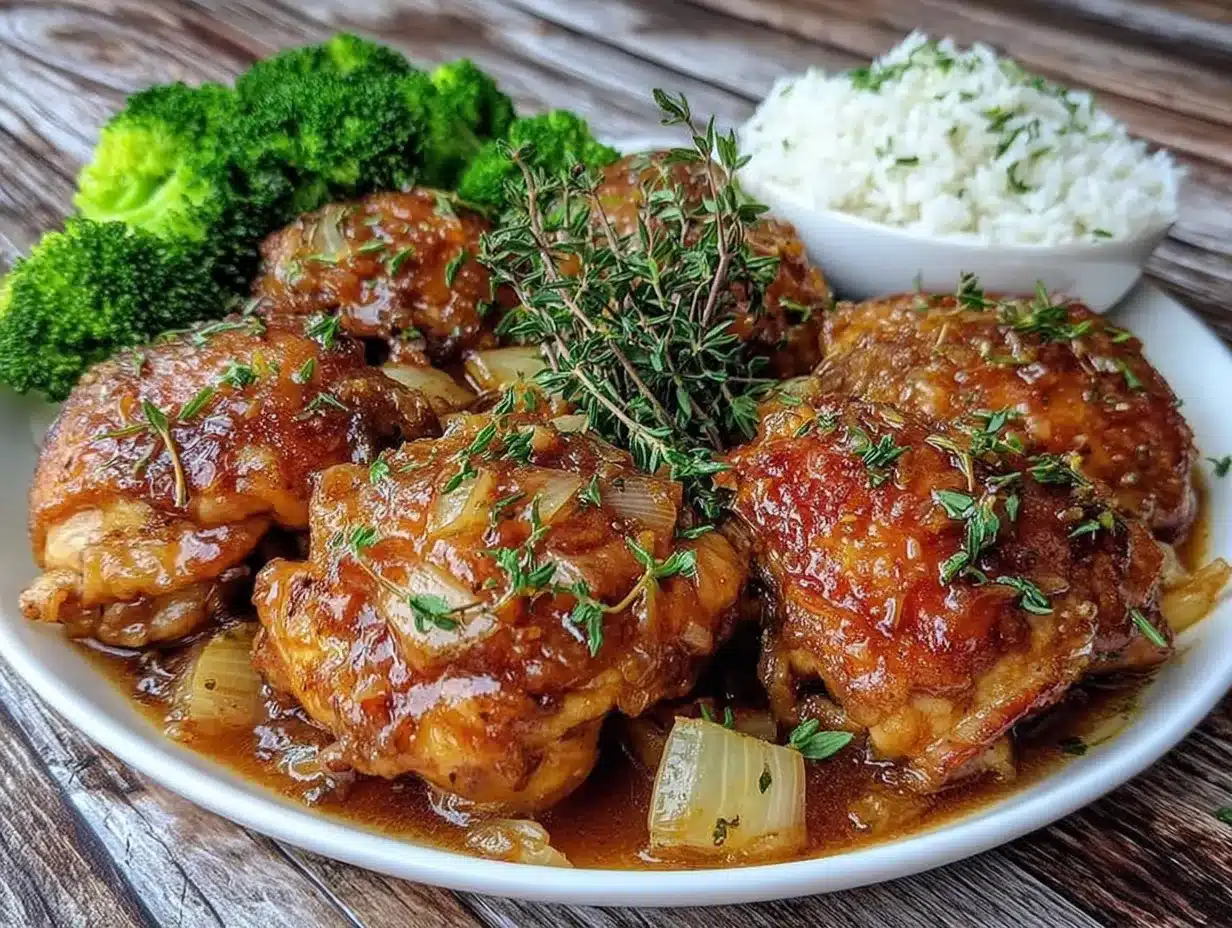
- ¼ cup honey — Use a good-quality honey here. The flavor really comes through, so avoid the cheap stuff that tastes like sugar syrup. Local honey is amazing if you can find it.
- 4 cloves garlic, minced — Fresh garlic is non-negotiable here. The jarred stuff just doesn’t have the same punch. I like to mince it finely so it melts into the glaze.
- 3 tablespoons soy sauce — I use low-sodium soy sauce to control the salt level. Tamari or coconut aminos work great for gluten-free options.
- 1 tablespoon rice vinegar — This adds a subtle brightness that balances the sweetness. Apple cider vinegar works as a substitute.
- 1 tablespoon brown sugar — This helps the glaze caramelize and adds depth. You can skip it if you want, but it really makes a difference in the final texture.
- 1 teaspoon sesame oil — Optional but highly recommended. It adds a lovely nutty flavor that complements the honey and garlic.
For Garnish (Optional but Recommended)
- Sesame seeds — Toasted white or black sesame seeds add a nice visual touch and a subtle crunch.
- Chopped green onions — Fresh scallions add a pop of color and a mild onion flavor that cuts through the richness.
- Fresh cilantro or parsley — A handful of fresh herbs brightens up the dish and adds freshness.
One thing I learned through trial and error — don’t skip the step of patting the chicken dry before seasoning. It seems like a small thing, but it’s the key to getting that perfectly crispy skin. Also, if you’re using a non-stick pan, you might need to adjust the heat slightly to get good browning. Cast iron or stainless steel gives you the best results.
Equipment Needed
You don’t need a lot of fancy equipment for this recipe, which is one of the reasons I love it. Here’s what you’ll need:
- Large oven-safe skillet — Cast iron is ideal because it holds heat beautifully and gives you that perfect sear. A 10- or 12-inch skillet works well. If you don’t have cast iron, any heavy-bottomed oven-safe pan will do. I’ve used my trusty Lodge cast iron skillet for this recipe more times than I can count, and it never lets me down.
- Tongs — For flipping the chicken and handling it during the cooking process. I prefer metal tongs with silicone tips for a good grip.
- Small bowl — For mixing the glaze ingredients together before adding them to the pan.
- Meat thermometer — This is optional but highly recommended. Chicken thighs are done when they reach 165°F internally, but I find they’re even better at 175-180°F — the extra heat breaks down the connective tissue and makes the meat incredibly tender.
- Cutting board and knife — For mincing the garlic and prepping any garnishes.
- Paper towels — For patting the chicken dry. This step is crucial for crispy skin, so don’t skip it.
If you don’t have an oven-safe skillet, you can transfer the chicken to a baking dish after searing and finish it in the oven. Budget-friendly options like a stainless steel pan from IKEA or a basic non-stick skillet work just fine — just be careful with high heat to avoid damaging the coating.
Preparation Method
Let me walk you through this step by step. I’ve made this recipe so many times that I could do it in my sleep, but I want to make sure you get the same amazing results on your first try.
- Prep the chicken (5 minutes): Start by patting the chicken thighs dry with paper towels. This is absolutely crucial — wet skin won’t crisp up, and you’ll end up with sad, soggy chicken. Season both sides generously with salt and pepper. Let them sit at room temperature for about 10 minutes while you prep the other ingredients.
- Make the glaze (2 minutes): In a small bowl, whisk together the honey, minced garlic, soy sauce, rice vinegar, brown sugar, and sesame oil. Set it aside. The smell alone should tell you this is going to be good.
- Preheat your oven (2 minutes): Set your oven to 400°F (200°C). If you’re using a convection oven, 375°F works well too.
- Sear the chicken (8-10 minutes): Heat your large oven-safe skillet over medium-high heat. Add the olive oil and swirl to coat the pan. When the oil is shimmering (but not smoking), carefully place the chicken thighs skin-side down. Here’s the key — don’t move them. Let them cook undisturbed for 5-6 minutes until the skin is deep golden brown and crispy. You’ll know it’s ready when the skin releases easily from the pan. If it sticks, give it another minute. Flip the chicken and cook for another 2-3 minutes on the other side.
- Add the glaze (1 minute): Pour the honey garlic mixture over the chicken thighs. Let it bubble and reduce for about 30 seconds, spooning some of the glaze over the tops of the chicken. The smell at this point is absolutely intoxicating — sweet, savory, with that garlicky punch.
- Finish in the oven (10-15 minutes): Transfer the skillet to the preheated oven. Roast for 10-15 minutes, depending on the size of your chicken thighs. The chicken is done when it reaches an internal temperature of 165°F, but I like to take it to 175-180°F for extra tenderness. The glaze should be bubbly and caramelized.
- Rest and serve (5 minutes): Remove the skillet from the oven and let the chicken rest for 5 minutes. This allows the juices to redistribute and the glaze to set slightly. Spoon any remaining glaze from the pan over the chicken. Garnish with sesame seeds and chopped green onions if you’re feeling fancy.
A few things I’ve learned the hard way: Don’t crowd the pan when searing. If your skillet is too small, cook the chicken in batches. Overcrowding lowers the pan temperature and you’ll end up steaming instead of searing. Also, keep an eye on the glaze in the oven — honey can burn quickly if the heat is too high. If you notice the glaze getting too dark, tent the pan with foil for the last few minutes.
Cooking Tips & Techniques
After making this recipe more times than I care to count, I’ve picked up a few tricks that make a real difference. Let me share them with you.
The secret to crispy skin: Patting the chicken dry is step one, but here’s something most recipes don’t tell you — let the seasoned chicken sit uncovered in the fridge for an hour before cooking. This dries out the skin even more, giving you that crackly, glass-like texture. If you’re short on time, just pat it dry really well and let it sit at room temperature for 10 minutes.
Don’t rush the sear: I know it’s tempting to flip the chicken early, but patience pays off here. Let that skin get deep golden brown before you touch it. If you flip too soon, the skin will tear and you’ll lose that beautiful crispy texture. Trust the process — the chicken will tell you when it’s ready by releasing easily from the pan.
Watch the heat: Honey burns faster than you think. When you add the glaze to the pan, keep the heat at medium rather than high. You want the glaze to bubble and reduce, not turn into a sticky, burnt mess. If you’re using an electric stove, you might need to adjust the temperature down a notch.
Use a meat thermometer: I learned this one the hard way after serving dry chicken one too many times. Chicken thighs are more forgiving than breasts, but they still have a sweet spot. For the juiciest results, cook to 175-180°F. The extra few degrees break down the connective tissue and make the meat incredibly tender.
Double the glaze: This is my favorite pro tip. Make extra glaze and save half for serving. Pour it over rice or mashed potatoes alongside the chicken, and you’ll have a meal that feels restaurant-quality. Just be sure to boil any extra glaze for at least 30 seconds before serving to ensure food safety.
One mistake I still make: Every now and then, I get distracted and forget to check the chicken until the glaze has gone from golden to almost-burnt. If this happens to you, don’t panic. Just remove the chicken from the pan and deglaze with a splash of water or chicken broth. The burnt bits will loosen, and you can stir them into the sauce for a deeper, more complex flavor. It’s not ideal, but it’s salvageable.
Variations & Adaptations
One of the best things about this recipe is how versatile it is. Here are some ways to make it your own.
Dietary Variations:
- Gluten-Free: Swap the soy sauce for tamari or coconut aminos. Everything else in the recipe is naturally gluten-free, so you’re good to go.
- Low-Carb/Keto: Replace the honey with a sugar-free honey substitute or use a combination of monk fruit sweetener and a little water. The texture won’t be exactly the same, but the flavor is still fantastic.
- Dairy-Free: This recipe is already dairy-free! Just make sure your butter alternative (if using) is plant-based.
Flavor Twists:
- Spicy Honey Garlic: Add ½ teaspoon of red pepper flakes or a minced Thai chili to the glaze for a sweet-heat combo that’s absolutely addictive.
- Ginger Honey Garlic: Grate a 1-inch piece of fresh ginger into the glaze. The ginger adds a warm, spicy note that’s perfect for fall.
- Citrus Honey Garlic: Add the zest of one orange or lemon to the glaze. The citrus brightens up the dish and cuts through the richness beautifully.
Different Cuts of Chicken:
- Chicken breasts: Use boneless, skinless breasts and reduce the cooking time to 15-20 minutes total. Pound them to even thickness first for consistent cooking.
- Chicken drumsticks: These work great with the same glaze. Increase the cooking time by 5-10 minutes since drumsticks are thicker.
- Chicken wings: Make these as an appetizer by tossing crispy baked wings in the honey garlic glaze. Bake at 400°F for 40-45 minutes, then toss with the glaze.
My personal variation: I once added a splash of bourbon to the glaze on a whim, and it was life-changing. The bourbon adds a smoky sweetness that pairs perfectly with the honey. If you try this, add the bourbon when you add the glaze and let it cook off for about a minute before transferring to the oven.
Serving & Storage Suggestions
This dish is incredibly versatile when it comes to serving. Here’s how I like to enjoy it.
Serving Temperature and Presentation: Serve the chicken hot from the oven, with extra glaze spooned over the top. I like to arrange the thighs on a platter and drizzle the remaining glaze over them, then sprinkle with sesame seeds and green onions. The contrast of the dark, glossy glaze against the white sesame seeds is gorgeous.
Perfect Pairings:
- Rice: Steamed jasmine rice or sticky rice is the perfect vehicle for all that extra glaze. The rice soaks up the sweet-savory sauce beautifully.
- Roasted Vegetables: Roasted broccoli, Brussels sprouts, or butternut squash make excellent sides. The caramelized vegetables complement the honey glaze perfectly.
- Mashed Potatoes: Creamy mashed potatoes are a classic pairing. The honey garlic sauce acts like a gravy, and the combination is pure comfort food.
- Simple Salad: A crisp green salad with a tangy vinaigrette cuts through the richness of the chicken and adds freshness to the meal.
Storage Instructions: Store leftover chicken in an airtight container in the refrigerator for up to 4 days. The flavors actually deepen and meld together overnight, so leftovers are often even better the next day. To reheat, place the chicken in a 350°F oven for 10-15 minutes, or until warmed through. You can also reheat in a skillet over medium heat with a splash of water to loosen the glaze.
Freezing: This recipe freezes beautifully. Let the chicken cool completely, then place it in a freezer-safe container with the glaze. Freeze for up to 3 months. To thaw, transfer to the refrigerator overnight and reheat as directed above.
Flavor Development: Here’s something interesting — the honey garlic glaze continues to develop flavor as it sits. The garlic mellows out, the honey gets deeper, and the soy sauce becomes more pronounced. I actually prefer the leftovers to the fresh dish sometimes. The chicken stays juicy, and the sauce becomes this incredible, complex glaze that’s even better the next day.
Nutritional Information & Benefits
While this dish feels indulgent, it actually has some surprising nutritional benefits. Here’s a rough breakdown per serving (based on 4 servings with bone-in, skin-on thighs):
| Nutrient | Amount per Serving |
|---|---|
| Calories | 420 |
| Protein | 32g |
| Fat | 22g |
| Saturated Fat | 6g |
| Carbohydrates | 22g |
| Sugar | 19g |
| Sodium | 780mg |
| Fiber | 0g |
Health Benefits: Chicken thighs are a great source of protein, iron, and B vitamins, which support energy metabolism and immune function. The bone-in cut also provides collagen and gelatin, which are beneficial for joint health and skin elasticity. Honey is a natural source of antioxidants and has antimicrobial properties, while garlic is well-known for its immune-boosting and anti-inflammatory benefits. The olive oil provides heart-healthy monounsaturated fats.
Dietary Considerations: This recipe is naturally dairy-free and nut-free. For a gluten-free version, simply use tamari instead of soy sauce. For a lower-sodium option, use low-sodium soy sauce and reduce the added salt. The sugar content comes primarily from honey, so if you’re watching your sugar intake, you can reduce the honey to 3 tablespoons or use a sugar-free alternative.
My perspective: I believe in balance. This dish isn’t health food, but it’s made with real, whole ingredients that nourish your body and soul. The protein keeps you full, the healthy fats support hormone function, and the satisfaction factor is through the roof. Sometimes, the healthiest thing you can do is enjoy a meal that makes you happy.
Conclusion
This cozy honey garlic chicken thighs recipe has become a staple in my kitchen for good reason. It’s the kind of dish that proves you don’t need complicated techniques or fancy ingredients to create something truly memorable. With just a handful of pantry staples and about 30 minutes, you can have a dinner that tastes like you spent hours in the kitchen.
What I love most about this recipe is how adaptable it is. Make it spicy, make it citrusy, or keep it classic — it works every time. It’s perfect for those busy fall weeknights when you want something warm and comforting without a lot of fuss. And honestly, it’s the kind of dish that makes you feel like a really good cook, even on days when you’re just going through the motions.
I’d love to hear how this recipe turns out for you. Did you try any of the variations? Did you discover a new favorite side dish to serve with it? Drop a comment below and let me know — I read every single one, and I love hearing about your kitchen adventures. And if you’re looking for more fall dinner ideas, check out my creamy pumpkin pasta or these maple glazed Brussels sprouts for the perfect seasonal meal.
Until next time, happy cooking — and don’t forget to save that extra glaze for your rice!
Frequently Asked Questions
Can I use boneless, skinless chicken thighs instead?
Absolutely! Boneless, skinless thighs will cook faster — about 15-20 minutes total. Just skip the searing step for the skin and go straight to browning the meat. The glaze will still be delicious, though you’ll miss out on that crispy skin texture.
How do I prevent the honey from burning?
Keep the heat at medium rather than high when you add the glaze. If you’re finishing in the oven, keep an eye on it after 10 minutes. If the glaze starts looking too dark, tent the pan with foil. Also, make sure your honey isn’t too thin — thick, high-quality honey caramelizes more evenly.
Can I make this recipe in advance?
Yes! You can prepare the glaze up to 3 days ahead and store it in the refrigerator. You can also cook the chicken completely, then reheat it in a 350°F oven for 10-15 minutes. The flavors actually improve overnight, so this is a great make-ahead meal.
What’s the best way to reheat leftovers?
The oven is your best bet. Place the chicken in a 350°F oven for 10-15 minutes, or until warmed through. You can also reheat in a skillet over medium heat with a splash of water to loosen the glaze. Avoid the microwave if possible — it tends to make the chicken rubbery and the glaze sticky.
Can I double this recipe for a crowd?
Definitely! Just make sure you don’t overcrowd the pan when searing. Cook the chicken in batches if needed, then transfer everything to a large baking dish before finishing in the oven. You might need to increase the oven time by 5-10 minutes for a larger batch.
Pin This Recipe!
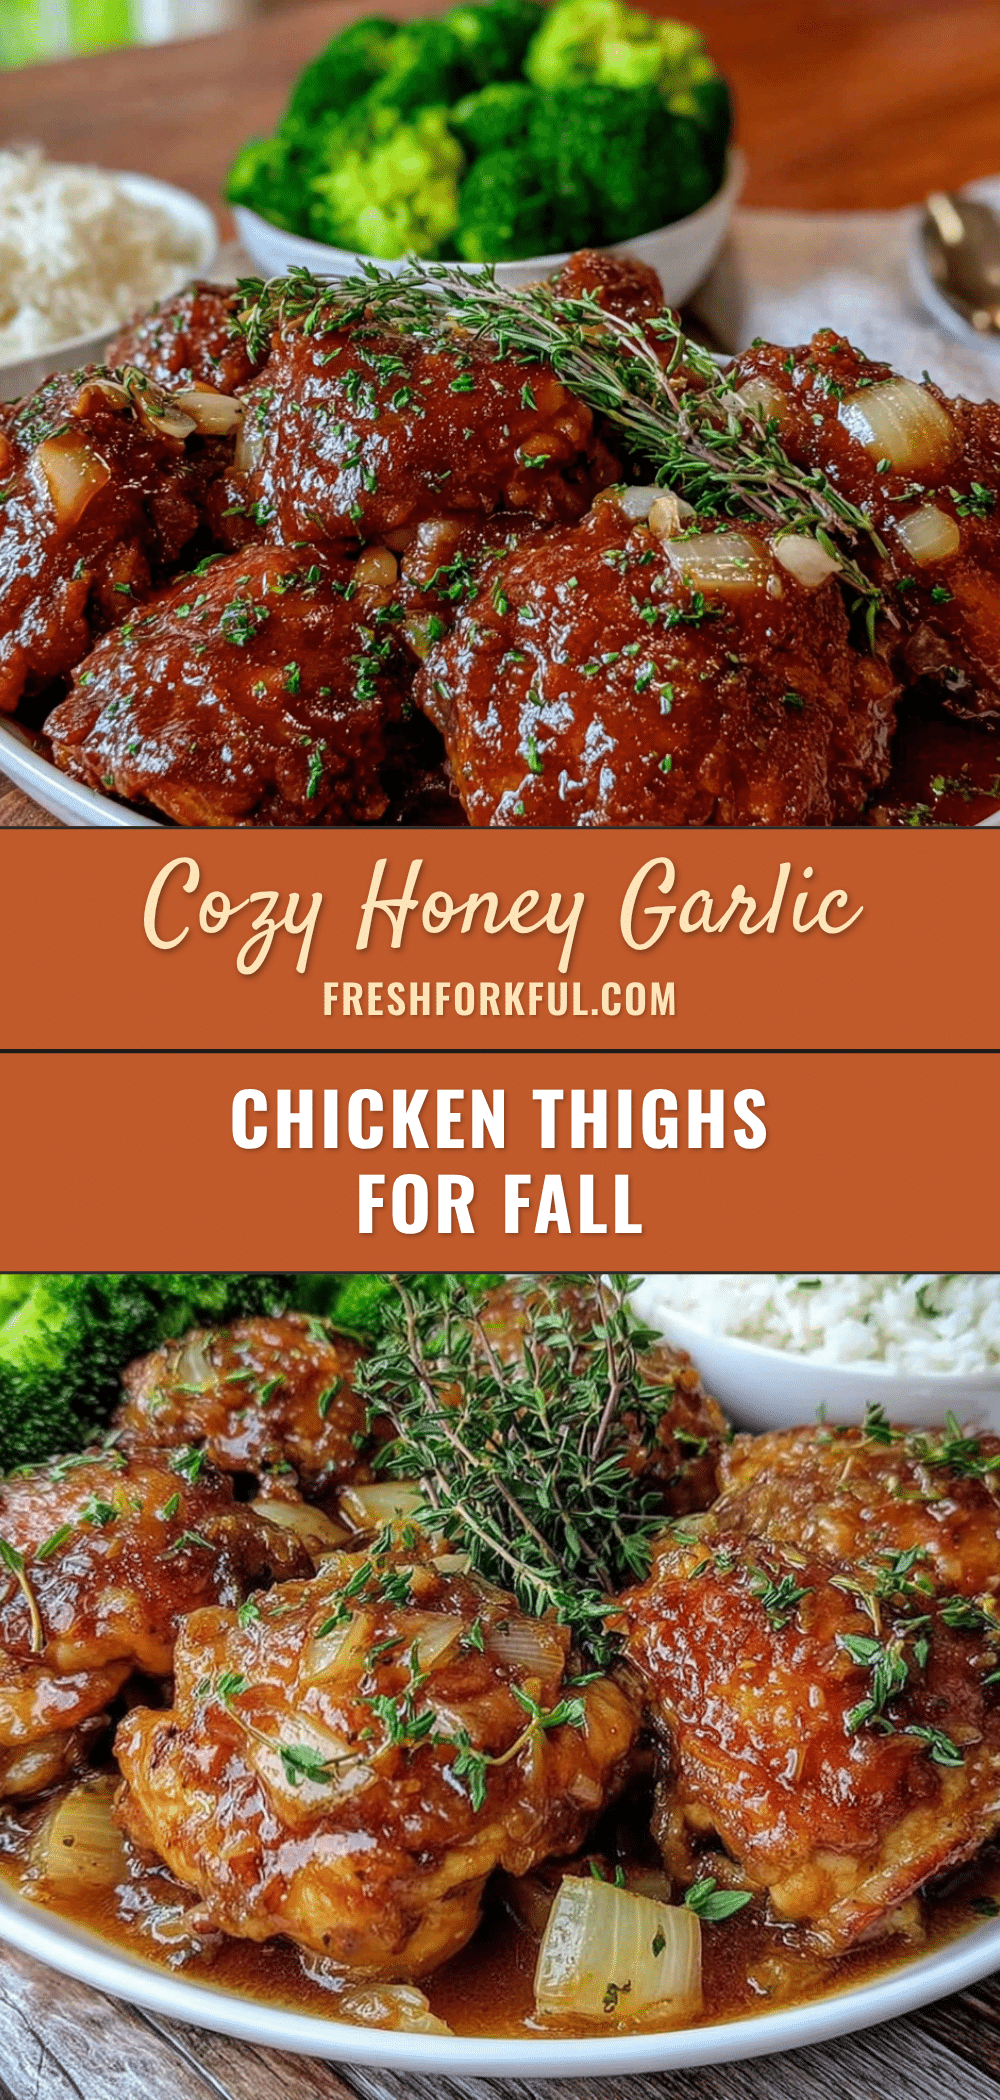
Cozy Honey Garlic Chicken Thighs: Perfect Fall Dinner

A quick and easy fall dinner featuring crispy, juicy chicken thighs coated in a sweet and savory honey garlic glaze. Ready in about 30 minutes with simple pantry ingredients.
- Prep Time: 10 minutes
- Cook Time: 20 minutes
- Total Time: 30 minutes
- Yield: 4 servings 1x
- Category: Main Course
- Cuisine: American
Ingredients
- 4 bone-in, skin-on chicken thighs (about 1.5 lbs total)
- 1 teaspoon kosher salt
- ½ teaspoon black pepper, freshly ground
- 1 tablespoon olive oil
- ¼ cup honey
- 4 cloves garlic, minced
- 3 tablespoons low-sodium soy sauce
- 1 tablespoon rice vinegar
- 1 tablespoon brown sugar
- 1 teaspoon sesame oil (optional)
- Sesame seeds for garnish (optional)
- Chopped green onions for garnish (optional)
- Fresh cilantro or parsley for garnish (optional)
Instructions
- Prep the chicken: Pat chicken thighs dry with paper towels. Season both sides with salt and pepper. Let sit at room temperature for 10 minutes.
- Make the glaze: In a small bowl, whisk together honey, minced garlic, soy sauce, rice vinegar, brown sugar, and sesame oil. Set aside.
- Preheat oven to 400°F (200°C).
- Sear the chicken: Heat a large oven-safe skillet over medium-high heat. Add olive oil and swirl to coat. Place chicken skin-side down and cook undisturbed for 5-6 minutes until deep golden brown and crispy. Flip and cook 2-3 minutes more.
- Add the glaze: Pour honey garlic mixture over chicken. Let bubble and reduce for about 30 seconds, spooning glaze over the tops.
- Finish in the oven: Transfer skillet to preheated oven. Roast for 10-15 minutes until chicken reaches an internal temperature of 165°F (or 175-180°F for extra tenderness).
- Rest and serve: Remove from oven and let rest 5 minutes. Spoon remaining glaze over chicken. Garnish with sesame seeds and green onions if desired.
Notes
Pat chicken dry for crispy skin. Let seasoned chicken sit uncovered in fridge for an hour for extra crispiness. Don’t crowd the pan when searing. Watch the glaze in the oven as honey can burn quickly. Double the glaze for extra sauce. Leftovers keep in the fridge for up to 4 days and freeze for up to 3 months.
Nutrition
- Serving Size: 1 chicken thigh with
- Calories: 420
- Sugar: 19
- Sodium: 780
- Fat: 22
- Saturated Fat: 6
- Carbohydrates: 22
- Protein: 32
Keywords: honey garlic chicken, chicken thighs, fall dinner, easy weeknight dinner, crispy chicken, honey garlic glaze


