Love this? Save it for later!
Share the inspiration with your friends
I used to think caramel apples were overrated. Honestly, for years I avoided them at fall festivals and Halloween parties, watching people bite into them with that dramatic pull of sticky caramel and thinking, “That’s just an apple with extra steps.” I mean, the whole thing always seemed like more trouble than it was worth—the caramel sliding off, the apple being too tart or too mealy, the mess. Then last October, my neighbor Maria knocked on my door holding a baking sheet covered in these perfectly sliced rounds, each one glistening with caramel and topped with what looked like a tiny Halloween candy explosion. “Just try one,” she said, and I did. I ate three before I even said thank you.
So here’s the thing about these cozy caramel apple slices—they fix everything that’s wrong with the traditional version. You don’t have to wrestle with a whole apple on a stick, wondering if you’ll break a tooth or end up wearing caramel down your shirt. Instead, you get these perfect, bite-sized rounds that are actually easy to eat. The caramel stays put, the toppings actually stick, and you can make a whole platter of them in the time it takes to argue with your kids about costumes. I made a batch for a Halloween get-together last week, and let me tell you, they disappeared faster than the candy bowl.
The best part? You can set up a toppings bar and let everyone customize their own. It turns a simple dessert into an activity, which is perfect for Halloween when everyone’s already in a playful mood. Maybe you’ve been there—staring at a Pinterest-perfect caramel apple recipe that looks beautiful but tastes like a disappointment. These slices are different. They’re the kind of treat that makes you close your eyes after the first bite, and honestly, that’s why I keep making them. They turned me from a skeptic into someone who now brings them to every fall gathering.
Why You’ll Love This Recipe
I’ve tested this recipe more times than I care to admit, tweaking the caramel consistency and figuring out the perfect apple thickness so everything holds together without being a hassle. Here’s what makes these cozy caramel apple slices stand out from every other version you’ve tried:
- Quick & Easy: You can have these ready in under 20 minutes. No candy thermometers, no fussing with sticky wrappers—just melt, dip, and decorate. Perfect for those last-minute Halloween cravings or when you realize you forgot to bring something to the school party.
- Simple Ingredients: Apples, caramel bits, and whatever toppings you have in your pantry. No fancy grocery trips needed; you likely already have everything in your kitchen right now.
- Perfect for Halloween: This isn’t just a dessert—it’s an activity. Set up a toppings bar and watch kids and adults alike get creative with sprinkles, crushed cookies, and candy eyes. It’s great for parties, classroom treats, or a cozy night in.
- Crowd-Pleaser: I’ve brought these to three different gatherings this fall, and every single time, people ask for the recipe. Kids love the fun toppings, and adults appreciate how easy they are to eat without the mess of a traditional caramel apple.
- Unbelievably Delicious: The combination of crisp, tart apples with sweet, buttery caramel and crunchy toppings is pure comfort food magic. It’s the kind of treat that makes you reach for another slice before you’ve finished the first one.
What makes this recipe different from the rest is the technique—slicing the apples into rounds before dipping them. This simple change means the caramel adheres perfectly, the toppings stay put, and everyone gets a perfectly proportioned bite every time. No more awkward bites where you get all caramel and no apple, or vice versa. It’s comfort food reimagined—simpler, faster, but with the same soul-soothing satisfaction that makes caramel apples a fall classic.
What Ingredients You Will Need
This recipe uses simple, wholesome ingredients to create something that feels special without requiring a trip to a specialty store. Most of these are pantry staples or easy to find at any grocery store, especially during the fall season.
For the Apple Slices
- 4 large apples (Granny Smith or Honeycrisp work best—their tartness balances the sweet caramel perfectly)
- 1 tablespoon lemon juice (mixed with water to prevent browning)
- 11 ounces soft caramel candies (I prefer Kraft Caramel Bits for convenience, but unwrapped Werther’s Soft Caramels work great too)
- 2 tablespoons heavy cream (helps the caramel stay smooth and pourable)
- 1 teaspoon vanilla extract (adds warmth and depth to the caramel)
For the Halloween Toppings Bar
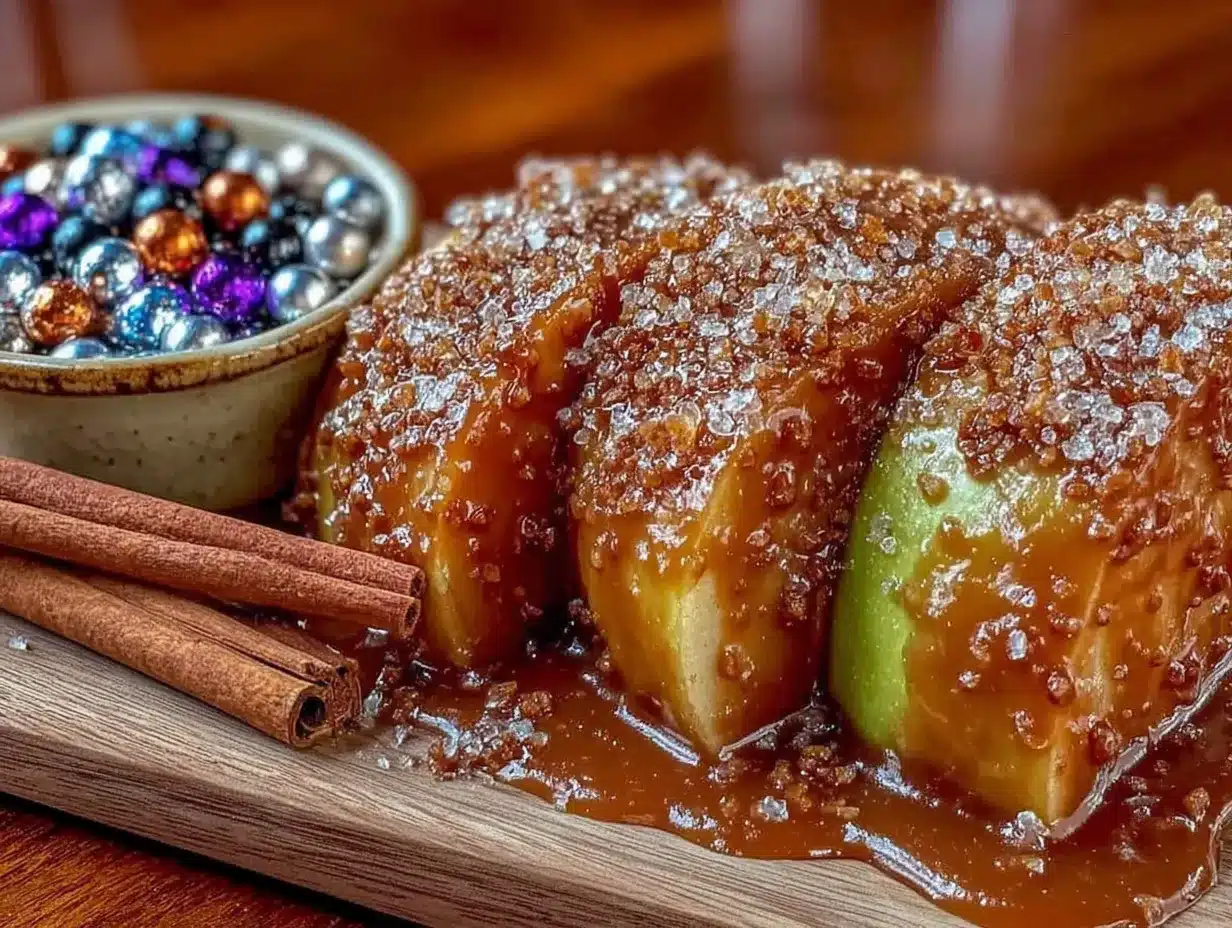
- ½ cup Halloween sprinkles (orange, purple, and green mixes are perfect)
- ¼ cup crushed graham crackers (adds a nice crunch)
- ¼ cup mini chocolate chips (semi-sweet or milk chocolate both work)
- ¼ cup crushed pretzels (for that sweet-salty combo)
- ¼ cup candy corn (because it’s not Halloween without it)
- ¼ cup chopped peanuts (optional, but traditional)
- 2 tablespoons edible candy eyes (these are so fun for Halloween)
- 2 tablespoons shredded coconut (toasted, for a ghostly look)
I recommend using Granny Smith apples for this recipe—their firm texture holds up well to the warm caramel, and the tartness cuts through the sweetness beautifully. If you prefer a sweeter apple, Honeycrisp is my second choice. Just avoid Red Delicious, which can be mealy and won’t hold their shape as well.
For the caramel, I’ve found that using caramel bits instead of unwrapping individual candies saves so much time. Kraft Caramel Bits are my go-to because they melt evenly and have a consistent texture. If you can’t find them, any soft caramel candy will work—just unwrap them first and add an extra tablespoon of cream to help them melt smoothly.
The toppings are where you can really get creative. I’ve listed my favorites, but feel free to swap in whatever you have on hand. Crushed Oreos, mini M&Ms, or even crumbled bacon (for the adventurous) all work beautifully. The key is having a variety of textures—crunchy, creamy, and chewy—to make each bite interesting.
Equipment Needed
You don’t need much fancy equipment for this recipe, which is part of why I love it. Here’s what you’ll need:
- Sharp knife and cutting board—a good chef’s knife makes slicing the apples evenly much easier. I use my Wusthof 8-inch chef’s knife, but any sharp knife will work.
- Medium saucepan or microwave-safe bowl—for melting the caramel. I prefer using a saucepan on the stove because I have more control over the heat, but the microwave works in a pinch.
- Parchment paper or silicone baking mat—essential for lining your baking sheet so the caramel slices don’t stick. Trust me, I learned this the hard way.
- Baking sheet—large enough to hold all your apple slices in a single layer.
- Small bowls or ramekins—for arranging your toppings bar. I use little ceramic dishes, but even paper cups work fine.
- Fork or skewer—for dipping the apple slices into the caramel. A fork works perfectly and is easier to clean.
- Paper towels—for patting the apple slices dry before dipping. This step is crucial for the caramel to stick.
If you don’t have a silicone baking mat, parchment paper is your best friend here. Wax paper won’t work—the caramel will stick to it. And if you’re using a microwave to melt the caramel, make sure your bowl is microwave-safe and go in 30-second intervals to avoid burning.
Preparation Method
Making these cozy caramel apple slices is straightforward, but a few key steps make all the difference. Follow these instructions, and you’ll have a platter of perfect Halloween treats in no time.
- Prepare your apples (5 minutes). Wash and dry your apples thoroughly. Using a sharp knife, cut each apple horizontally into ½-inch thick rounds. You’ll get about 4-5 slices per apple, depending on size. Use a small cookie cutter or knife to remove the core and seeds from the center of each slice, creating a ring shape. Immediately place the slices in a bowl of cold water mixed with the lemon juice to prevent browning. Let them soak for 2-3 minutes, then pat them completely dry with paper towels. This step is crucial—any moisture on the apples will cause the caramel to slide right off.
- Line your baking sheet (1 minute). Cover a large baking sheet with parchment paper or a silicone baking mat. You’ll place the dipped slices here to set, so make sure it’s clean and ready to go.
- Prepare your toppings bar (5 minutes). While the apples are soaking, arrange your toppings in small bowls or ramekins. I like to set them up in a row so it’s easy to grab and dip. If you’re using crushed cookies or pretzels, make sure they’re in a fine crumb—large pieces won’t stick as well to the caramel.
- Melt the caramel (5 minutes). In a medium saucepan over low heat, combine the caramel bits and heavy cream. Stir constantly with a rubber spatula until the caramels are completely melted and the mixture is smooth. This takes about 4-5 minutes. Remove from heat and stir in the vanilla extract. If the caramel seems too thick, add another tablespoon of cream. If it’s too thin, let it cool for a minute—it will thicken as it sits. Pro tip: Don’t rush this step with high heat. Low and slow prevents the caramel from burning or becoming grainy.
- Dip the apple slices (10 minutes). Working with one slice at a time, insert a fork into the center hole of an apple slice. Dip it into the warm caramel, using a spoon to help coat the edges if needed. Let any excess caramel drip off back into the saucepan, then place the slice on the prepared baking sheet. Repeat with the remaining slices. Work quickly—the caramel will start to set as it cools.
- Add toppings immediately (5 minutes). While the caramel is still warm and sticky, sprinkle or press your chosen toppings onto each slice. This is where the fun begins! I like to do a variety—some with sprinkles, some with crushed pretzels and chocolate chips, and a few with candy eyes for a spooky touch. You need to add toppings right away, because once the caramel sets, nothing will stick to it.
- Let them set (15-20 minutes). Allow the caramel apple slices to sit at room temperature until the caramel is firm to the touch. If you’re in a hurry, you can pop them in the refrigerator for 10 minutes, but room temperature setting gives a better texture. The caramel should be firm but still have a slight give when you bite into it.
- Serve and enjoy. Arrange the slices on a platter and serve immediately. The contrast between the crisp apple, chewy caramel, and crunchy toppings is absolutely perfect.
You’ll know the caramel is at the right consistency when it coats the back of a spoon and drips off in a slow, steady ribbon. If it runs off too quickly, it’s too thin—let it cool for a minute. If it’s too thick to coat the apples, add another splash of cream.
Cooking Tips & Techniques
After making these caramel apple slices more times than I can count (and messing up plenty along the way), I’ve learned a few tricks that make the process foolproof.
The biggest mistake people make is not drying the apples thoroughly. I learned this the hard way when my first batch of caramel slid off in sheets. Water and caramel don’t mix, so pat those slices bone-dry before dipping. I even let them sit on paper towels for a few minutes to make sure any hidden moisture evaporates.
Temperature control is everything with caramel. If you overheat it, the caramel can become grainy or even burn. I keep the heat on low and stir constantly, scraping the bottom and sides of the pan. If you’re using the microwave, go in 30-second bursts, stirring in between. The caramel should be warm and fluid, not hot. I once rushed this step and ended up with caramel that tasted burnt and had a weird texture—total waste of ingredients.
Work in small batches. Don’t try to dip all the slices at once. The caramel will start to set as it cools, making it harder to work with. I dip 4-5 slices, add their toppings, then reheat the caramel briefly if needed before dipping the next batch. This keeps everything manageable and ensures each slice gets the perfect coating.
For the best texture, use room temperature apples. Cold apples straight from the fridge will cause the caramel to harden too quickly, making it difficult to add toppings. Let your apples sit on the counter for 15-20 minutes before slicing. This small step makes a big difference in how well the toppings adhere.
Multitask strategically. While the caramel is melting, I set up my toppings bar and line my baking sheet. This way, once the caramel is ready, I can focus entirely on dipping and decorating without scrambling for supplies. It turns a potentially stressful process into a relaxed, enjoyable activity.
Variations & Adaptations
One of the best things about this recipe is how adaptable it is. Here are some of my favorite variations, each with its own personality:
Dairy-Free Version: Use dairy-free caramel candies (many brands make them now) and substitute the heavy cream with full-fat coconut cream. The texture is slightly different—a bit softer—but still delicious. I’ve made this for friends with dairy sensitivities, and they couldn’t tell the difference.
Nut-Free Toppings Bar: Instead of peanuts and other nuts, use crushed pretzels, sunflower seeds, or toasted oats for crunch. You can also add crushed freeze-dried strawberries for a fruity twist that’s completely nut-free.
Spooky Spider Web Design: After dipping the slices in caramel, drizzle melted white chocolate in a spiral pattern, then drag a toothpick outward from the center to create a web effect. Add a candy spider on top for maximum Halloween impact. This takes an extra 5 minutes but looks incredibly impressive.
Kid-Friendly Monster Faces: Use green or purple candy melts instead of caramel for a colorful base. Add candy eyes, a red licorice smile, and pretzel stick arms. My nephew’s friends went crazy for these at their Halloween party—they were almost too cute to eat.
Adult-Approved Caramel Apple Slices: For a grown-up version, skip the Halloween sprinkles and top with flaky sea salt, toasted pecans, and a drizzle of dark chocolate. The salt enhances the caramel’s sweetness, and the pecans add an earthy richness that pairs beautifully with tart apples.
Air Fryer Option: If you want a warm, slightly caramelized version, arrange the dipped slices (without toppings) in an air fryer basket lined with parchment. Air fry at 350°F for 2-3 minutes, then add toppings. The caramel gets slightly toasted on the edges, which is absolutely divine. Just be sure to let them cool for a minute before eating—the caramel gets very hot.
I once tried a version with crushed bacon and a drizzle of maple syrup, thinking it would be amazing. It was… interesting. The flavors worked, but the texture was too heavy. Sometimes the simplest combinations really are the best.
Serving & Storage Suggestions
These caramel apple slices are best served at room temperature, arranged on a large platter or wooden board. The contrast between the cool, crisp apple and the soft, chewy caramel is most pronounced when they haven’t been refrigerated. For Halloween parties, I like to arrange them on a black platter with some fake spider webs and plastic spiders scattered around for a spooky presentation.
They pair beautifully with a warm beverage—think spiced apple cider, hot chocolate, or even a pumpkin spice latte. The warmth of the drink complements the cool apple slices perfectly. For adults, a glass of bourbon or a hard cider is a fantastic pairing.
Storage: These are best eaten the day they’re made, but you can store leftovers in an airtight container in the refrigerator for up to 2 days. Place parchment paper between layers to prevent sticking. The caramel will harden in the fridge, so let them sit at room temperature for 10-15 minutes before serving to soften slightly.
Freezing: I don’t recommend freezing these—the apples release moisture as they thaw, which makes the caramel slide off and the texture becomes watery. If you need to make them ahead, prepare the apple slices and caramel separately, then dip and decorate just before serving.
Reheating: If the caramel has hardened too much after refrigeration, you can microwave individual slices for 10-15 seconds to soften the caramel. Just be careful not to overheat, or the apple will start to cook. Alternatively, let them sit at room temperature for 20 minutes, and they’ll be perfect.
Flavor Development: Interestingly, these slices actually taste better after about an hour. The flavors meld together, and the caramel absorbs a bit of apple juice, creating a more cohesive bite. So if you’re making them for a party, aim to have them ready about an hour before serving.
Nutritional Information & Benefits
While these caramel apple slices are definitely a treat, they do offer some nutritional benefits thanks to the apples. Here’s a rough estimate per slice (based on 20 slices from 4 apples):
| Nutrient | Amount Per Slice |
|---|---|
| Calories | 145 |
| Total Fat | 4g |
| Saturated Fat | 2g |
| Carbohydrates | 27g |
| Fiber | 2g |
| Sugar | 21g |
| Protein | 1g |
| Vitamin C | 4% DV |
Apples are a good source of dietary fiber and vitamin C, and they contain antioxidants that support overall health. The fiber in apples helps slow down sugar absorption, which means these treats won’t cause the same blood sugar spike as, say, a candy bar. That said, the caramel and toppings do add sugar, so moderation is key.
For those with dietary restrictions, this recipe can be made gluten-free by using certified gluten-free toppings like gluten-free pretzels or sprinkles. It’s naturally vegetarian, and with the dairy-free modifications mentioned earlier, it can accommodate most common dietary needs. The main allergens to watch for are dairy (in the caramel and cream) and nuts (in the toppings).
I personally love that this recipe lets me enjoy a Halloween treat without feeling like I’ve completely abandoned my healthy eating habits. One or two slices satisfy that sweet craving without the regret of a whole candy bar. It’s all about balance, right?
FAQs
Can I use pre-made caramel sauce instead of caramel candies?
You can, but it won’t set up the same way. Caramel sauce is thinner and will run off the apple slices, making a mess. If you want to use it, you’ll need to add a thickener like cornstarch (mix 1 tablespoon cornstarch with 2 tablespoons water, then whisk into warm caramel sauce) and cook until thickened. The texture won’t be as chewy, but it’ll still taste good.
How do I keep the apples from turning brown?
The lemon juice water soak is your best defense. The citric acid in the lemon juice slows down oxidation, keeping your apple slices looking fresh for hours. If you’re making these in advance, you can also brush the cut surfaces with a mixture of 1 part lemon juice to 3 parts water before dipping.
What if my caramel is too thick to dip?
Simply add more heavy cream, one tablespoon at a time, stirring over low heat until you reach the desired consistency. The caramel should be thin enough to coat the apple slices but thick enough to stick. If it’s still too thick after adding cream, you might have overheated it—next time, use lower heat.
Can I make these without a toppings bar?
Absolutely! The toppings bar is just for fun and customization. You can skip it entirely and just enjoy the plain caramel apple slices, or choose one or two toppings and sprinkle them on all the slices. Sometimes I just do a simple sprinkle of flaky sea salt, and they’re still amazing.
How far in advance can I make these?
I recommend making them no more than 4-6 hours before serving. The apples will start to release moisture over time, which can make the caramel slide off. If you need to prep ahead, slice the apples and soak them in lemon water (store in the fridge), melt the caramel, and set up your toppings bar. Then dip and decorate just before serving.
Conclusion
These cozy caramel apple slices have completely changed how I think about fall desserts. They’re proof that sometimes the simplest ideas—slicing apples into rounds instead of leaving them whole—can transform an entire recipe. The caramel stays put, the toppings actually stick, and everyone gets a perfect, mess-free bite every single time.
I love how this recipe brings people together, especially around Halloween. Setting up a toppings bar turns dessert into an activity, and watching everyone get creative with their combinations is genuinely heartwarming. It’s the kind of recipe that creates memories, not just full bellies.
So whether you’re hosting a Halloween party, looking for a fun activity to do with kids, or just craving something sweet and cozy on a crisp fall evening, give these caramel apple slices a try. Customize them with your favorite toppings, make them your own, and don’t be surprised if they become a new fall tradition in your house. Trust me—I went from skeptic to obsessed, and I have a feeling you will too.
Have you tried this recipe? I’d love to hear about your favorite topping combinations! Drop a comment below and share your creations—your idea might inspire someone else’s Halloween dessert table.
Pin This Recipe!

Cozy Caramel Apple Slices: Easy Halloween Toppings Bar

These easy caramel apple slices fix everything wrong with traditional caramel apples—the caramel stays put, toppings actually stick, and they’re perfect for a Halloween toppings bar. Ready in under 20 minutes, they’re a crowd-pleasing fall treat that turns dessert into an activity.
- Prep Time: 15 minutes
- Cook Time: 5 minutes
- Total Time: 20 minutes
- Yield: 20 slices 1x
- Category: Dessert
- Cuisine: American
Ingredients
- 4 large apples (Granny Smith or Honeycrisp)
- 1 tablespoon lemon juice (mixed with water)
- 11 ounces soft caramel candies (Kraft Caramel Bits preferred)
- 2 tablespoons heavy cream
- 1 teaspoon vanilla extract
- ½ cup Halloween sprinkles
- ¼ cup crushed graham crackers
- ¼ cup mini chocolate chips
- ¼ cup crushed pretzels
- ¼ cup candy corn
- ¼ cup chopped peanuts (optional)
- 2 tablespoons edible candy eyes
- 2 tablespoons shredded coconut (toasted)
Instructions
- Prepare your apples: Wash and dry apples thoroughly. Cut each apple horizontally into ½-inch thick rounds (about 4-5 slices per apple). Use a small cookie cutter or knife to remove the core and seeds from the center of each slice. Immediately place slices in a bowl of cold water mixed with lemon juice to prevent browning. Soak for 2-3 minutes, then pat completely dry with paper towels.
- Line your baking sheet: Cover a large baking sheet with parchment paper or a silicone baking mat.
- Prepare your toppings bar: Arrange toppings in small bowls or ramekins. Ensure crushed items are in fine crumbs for better adherence.
- Melt the caramel: In a medium saucepan over low heat, combine caramel bits and heavy cream. Stir constantly until completely melted and smooth (about 4-5 minutes). Remove from heat and stir in vanilla extract. If too thick, add another tablespoon of cream; if too thin, let cool for a minute.
- Dip the apple slices: Working one at a time, insert a fork into the center hole of an apple slice. Dip into warm caramel, using a spoon to coat edges if needed. Let excess drip off, then place on prepared baking sheet. Repeat with remaining slices, working quickly.
- Add toppings immediately: While caramel is still warm and sticky, sprinkle or press chosen toppings onto each slice. Add toppings right away before caramel sets.
- Let them set: Allow caramel apple slices to sit at room temperature until caramel is firm (15-20 minutes). For quicker setting, refrigerate for 10 minutes.
- Serve and enjoy: Arrange slices on a platter and serve immediately.
Notes
Dry apples thoroughly before dipping to prevent caramel from sliding off. Work in small batches to keep caramel from setting. Use room temperature apples for best texture. For dairy-free version, use dairy-free caramel and coconut cream. Best eaten the day they’re made; store leftovers in refrigerator for up to 2 days. Let refrigerated slices sit at room temperature for 10-15 minutes before serving.
Nutrition
- Serving Size: 1 slice
- Calories: 145
- Sugar: 21
- Sodium: 85
- Fat: 4
- Saturated Fat: 2
- Carbohydrates: 27
- Fiber: 2
- Protein: 1
Keywords: caramel apple slices, Halloween dessert, easy fall treat, toppings bar, party dessert, apple recipe, no-bake dessert


