Love this? Save it for later!
Share the inspiration with your friends
My neighbor Carol wasn’t trying to impress anyone. I’d stopped by to borrow a pie plate—mine had mysteriously vanished after last Thanksgiving—and the smell of butter and vanilla hit me before I even knocked on the screen door. She was standing at her kitchen counter in a faded sweatshirt, completely unfazed by the fact that her entire house smelled like a bakery exploded in the best possible way. “Oh, these?” she said when I asked about the tray of turkey-shaped cookies cooling on her counter. “Just something I do every year. Keeps the kids busy while the turkey roasts.”
Honestly, that casualness is what got me. She wasn’t running a baking blog or hosting a cookie-decorating party for Instagram. She was just making turkey cookies because that’s what she did every November, like clockwork, with the same stained cookie cutter her mom used in the 80s. The royal icing was still wet in places, pooling into perfect little feather patterns she’d piped while talking to me about her garden. I mean, who does that? Who makes royal icing look like an afterthought?
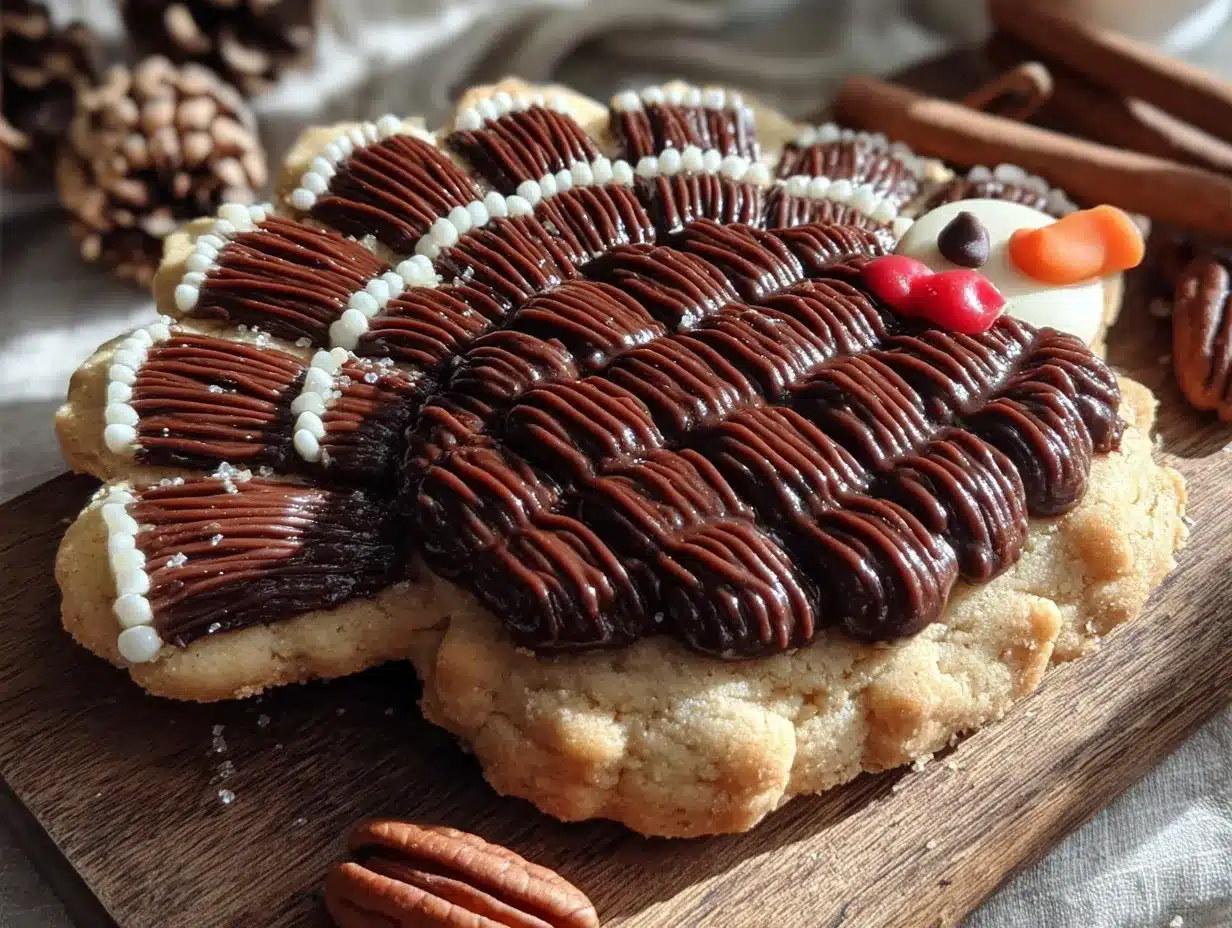
I stood there holding my borrowed pie plate, trying not to stare at those cookies. They were ridiculous in the best way—bright orange beaks, googly-eyed with white icing, and tail feathers that fanned out like a peacock’s. Carol shrugged and handed me one. “Here, take a few. I make too many anyway.” That first bite was buttery, not too sweet, with royal icing that had that perfect snap before it melted on your tongue. And I thought, I need to learn how to do this.
Maybe you’ve been there—you taste something at someone else’s house and suddenly you can’t stop thinking about it. That’s what happened with these turkey sugar cookies. They’re not fancy. They’re not complicated. But they’re the kind of cookie that makes people smile before they even take a bite. And honestly, that’s the whole point. So here’s how to make them yourself, complete with royal icing that sets up beautifully, just like Carol’s did that afternoon in her messy, wonderful kitchen.
Why You’ll Love This Recipe
I have made these turkey cookies every single year since that day at Carol’s house, and let me tell you—they never get old. Here is why this recipe works so well for Thanksgiving baking:
- Simple Ingredients: You probably have everything in your pantry already. No weird extracts, no specialty flours. Just butter, sugar, eggs, and a few pantry staples.
- Perfect for Thanksgiving Baking: These cookies are the ultimate activity while the turkey roasts or the pie cools. Kids and adults both love decorating them.
- Make-Ahead Friendly: The cookie dough freezes beautifully, and the royal icing can be made a day ahead. You can spread the work out over several days.
- Crowd-Pleaser: I have brought these to Friendsgivings, classroom parties, and family dinners. They disappear every single time.
- Foolproof Royal Icing: This recipe uses a simple royal icing that sets hard enough to stack but stays soft enough to pipe easily. No stress, no complicated techniques.
What makes this different from other cut-out cookie recipes? It is the texture. These cookies hold their shape perfectly—no spread, no puffy edges, no lost turkey tails in the oven. The royal icing dries to a beautiful matte finish that looks professional without requiring any special skills. I have tested this dough with different flours, different chilling times, and different butter temperatures. This version is the one that works every time.
This recipe is not just good—it is the kind that makes you close your eyes after the first bite. The butter flavor is rich without being greasy. The royal icing has that classic snap that sugar cookies need. And the whole process? It feels like a cozy afternoon activity, not a stressful baking project. That is exactly what Thanksgiving baking should feel like.
What Ingredients You Will Need
This recipe uses simple, wholesome ingredients to deliver buttery sugar cookies with royal icing that sets perfectly. Most of these are pantry staples, which makes this recipe perfect for last-minute Thanksgiving baking.
For the Sugar Cookies
- 2 ¾ cups (345g) all-purpose flour – Spoon and level your flour for the best results. I use Gold Medal unbleached all-purpose flour for consistent texture.
- 1 cup (226g) unsalted butter, softened – European-style butter like Kerrygold adds extra richness, but any unsalted butter works well. Let it sit at room temperature for about 45 minutes before starting.
- 1 cup (200g) granulated sugar – Regular white sugar gives these cookies the perfect sweetness without making them too sweet.
- 1 large egg, room temperature – Cold eggs can cause the butter to seize. Let your egg sit out for 15-20 minutes before using.
- 1 teaspoon vanilla extract – Pure vanilla extract makes a difference here. I prefer Nielsen-Massey for its rich flavor.
- ½ teaspoon baking powder – This helps the cookies hold their shape without puffing up too much.
- ½ teaspoon salt – Fine sea salt balances the sweetness and enhances the butter flavor.
For the Royal Icing
- 4 cups (480g) powdered sugar – Sift your powdered sugar first to avoid lumps in the icing. I use C&H powdered sugar for smooth results.
- 3 tablespoons meringue powder – This is the secret to royal icing that dries hard without using raw egg whites. Wilton brand works great.
- 6-7 tablespoons warm water – Start with 6 tablespoons and add more if needed. The consistency should be thick enough to hold a ribbon trail for 10 seconds.
- 1 teaspoon vanilla extract – Optional, but it adds a lovely flavor to the icing. Clear vanilla extract keeps the icing white if that matters to you.
- Food coloring gels – I use Wilton gel colors in orange, brown, yellow, and red for the turkey decorations. Gel colors are thicker and more concentrated than liquid drops.
For Decorating
- Turkey-shaped cookie cutter – A 3-inch turkey cutter works perfectly. I found mine at a craft store for about $3.
- Piping bags or squeeze bottles – Wilton disposable piping bags are easy to use. Squeeze bottles work well for flooding icing.
- Small round piping tips – A #2 or #3 tip works best for outlining and detail work.
- Edible glitter or sprinkles – Optional, but fun for adding sparkle to the turkey feathers.
Substitution Notes: For a dairy-free version, use plant-based butter like Earth Balance. The texture will be slightly softer, so chill the dough for an extra 30 minutes. For gluten-free cookies, use a 1:1 gluten-free baking flour blend like King Arthur Measure for Measure. The cookies will be a bit more delicate but still delicious. If you cannot find meringue powder, you can use 3 tablespoons of pasteurized egg whites and omit the water, though the consistency will be slightly different.
Equipment Needed
You do not need a fancy kitchen to make these turkey cookies. Here is what you will need:
- Electric mixer – A stand mixer with the paddle attachment is ideal, but a hand mixer works perfectly fine. I have made this dough with both many times.
- Rolling pin – A standard rolling pin works. If you have adjustable rolling rings, they help get even thickness every time.
- Turkey cookie cutter – Available at craft stores, baking supply shops, or online. A 3 to 4-inch cutter is the perfect size.
- Baking sheets – Light-colored aluminum sheets work best. Dark sheets can cause cookies to brown too quickly.
- Parchment paper or silicone baking mats – Parchment paper is cheap and disposable. Silicone mats are reusable and work great.
- Piping bags or squeeze bottles – I prefer disposable piping bags with a #2 tip for outlining. Squeeze bottles make flooding the cookies much faster.
- Small offset spatula – Helpful for smoothing icing and cleaning up edges.
- Cooling rack – Essential for letting cookies cool completely before decorating.
If you do not have a turkey cookie cutter, you can use a large oval cutter and a small triangle cutter to create a turkey shape. Cut the oval for the body and the triangle for the head, then press them together before baking. It takes a little extra effort, but the result is still adorable.
Preparation Method
Step 1: Make the Cookie Dough
In a medium bowl, whisk together the flour, baking powder, and salt. Set aside. In the bowl of your stand mixer, beat the softened butter and granulated sugar together on medium speed until light and fluffy, about 2-3 minutes. You want the mixture to look pale and airy. Scrape down the sides of the bowl with a spatula. Add the egg and vanilla extract, then beat on medium speed until fully combined, about 1 minute. The mixture might look slightly curdled at this point—that is normal.
Gradually add the flour mixture to the wet ingredients, mixing on low speed until just combined. Do not overmix. The dough should come together into a soft, cohesive ball. If it feels too sticky, add an extra tablespoon of flour. If it feels too dry, add a teaspoon of water.
Step 2: Chill the Dough
Divide the dough into two equal portions. Flatten each portion into a disk about 1-inch thick. Wrap each disk tightly in plastic wrap. Refrigerate for at least 2 hours, or up to 3 days. Chilling the dough is non-negotiable—it prevents the cookies from spreading and helps them hold their turkey shape in the oven. I have skipped this step before, and let me tell you, those turkeys came out looking like blobs.
Step 3: Roll and Cut the Cookies
Preheat your oven to 350°F (175°C). Line two baking sheets with parchment paper or silicone mats. Remove one disk of dough from the refrigerator. On a lightly floured surface, roll the dough to about ¼-inch thickness. If the dough cracks at the edges, let it sit at room temperature for 5 minutes to soften slightly. Use your turkey cookie cutter to cut out shapes, pressing firmly and wiggling the cutter slightly to release the dough. Place the cookies about 1 inch apart on the prepared baking sheets. Gather the scraps, re-roll, and cut more cookies.
Step 4: Bake the Cookies
Bake the cookies for 8-10 minutes, or until the edges are just barely golden brown. The centers should look set but not browned. Rotate the baking sheets halfway through for even baking. Let the cookies cool on the baking sheets for 5 minutes, then transfer them to a wire rack to cool completely. Do not rush this step—warm cookies will ruin the royal icing.
Step 5: Make the Royal Icing
In the bowl of your stand mixer fitted with the whisk attachment, combine the powdered sugar and meringue powder. Add 6 tablespoons of warm water and the vanilla extract. Mix on low speed until combined, then increase to medium-high speed and beat for 4-5 minutes. The icing should be thick, glossy, and hold a stiff peak. If it is too thick, add water ½ teaspoon at a time. If it is too thin, add more powdered sugar 1 tablespoon at a time.
Step 6: Color and Thin the Icing
Divide the royal icing into separate bowls for each color you plan to use. I use orange for the beak, brown for the body, red for the wattle, and yellow or orange for the feathers. Add gel food coloring a little at a time until you reach the desired shade. For flooding icing, thin each color with water 1 teaspoon at a time until it reaches a 10-second consistency—when you lift a spoon, the ribbon of icing should disappear into the surface in about 10 seconds.
Step 7: Decorate the Cookies
Transfer each color of icing to a separate piping bag fitted with a #2 tip or to a squeeze bottle. Outline each section of the cookie first—the body, the feathers, the beak, and the wattle. Then flood the outlined sections with the thinner icing, using a toothpick to spread the icing into the corners. Let the base colors dry for 30 minutes before adding any details like eyes or feather lines. Add edible glitter or sprinkles while the icing is still wet.
Cooking Tips & Techniques
I have made these turkey cookies enough times to learn a few things the hard way. Here are the tips that actually matter:
Chill the dough thoroughly. I cannot stress this enough. The first time I made these, I was impatient and only chilled the dough for 30 minutes. Every single turkey cookie spread into a shapeless blob. The butter needs to be fully cold so the cookies hold their shape. Two hours minimum, no shortcuts.
Watch the oven like a hawk. Sugar cookies go from perfectly baked to overdone in about 60 seconds. Start checking at 7 minutes. The edges should be just barely golden. If they look done in the center, they are overbaked. Remember that cookies continue to bake on the hot sheet after you pull them out.
Use the 10-second test for royal icing. This changed everything for me. When you lift a spoonful of icing and let it drizzle back into the bowl, count how long it takes for the surface to smooth out. Ten seconds is the perfect consistency for flooding. If it smooths out in 3 seconds, it is too thin. If it never smooths out, it is too thick.
Pipe in a logical order. Outline and flood the largest area first—usually the feathers or the body. Then move to smaller details like the beak and wattle. This prevents the icing from bleeding into areas you already decorated. Let each color dry for at least 20 minutes before adding adjacent colors.
Keep a damp paper towel handy. Royal icing crusts over quickly. If your piping tip gets clogged, wipe it with a damp paper towel. Cover bowls of unused icing with plastic wrap pressed directly onto the surface to prevent skin from forming.
Variations & Adaptations
One of the best things about these turkey cookies is how easily you can adapt them to suit your preferences or dietary needs.
Chocolate Sugar Cookies: Replace ¼ cup of the all-purpose flour with ¼ cup of unsweetened cocoa powder. The chocolate version pairs beautifully with white royal icing for a dramatic contrast. I made these for a Friendsgiving last year and they were gone before the regular ones.
Spiced Thanksgiving Cookies: Add 1 teaspoon of cinnamon, ½ teaspoon of nutmeg, and ¼ teaspoon of cloves to the dry ingredients. These taste like a warm slice of pumpkin pie in cookie form. The spices complement the royal icing beautifully.
Gluten-Free Version: Use a 1:1 gluten-free baking flour blend. King Arthur Measure for Measure works especially well. Add an extra tablespoon of butter to compensate for the dryness of gluten-free flours. Chill the dough for at least 3 hours—gluten-free dough is stickier and needs more time to firm up.
Vegan Royal Icing: Replace the meringue powder with 3 tablespoons of aquafaba (the liquid from a can of chickpeas) and omit the water. Beat the aquafaba and powdered sugar together for 6-7 minutes until stiff peaks form. The texture is slightly different but the result is still beautiful.
Mini Turkey Cookies: Use a smaller turkey cutter and reduce the baking time to 6-7 minutes. These are perfect for classroom parties or cookie platters where you want variety. I made a batch of mini turkeys last year and they were adorable on a dessert board.
Serving & Storage Suggestions
These turkey cookies are best served at room temperature, which is convenient because that is how they store anyway. Arrange them on a platter or tiered stand for a Thanksgiving dessert table. They pair beautifully with hot apple cider, spiced chai, or a warm cup of coffee. For a fun presentation, arrange the cookies in a circle with the tails pointing outward, like a flock of turkeys.
For storage, place the decorated cookies in a single layer in an airtight container. Separate layers with parchment paper to prevent the icing from sticking. They will stay fresh at room temperature for up to 2 weeks. Do not refrigerate them—the humidity can cause the royal icing to soften and become sticky.
These cookies also freeze beautifully. Place undecorated baked cookies in a freezer-safe bag or container for up to 3 months. When you are ready to decorate, thaw them at room temperature for 30 minutes, then ice as directed. The royal icing itself does not freeze well, so always make it fresh.
The flavors actually improve after a day or two. The butter flavor deepens, and the royal icing sets completely. I always make these a day or two before I plan to serve them. It makes Thanksgiving morning so much less stressful.
Nutritional Information & Benefits
One turkey cookie (with royal icing) contains approximately 180 calories, 8g of fat, 26g of carbohydrates, and 1g of protein. These numbers are estimates and will vary based on your specific ingredients and the amount of icing used.
While these are definitely a treat, there are a few redeeming qualities. The butter provides vitamin A and healthy fats. The egg adds a small amount of protein. And honestly, the biggest benefit is the joy they bring to a Thanksgiving table. Baking with family, decorating together, and sharing something handmade—that is good for the soul.
For those with dietary restrictions, the gluten-free and vegan variations above work beautifully. The cookies are nut-free if you use standard ingredients, but always check labels if serving to someone with allergies. The royal icing contains meringue powder, which is made from dried egg whites, so it is not suitable for those avoiding eggs.
Frequently Asked Questions
Can I make the dough ahead of time?
Absolutely. The dough can be refrigerated for up to 3 days or frozen for up to 3 months. If freezing, wrap the dough disks tightly in plastic wrap, then place them in a freezer bag. Thaw overnight in the refrigerator before rolling and cutting.
Why did my cookies spread in the oven?
This is almost always because the dough was not chilled enough. Make sure you chill the dough for at least 2 hours. Also check that your butter was not too soft when you started—it should be softened but still cool to the touch. If your baking sheets are warm from a previous batch, let them cool completely before adding more cookies.
Can I use store-bought royal icing?
You can, but the texture will not be the same. Store-bought royal icing in a can is usually too thin and does not set as hard. Homemade royal icing with meringue powder is easy to make and gives much better results. It takes less than 10 minutes to whip up.
How do I get smooth royal icing without bubbles?
After mixing the royal icing, let it sit for 10-15 minutes to allow bubbles to rise to the surface. Gently stir it with a spatula before using. When flooding, use a toothpick to pop any visible bubbles. Work slowly and avoid over-stirring the icing once it is made.
Can I use this recipe for other shapes?
Yes, this sugar cookie recipe works beautifully with any cookie cutter. The dough holds its shape for stars, circles, leaves, or any Thanksgiving-themed cutter. Just adjust the baking time slightly for smaller or larger shapes. The royal icing recipe also works for any decorating project.
Conclusion
These classic turkey sugar cookies have become a Thanksgiving tradition in my house, all because of a casual afternoon at my neighbor’s kitchen counter. They are simple enough for beginner bakers but pretty enough to impress anyone. The buttery cookie paired with the crisp royal icing is a combination that never gets old.
I hope you make these your own. Add extra cinnamon. Use different colors. Let the kids decorate them however they want—honestly, the imperfect ones are always the most charming. The whole point of these cookies is the joy they bring, not perfection.
So grab that turkey cookie cutter, preheat your oven, and make a mess in your kitchen. Your Thanksgiving table will thank you. And if you come up with a fun variation or decorating idea, I would love to hear about it. Drop a comment below or tag me in your photos. Happy baking, friends!
Pin This Recipe!
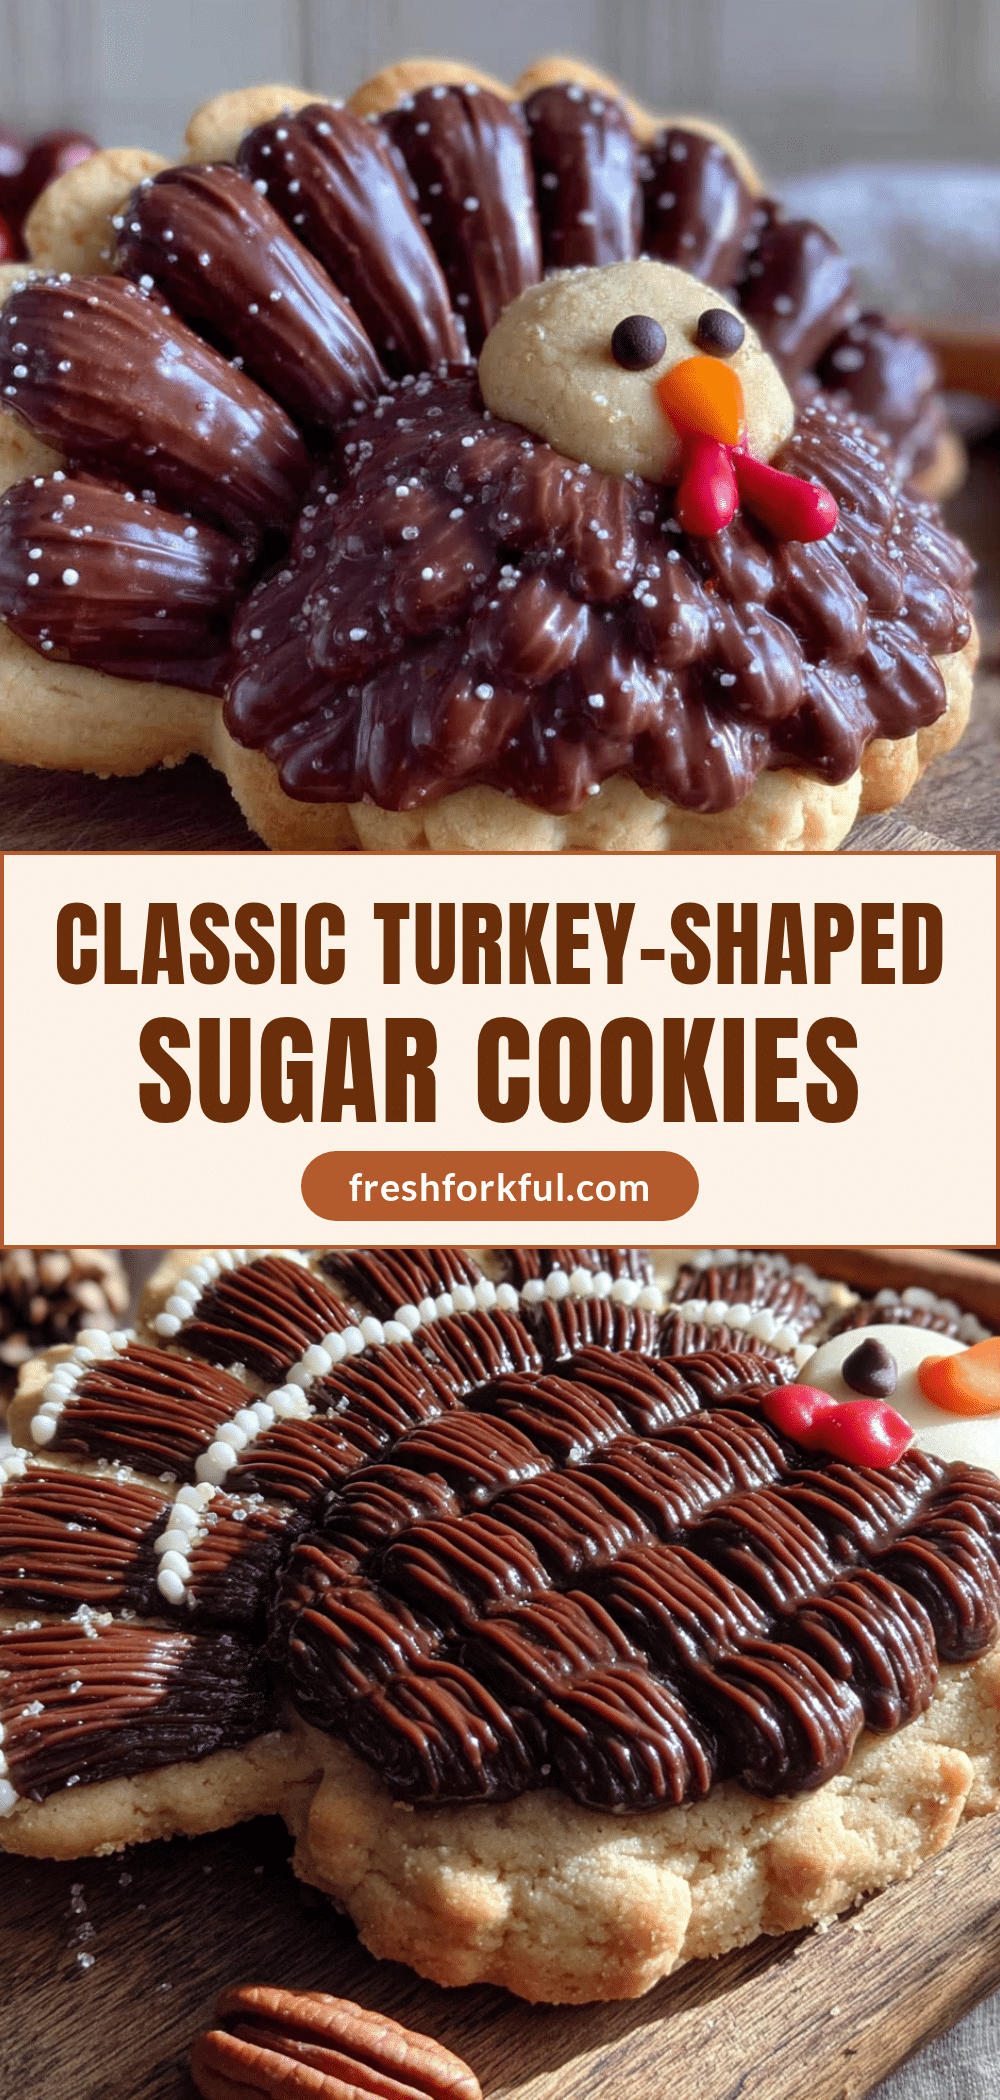
Classic Turkey Sugar Cookies with Easy Royal Icing

These buttery turkey-shaped sugar cookies are a Thanksgiving tradition, featuring a foolproof royal icing that sets beautifully. Perfect for holiday baking with family, they’re simple enough for beginners yet impressive enough for any dessert table.
- Prep Time: 30 minutes
- Cook Time: 10 minutes
- Total Time: 2 hours 40 minutes (includes 2 hours chilling)
- Yield: 24 servings 1x
- Category: Dessert
- Cuisine: American
Ingredients
- 2 ¾ cups (345g) all-purpose flour
- 1 cup (226g) unsalted butter, softened
- 1 cup (200g) granulated sugar
- 1 large egg, room temperature
- 1 teaspoon vanilla extract
- ½ teaspoon baking powder
- ½ teaspoon salt
- 4 cups (480g) powdered sugar
- 3 tablespoons meringue powder
- 6–7 tablespoons warm water
- 1 teaspoon vanilla extract (optional, for icing)
- Food coloring gels (orange, brown, yellow, red)
Instructions
- Make the cookie dough: In a medium bowl, whisk together flour, baking powder, and salt. Set aside. In a stand mixer, beat softened butter and granulated sugar on medium speed until light and fluffy, about 2-3 minutes. Scrape down sides. Add egg and vanilla extract, beat until combined, about 1 minute. Gradually add flour mixture on low speed until just combined.
- Chill the dough: Divide dough into two equal portions, flatten into 1-inch thick disks, wrap in plastic wrap, and refrigerate for at least 2 hours or up to 3 days.
- Roll and cut cookies: Preheat oven to 350°F (175°C). Line baking sheets with parchment paper. On a lightly floured surface, roll dough to ¼-inch thickness. Cut with turkey cookie cutter, placing cookies 1 inch apart on prepared sheets. Gather scraps, re-roll, and cut more.
- Bake cookies: Bake for 8-10 minutes until edges are just barely golden. Rotate sheets halfway through. Cool on baking sheets for 5 minutes, then transfer to wire rack to cool completely.
- Make royal icing: In a stand mixer with whisk attachment, combine powdered sugar and meringue powder. Add 6 tablespoons warm water and vanilla extract. Mix on low, then increase to medium-high and beat for 4-5 minutes until thick, glossy, and holds a stiff peak. Adjust consistency with water or powdered sugar as needed.
- Color and thin icing: Divide icing into bowls for each color. Add gel food coloring. For flooding, thin each color with water 1 teaspoon at a time until it reaches a 10-second consistency (ribbon disappears into surface in about 10 seconds).
- Decorate cookies: Transfer icing to piping bags with #2 tips or squeeze bottles. Outline and flood each section (body, feathers, beak, wattle). Use toothpick to spread icing. Let base colors dry 30 minutes before adding details. Add edible glitter or sprinkles while icing is wet.
Notes
Chill dough for at least 2 hours to prevent spreading. Watch cookies closely as they go from perfectly baked to overdone quickly. Use the 10-second test for royal icing consistency. Pipe largest areas first to prevent bleeding. Store decorated cookies in airtight container at room temperature for up to 2 weeks. Do not refrigerate. Undecorated cookies freeze well for up to 3 months.
Nutrition
- Serving Size: 1 cookie
- Calories: 180
- Sugar: 18
- Sodium: 95
- Fat: 8
- Saturated Fat: 5
- Carbohydrates: 26
- Protein: 1
Keywords: turkey cookies, sugar cookies, Thanksgiving cookies, royal icing, holiday baking, cut-out cookies


