Love this? Save it for later!
Share the inspiration with your friends
Hand me that skillet, I said to my neighbor Maria, who was holding it out like an offering over the fence. She’d watched me unloading groceries the week before, struggling with three bags and a toddler on my hip, and didn’t say anything at first. Then she appeared the next Tuesday with this dented cast iron pan and a crumpled index card covered in what I’d later learn was her mother’s handwriting. The card was smudged with what looked like tomato sauce and years of use. Honestly, I almost cried right there in my driveway.
Maria’s English is broken, and my Spanish is worse, but we’ve been communicating through food for about six months now. She’d noticed I always bought ground beef and rice, and she figured I needed a better way to cook them together. She was right. Her mother’s recipe for this cheesy ground beef and rice skillet was scribbled in a mix of Spanish and English, with measurements like “un poco” and “hasta que huela bien.” I’ve adapted it over time, making it my own while keeping her mother’s soul intact. You know that feeling when someone shares something truly personal with you? That’s what this recipe feels like.
The first time I made it, I forgot to drain the beef fat and ended up with something closer to soup than a skillet dinner. Maria laughed when I told her, then mimed tilting the pan and using a spoon. I’ve made it dozens of times since, tweaking the cheese blend, adjusting the rice-to-liquid ratio, and figuring out the perfect simmer time. This cheesy ground beef and rice skillet has become my go-to for those nights when I need dinner on the table fast, no fuss, no fancy ingredients. It’s the recipe that keeps giving, and I’m so glad to share it with you.
Why You’ll Love This Cheesy Ground Beef and Rice Skillet
Let me tell you why this recipe has earned a permanent spot in my weekly rotation. I’ve tested it on picky kids, hungry teenagers, and adults who claim they don’t like “casserole-type” food. Every single person has asked for seconds. That’s not just luck—it’s the combination of simple ingredients and a few smart techniques I’ve picked up along the way.
- Quick & Easy: This cheesy ground beef and rice skillet comes together in about 30 minutes from start to finish. Perfect for those evenings when you walk in the door and everyone is already asking what’s for dinner.
- Simple Ingredients: You probably have most of these in your pantry right now. No trips to specialty stores, no weird ingredients you’ll never use again. Just good, honest food.
- Perfect for Busy Weeknights: This is the definition of a one-pan wonder. Less cleanup, more time to actually sit down and enjoy your meal. I mean, who wants to wash a sink full of dishes after cooking all day?
- Crowd-Pleaser: Kids love the cheesy, savory flavor. Adults appreciate how satisfying and comforting it is. It’s the kind of dinner that makes everyone at the table happy.
- Unbelievably Delicious: The cheese gets all melty and golden on top, the rice absorbs all that beefy flavor, and every bite is pure comfort. It’s simple food done right.
What makes this cheesy ground beef and rice skillet different from other versions you might have tried? It’s the technique. I brown the beef until it’s really crispy on the edges, then I cook the rice right in the same pan with the beef drippings and aromatics. That extra step infuses every grain with flavor. Plus, I use a blend of two cheeses—sharp cheddar for bite and Monterey Jack for that stretchy, gooey texture we all crave. It’s not just another skillet dinner; it’s the one you’ll keep coming back to.
What Ingredients You Will Need
This recipe uses simple, wholesome ingredients that work together to create something truly special. Most of these are pantry staples, so you can whip this up anytime the craving hits.
- Ground Beef: 1 pound (450g) of 80/20 ground beef works best. The fat adds flavor and helps brown the meat nicely. If you use leaner beef, add a tablespoon of oil to prevent sticking.
- Long-Grain White Rice: 1 cup (200g) uncooked. I prefer long-grain because it stays fluffy and separate. Basmati or jasmine work great too. Avoid short-grain rice here—it gets too sticky.
- Yellow Onion: 1 medium, diced. About 1 cup. Adds sweetness and depth. I’ve used shallots in a pinch and they work fine.
- Garlic: 3 cloves, minced. Fresh is best, but 1 teaspoon of garlic powder works if that’s what you have.
- Beef Broth: 2 cups (480ml). Low-sodium is ideal so you can control the salt. Chicken broth works too, but beef gives a richer flavor.
- Canned Diced Tomatoes: 1 can (14.5 oz or 400g), undrained. Look for fire-roasted for extra flavor. I like Muir Glen or San Marzano brands.
- Tomato Paste: 2 tablespoons. This concentrates the tomato flavor and thickens the sauce nicely.
- Sharp Cheddar Cheese: 1 cup (120g), shredded. Buy a block and shred it yourself—it melts so much better than pre-shredded.
- Monterey Jack Cheese: 1 cup (120g), shredded. For that perfect melt. You can substitute with mozzarella if needed.
- Seasonings: 1 teaspoon each of smoked paprika, dried oregano, and ground cumin. Plus salt and black pepper to taste. Smoked paprika is non-negotiable in my book—it adds a subtle smokiness that makes this dish.
- Olive Oil: 1 tablespoon, for sautéing if needed.
- Fresh Parsley: For garnish. Optional but pretty. Chives work too.
Ingredient Selection Tips: When buying ground beef, look for meat that’s bright red with minimal gray spots. For the rice, I recommend Jasmine or Basmati for the fluffiest texture. If you’re using pre-shredded cheese, toss it with a teaspoon of cornstarch to help it melt smoother—those anti-caking agents can make cheese grainy.
Substitution Guidance: Use ground turkey or chicken instead of beef. Swap in brown rice, but increase the cooking time by about 15 minutes and add an extra 1/2 cup of broth. For a dairy-free version, use your favorite plant-based cheese shreds—just know the texture will be different. If you don’t have diced tomatoes, use 1 1/2 cups of tomato sauce and reduce the broth by 1/4 cup.
Equipment Needed
You don’t need much for this cheesy ground beef and rice skillet, and that’s part of the beauty. Here’s what you’ll need:
- Large Skillet or Deep Pan: A 12-inch skillet with a lid is ideal. Cast iron works beautifully, but any heavy-bottomed pan will do. I use my trusty Lodge cast iron that Maria gave me. If you don’t have a lid, use a baking sheet or aluminum foil to cover.
- Wooden Spoon or Spatula: For breaking up the beef and stirring. A flat-edged wooden spatula works best for scraping up those browned bits.
- Cutting Board and Knife: For dicing the onion and mincing garlic. Nothing fancy needed.
- Measuring Cups and Spoons: For accurate measurements. I’ve eyeballed it before and regretted it.
- Cheese Grater: If you’re buying block cheese, which I highly recommend. A box grater or microplane works.
- Can Opener: For the diced tomatoes. Obvious, but easy to forget.
Budget-Friendly Options: Don’t have a cast iron skillet? Any non-stick pan with a lid will work. No lid at all? A dinner plate placed upside down on top of the pan works in a pinch. I’ve done it. It’s not pretty, but it gets the job done. For the cheese grater, you can just buy pre-shredded—just know the melt won’t be as smooth.
Maintenance Tip: If using cast iron, don’t let the tomato sauce sit in the pan for too long after cooking. The acidity can react with the metal. Transfer leftovers to a glass container promptly.
Preparation Method
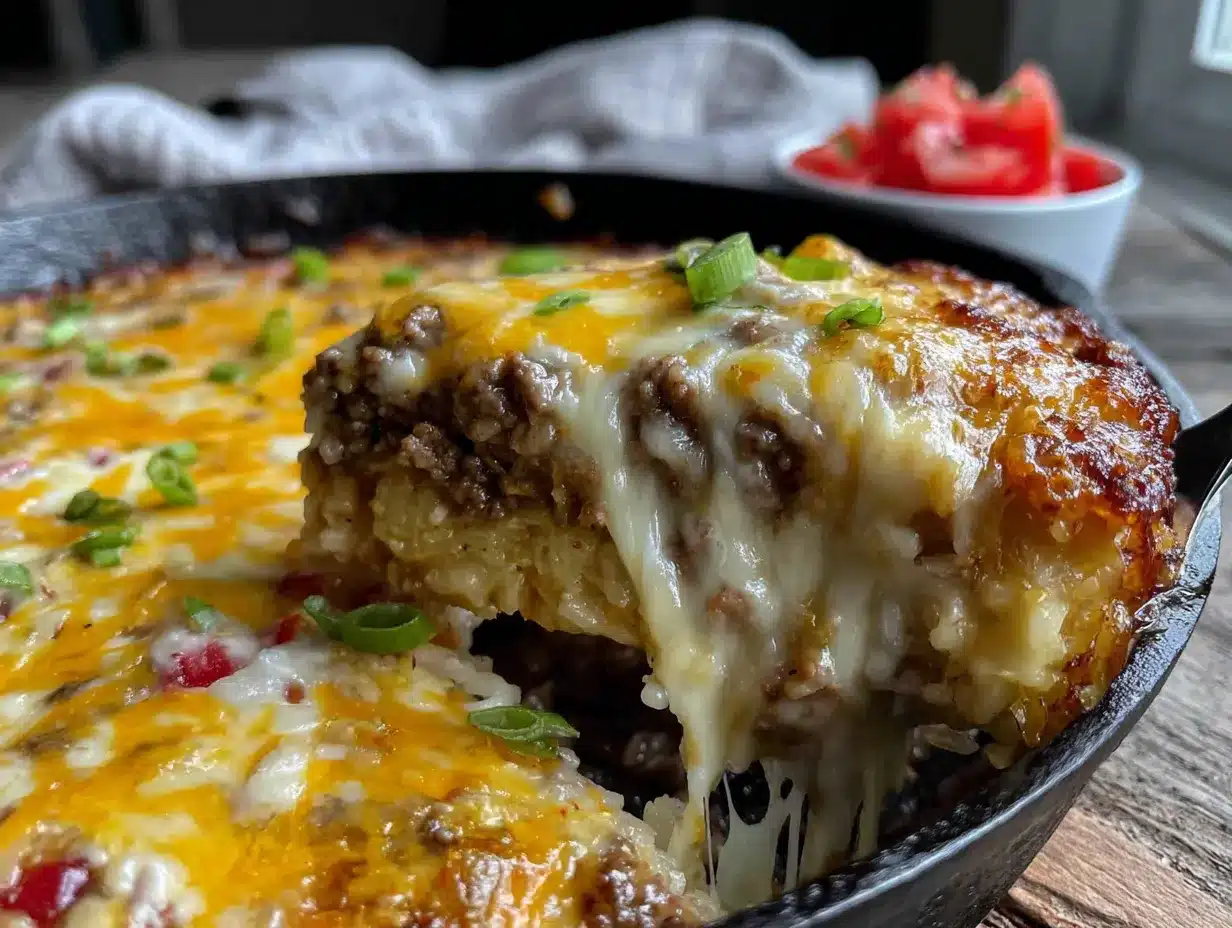
This cheesy ground beef and rice skillet comes together in about 30 minutes. Let me walk you through each step so you get perfect results every time.
- Brown the Beef: Place your skillet over medium-high heat and add the ground beef. Break it up with your spoon and let it cook undisturbed for 3-4 minutes until the bottom gets deeply browned. Then stir and continue cooking until fully browned, about 5-6 minutes total. You want those crispy edges—that’s where the flavor lives. If there’s more than 2 tablespoons of fat, drain the excess, leaving about a tablespoon in the pan.
- Sauté the Aromatics: Reduce heat to medium. Add the diced onion to the pan with the beef drippings. Cook for 3-4 minutes until softened and translucent. Add the minced garlic and cook for 30 seconds until fragrant. Your kitchen should smell amazing at this point. If the pan looks dry, add that tablespoon of olive oil.
- Toast the Rice: Add the uncooked rice to the pan and stir to coat it in all those flavorful bits. Cook for 1-2 minutes, stirring constantly. This toasting step is crucial—it keeps the rice from getting mushy and adds a nutty flavor. You’ll hear the rice start to crackle slightly.
- Add the Liquids and Seasonings: Pour in the beef broth and undrained diced tomatoes. Add the tomato paste, smoked paprika, oregano, cumin, and a pinch of salt and pepper. Stir everything together, scraping up any browned bits from the bottom of the pan. Bring the mixture to a boil.
- Simmer the Skillet: Once boiling, reduce the heat to low, cover the pan with the lid, and let it simmer gently for 18-20 minutes. Don’t peek too often—lifting the lid lets steam escape and can dry out the rice. The liquid should be mostly absorbed and the rice tender but with a slight bite.
- Add the Cheese: Remove the lid and sprinkle the shredded cheddar and Monterey Jack evenly over the top. Cover again and let it sit off the heat for 2-3 minutes until the cheese is completely melted and gooey. If you want a golden top, pop the skillet under the broiler for 1-2 minutes—just watch it carefully so it doesn’t burn.
- Rest and Serve: Let the skillet rest for 5 minutes before serving. This allows the rice to absorb any remaining liquid and the cheese to set slightly. Garnish with fresh parsley if you’re feeling fancy. Scoop directly from the pan and enjoy.
Troubleshooting Tips: If the rice is still crunchy after 20 minutes, add 1/4 cup of broth or water, cover, and cook for 5 more minutes. If the skillet seems too dry before the rice is done, add liquid in small increments. If it’s too soupy, remove the lid and cook uncovered for 3-4 minutes to evaporate excess liquid.
Cooking Tips & Techniques
I’ve made this cheesy ground beef and rice skillet more times than I can count, and I’ve learned a few things along the way. Let me share what works and what doesn’t.
Don’t Skip the Toasting Step: I know it seems like an extra, unnecessary step, but toasting the rice in the beef fat before adding liquid is what keeps the grains separate and fluffy. Skip this, and you’ll end up with sticky, clumpy rice. I learned this the hard way when I was rushing one Tuesday night and ended up with a glue-like mess.
Get That Maillard Reaction: Let the beef brown without moving it for those first few minutes. I used to stir constantly because I thought that’s what you’re supposed to do. But those deep brown bits on the bottom of the pan—the fond—are pure flavor. They dissolve into the broth and make the whole dish taste like you’ve been cooking all day.
Watch Your Heat: Once you add the liquid and cover the pan, keep the heat on low. A vigorous boil will cook the rice unevenly and can burn the bottom. A gentle simmer is what you’re after. I check mine after 10 minutes and give it a quick stir to make sure nothing’s sticking.
Timing Strategy: While the rice is simmering, shred your cheese and chop your parsley. This saves you from scrambling at the end. I also like to set the table and pour drinks during that time. It makes the whole dinner process feel less chaotic.
Consistency Secret: If you like your rice on the drier side, use 1 3/4 cups of broth instead of 2. If you prefer it saucier, add an extra 1/4 cup. I’ve made it both ways, and honestly, there’s no wrong answer. It’s all about what makes you happy.
Variations & Adaptations
This cheesy ground beef and rice skillet is endlessly adaptable. Here are some of my favorite variations.
Spicy Southwest Version: Add 1 diced jalapeño with the onion, use pepper jack cheese instead of Monterey Jack, and stir in 1/2 cup of frozen corn and a drained can of black beans along with the broth. Top with sliced avocado and a squeeze of lime. This version is my personal favorite when I’m craving something with a kick.
Vegetable-Packed Version: Add 1 cup of diced zucchini, 1 cup of chopped bell peppers, and 1 cup of frozen peas. Sauté the zucchini and peppers with the onion, then add the peas with the broth. You get extra nutrients and color without sacrificing any of the cheesy goodness. My kids don’t even notice the veggies.
Low-Carb Adaptation: Swap the rice for 2 cups of cauliflower rice. Cook the cauliflower rice separately according to package directions, then stir it in at the end along with the cheese. Reduce the broth to 1 cup since cauliflower releases water. This version is surprisingly satisfying and cuts the carbs significantly.
Meaty Upgrade: Use half ground beef and half ground Italian sausage for a deeper, more complex flavor. Brown the sausage first, then add the beef. You might need to drain a bit more fat. This is what I make when I want something extra indulgent.
Dairy-Free Version: Use your favorite dairy-free cheese shreds. I’ve had good luck with Violife and Daiya brands. Add a tablespoon of nutritional yeast along with the seasonings for a cheesy flavor without the dairy. The texture won’t be as stretchy, but the flavor is still fantastic.
Serving & Storage Suggestions
This cheesy ground beef and rice skillet is best served hot, straight from the pan. I like to scoop it into bowls and let everyone top it with their own extras. A dollop of sour cream, a sprinkle of hot sauce, some fresh cilantro—let people customize.
What to Serve With It: A simple green salad with a tangy vinaigrette balances the richness of the cheese. I also love serving it with warm tortillas or crusty bread to soak up any extra sauce. For a complete meal, add a side of steamed broccoli or roasted green beans. Honestly, this dish is hearty enough to stand on its own.
Storage Instructions: Let any leftovers cool completely, then transfer to an airtight container. Refrigerate for up to 4 days. The flavors actually meld and deepen overnight, so leftovers might taste even better. I often make a double batch just for this reason.
Freezer Tips: This skillet freezes beautifully. Portion it into freezer-safe containers and freeze for up to 3 months. Thaw overnight in the refrigerator before reheating. I like to freeze individual portions for quick lunches.
Reheating Methods: The best way to reheat is in a skillet over medium-low heat with a splash of broth or water to loosen it up. Stir occasionally until heated through, about 5-7 minutes. The microwave works too—just cover the bowl and heat in 1-minute intervals, stirring between each. Add a little water if it seems dry.
Flavor Development: I’ve noticed that this cheesy ground beef and rice skillet tastes even better the next day. The rice absorbs more of the liquid, and the spices have time to meld. It’s one of those rare dishes that improves with time.
Nutritional Information & Benefits
Here’s an approximate nutritional breakdown for one serving of this cheesy ground beef and rice skillet, based on 6 servings:
| Nutrient | Amount Per Serving |
|---|---|
| Calories | 485 |
| Protein | 28g |
| Fat | 22g |
| Saturated Fat | 10g |
| Carbohydrates | 42g |
| Fiber | 3g |
| Sugar | 5g |
| Sodium | 680mg |
Health Benefits: This dish provides a solid amount of protein from the beef and cheese, which helps keep you full and satisfied. The tomatoes are rich in lycopene, an antioxidant linked to heart health. Garlic and onions offer immune-boosting properties. The rice provides energy in the form of complex carbohydrates. For a balanced meal, serve it with a generous portion of vegetables on the side.
Dietary Considerations: This recipe is naturally gluten-free. For a lower-sodium version, use low-sodium broth and reduce the added salt. To lower the fat content, use lean ground beef and reduced-fat cheese. If you’re watching your carb intake, try the cauliflower rice variation mentioned earlier.
Potential Allergens: This recipe contains dairy from the cheese. It does not contain nuts, eggs, or soy. Always check your specific ingredient labels if you have food allergies.
Conclusion
This cheesy ground beef and rice skillet is more than just a weeknight dinner—it’s a reminder that the best recipes often come from the simplest exchanges. Maria didn’t give me a fancy cooking lesson or a binder full of recipes. She gave me a dented pan and a smudged card, and in doing so, she gave me a meal that has fed my family dozens of times over. That’s the kind of recipe worth holding onto.
I hope you make this your own. Add extra spice, swap in different cheese, throw in whatever vegetables are lingering in your crisper drawer. That’s what cooking is all about. This recipe is a starting point, not a rulebook. And honestly, I’d love to hear how it turns out for you. Drop a comment below and tell me about your version. Did you add something unexpected? Did your kids ask for seconds? Did you burn the garlic like I did the first time? Share it all.
Thanks for cooking along with me today. Now go make that cheesy ground beef and rice skillet—your family is going to love it.
Frequently Asked Questions
Can I use ground turkey instead of beef?
Absolutely. Ground turkey works great in this recipe. Just add a tablespoon of olive oil when browning since turkey is leaner than beef. The flavor will be slightly milder, so you might want to bump up the seasonings a bit.
Can I make this in advance for meal prep?
Yes, this is an excellent meal prep recipe. Cook it completely, let it cool, and portion it into containers. It reheats beautifully and tastes even better the next day. It will keep in the fridge for up to 4 days.
Why is my rice still crunchy after 20 minutes?
This usually happens when the heat was too low or the lid wasn’t tight enough. Add 1/4 cup of broth or water, cover tightly, and cook for 5 more minutes on low heat. Also, make sure your rice isn’t too old—older rice takes longer to cook.
Can I freeze this cheesy ground beef and rice skillet?
Yes, it freezes wonderfully. Let it cool completely, then transfer to freezer-safe containers. It will keep for up to 3 months. Thaw overnight in the fridge and reheat in a skillet with a splash of broth.
What can I use instead of diced tomatoes?
You can use 1 1/2 cups of tomato sauce or crushed tomatoes instead. If using tomato sauce, reduce the broth by 1/4 cup to keep the liquid ratio correct. Fresh diced tomatoes work too—use about 2 medium tomatoes, diced, and add them with the broth.
Pin This Recipe!

Cheesy Ground Beef & Rice Skillet: Easy One-Pan Dinner

A quick and easy one-pan dinner featuring ground beef, rice, and a blend of sharp cheddar and Monterey Jack cheese. Perfect for busy weeknights, this comforting skillet meal comes together in about 30 minutes with simple pantry ingredients.
- Prep Time: 10 minutes
- Cook Time: 20 minutes
- Total Time: 30 minutes
- Yield: 6 servings 1x
- Category: Main Course
- Cuisine: American
Ingredients
- 1 pound (450g) 80/20 ground beef
- 1 cup (200g) uncooked long-grain white rice (such as basmati or jasmine)
- 1 medium yellow onion, diced (about 1 cup)
- 3 cloves garlic, minced (or 1 teaspoon garlic powder)
- 2 cups (480ml) low-sodium beef broth
- 1 can (14.5 oz or 400g) diced tomatoes, undrained (fire-roasted preferred)
- 2 tablespoons tomato paste
- 1 cup (120g) shredded sharp cheddar cheese
- 1 cup (120g) shredded Monterey Jack cheese
- 1 teaspoon smoked paprika
- 1 teaspoon dried oregano
- 1 teaspoon ground cumin
- Salt and black pepper to taste
- 1 tablespoon olive oil (if needed)
- Fresh parsley for garnish (optional)
Instructions
- Brown the Beef: Place a large skillet (12-inch with lid) over medium-high heat. Add ground beef and break it up with a spoon. Cook undisturbed for 3-4 minutes until deeply browned on the bottom, then stir and continue cooking until fully browned, about 5-6 minutes total. Drain excess fat, leaving about 1 tablespoon in the pan.
- Sauté the Aromatics: Reduce heat to medium. Add diced onion to the pan with the beef drippings. Cook for 3-4 minutes until softened and translucent. Add minced garlic and cook for 30 seconds until fragrant. If the pan looks dry, add 1 tablespoon olive oil.
- Toast the Rice: Add uncooked rice to the pan and stir to coat in the drippings. Cook for 1-2 minutes, stirring constantly, until the rice crackles slightly and smells nutty.
- Add Liquids and Seasonings: Pour in beef broth and undrained diced tomatoes. Add tomato paste, smoked paprika, oregano, cumin, and a pinch of salt and pepper. Stir well, scraping up any browned bits from the bottom. Bring to a boil.
- Simmer the Skillet: Reduce heat to low, cover the pan with a lid, and let simmer gently for 18-20 minutes. Do not lift the lid frequently. The liquid should be mostly absorbed and the rice tender with a slight bite.
- Add the Cheese: Remove lid and sprinkle shredded cheddar and Monterey Jack evenly over the top. Cover again and let sit off the heat for 2-3 minutes until cheese is melted and gooey. For a golden top, broil for 1-2 minutes, watching carefully.
- Rest and Serve: Let the skillet rest for 5 minutes before serving. Garnish with fresh parsley if desired. Scoop directly from the pan and enjoy.
Notes
For best results, use block cheese and shred it yourself for smoother melting. If rice is still crunchy after 20 minutes, add 1/4 cup broth or water, cover, and cook 5 more minutes. If too soupy, cook uncovered for 3-4 minutes. Leftovers keep in the fridge for up to 4 days and freeze well for up to 3 months.
Nutrition
- Serving Size: 1 serving (about 1.5
- Calories: 485
- Sugar: 5
- Sodium: 680
- Fat: 22
- Saturated Fat: 10
- Carbohydrates: 42
- Fiber: 3
- Protein: 28
Keywords: cheesy ground beef and rice skillet, one-pan dinner, easy weeknight meal, ground beef recipe, cheesy skillet dinner


