Love this? Save it for later!
Share the inspiration with your friends
It was 11:47 PM on a random Thursday in October, and I was wide awake with a very specific, slightly unhinged craving. I didn’t want candy corn or those sad store-bought pumpkin cookies. I wanted something that looked absolutely ridiculous and tasted like a buttery, almond-infused shortbread dream. The problem? I didn’t have any cookie cutters shaped like body parts, and I certainly didn’t have a “witch finger” recipe memorized. But I had a bag of slivered almonds leftover from a salad I made three days ago, a stick of butter that was finally at room temperature, and the sudden, undeniable urge to make my friends at the upcoming Halloween potluck do a double-take. Honestly, it was one of those ideas that feels either genius or a complete disaster, and at that hour, I was all in. I mean, what’s the worst that could happen? I end up with a batch of weird-looking, delicious cookies? That’s a win in my book.
I started pulling things from the pantry, and let me tell you, the kitchen was a mess. Flour dust on my favorite black sweater, a cracked egg shell that I spent five minutes fishing out of the bowl—the whole nine yards. But when those first cookies came out of the oven, with their almond “fingernails” slightly toasted and the little “knuckle” indentations looking eerily real, I knew I had stumbled onto something special. They were the star of the potluck, no contest. People were grossed out and delighted in equal measure, and that’s exactly the kind of reaction you want when you’re hosting. Maybe you’ve been there, staying up way too late, chasing a silly, brilliant idea? That’s how these witch finger cookies were born, and I’ve been making them for every Halloween gathering since.
Why You’ll Love This Recipe
Look, I’ve tested a lot of Halloween cookie recipes over the years. Some are too dry, some are too sweet, and some just fall apart when you try to shape them into something spooky. This one is different. It’s the kind of recipe that makes you look like a baking genius with minimal actual effort. As a food blogger who has made more batches of these than I can count, I can tell you with confidence: this is the version you want.
- Quick & Easy: From start to finish, you’re looking at about 45 minutes. The dough comes together in one bowl, and there’s no chilling required. Perfect for those last-minute Halloween party invites.
- Simple Ingredients: You probably have 90% of these in your kitchen right now. No weird gelatin or specialty food coloring needed—just basic baking staples.
- Perfect for Halloween Parties: These are the ultimate conversation starter. They’re gross-looking in the best way, and they always get the biggest reaction at any gathering.
- Crowd-Pleaser: Kids love the creepy factor, adults love the buttery, almond flavor. They disappear faster than any candy bowl I’ve ever set out.
- Unbelievably Delicious: This isn’t just a gimmick cookie. The texture is perfectly crumbly, and the almond extract gives it this warm, almost marzipan-like flavor that’s absolutely addictive.
What makes this recipe stand out from the dozens of other witch finger cookies out there? It’s the texture. I spent three batches getting it just right—not too soft that the fingers lose their shape, not too hard that they crack when you try to form the knuckles. The secret is using almond flour in addition to all-purpose flour. It gives the cookies a tender, melt-in-your-mouth quality that regular shortbread just can’t match. This isn’t just another version of a Halloween cookie. It’s the best version, and it’s the one you’ll come back to year after year.
What Ingredients You Will Need
This recipe uses simple, wholesome ingredients to deliver that signature buttery flavor and creepy-crawly texture. Most of these are pantry staples, which makes this an easy recipe to whip up on a whim.
- For the Cookie Dough:
- 1 cup (2 sticks) unsalted butter, softened (I use Kerrygold for the best flavor, but any good-quality butter works)
- 1 cup powdered sugar (this gives the cookies a finer, more tender crumb than granulated sugar)
- 1 large egg, room temperature
- 1 teaspoon vanilla extract
- 1 teaspoon almond extract (don’t skip this—it’s the key to that signature flavor)
- 2 ½ cups all-purpose flour
- ½ cup almond flour (this is my secret ingredient for the perfect texture; Bob’s Red Mill is my go-to brand)
- ½ teaspoon salt
- For the Decoration:
- About 40 whole blanched almonds (one for each cookie; look for ones that are uniform in size and shape for the most realistic “nails”)
- Red food coloring (gel works best for a deep, bloody color; I use Americolor Super Red)
- Green food coloring (for that sickly witch skin tone)
- A small paintbrush (a clean, unused one from a craft store is perfect)
Ingredient Selection Tips: When choosing your almonds, look for the “blanched” variety—these have the skin removed, giving them that pale, nail-like appearance. If you only have slivered almonds, those work in a pinch, but whole blanched almonds look much more realistic. For the almond flour, make sure you’re not using almond meal. Almond flour is much finer and will give you a smoother dough. If you need a nut-free version, you can substitute the almond flour with an equal amount of all-purpose flour, but the texture will be slightly less tender. You can also use a gluten-free all-purpose blend for a gluten-free version, just be aware the dough might be a bit more fragile.
Equipment Needed
You don’t need any fancy gadgets for this recipe, which is part of its charm. Here’s what you’ll need to get the job done:
- Large mixing bowl and a hand mixer (or a stand mixer with the paddle attachment—I’ve used both, and either works great)
- Measuring cups and spoons
- Baking sheets (I recommend lining them with parchment paper or a silicone baking mat for easy cleanup)
- A sharp knife or a bench scraper (for cutting the dough into finger-sized pieces)
- A small paintbrush (for applying the food coloring; I keep a set of cheap craft brushes just for baking)
- Cooling rack
If you don’t have a hand mixer, you can cream the butter and sugar by hand with a wooden spoon. It’ll take a bit more elbow grease, but it’s totally doable. For the knuckle indentations, I use the back of a small knife, but the back of a spoon works just as well. And if you don’t have a paintbrush, you can use a toothpick to dab on the red food coloring for the “bloody” effect. It’s a little messier, but it gets the job done.
Preparation Method
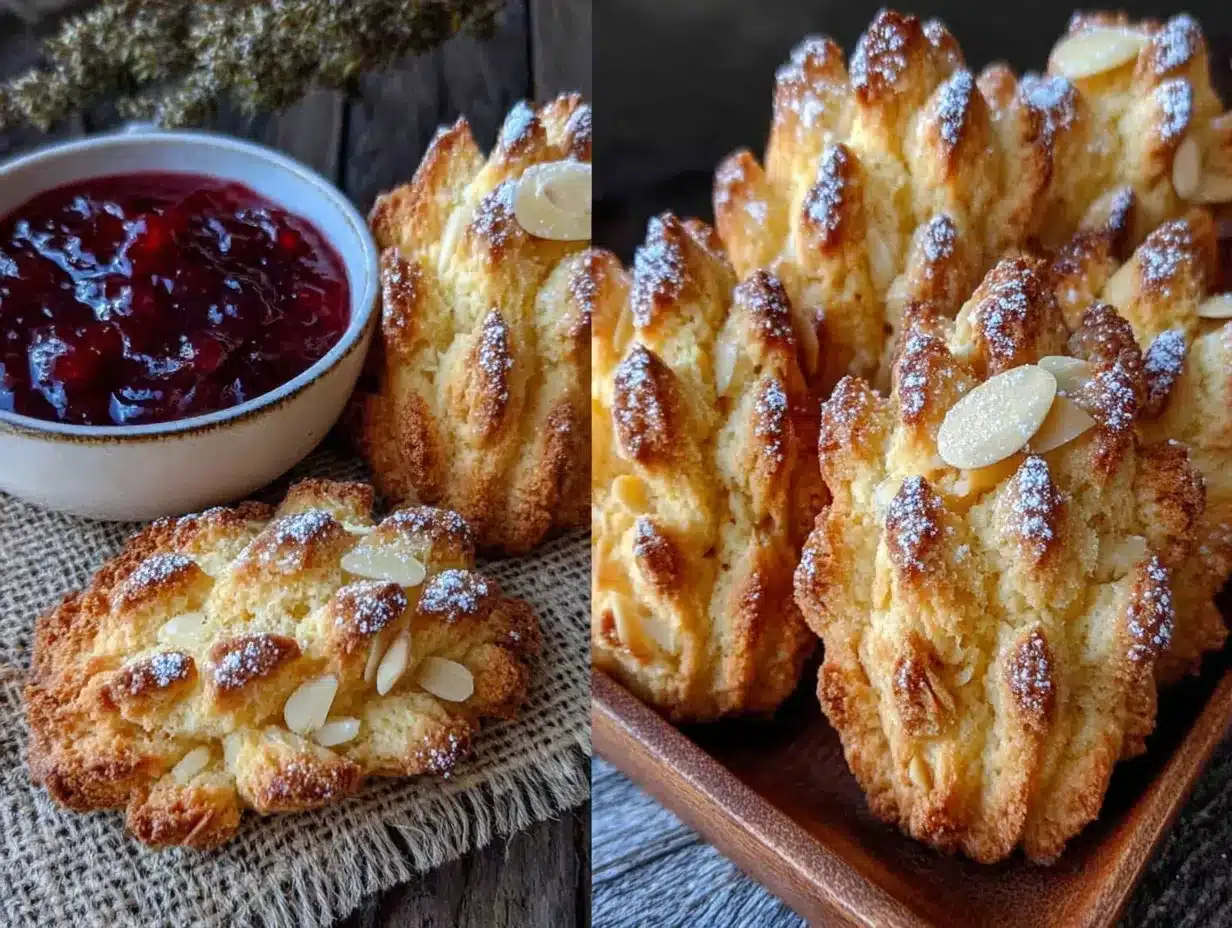
Alright, let’s get to the fun part. Follow these steps, and you’ll have a batch of gloriously creepy cookies in no time.
- Preheat and Prep: Preheat your oven to 325°F (160°C). Line two baking sheets with parchment paper or silicone baking mats. This is non-negotiable—these cookies are delicate, and they’ll stick to an unlined pan.
- Cream the Butter and Sugar: In a large mixing bowl, beat the softened butter and powdered sugar together until light and fluffy. This should take about 2-3 minutes with a hand mixer on medium speed. You’re looking for a pale, creamy texture. Don’t rush this step—properly creamed butter and sugar is the foundation of a good shortbread.
- Add the Wet Ingredients: Beat in the egg, vanilla extract, and almond extract until everything is well combined. The mixture might look a little curdled at this point, but don’t worry—that’s totally normal. It will come together once you add the dry ingredients.
- Combine the Dry Ingredients: In a separate bowl, whisk together the all-purpose flour, almond flour, and salt. Gradually add this dry mixture to the wet ingredients, mixing on low speed until a soft dough forms. The dough should be pliable but not sticky. If it feels too sticky, add an extra tablespoon of flour. If it’s too dry, add a teaspoon of milk.
- Shape the Fingers: This is where the magic happens. Scoop out about a tablespoon of dough and roll it into a log shape, about 3 inches long and ¾ inch thick. Gently taper one end to form the “wrist” and make the other end slightly wider to form the “fingertip.” Place it on the prepared baking sheet. Repeat with the remaining dough, spacing the fingers about 2 inches apart. You should get about 35-40 cookies.
- Create the Knuckles: Using the back of a small knife or a chopstick, gently press three indentations into each finger to create the knuckles. Don’t press too hard—you want the indentations to be visible after baking, but you don’t want to cut through the dough.
- Add the Almond Nails: Press one whole blanched almond firmly into the wider end of each finger to create the “nail.” Make sure it’s pressed in about halfway so it stays put during baking.
- Bake: Bake for 12-15 minutes, or until the cookies are just set and the edges are very lightly golden. The bottoms should be a pale golden brown. The key here is to not overbake—they should be pale, not browned, to maintain that creepy witch-skin color.
- Cool: Let the cookies cool on the baking sheet for 5 minutes, then carefully transfer them to a wire rack to cool completely. They will be very fragile when warm, so handle them gently.
- Decorate: Once the cookies are completely cool, it’s time for the finishing touches. Mix a drop of green food coloring with a teaspoon of water to create a wash. Using your paintbrush, lightly brush the wash over the cookies to give them that sickly witch skin tone. Then, dip the tip of your brush in red food coloring and dab a small amount around the base of each almond “nail” to look like blood. Let the food coloring dry for about 10 minutes before serving.
Sensory Cue: When you press the almond into the dough, you should feel it sink in about halfway with a gentle push. If it slides in too easily, your dough is too soft. If it won’t go in at all, your dough is too dry. The perfect dough will hold the almond firmly in place without cracking around the edges.
Cooking Tips & Techniques
I’ve made these cookies more times than I care to admit, and I’ve learned a few things the hard way. Let me save you some trouble.
The Dough Temperature is Everything: If your dough gets too warm from handling, the cookies will spread in the oven and lose their finger shape. If you notice the dough getting soft and sticky, pop the baking sheet in the fridge for 10 minutes before baking. I’ve had entire batches turn into sad, blob-like lumps because I got too enthusiastic with the shaping.
Don’t Skip the Almond Extract: I know it can be strong, but this is what gives the cookies that authentic witchy flavor. One time I ran out and used extra vanilla instead, and the cookies just tasted like bland shortbread. The almond extract is non-negotiable if you want that marzipan-like depth.
Multitasking Strategy: While the first batch is baking, shape the second batch. This keeps the workflow smooth and prevents the dough from sitting out too long. I usually shape all the cookies first, then bake them in two batches.
Common Mistake: Overbaking: These cookies should be pale. If they start turning golden brown, you’ve gone too far. They’ll still taste fine, but they won’t have that creepy, flesh-like appearance. Set a timer, and check them at the 12-minute mark.
The “Blood” Effect: For the most realistic effect, use gel food coloring instead of liquid. It’s thicker and creates a more convincing “blood” texture. I learned this after a batch where the liquid coloring just soaked into the cookie and disappeared.
Variations & Adaptations
One of the best things about this recipe is how easy it is to customize. Here are some variations I’ve tried over the years:
- Vegan Witch Fingers: Substitute the butter with a high-quality vegan butter (I like Miyoko’s), and use a flax egg (1 tablespoon ground flaxseed mixed with 3 tablespoons water) instead of the regular egg. The texture will be slightly less tender, but they’ll still be delicious and creepy.
- Gluten-Free Version: Use a 1:1 gluten-free all-purpose flour blend. I’ve had great results with King Arthur’s Measure for Measure. The dough will be a bit more fragile, so handle it gently and chill it for 15 minutes before shaping.
- Chocolate Witch Fingers: Replace ¼ cup of the all-purpose flour with ¼ cup of unsweetened cocoa powder. The chocolate version looks even more sinister, and the flavor pairs beautifully with the almond extract.
- Spooky Spider Variation: Instead of shaping them into fingers, roll the dough into small balls, press an almond into the center, and use black licorice strings for spider legs. I tried this for a friend’s “Spider Night” party, and they were a huge hit.
- Colorful Nails: For a less gruesome version, use colored sprinkles or candy-coated chocolates instead of almonds for the nails. This is a great option if you’re making these for a younger crowd.
Serving & Storage Suggestions
These cookies are best served at room temperature, and they look absolutely terrifying arranged on a platter with a few fake spider webs and plastic spiders scattered around. For the full effect, serve them with a bowl of “blood” (strawberry or raspberry sauce) for dipping.
What to Serve Alongside: These pair perfectly with a hot cup of spiced apple cider or a pumpkin spice latte. If you’re hosting a Halloween party, arrange them on a platter with other spooky treats like my creamy spider web dip or some ghostly meringue cookies for a full spread.
Storage Instructions: Store the undecorated cookies in an airtight container at room temperature for up to 5 days. Do not add the food coloring until just before serving, as it can bleed into the cookies over time. If you need to make them ahead, bake and shape the cookies, then store them undecorated. Add the almond nails and food coloring on the day of your party.
Freezer Instructions: You can freeze the shaped, unbaked cookies for up to 3 months. Place them on a baking sheet in the freezer until solid, then transfer them to a freezer bag. When you’re ready to bake, add 2-3 minutes to the baking time. Do not thaw before baking—pop them straight from the freezer into the oven.
Flavor Development: These cookies actually taste better the next day. The almond flavor deepens and melds with the butter, creating an even more complex taste. So don’t worry if you make them a day ahead—they’ll be even more delicious.
Nutritional Information & Benefits
Let’s be real—these are Halloween cookies, not health food. But here’s the breakdown so you know what you’re working with. Per cookie (based on 40 cookies):
- Calories: 110
- Fat: 7g
- Carbohydrates: 11g
- Protein: 2g
- Sugar: 5g
Health Highlights: The almonds in this recipe provide a small dose of vitamin E and healthy monounsaturated fats. The almond flour adds a bit of extra protein compared to regular cookies. That said, these are a treat, and I firmly believe that treats should be enjoyed without guilt. They’re perfect for a once-a-year Halloween indulgence.
Dietary Considerations: This recipe contains dairy, eggs, gluten, and tree nuts (almonds). For a nut-free version, use all all-purpose flour and skip the almond extract, substituting with extra vanilla. For a dairy-free version, use vegan butter as mentioned in the variations section.
I always tell my readers that balance is key. Enjoy a couple of these with your spooky punch, fill up on the veggie platter, and call it a win. That’s what Halloween is all about.
Conclusion
These witch finger cookies are more than just a Halloween novelty—they’re a testament to what happens when you let a late-night craving run wild. They’re creepy, they’re delicious, and they’re guaranteed to be the most talked-about item at any Halloween gathering. The combination of buttery shortbread and fragrant almond is genuinely addictive, and the look on people’s faces when they realize what they’re eating is priceless.
I love this recipe because it brings out the playful side of baking. It’s not about perfection—it’s about having fun, getting a little messy, and creating something that makes people laugh and gasp in equal measure. Whether you make them exactly as written or put your own spin on them, I promise you’ll have a blast.
So go ahead—get your hands dirty, embrace the weirdness, and make a batch of these for your next Halloween party. And when your guests ask for the recipe (and they will), send them my way! Drop a comment below and let me know how yours turned out. Did you add any creative twists? Did anyone refuse to eat them because they looked too real? I’d love to hear your stories. Happy Halloween, and happy baking!
Frequently Asked Questions
Can I make these cookies ahead of time?
Absolutely! You can bake the cookies up to 5 days in advance and store them in an airtight container. Just wait to add the food coloring until the day you’re serving them so it doesn’t bleed into the cookies.
Why did my cookies spread and lose their shape?
This usually happens if the dough is too warm. If your kitchen is hot or you’ve been handling the dough for a while, pop the shaped cookies in the fridge for 10-15 minutes before baking. This firms up the butter and helps them hold their shape.
Can I use a different type of nut for the nails?
Yes! Whole pecans or cashews work well, though they won’t look quite as nail-like. You can also use candy corn for a sweeter, more colorful version. Just press them in gently before baking.
How do I get the food coloring to look realistic?
Use gel food coloring for the best effect. For the “blood,” dab a small amount around the base of the almond and let it dry. For the skin tone, mix a drop of green gel coloring with a teaspoon of water and brush it lightly over the cookie.
Can I freeze the baked cookies?
Yes, but I recommend freezing them before adding the food coloring. Place the cooled, undecorated cookies in a single layer in a freezer-safe container. They’ll keep for up to 3 months. Thaw at room temperature, then add the food coloring before serving.
Pin This Recipe!
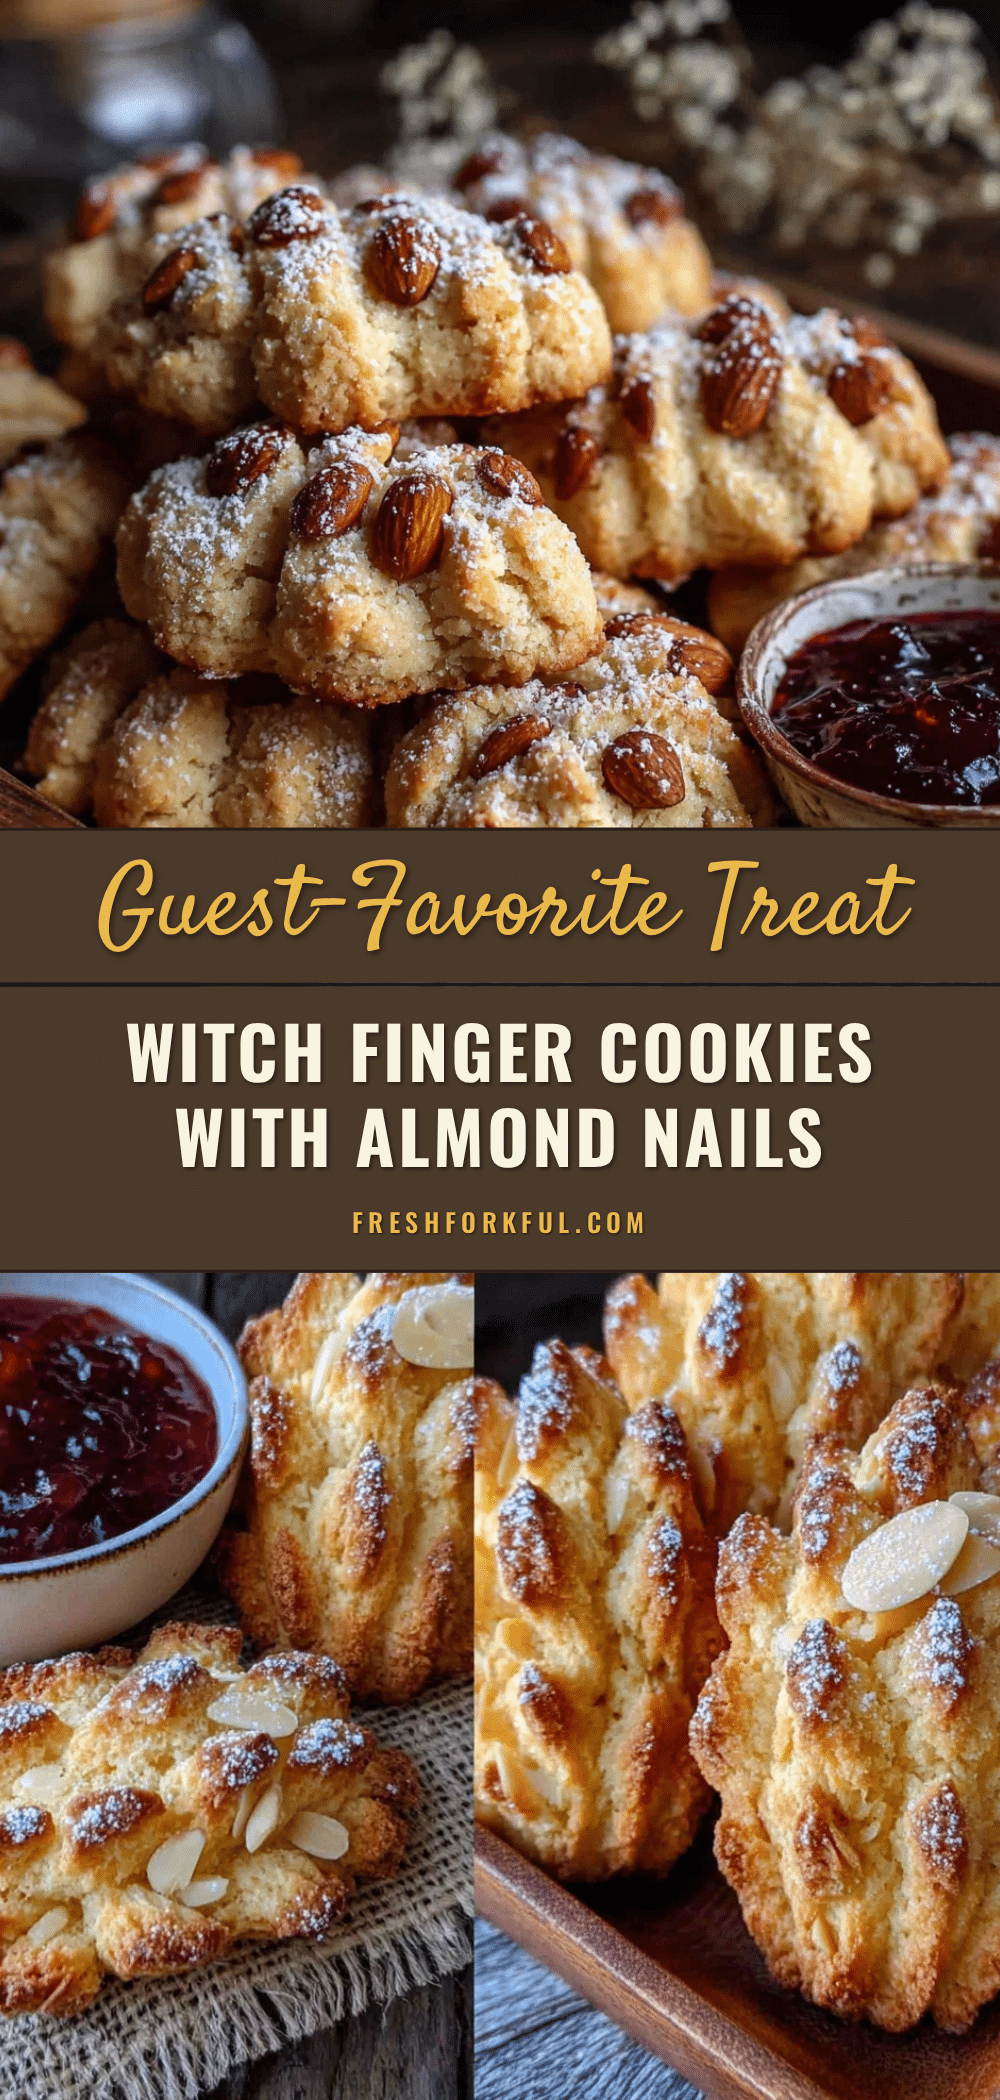
Best Witch Finger Cookies with Almond Nails for Halloween

These creepy but delicious witch finger cookies are made with a buttery almond shortbread dough and topped with almond ‘nails’. Perfect for Halloween parties, they’re easy to make and guaranteed to be a conversation starter.
- Prep Time: 20 minutes
- Cook Time: 15 minutes
- Total Time: 45 minutes
- Yield: 35-40 cookies 1x
- Category: Dessert
- Cuisine: American
Ingredients
- 1 cup (2 sticks) unsalted butter, softened
- 1 cup powdered sugar
- 1 large egg, room temperature
- 1 teaspoon vanilla extract
- 1 teaspoon almond extract
- 2 ½ cups all-purpose flour
- ½ cup almond flour
- ½ teaspoon salt
- About 40 whole blanched almonds
- Red food coloring (gel works best)
- Green food coloring
- A small paintbrush
Instructions
- Preheat your oven to 325°F (160°C). Line two baking sheets with parchment paper or silicone baking mats.
- In a large mixing bowl, beat the softened butter and powdered sugar together until light and fluffy, about 2-3 minutes with a hand mixer on medium speed.
- Beat in the egg, vanilla extract, and almond extract until well combined.
- In a separate bowl, whisk together the all-purpose flour, almond flour, and salt. Gradually add this dry mixture to the wet ingredients, mixing on low speed until a soft dough forms.
- Scoop out about a tablespoon of dough and roll it into a log shape, about 3 inches long and ¾ inch thick. Gently taper one end to form the ‘wrist’ and make the other end slightly wider to form the ‘fingertip’. Place on the prepared baking sheet. Repeat with remaining dough, spacing fingers about 2 inches apart. You should get about 35-40 cookies.
- Using the back of a small knife or a chopstick, gently press three indentations into each finger to create the knuckles.
- Press one whole blanched almond firmly into the wider end of each finger to create the ‘nail’, pressing it in about halfway.
- Bake for 12-15 minutes, or until the cookies are just set and the edges are very lightly golden. The bottoms should be a pale golden brown.
- Let the cookies cool on the baking sheet for 5 minutes, then carefully transfer them to a wire rack to cool completely.
- Once completely cool, mix a drop of green food coloring with a teaspoon of water to create a wash. Lightly brush the wash over the cookies. Then, dip the tip of your brush in red food coloring and dab a small amount around the base of each almond ‘nail’ to look like blood. Let the food coloring dry for about 10 minutes before serving.
Notes
The dough temperature is crucial—if it gets too warm, the cookies will spread. Chill the shaped cookies for 10-15 minutes before baking if needed. Do not overbake; the cookies should remain pale for a realistic witch skin tone. For best results, use gel food coloring for the ‘blood’ effect. Store undecorated cookies in an airtight container at room temperature for up to 5 days; add food coloring just before serving.
Nutrition
- Serving Size: 1 cookie
- Calories: 110
- Sugar: 5
- Sodium: 35
- Fat: 7
- Saturated Fat: 3.5
- Carbohydrates: 11
- Fiber: 0.5
- Protein: 2
Keywords: witch finger cookies, Halloween cookies, almond shortbread, spooky cookies, Halloween dessert, creepy cookies, almond nail cookies


