Love this? Save it for later!
Share the inspiration with your friends
Last Thursday, I was wrestling with a bag of mushrooms at the farmers market, trying to decide if I really needed another ingredient for dinner. A woman next to me, maybe sixty, with flour dusted on her apron, just watched me for a second. Then she pointed at the mushrooms and said, “Those are just waiting for a story.” I laughed and told her I was stuck between two recipes and couldn’t commit. She smiled, picked up a portobello, and told me her grandmother used to stuff them with whatever was left from Sunday dinner. That conversation—standing there between the zucchini and the bell peppers—is how these Kid-Approved Green Bean Casserole Stuffed Mushrooms came to life.
She didn’t give me a formal recipe, you know. She just described the feeling of biting into a mushroom cap that tasted like a whole meal. I went home, looked at the green beans in my fridge, and thought about my own kids. They love green bean casserole, but they pick at the mushrooms in it. So I flipped the script. I stuffed the mushrooms *with* the casserole. Honestly, it was one of those accidental genius moments that happens when you’re tired and just trying to use up leftovers.
I messed up the first batch, of course. I used cremini mushrooms that were too small, and the filling just slid off. My youngest said it looked like “soup on a plate.” But the second try? That was the one. Big, sturdy mushroom caps, a creamy green bean filling, and a crunchy fried onion topping that made my kids fight over the last one. Maybe you’ve been there—staring at a dish that needs a little magic, not a whole new recipe. That’s exactly what this is. It’s comfort food turned into a handheld bite, and it’s the reason I keep coming back to that market conversation. It wasn’t just a tip; it was a reminder that the best recipes come from talking to strangers.
Why You’ll Love This Recipe
I’ve tested this recipe about six times now, tweaking the creaminess and the crunch until it felt just right. As someone who cooks for a family on a budget, I can tell you this one checks every box. It’s not just another stuffed mushroom recipe—it’s the one that actually gets eaten by picky eaters.
- Quick & Easy: From start to table in about 35 minutes. Perfect for a Tuesday night when you forgot to plan dinner.
- Simple Ingredients: You probably have green beans, cream of mushroom soup, and fried onions in your pantry right now. No fancy cheese or obscure spices required.
- Perfect for Family Dinners: Great as a side dish or a main course when served with a simple salad. My kids call them “casserole cups.”
- Crowd-Pleaser: I brought these to a potluck last month, and they disappeared before the main dishes even hit the table. Adults love them, kids devour them.
- Unbelievably Delicious: The creamy filling contrasts with the juicy mushroom cap, and the crunchy topping ties it all together. It’s comfort food in a single bite.
What makes this different from other stuffed mushroom recipes is the texture balance. I blend part of the green bean mixture to create a creamy base while leaving some beans whole for bite. That little trick makes the filling hold together without being mushy. It’s the kind of recipe that makes you close your eyes after the first bite—trust me, I’ve done it. Plus, it reheats beautifully, which is a lifesaver for busy weeknights when you’re feeding hungry kids on a schedule.
What Ingredients You Will Need
This recipe uses simple, wholesome ingredients that come together to create a creamy, crunchy, and utterly satisfying dish. Most of these are pantry staples, which makes this a go-to for last-minute meals or holiday leftovers.
- For the Mushrooms:
- 12 large white or cremini mushrooms, stems removed and reserved (look for caps that are firm and about 2 inches wide—they hold the filling best)
- 2 tablespoons olive oil (for brushing the caps; adds richness and helps them brown)
- Salt and black pepper, to taste
- For the Filling:
- 2 cups fresh or frozen green beans, trimmed and cut into 1-inch pieces (if using frozen, thaw and pat dry—nobody wants soggy filling)
- 1 can (10.5 ounces) condensed cream of mushroom soup (I prefer Campbell’s for consistency, but any brand works)
- 1/2 cup milk (whole milk makes it creamier, but 2% works fine too)
- 1/2 cup shredded cheddar cheese (sharp cheddar adds the most flavor; mild cheddar is gentler for kids)
- 1/4 cup sour cream (adds tanginess and keeps the filling moist)
- 1/2 teaspoon garlic powder
- 1/4 teaspoon onion powder
- 1/4 teaspoon smoked paprika (optional, but it adds a subtle warmth)
- Salt and pepper, to taste
- For the Topping:
- 1 cup French’s crispy fried onions (crush them slightly for better coverage—I learned this after the first batch where they just rolled off)
- 1/4 cup grated Parmesan cheese (the kind in the green can works fine, but fresh grated melts better)
Ingredient Tips: For the mushrooms, pick caps that are deep enough to hold filling—flat ones will spill over. If you’re dairy-free, swap the milk with unsweetened almond milk and use a dairy-free cheese shred. I’ve tried this with oat milk too, and it works, though the filling is slightly less thick. For a gluten-free version, use gluten-free cream of mushroom soup and check your fried onions—some brands contain wheat flour. I personally like using fresh green beans when they’re in season, but frozen ones save time and are just as good in this recipe.
Equipment Needed
You don’t need a fancy kitchen to pull this off. Here’s what you’ll need:
- Baking sheet or 9×13-inch baking dish (a rimmed sheet pan works best to catch any drips)
- Mixing bowls (one medium, one small)
- Small skillet or saucepan (for blanching the green beans)
- Sharp knife and cutting board
- Measuring cups and spoons
- Fork or potato masher (for partially mashing the bean mixture)
- Pastry brush (optional, for brushing oil on mushrooms—your fingers work too)
If you don’t have a pastry brush, just drizzle the oil over the mushroom caps and rub it in with your hands. I’ve done it that way plenty of times, and it works just fine. For the baking dish, any oven-safe pan will do—just make sure the mushrooms fit snugly so they don’t tip over. I use a cast iron skillet sometimes because it holds heat well, but a regular baking sheet is my go-to for easy cleanup.
Preparation Method
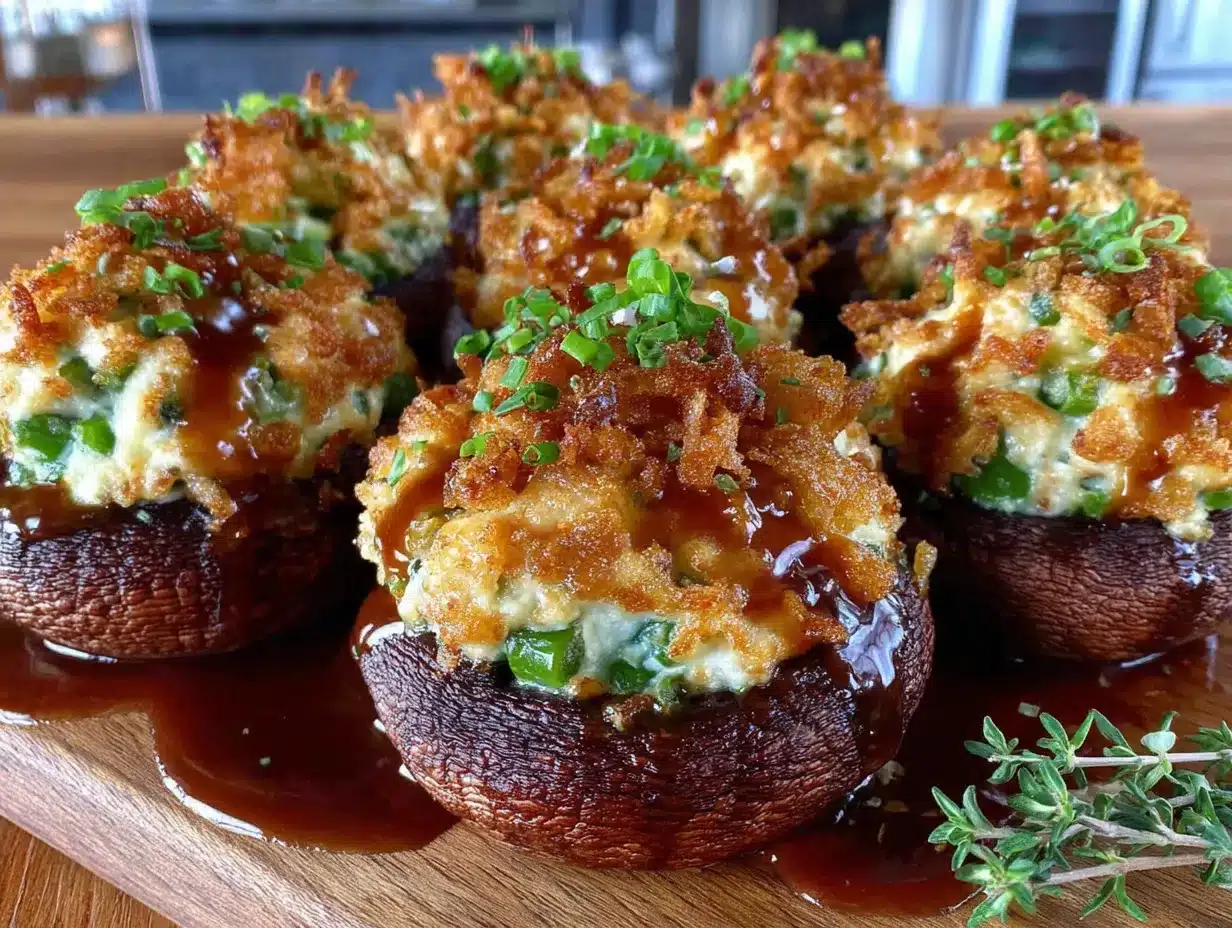
Let’s get cooking. This recipe comes together in a few simple steps, and I’ll walk you through each one so you feel confident.
- Preheat your oven to 375°F (190°C). While it’s heating, line a baking sheet with parchment paper or aluminum foil for easy cleanup. Trust me, you’ll thank yourself later.
- Prepare the mushroom caps. Clean the mushrooms with a damp paper towel—don’t rinse them under water, or they’ll soak up moisture and get soggy. Gently twist off the stems and set them aside. You can chop the stems finely and add them to the filling if you want extra mushroom flavor, but I usually skip them for this recipe. Brush the caps with olive oil and season lightly with salt and pepper. Place them cavity-side up on the baking sheet.
- Blanch the green beans. Bring a small pot of salted water to a boil. Add the green beans and cook for 2-3 minutes until they’re bright green and slightly tender. Drain them immediately and transfer to a bowl of ice water to stop the cooking. This keeps them crisp in the filling. After a minute, drain them again and pat dry with a clean towel.
- Make the filling. In a medium bowl, combine the cream of mushroom soup, milk, sour cream, garlic powder, onion powder, smoked paprika, and half of the shredded cheddar cheese. Stir until smooth. Add the blanched green beans and mix well. Now, here’s the trick: take a fork or potato masher and gently mash about a third of the green beans right in the bowl. This creates a creamier base while leaving some whole beans for texture. Taste the mixture and adjust salt and pepper as needed.
- Stuff the mushrooms. Using a small spoon, divide the filling evenly among the mushroom caps. Don’t be shy—pile it high. The filling will settle as it bakes. Sprinkle the remaining cheddar cheese over the top of each stuffed mushroom.
- Add the crunchy topping. In a small bowl, mix the crushed fried onions with the grated Parmesan cheese. Sprinkle this mixture generously over each mushroom. Press down gently so it sticks to the filling.
- Bake. Place the baking sheet in the preheated oven and bake for 18-22 minutes, until the mushrooms are tender and the topping is golden brown and bubbly. If you want extra crunch, broil for the last 1-2 minutes—but watch them closely, because fried onions burn fast. I learned that the hard way.
- Rest and serve. Let the mushrooms cool on the baking sheet for 5 minutes before serving. This helps the filling set and prevents burns—those little pockets of hot filling are sneaky. Serve warm.
Sensory Cues: When you blanch the beans, they should turn a vibrant green and smell fresh and grassy. The filling should look thick and creamy, not runny—if it’s too thin, add a tablespoon more cheese. The mushrooms are done when the caps are tender enough to pierce easily with a fork, and the tops are golden with crispy edges.
Cooking Tips & Techniques
I’ve made this recipe enough times to know where things can go wrong. Let me save you some trouble.
Don’t over-blanch the green beans. I did this once, and the filling turned into mush. Two to three minutes is plenty—you want them bright and slightly crisp. They’ll continue cooking in the oven.
Choose the right mushroom size. Small mushrooms won’t hold enough filling, and giant portobellos can be too meaty. Medium white or cremini caps, about 2 inches across, are perfect. If you can only find large ones, just increase the baking time by 3-4 minutes.
Make the filling ahead of time. This is a game-changer for busy nights. You can prep the filling up to two days in advance and store it in the fridge. When you’re ready, just stuff the mushrooms and bake. I’ve done this for holiday dinners, and it saves so much stress.
Watch your topping. Fried onions can go from golden to burnt in under a minute. If you’re broiling at the end, keep the oven door slightly open and watch them like a hawk. I once got distracted by a phone call and ended up with charcoal mushrooms—not my finest moment.
Multitasking tip: While the mushrooms are baking, you can whip up a quick side salad or steam some rice. The 20-minute bake time is the perfect window to finish the rest of your meal.
Consistency trick: If your filling seems too thick, add a splash of milk. If it’s too thin, stir in an extra tablespoon of cheese or crushed fried onions. The filling should hold its shape when spooned, not spread out like a puddle.
Variations & Adaptations
This recipe is flexible, which is why I love it for families. Here are some ways to change it up.
- Vegetarian Version: It’s already vegetarian, but you can make it vegan by using dairy-free cream of mushroom soup, plant-based milk, and vegan cheese shreds. I’ve tried it with Violife cheddar, and it melts beautifully. Skip the Parmesan or use a vegan alternative.
- Gluten-Free Adaptation: Use gluten-free cream of mushroom soup (Pacific Foods makes a good one) and gluten-free fried onions. Most brands in the health food section work well. The texture stays the same, I promise.
- Add Protein: Stir in 1/2 cup of cooked, crumbled bacon or diced cooked chicken to the filling. My husband loves the bacon version—it adds a smoky crunch that pairs perfectly with the creamy green beans.
- Spicy Twist: Add 1/4 teaspoon of cayenne pepper or a diced jalapeño to the filling for a kick. My oldest kid actually requests this version, which surprised me. Just go easy if you’re feeding little ones.
- Seasonal Swap: In summer, use fresh green beans from the farmers market. In fall, swap half the green beans for finely chopped broccoli or asparagus. Both work great and add a different flavor profile.
- Cheese Variations: Instead of cheddar, try Gruyère for a nuttier flavor or pepper jack for heat. I made a batch with smoked Gouda once, and it was incredible—smoky and rich.
Personally, I love the bacon version the most. It feels like a complete meal in one bite, and the saltiness of the bacon balances the creamy filling perfectly. But for a quick weeknight dinner, the original version is my go-to.
Serving & Storage Suggestions
These mushrooms are best served warm, straight from the oven. Let them rest for 5 minutes so the filling sets, then arrange them on a platter. They’re perfect as a side dish alongside roasted chicken or a simple green salad. For a heartier meal, serve them over rice or quinoa to soak up any extra creamy bits.
Storage: Leftover stuffed mushrooms keep well in an airtight container in the refrigerator for up to 3 days. The topping will lose some crunch, but the flavor stays delicious. To reheat, place them on a baking sheet in a 350°F (175°C) oven for 8-10 minutes, or until warmed through. Avoid the microwave—it makes the topping soggy and the mushrooms rubbery.
Freezer Instructions: You can freeze the unbaked stuffed mushrooms. Assemble them completely, but don’t add the fried onion topping yet. Place them on a baking sheet and freeze until solid, then transfer to a freezer bag. When you’re ready to bake, add the topping and bake from frozen for 25-30 minutes at 375°F (190°C). The filling stays creamy, and the mushrooms hold up well. I’ve done this for busy weeks, and it’s a lifesaver.
Flavor Development: Honestly, these taste even better the next day. The flavors meld together overnight, and the filling gets richer. If you’re meal-prepping, make them a day ahead and reheat gently. My kids actually prefer them as leftovers—they say the “flavors get cozy.”
Nutritional Information & Benefits
Here’s a rough estimate per serving (2 stuffed mushrooms):
| Nutrient | Amount |
|---|---|
| Calories | 210 kcal |
| Total Fat | 12 g |
| Saturated Fat | 5 g |
| Cholesterol | 20 mg |
| Sodium | 580 mg |
| Total Carbohydrates | 18 g |
| Dietary Fiber | 3 g |
| Sugars | 4 g |
| Protein | 8 g |
| Vitamin A | 8% DV |
| Vitamin C | 10% DV |
| Calcium | 12% DV |
| Iron | 6% DV |
Health Benefits: Mushrooms are a great source of B vitamins and selenium, which support immune function. Green beans provide fiber and vitamin K, important for bone health. This recipe is also a good way to sneak vegetables into a meal—my kids don’t even realize they’re eating green beans sometimes. If you’re watching your sodium, use low-sodium cream of mushroom soup and skip the added salt in the filling.
Dietary Considerations: This recipe is vegetarian as written. For a lower-carb option, serve the mushrooms without rice or bread. It’s naturally nut-free and can be made gluten-free with simple swaps. Always check labels if you have specific allergies.
FAQs
Can I use canned green beans instead of fresh or frozen?
You can, but I don’t recommend it. Canned green beans are much softer and can make the filling mushy. If that’s all you have, drain them well and skip the blanching step. Just mix them directly into the filling. The texture will be different, but the flavor will still be good.
How do I keep the mushrooms from getting watery?
This happens when the mushrooms release moisture during baking. To prevent it, brush the caps with oil and bake them empty for 5 minutes before stuffing. This step dries them out slightly and helps them hold their shape. I do this when I’m making a big batch for a party, and it makes a noticeable difference.
Can I make these ahead for a party?
Absolutely. Assemble the mushrooms up to the point of adding the topping, then cover and refrigerate for up to 24 hours. When you’re ready to bake, add the topping and bake as directed, adding 3-5 minutes to the cooking time since they’ll be cold. This is my go-to strategy for holiday gatherings.
My kids are picky about mushrooms. Will they like these?
Surprisingly, yes. The creamy filling and crunchy topping mask the mushroom flavor quite a bit. My youngest hates regular mushrooms but eats these without complaint. Start with smaller mushroom caps so the ratio of filling to mushroom is higher, and let them help with the topping—kids love sprinkling the crunchy onions.
Can I use a different cream soup?
Sure. Cream of chicken or cream of celery both work well. I’ve used cream of celery in a pinch, and it adds a subtle herbiness that pairs nicely with the green beans. Just avoid cream of shrimp or anything too strongly flavored—it can overpower the dish.
Conclusion
These Kid-Approved Green Bean Casserole Stuffed Mushrooms are the kind of recipe that makes you feel like a kitchen genius without actually trying that hard. They take a classic comfort dish and turn it into something fun, portable, and totally family-friendly. Whether you’re feeding picky eaters, meal-prepping for a busy week, or just looking for a new way to use up green beans, this recipe delivers every time.
I love this recipe because it reminds me of that conversation at the farmers market—how a simple idea shared between strangers can turn into something you make again and again. It’s not fancy, and it’s not complicated, but it’s honest food that brings people together. So go ahead and make them your own. Swap the cheese, add some bacon, or double the topping—I won’t judge. In fact, I’d love to hear how they turn out. Drop a comment below and tell me your favorite variation, or tag me in your photos. Happy cooking, friends!
Pin This Recipe!
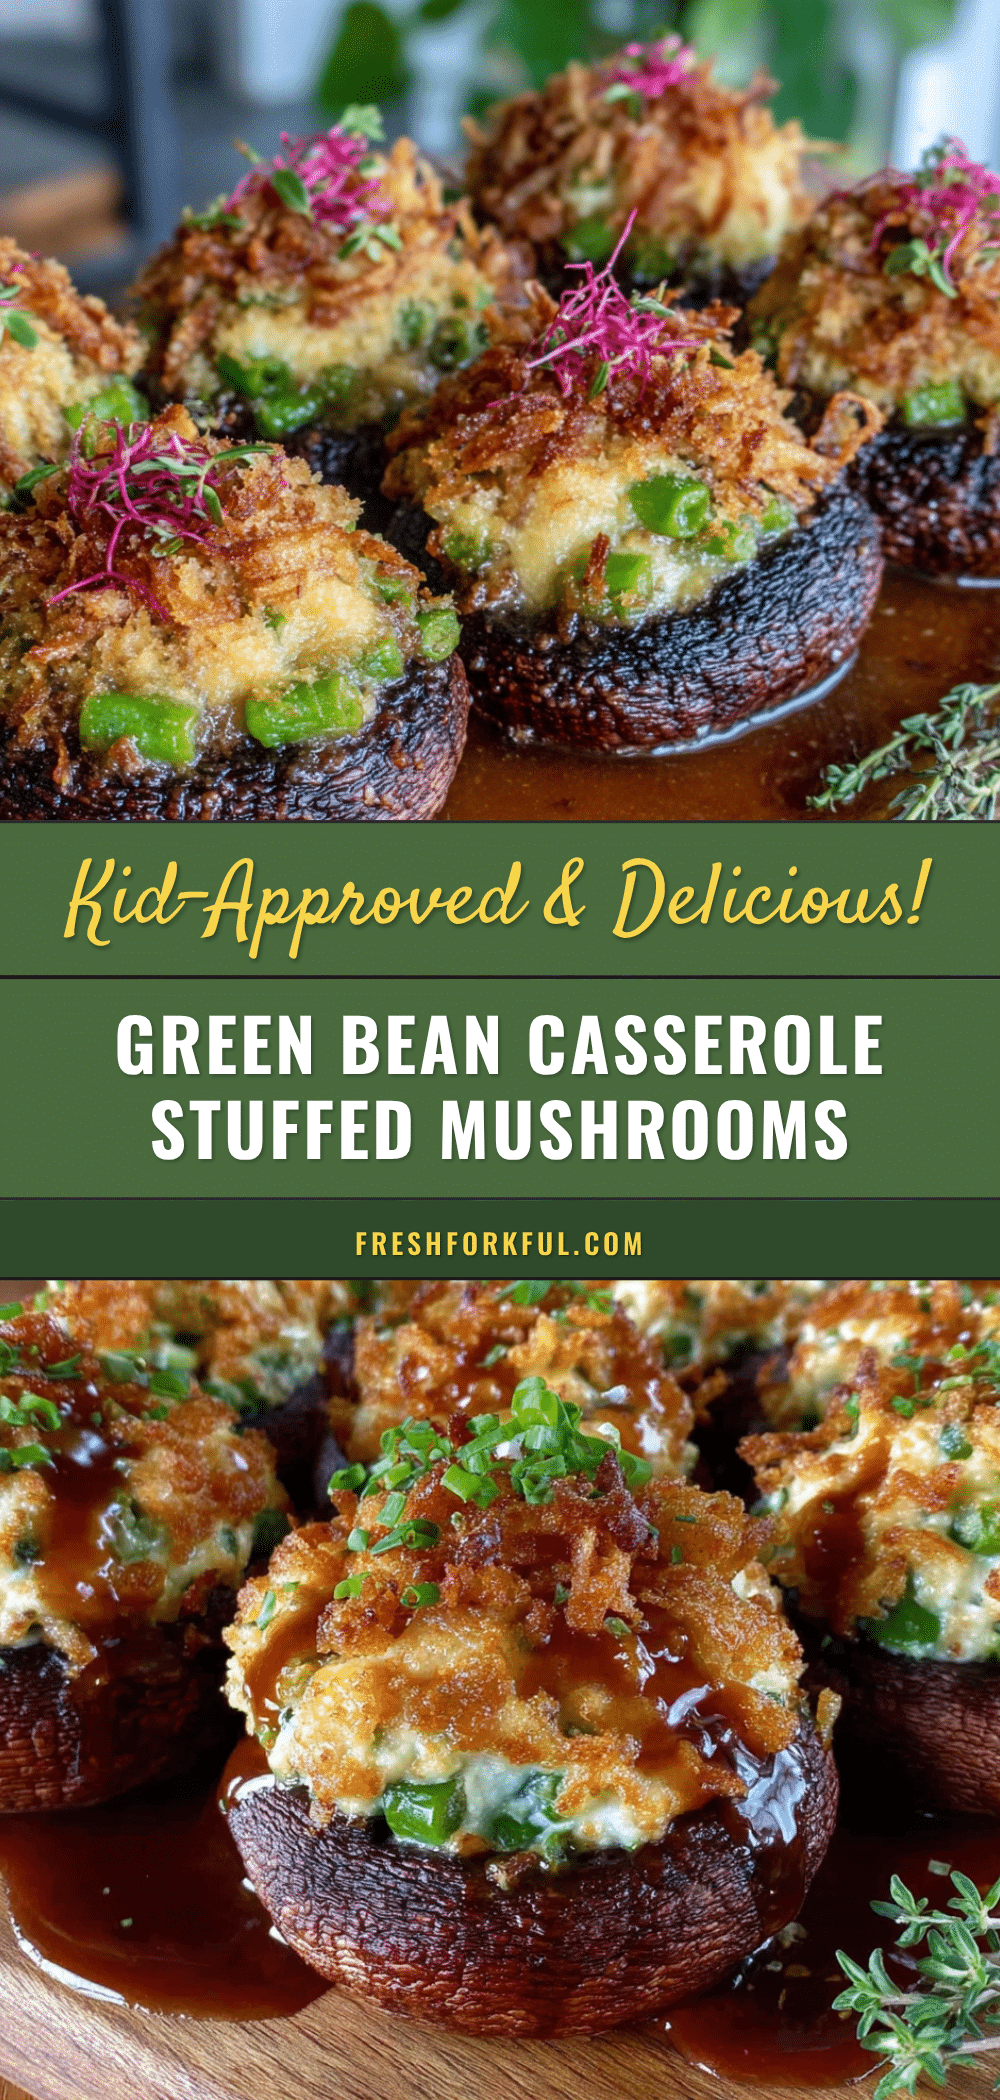
Best Kid-Approved Green Bean Casserole Stuffed Mushrooms
These stuffed mushrooms flip the classic green bean casserole into a handheld bite, with a creamy filling and crunchy fried onion topping. Perfect for picky eaters and family dinners.
- Prep Time: 15 minutes
- Cook Time: 20 minutes
- Total Time: 35 minutes
- Yield: 6 servings (2 mushrooms per serving) 1x
- Category: Appetizer
- Cuisine: American
Ingredients
- 12 large white or cremini mushrooms, stems removed and reserved
- 2 tablespoons olive oil
- Salt and black pepper, to taste
- 2 cups fresh or frozen green beans, trimmed and cut into 1-inch pieces
- 1 can (10.5 ounces) condensed cream of mushroom soup
- 1/2 cup milk
- 1/2 cup shredded cheddar cheese
- 1/4 cup sour cream
- 1/2 teaspoon garlic powder
- 1/4 teaspoon onion powder
- 1/4 teaspoon smoked paprika (optional)
- 1 cup French’s crispy fried onions, crushed
- 1/4 cup grated Parmesan cheese
Instructions
- Preheat your oven to 375°F (190°C). Line a baking sheet with parchment paper or aluminum foil.
- Clean the mushrooms with a damp paper towel. Gently twist off the stems and set aside. Brush the caps with olive oil and season lightly with salt and pepper. Place them cavity-side up on the baking sheet.
- Bring a small pot of salted water to a boil. Add the green beans and cook for 2-3 minutes until bright green and slightly tender. Drain and transfer to a bowl of ice water to stop the cooking. Drain again and pat dry.
- In a medium bowl, combine the cream of mushroom soup, milk, sour cream, garlic powder, onion powder, smoked paprika, and half of the shredded cheddar cheese. Stir until smooth. Add the blanched green beans and mix well. Gently mash about a third of the green beans with a fork or potato masher. Taste and adjust salt and pepper as needed.
- Using a small spoon, divide the filling evenly among the mushroom caps. Sprinkle the remaining cheddar cheese over the top.
- In a small bowl, mix the crushed fried onions with the grated Parmesan cheese. Sprinkle this mixture generously over each mushroom, pressing down gently.
- Bake for 18-22 minutes, until the mushrooms are tender and the topping is golden brown and bubbly. If desired, broil for the last 1-2 minutes, watching closely.
- Let the mushrooms cool on the baking sheet for 5 minutes before serving. Serve warm.
Notes
For best results, choose mushroom caps about 2 inches wide. To prevent watery mushrooms, brush with oil and bake empty for 5 minutes before stuffing. The filling can be made up to 2 days ahead. For extra crunch, broil the topping for 1-2 minutes at the end, but watch closely to avoid burning.
Nutrition
- Serving Size: 2 stuffed mushrooms
- Calories: 210
- Sugar: 4
- Sodium: 580
- Fat: 12
- Saturated Fat: 5
- Carbohydrates: 18
- Fiber: 3
- Protein: 8
Keywords: green bean casserole, stuffed mushrooms, kid-friendly, appetizer, holiday, comfort food


