Love this? Save it for later!
Share the inspiration with your friends
I was at the farmer’s market last October, just minding my own business and admiring the piles of orange bell peppers. A little girl, maybe five years old, was tugging on her mom’s sleeve, pointing at the peppers and shouting, “Pumpkins, Mama! Little pumpkins!” And honestly, she wasn’t wrong. They really did look like tiny, edible pumpkins just sitting there waiting for a face. That moment stuck with me all the way home. I mean, I had a bag full of ground turkey, some rice, and a block of cheddar cheese in my fridge, and suddenly it clicked. Why not carve them? Why not make dinner actually fun for once?
So I bought a dozen of those orange bell peppers, got home, and spent the next hour figuring out how to turn dinner into a craft project. Let me tell you, my first attempt was a mess. I cut the face too close to the top and the whole thing collapsed into a sad, cheesy heap on the baking sheet. But the second one? That little pepper had a proper grin, and it held its shape perfectly. I stuffed it, baked it, and my kid actually cheered when I put it on the table. You know that feeling when you accidentally create something that makes everyone happy? That was it.
Now this recipe is a staple in my house every October. It’s got that cozy, savory filling you expect from stuffed peppers, but with a face that makes you smile before you even take a bite. The best part? You get to eat the jack-o-lantern. Honestly, it’s hard to beat that combination of comfort food and Halloween fun all in one dish. Maybe you’ve been looking for something to make dinner feel special without spending hours in the kitchen. These festive jack-o-lantern stuffed bell peppers are exactly that.
Why You’ll Love This Recipe
I’ve made these peppers at least a dozen times over the past few years, tweaking the filling and the cooking time until everything was just right. Here’s why I keep coming back to them, and why I think you will too:
- Fun for the Whole Family: Let’s be real. Getting kids excited about dinner is half the battle. When you put a smiling pepper face on the table, that battle is already won. My kids now ask for these weeks before Halloween.
- Simple Ingredients: You probably have most of this stuff in your kitchen already. Ground meat, rice, cheese, tomatoes, and bell peppers. No weird specialty items or expensive pantry staples.
- Perfect for Halloween Dinner: Whether you’re hosting a little party or just want something festive on October 31st, these fit the bill without being another plate of candy or junk food.
- Customizable Filling: You can switch up the protein, make it vegetarian, add different spices, or go mild or spicy depending on who’s eating. I’ve made about five different versions now, and they’ve all been good.
- Crowd-Pleaser: I brought these to a potluck once, and people were taking pictures before they even ate them. Then they ate them, and the plate was empty in fifteen minutes.
What makes this recipe different from other stuffed peppers is the presentation. I mean, we’ve all had stuffed peppers before. They’re delicious, but they’re not exactly exciting to look at. By carving a simple jack-o-lantern face into the pepper before stuffing and baking, you turn a weeknight dinner into something memorable. Plus, I figured out a trick to keep the faces from collapsing during baking, which I’ll share in the preparation method. It’s a small change that makes a huge difference.
This recipe is the kind that makes you feel good about what you’re serving. It’s hearty, it’s healthy-ish, and it’s got that soul-soothing comfort food quality that makes everyone at the table happy. Perfect for impressing guests without any stress, or turning a regular Tuesday into something a little more fun.
What Ingredients You Will Need
This recipe uses simple, wholesome ingredients to deliver bold flavor and a satisfying texture without the fuss. Most of these are pantry staples or easy to find at any grocery store.
- 6 large orange bell peppers (look for ones that are wide and squat, like mini pumpkins; they hold their shape better and have a flat base for standing upright)
- 1 pound ground beef or ground turkey (I prefer 85/15 ground beef for flavor, but ground turkey works great if you want something leaner; just add a little olive oil to the pan)
- 1 cup cooked rice (white, brown, or even cauliflower rice works; leftover rice from takeout is perfect here)
- 1 small yellow onion, diced (about 1 cup; adds sweetness and depth to the filling)
- 3 cloves garlic, minced (fresh is best, but jarred minced garlic works in a pinch)
- 1 can (15 ounces) diced tomatoes, drained (I like fire-roasted for extra flavor; you can also use fresh tomatoes if they’re in season)
- 1 cup shredded cheddar cheese, divided (sharp cheddar gives the best flavor, but Monterey Jack or a Mexican blend works too)
- 1 teaspoon ground cumin (adds warmth and a little smokiness)
- 1 teaspoon chili powder (use mild or hot depending on your preference)
- 1/2 teaspoon smoked paprika (optional, but it adds a lovely depth that regular paprika doesn’t)
- 1/2 teaspoon salt (plus more to taste)
- 1/4 teaspoon black pepper
- 2 tablespoons tomato paste (this helps bind the filling and adds concentrated tomato flavor)
- 2 tablespoons fresh parsley or cilantro, chopped (for garnish; adds a fresh pop of color and flavor)
- Olive oil (for sautéing)
A few notes on ingredients. For the bell peppers, I really recommend orange ones because they look the most like pumpkins. But if you can only find red or yellow, those work too. Just avoid green peppers for this recipe, they have a sharper, more bitter flavor that doesn’t match the festive vibe as well.
For the cheese, I’ve tried a few different kinds. Cheddar is my go-to because it melts beautifully and has that familiar, comforting taste. But if you want something a little different, try pepper jack for a spicy kick or a Mexican blend for a more complex flavor profile.
If you’re making this vegetarian, you can substitute the ground meat with a plant-based ground meat alternative or a mix of black beans and quinoa. I’ve done the black bean version, and it’s honestly just as satisfying. Just make sure to drain and rinse the beans well before adding them to the filling.
Equipment Needed
You don’t need anything fancy for this recipe, which is part of why I love it. Here’s what you’ll need:
- Large baking dish (9×13 inch works perfectly; you want something with sides to catch any juices that bubble up during baking)
- Sharp paring knife (for carving the jack-o-lantern faces; a small, sharp knife gives you more control than a big chef’s knife)
- Large skillet or frying pan (for cooking the filling)
- Cutting board
- Mixing bowl (for combining the filling ingredients)
- Measuring cups and spoons
- Small spoon or melon baller (for scooping out the pepper seeds and membranes)
- Aluminum foil (for covering the peppers during the first part of baking)
If you don’t have a melon baller, a regular teaspoon works just fine. I actually use a teaspoon most of the time because it gives me more control. And if you don’t have a 9×13 baking dish, you can use a smaller dish and just arrange the peppers snugly, or even use a cast iron skillet. I’ve done both, and they work great.
One tip on the knife. Use a small, serrated knife if you have one. It makes carving the faces so much easier because it cuts through the pepper skin without squishing it. I learned this after my first attempt with a dull butter knife, which was a disaster. The pepper basically got crushed before I even got the eyes cut out.
Preparation Method
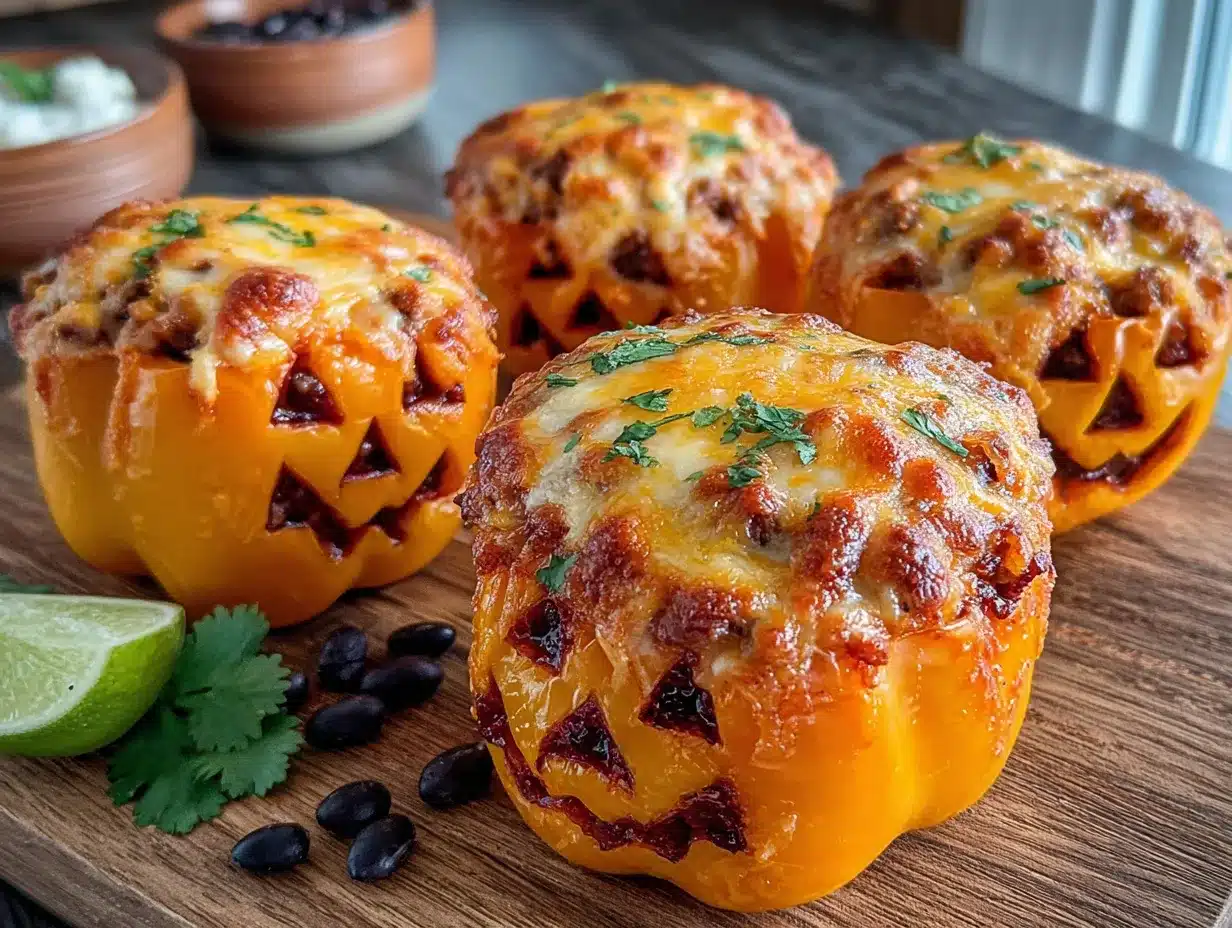
Alright, let’s get into the actual cooking. This whole process takes about 45 minutes to an hour, including baking time. Most of that is hands-off while the peppers are in the oven.
Step 1: Preheat and Prep
Preheat your oven to 375°F (190°C). While it’s heating up, wash your bell peppers and pat them dry. Using a sharp knife, cut the top off each pepper about half an inch from the stem. Set the tops aside. Carefully remove the seeds and white membranes from inside each pepper. A small spoon works great for this. Be gentle so you don’t tear the pepper walls.
Step 2: Carve the Faces
Here’s the fun part. Using your small paring knife, carve jack-o-lantern faces into the front of each pepper. Start with simple shapes. Two triangle eyes and a little zigzag mouth. You can also do a happy face, a scary face, or whatever you want. Just make sure the cuts are clean and go all the way through the pepper skin. Don’t make the holes too big, or the filling might leak out during baking. I usually cut the eyes about half an inch wide and the mouth about an inch wide. Trust me, simple is better here. My first attempt had a super elaborate face with eyebrows and a nose, and it looked more like a confused robot than a pumpkin.
Step 3: Cook the Filling
Heat a drizzle of olive oil in a large skillet over medium-high heat. Add the diced onion and cook for 3 to 4 minutes until it’s soft and translucent. Add the minced garlic and cook for another 30 seconds until fragrant. Add the ground beef or turkey to the pan. Break it up with a wooden spoon and cook until it’s browned, about 5 to 7 minutes. If there’s excess fat, drain it off, but leave a little bit for flavor.
Step 4: Season and Combine
Add the drained diced tomatoes, tomato paste, cumin, chili powder, smoked paprika, salt, and pepper to the pan. Stir everything together and let it cook for 2 to 3 minutes so the flavors meld. Turn off the heat and stir in the cooked rice and half of the shredded cheddar cheese (about 1/2 cup). Mix until the cheese is melted and everything is well combined. Taste the filling and adjust the seasoning if needed. I usually add a little more salt here.
Step 5: Stuff the Peppers
Place the carved peppers upright in your baking dish. If they wobble, trim a tiny slice off the bottom to make them flat. Be careful not to cut through the bottom though. Spoon the filling into each pepper, pressing down gently to pack it in. Fill them all the way to the top. Don’t worry if a little bit of filling peeks out of the carved holes. That just adds character.
Step 6: Bake
Sprinkle the remaining 1/2 cup of shredded cheddar cheese over the tops of the stuffed peppers. Place the pepper tops back on like little hats. Cover the baking dish with aluminum foil. Bake for 25 minutes. Then remove the foil and bake for another 10 to 15 minutes until the peppers are tender and the cheese is bubbly and golden.
Step 7: Rest and Serve
Let the peppers rest in the dish for 5 minutes after you take them out of the oven. This helps them set so they don’t fall apart when you move them. Garnish with fresh parsley or cilantro and serve warm.
A quick note on timing. If you’re short on time, you can cook the rice ahead of time or use leftover rice from the night before. I’ve also used frozen pre-cooked rice in a pinch, and it works fine. Just make sure to thaw it first.
Cooking Tips & Techniques
I’ve made these festive jack-o-lantern stuffed bell peppers enough times to know where things can go wrong. Here are some tips to help you avoid my mistakes.
Choose the right peppers. Look for peppers that are wide and have a flat bottom. If they’re too tall and skinny, they’ll tip over in the baking dish. I learned this the hard way when one of my peppers fell over and all the filling spilled out into the dish. It was still tasty, but it looked like a mess.
Don’t overstuff the peppers. I know it’s tempting to pack as much filling as possible, but if you overstuff them, the filling will push out through the carved holes and make a mess. Leave a little bit of room at the top. The filling will settle as it bakes, so it’ll look fine in the end.
Use a foil tent. Covering the peppers with foil for the first 25 minutes of baking is crucial. It traps steam and helps the peppers cook through without burning the cheese or the tops. If you skip this step, the pepper walls will be too firm and the cheese will be overcooked.
Let them rest. I know you’ll be excited to eat them, but letting them rest for 5 minutes makes a huge difference. The filling sets, the cheese firms up a little, and the peppers become easier to handle. If you try to eat them straight out of the oven, the filling might fall out and you’ll burn your mouth. Trust me on this one.
Make extra filling. I always make a little more filling than I think I’ll need. Sometimes the peppers are bigger than expected, or I want to add a little extra on top. Leftover filling is great on its own or served over salad the next day.
One more thing. If you’re making these for a party or a Halloween gathering, you can prep the peppers and the filling separately a day ahead. Just store the carved peppers in the fridge in a sealed container and keep the filling in another container. When you’re ready to eat, stuff them and bake. It saves a ton of time and stress.
Variations & Adaptations
One of the best things about this recipe is how easy it is to change up. Here are some variations I’ve tried and loved.
Vegetarian Version: Swap the ground meat for a can of black beans (drained and rinsed) and a cup of cooked quinoa. The texture is slightly different, but it’s just as hearty and satisfying. I’ve also used crumbled tofu with taco seasoning, and that was surprisingly good.
Spicy Version: Add a diced jalapeño to the onion and garlic while they’re cooking. You can also use pepper jack cheese instead of cheddar and add a pinch of cayenne pepper to the filling. If you really want heat, drizzle some hot sauce over the finished peppers before serving.
Low-Carb Version: Skip the rice and double up on the vegetables. Finely diced zucchini or cauliflower rice works great as a substitute. I’ve also used riced broccoli, which adds a nice texture. Just make sure to squeeze out any excess moisture from the cauliflower rice before adding it to the filling.
Mexican-Inspired Version: Add a can of drained corn and a can of black beans to the filling. Use a Mexican cheese blend instead of cheddar. Top with sliced avocado, sour cream, and a squeeze of lime juice before serving. This version is always a hit.
Italian-Inspired Version: Swap the cumin and chili powder for Italian seasoning and dried oregano. Use ground Italian sausage instead of ground beef. Top with mozzarella cheese and serve with marinara sauce on the side. This one feels completely different but is just as delicious.
I’ve also tried making these with different colored peppers just for fun. Red peppers are sweeter, yellow are milder, and orange is that perfect pumpkin color. Honestly, any color works, but orange really sells the jack-o-lantern look.
Serving & Storage Suggestions
These festive jack-o-lantern stuffed bell peppers are best served warm, straight out of the oven. The cheese should be bubbly and the peppers should be tender but still hold their shape. I like to serve them on a big platter so everyone can see the faces before they dig in.
For sides, a simple green salad with a tangy vinaigrette works beautifully to balance the richness of the filling. You can also serve them with rice or crusty bread to soak up any juices. If you’re going all out for Halloween, some roasted pumpkin seeds on the side make a nice crunchy contrast.
For storage, let any leftovers cool completely before transferring them to an airtight container. They’ll keep in the refrigerator for up to 4 days. The flavors actually meld together even more overnight, so leftovers taste amazing the next day.
To reheat, place the peppers in a baking dish, cover with foil, and warm them in a 350°F oven for about 10 to 15 minutes. You can also microwave them, but the peppers will be softer and the cheese won’t be as melty. I prefer the oven method for the best texture.
These peppers also freeze well. Wrap each pepper individually in plastic wrap, then place them in a freezer-safe bag. They’ll keep for up to 3 months. To reheat from frozen, thaw them in the refrigerator overnight, then bake as directed. I’ve done this for Halloween parties, and it’s a lifesaver.
One thing I’ve noticed is that the carved faces can get a little softer after refrigeration. That’s totally normal. They still taste great, and the faces are still visible, just a little more relaxed looking.
Nutritional Information & Benefits
Here’s an approximate nutritional breakdown for one stuffed pepper (using ground beef and white rice):
| Nutrient | Amount per Serving |
|---|---|
| Calories | 385 |
| Protein | 28g |
| Carbohydrates | 22g |
| Fat | 18g |
| Fiber | 4g |
| Sugar | 8g |
| Sodium | 620mg |
Bell peppers are packed with vitamin C, actually more than oranges gram for gram. They also contain vitamin A, which is great for eye health, and antioxidants that help reduce inflammation. The ground beef provides iron and B vitamins, while the rice offers steady energy from complex carbohydrates.
If you’re watching your sodium, you can use no-salt-added diced tomatoes and reduce the salt in the filling. The chili powder and cumin add so much flavor that you honestly won’t miss the extra salt.
This recipe is naturally gluten-free as long as you use a gluten-free rice or grain. It’s also nut-free and egg-free, making it a safe option for many common food allergies. Just be sure to check your spice blends for any hidden gluten or additives.
From a personal wellness perspective, I love that this recipe feels indulgent but is actually pretty balanced. You’re getting protein, vegetables, and carbs all in one dish, plus a serving of vegetables that even picky eaters will enjoy. It’s comfort food that doesn’t leave you feeling heavy or sluggish afterward.
Conclusion
These festive jack-o-lantern stuffed bell peppers are the kind of recipe that makes dinner feel like an event. They’re fun to make, fun to eat, and they bring a smile to everyone’s face. Whether you’re making them for Halloween dinner, a fall party, or just because you want to try something different, they deliver on flavor and presentation every single time.
I love how customizable this recipe is. You can make it spicy or mild, meaty or vegetarian, and it always turns out delicious. The carving part might feel a little silly at first, but honestly, once you see those little pepper faces smiling back at you from the baking dish, you’ll be glad you did it.
I’d love to hear how yours turn out. Did you try a different filling? Did your kids help carve the faces? Drop a comment below and let me know. And if you share a photo on Pinterest or Instagram, tag me so I can see your creations. Happy Halloween cooking, friends!
Frequently Asked Questions
Can I make these ahead of time?
Absolutely. You can carve the peppers and prepare the filling up to 24 hours in advance. Store them separately in the fridge, then stuff and bake when you’re ready. This is perfect for Halloween parties or busy weeknights.
Can I use green bell peppers instead of orange?
You can, but they won’t look like pumpkins. Green peppers have a more bitter flavor that doesn’t match the festive vibe as well. Red, yellow, or orange peppers are much sweeter and more visually appealing for this recipe.
How do I keep the peppers from tipping over in the dish?
Trim a thin slice off the bottom of each pepper to create a flat surface. Just be careful not to cut through the bottom, or the filling will leak out. If they still wobble, nestle them close together in the baking dish so they support each other.
Can I freeze the stuffed peppers?
Yes! Freeze them after baking and cooling. Wrap each pepper individually in plastic wrap, then place them in a freezer-safe bag. They’ll keep for up to 3 months. Thaw in the fridge overnight and reheat in the oven for best results.
What can I use instead of rice?
Cauliflower rice, quinoa, or even cooked lentils work great as substitutes. For a low-carb option, finely diced zucchini or mushrooms can replace the rice entirely. Just make sure to squeeze out any excess moisture from vegetables before adding them to the filling.
Pin This Recipe!
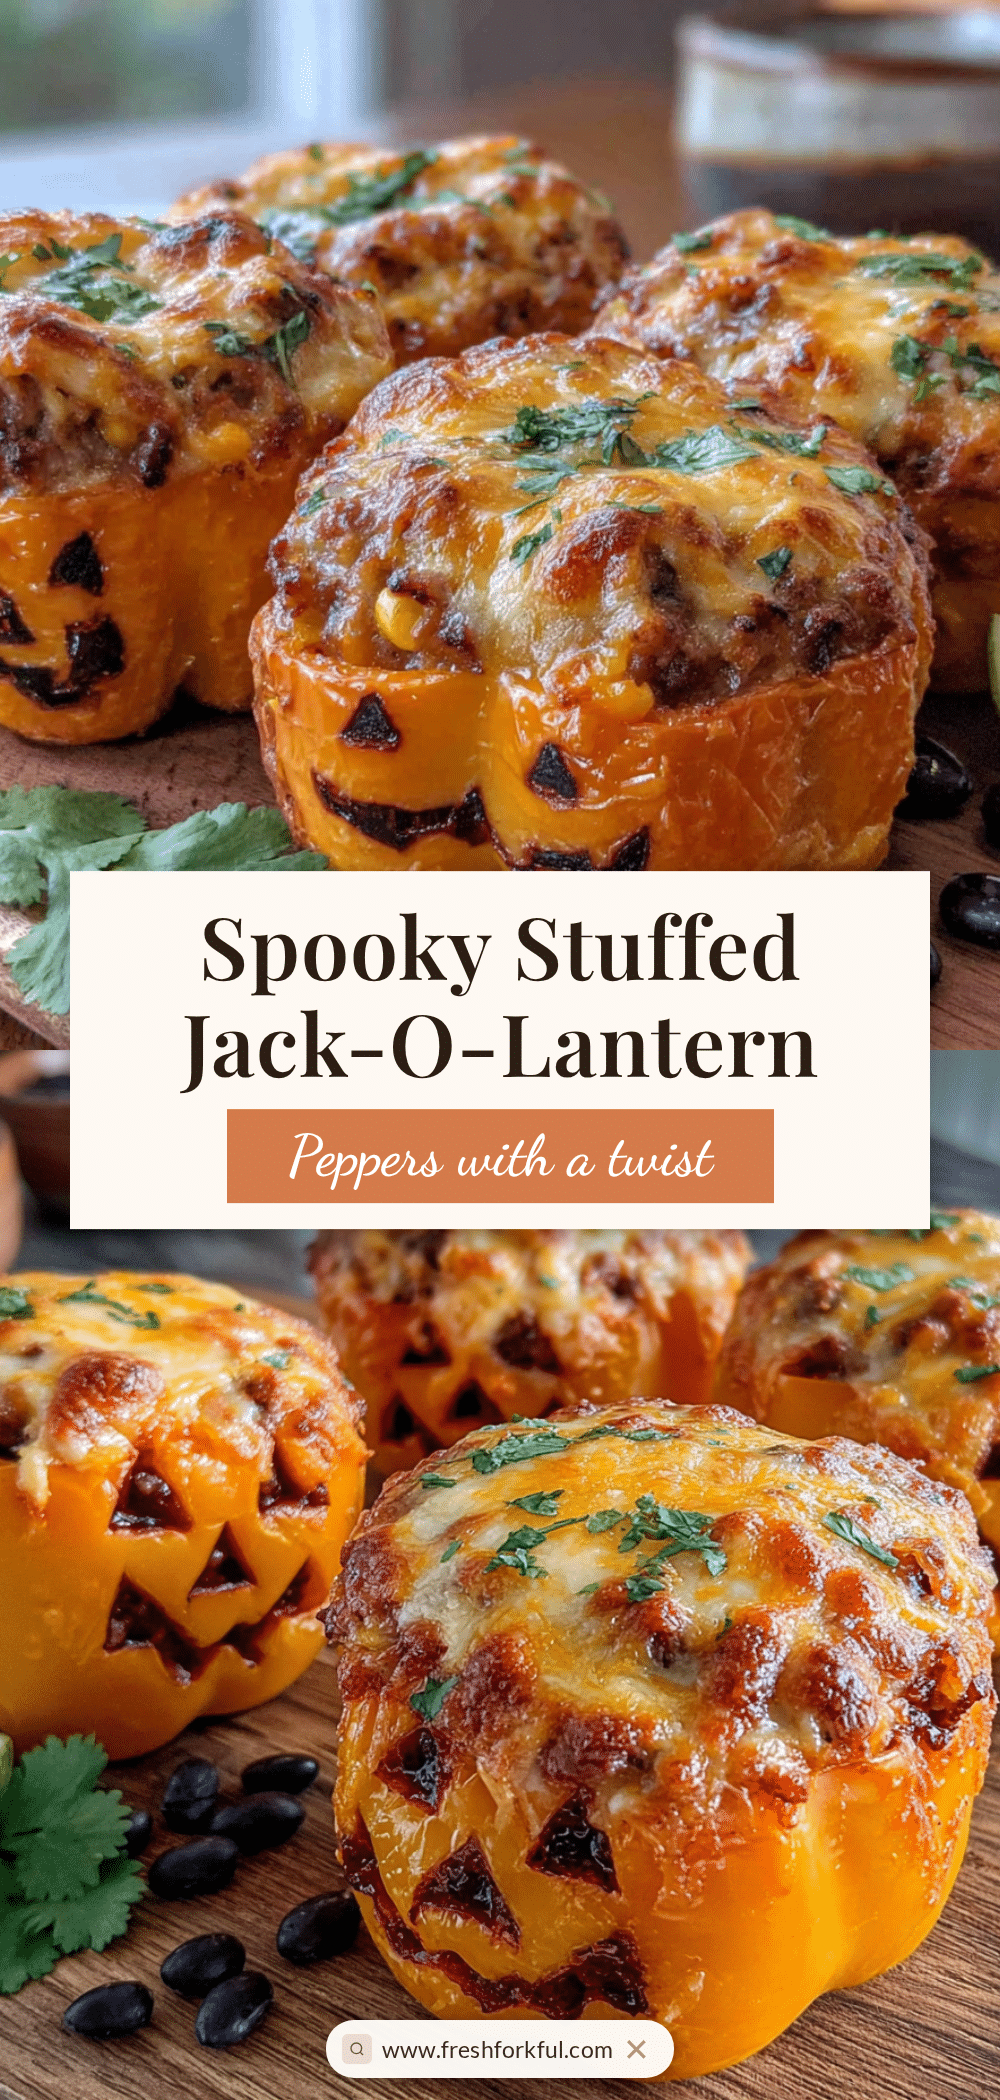
Best Easy Jack-o-Lantern Stuffed Bell Peppers Recipe

These festive jack-o-lantern stuffed bell peppers combine a savory, cozy filling with a fun Halloween presentation. Carved orange bell peppers are stuffed with a seasoned ground meat and rice mixture, topped with cheese, and baked until tender.
- Prep Time: 20 minutes
- Cook Time: 35 minutes
- Total Time: 55 minutes
- Yield: 6 servings 1x
- Category: Main Course
- Cuisine: American
Ingredients
- 6 large orange bell peppers
- 1 pound ground beef or ground turkey (85/15 recommended)
- 1 cup cooked rice (white, brown, or cauliflower rice)
- 1 small yellow onion, diced (about 1 cup)
- 3 cloves garlic, minced
- 1 can (15 ounces) diced tomatoes, drained (fire-roasted preferred)
- 1 cup shredded cheddar cheese, divided
- 1 teaspoon ground cumin
- 1 teaspoon chili powder
- 1/2 teaspoon smoked paprika (optional)
- 1/2 teaspoon salt
- 1/4 teaspoon black pepper
- 2 tablespoons tomato paste
- 2 tablespoons fresh parsley or cilantro, chopped (for garnish)
- Olive oil (for sautéing)
Instructions
- Preheat oven to 375°F (190°C). Wash bell peppers and pat dry. Cut the top off each pepper about 1/2 inch from the stem. Remove seeds and membranes carefully with a small spoon.
- Using a small paring knife, carve jack-o-lantern faces into the front of each pepper. Keep shapes simple (triangle eyes, zigzag mouth). Make cuts clean and go all the way through the skin. Avoid making holes too large.
- Heat olive oil in a large skillet over medium-high heat. Add diced onion and cook 3-4 minutes until soft. Add minced garlic and cook 30 seconds until fragrant.
- Add ground meat to the pan. Break it up and cook until browned, about 5-7 minutes. Drain excess fat if desired.
- Add drained diced tomatoes, tomato paste, cumin, chili powder, smoked paprika, salt, and pepper. Stir and cook 2-3 minutes. Turn off heat. Stir in cooked rice and 1/2 cup shredded cheddar cheese until melted and combined. Adjust seasoning to taste.
- Place carved peppers upright in a 9×13-inch baking dish. Trim a thin slice off the bottom if needed to make them flat. Spoon filling into each pepper, pressing gently to pack. Fill to the top.
- Sprinkle remaining 1/2 cup cheddar cheese over the tops. Place pepper tops back on like hats. Cover dish with aluminum foil.
- Bake covered for 25 minutes. Remove foil and bake another 10-15 minutes until peppers are tender and cheese is bubbly and golden.
- Let rest in dish for 5 minutes. Garnish with fresh parsley or cilantro and serve warm.
Notes
Choose wide, squat orange bell peppers with flat bottoms for best results. Don’t overstuff peppers to prevent filling from leaking through carved holes. Covering with foil for the first 25 minutes is crucial for even cooking. Let peppers rest 5 minutes before serving to help them set. Can be prepped a day ahead: carve peppers and prepare filling separately, then stuff and bake when ready. Leftovers keep in fridge up to 4 days or freeze up to 3 months.
Nutrition
- Serving Size: 1 stuffed pepper
- Calories: 385
- Sugar: 8
- Sodium: 620
- Fat: 18
- Saturated Fat: 8
- Carbohydrates: 22
- Fiber: 4
- Protein: 28
Keywords: stuffed bell peppers, jack-o-lantern peppers, Halloween dinner, stuffed peppers, festive dinner, ground beef, ground turkey, fall recipe


