Love this? Save it for later!
Share the inspiration with your friends
I was standing in the frozen foods aisle of a grocery store last November when the smell hit me. It wasn’t anything actually there, you know—just some random combination of cold air and cardboard and maybe someone’s cinnamon candle wafting from the seasonal display. But suddenly I was seven years old, standing on a step stool in my aunt Rita’s tiny kitchen, watching her brown butter on the stove for the first time.
She wasn’t even making pie that day. It was just some weeknight thing she was whipping up, but the smell—that nutty, almost caramel smell that fills a room and makes you feel like everything’s going to be okay—stuck with me. Rita passed a few years back, and honestly, I’ve spent what feels like a hundred Thanksgivings trying to recreate that exact feeling. Not the pie she made, but the way that smell made me feel. Safe. Like someone was taking care of things.
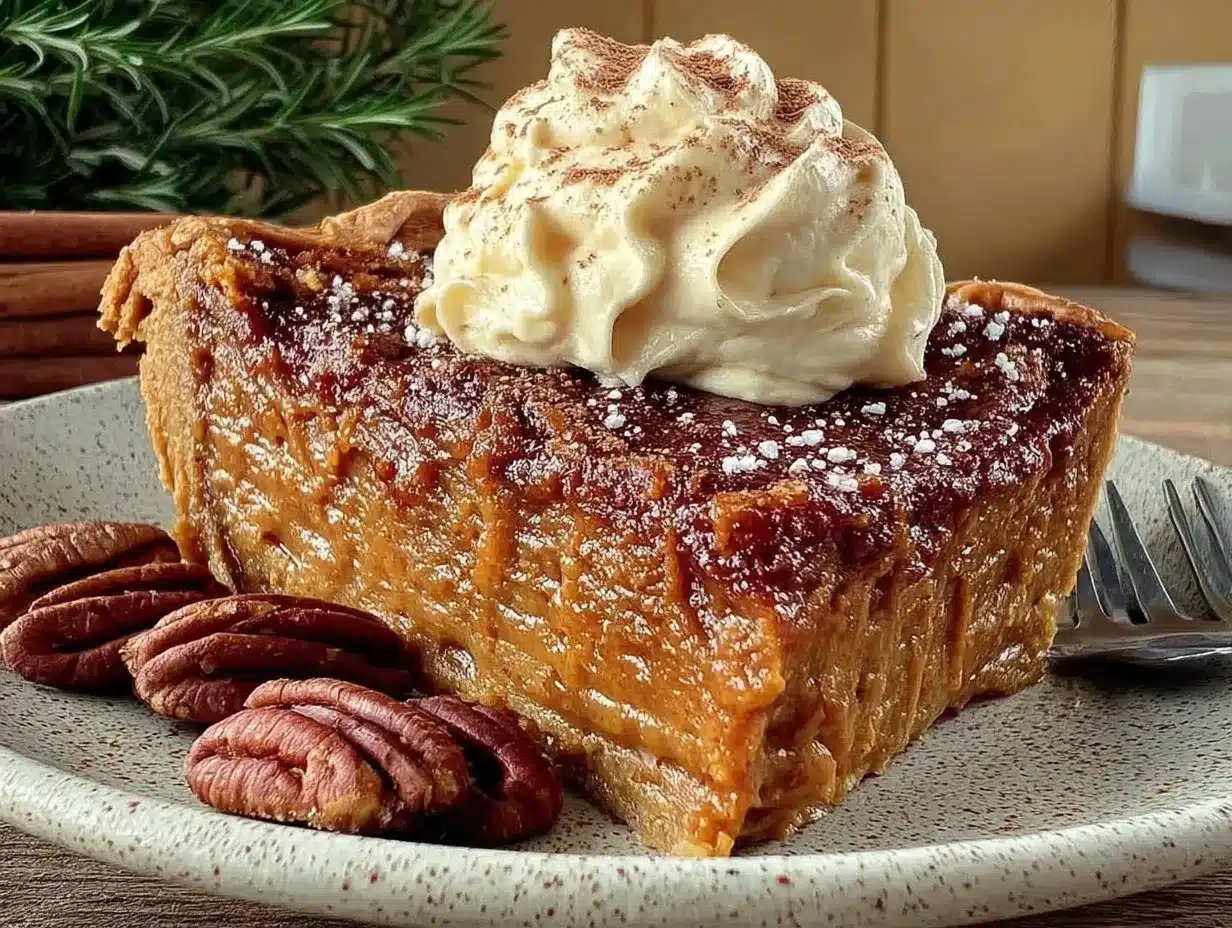
This brown butter pumpkin pie with maple whipped cream is the closest I’ve ever gotten. It’s not her recipe, not exactly. But the first time I pulled it from the oven, that same nutty warmth filled my kitchen, and I just stood there for a minute. Maybe you’ve had that moment—where a smell grabs you by the collar and drags you somewhere you didn’t even know you needed to go.
This pie is for those moments. It’s for the host who wants to serve something that stops conversation. For the dinner party where you want people to close their eyes after the first bite. And honestly? It’s for anyone who’s ever tried to chase a memory through food. This one’s worth chasing.
Why You’ll Love This Recipe
Let me be real with you for a second. I’ve made a lot of pumpkin pies in my day. Some were good. Some were, well, forgettable. But this brown butter pumpkin pie with maple whipped cream? This one’s different. It’s the recipe I pull out when I need to impress people who know good food.
- Deep, Nutty Flavor: Browning the butter adds this almost toasty, caramelized depth that plain butter just can’t touch. It makes the pumpkin filling taste richer without being heavy.
- Perfect for Hosting: You can make the filling and the crust a full day ahead. That means on party day, you’re just pouring and baking. Less stress, more time to actually enjoy your guests.
- Show-Stopping Presentation: The maple whipped cream on top? It’s not just garnish. It’s the thing people will ask you for the recipe for. Trust me.
- Simple Ingredients: Nothing fancy here. Brown butter, pumpkin puree, eggs, cream, maple syrup. Stuff you probably already have or can grab in one trip.
- Crowd-Pleaser: I’ve served this at three different Friendsgivings and two actual Thanksgivings. Every single time, someone asks for the recipe before they’ve even finished their slice.
What makes this pie different from every other pumpkin pie out there? It’s the brown butter. I mean, regular pumpkin pie is fine. It’s classic. But browning the butter first? That takes it from “oh, nice” to “what did you put in this?” It adds this subtle, nutty complexity that makes people pause mid-bite. And the maple whipped cream on top? It’s the perfect sweet, creamy finish.
Honestly, this is the kind of pie that makes you close your eyes after the first bite. It’s comfort food reimagined—familiar enough to feel like home, but special enough to feel like an occasion. Perfect for impressing guests without stress, or turning a simple fall dinner into something memorable.
What Ingredients You Will Need
This recipe uses simple, wholesome ingredients to deliver that deep, nutty flavor and silky texture without any fuss. Most of these are pantry staples, especially if you’re a fall baker like me.
For the Pie Crust
- 1 1/4 cups all-purpose flour (spooned and leveled)
- 1/2 teaspoon salt
- 1 tablespoon granulated sugar (a little sweetness in the crust makes a difference)
- 1/2 cup cold unsalted butter, cut into small cubes (I use Kerrygold for the flavor)
- 3-4 tablespoons ice water (you might need a little more or less depending on humidity)
For the Brown Butter Pumpkin Filling
- 1/2 cup unsalted butter (this will get browned, so don’t skip the color change)
- 1 can (15 oz) pumpkin puree (not pumpkin pie filling! Just pure pumpkin. Libby’s is my go-to.)
- 3/4 cup packed light brown sugar (adds moisture and that molasses-y depth)
- 1/4 cup granulated sugar
- 2 large eggs, room temperature
- 1 large egg yolk, room temperature
- 1 teaspoon vanilla extract
- 1 1/2 teaspoons pumpkin pie spice (or make your own with cinnamon, ginger, nutmeg, and cloves)
- 1/2 teaspoon ground cinnamon (extra, because why not)
- 1/4 teaspoon salt
- 1 cup heavy cream (full fat, please. Lighter versions won’t give you that silky texture.)
For the Maple Whipped Cream
- 1 cup heavy cream, cold
- 3 tablespoons pure maple syrup (the real stuff, not pancake syrup. Grade A dark is lovely here.)
- 1/2 teaspoon vanilla extract
- Pinch of salt (trust me on this)
For the brown butter, I’ve found that using a light-colored pan helps you see the color change better. Dark pans make it hard to tell when the butter’s actually browned versus just looking dark. And for the pumpkin puree, look for cans that don’t have any added spices or sugar. You want control over your own seasoning.
If you’re dairy-free, you can substitute the butter with a good vegan butter for browning (Miyoko’s works well), and use coconut cream instead of heavy cream. The texture will be slightly different, but still delicious.
Equipment Needed
Nothing too crazy here. If you bake pies, you probably have most of this already.
- 9-inch pie dish (glass or ceramic works best for even baking)
- Light-colored saucepan for browning the butter (so you can actually see the color change)
- Mixing bowls (one large, one medium)
- Whisk
- Rolling pin
- Plastic wrap for chilling the dough
- Pie weights or dried beans for blind baking the crust
- Parchment paper or aluminum foil for lining the crust
- Electric mixer or hand whisk for the whipped cream (I prefer my stand mixer for this)
- Cooling rack
If you don’t have pie weights, honestly, dried beans work perfectly. I keep a bag of cheap pinto beans in my pantry just for blind baking. You can reuse them over and over. Just don’t try to cook and eat them afterward—they get pretty sad.
For the pie dish, I love my Emile Henry ceramic pie dish. It heats evenly and gives a beautiful golden crust. But a standard glass Pyrex dish works great too. Budget-friendly and reliable.
Preparation Method
Okay, let’s get into the good stuff. I’ll walk you through this step by step, with all the little notes I’ve picked up from making this pie about a dozen times.
Step 1: Make the Pie Crust
In a large bowl, whisk together the flour, salt, and sugar. Add the cold butter cubes. Using a pastry cutter or your fingertips, work the butter into the flour until it looks like coarse meal with some pea-sized butter pieces remaining. You want those little chunks—they create flakiness.
Sprinkle the ice water over the mixture, one tablespoon at a time, and stir with a fork until the dough just comes together. It should hold together when you squeeze a handful. Don’t overwork it, or your crust will be tough. I’ve made that mistake. More than once.
Flatten the dough into a disc, wrap it in plastic wrap, and refrigerate for at least 1 hour (or up to 3 days). This rest is crucial—it lets the gluten relax and the butter firm up again.
Step 2: Brown the Butter
While the dough chills, make the brown butter. Place the 1/2 cup butter in a light-colored saucepan over medium heat. Stir constantly with a rubber spatula or wooden spoon. The butter will melt, then foam, then start to turn golden. Watch carefully—it goes from browned to burnt fast.
When you see little brown specks forming at the bottom and the butter smells nutty and amazing (that’s the smell I told you about), remove it from the heat immediately. Pour it into a heat-safe bowl to stop the cooking. Let it cool slightly while you roll out the crust.
Step 3: Blind Bake the Crust
Preheat your oven to 375°F (190°C). On a lightly floured surface, roll out the chilled dough to about 12 inches in diameter. Gently transfer it to your pie dish, pressing it into the bottom and up the sides. Trim the overhang to about 1/2 inch, then fold it under and crimp the edges however you like. I do a simple fluted edge with my fingers.
Line the crust with parchment paper and fill with pie weights or dried beans. Bake for 15 minutes, then remove the parchment and weights. Prick the bottom of the crust with a fork (this prevents bubbles) and bake for another 8-10 minutes, until lightly golden. Set aside to cool slightly. Reduce oven temperature to 350°F (175°C).
Step 4: Make the Filling
In a large bowl, whisk together the browned butter (it should be slightly warm, not hot), pumpkin puree, brown sugar, and granulated sugar until smooth. Add the eggs and egg yolk, one at a time, whisking well after each. Stir in the vanilla, pumpkin pie spice, cinnamon, and salt.
Slowly pour in the heavy cream while whisking gently. Don’t whisk too vigorously—you don’t want to incorporate too much air, which can cause cracks. The filling should be smooth and silky.
Step 5: Bake the Pie
Pour the filling into the pre-baked crust. Place the pie on a baking sheet (this catches any drips and helps the bottom crust cook evenly). Bake at 350°F (175°C) for 50-60 minutes. The edges should be set, but the center should still jiggle slightly when you gently shake the pan. It will continue to set as it cools.
If the crust edges are browning too quickly, tent them with foil or a pie shield around the 30-minute mark. I learned this the hard way after a few overdone crusts.
Step 6: Cool Completely
Let the pie cool on a wire rack for at least 2 hours at room temperature. Then refrigerate for at least 4 hours, or overnight. This is non-negotiable for clean slices. I know you want to dig in, but trust me—the wait is worth it.
Step 7: Make the Maple Whipped Cream
Just before serving, pour the cold heavy cream into a chilled bowl. Add the maple syrup, vanilla, and pinch of salt. Beat with an electric mixer on medium-high speed until soft peaks form. Don’t overbeat, or you’ll end up with butter. Stop when the cream holds its shape but is still soft and luscious.
Spread or pipe the whipped cream over the cooled pie. Or serve it on the side so everyone can add their own. I like to pipe it in rosettes for a dinner party—it looks fancy and takes about two extra minutes.
Cooking Tips & Techniques
Alright, let me share some hard-earned wisdom. I’ve messed up this pie more times than I’d like to admit, and here’s what I learned.
Don’t skip browning the butter. I know it’s an extra step, but it’s literally the whole point of this pie. The nutty flavor is what sets it apart from every other pumpkin pie. If you’re short on time, you can brown the butter a day ahead and keep it in the fridge. Just warm it slightly before using so it mixes smoothly.
Watch your oven temperature. Every oven runs differently. My old oven ran hot, and I’d get cracks in my filling every single time. If your filling cracks, don’t panic. The maple whipped cream covers a multitude of sins. But to prevent cracks, avoid overbaking and don’t open the oven door during the first 40 minutes of baking.
Use room temperature eggs. Cold eggs can seize the brown butter and make the filling lumpy. Just leave them on the counter for 30 minutes before you start. If you forget, place them in a bowl of warm water for 5 minutes.
Chill the pie completely. I cannot stress this enough. A warm pumpkin pie is a messy pumpkin pie. For clean, beautiful slices, the pie needs at least 4 hours in the fridge. Overnight is even better. The filling firms up and the flavors meld together.
Make the whipped cream fresh. It only takes a few minutes, and fresh whipped cream is infinitely better than anything from a can. Plus, the maple flavor really shines when it’s freshly made.
Multitasking tip: While the crust is chilling, brown your butter. While the crust is blind baking, make your filling. You can have this whole pie assembled in about 30 minutes of active time, even though the total time is longer.
Variations & Adaptations
One of the things I love about this recipe is how flexible it is. Here are a few ways to make it your own.
Gluten-Free Version: Substitute the all-purpose flour with a good gluten-free flour blend that includes xanthan gum. I’ve had great results with Bob’s Red Mill 1-to-1 Baking Flour. The texture is slightly more tender, but still flaky and delicious.
Dairy-Free Version: Use a high-quality vegan butter for browning (Miyoko’s European Style Cultured Vegan Butter works beautifully). For the filling, replace the heavy cream with full-fat coconut cream. The coconut flavor is subtle and actually complements the pumpkin nicely. For the whipped cream, use chilled coconut cream whipped with maple syrup.
Spice It Up: If you like a little heat, add 1/4 teaspoon of cayenne pepper or a pinch of ground ginger to the filling. The warmth pairs beautifully with the brown butter and maple. I tried this on a whim last year, and it was a hit at my Friendsgiving.
Pecan Praline Topping: For an extra layer of texture, sprinkle a mixture of chopped pecans, brown sugar, and a little melted butter over the top of the pie during the last 10 minutes of baking. It creates a crunchy, caramelized crust that’s absolutely divine.
Individual Mini Pies: Use a muffin tin instead of a pie dish. Roll out the dough and cut circles to fit into the muffin cups. Blind bake for 10 minutes, then fill and bake for 25-30 minutes. Perfect for parties where everyone wants their own little pie.
Serving & Storage Suggestions
This pie is best served cold or at room temperature. I personally prefer it straight from the fridge with a generous dollop of maple whipped cream. The contrast between the cool, creamy filling and the flaky crust is just perfect.
For a dinner party: Slice the pie and plate each piece with a swirl of whipped cream and a light dusting of cinnamon or nutmeg. It looks gorgeous and feels special. Serve alongside a cup of hot coffee or a glass of bourbon for a truly adult dessert.
What to serve alongside: This pie is rich, so keep the rest of the meal balanced. A simple roasted turkey, green beans with almonds, and a light salad are all great choices. For dessert, this pie pairs beautifully with a scoop of vanilla ice cream or a drizzle of caramel sauce.
Storage: Cover the pie loosely with plastic wrap or aluminum foil and store in the refrigerator for up to 4 days. The maple whipped cream is best made fresh, but you can store it in an airtight container in the fridge for up to 24 hours. Just give it a quick whisk before serving if it separates.
Freezing: You can freeze the baked, cooled pie (without whipped cream) for up to 2 months. Wrap it tightly in plastic wrap, then foil. Thaw in the refrigerator overnight before serving. Make the whipped cream fresh when you’re ready to serve.
Flavor development: Honestly, this pie tastes even better the next day. The flavors meld together and the texture becomes even more silky. So if you can, make it a day ahead. Your future self will thank you.
Nutritional Information & Benefits
Let’s be real—this is a dessert, and it’s indulgent. But there are some redeeming qualities.
Per slice (based on 8 servings, with whipped cream):
- Calories: approximately 480
- Fat: 32g
- Carbohydrates: 42g
- Protein: 6g
- Fiber: 3g
- Sugar: 28g
Pumpkin is packed with vitamin A, which is great for your eyes and immune system. It’s also a good source of fiber and potassium. The brown butter adds healthy fats, and the maple syrup provides antioxidants (yes, really!).
This recipe contains dairy, gluten, and eggs, so it’s not suitable for those with allergies to those ingredients. But the variations I mentioned above can help adapt it.
My personal perspective? I don’t make this pie every week. It’s a special occasion dessert. But when I do make it, I enjoy every single bite without guilt. Food is about joy, connection, and memory. And this pie delivers all three.
Conclusion
So there you have it. My best brown butter pumpkin pie with maple whipped cream. It’s the pie I turn to when I want to impress, when I want to comfort, and when I want to chase that feeling I had in my aunt Rita’s kitchen all those years ago.
This recipe is worth trying because it takes something familiar and makes it extraordinary. The brown butter adds depth. The maple whipped cream adds sweetness and lightness. And together, they create a dessert that feels both nostalgic and new.
I hope you’ll make this pie your own. Add your own spice blend. Try the pecan topping. Serve it with a scoop of ice cream. The best recipes are the ones you adapt and make your own.
If you make this brown butter pumpkin pie, I’d love to hear about it. Leave a comment below, share a photo, or tag me on social media. Honestly, hearing that someone made my recipe and loved it? That’s the best part of this whole food blogging thing.
Now go forth and brown some butter. Your Thanksgiving table (or Tuesday night dinner, no judgment) will thank you.
Frequently Asked Questions
Can I use store-bought pie crust instead of making my own?
Absolutely. If you’re short on time, a good quality refrigerated pie crust works fine. Just blind bake it according to the package directions before adding the filling. The brown butter filling is the star here, so the crust is secondary.
Why did my pumpkin pie crack?
Cracks usually happen from overbaking or sudden temperature changes. Make sure you pull the pie out when the center is still slightly jiggly. Also, let it cool gradually on a wire rack instead of putting it straight in the fridge. And don’t open the oven door during baking!
Can I make this pie ahead of time?
Yes! This pie is actually better made a day ahead. Bake it, cool it completely, and store it in the refrigerator. Make the maple whipped cream fresh just before serving. The flavors meld and the texture becomes even more silky overnight.
Can I use pumpkin pie spice instead of individual spices?
Definitely. Use 1 1/2 teaspoons of pumpkin pie spice in place of the individual spices listed. It’s a convenient shortcut, and most blends have a nice balance of cinnamon, ginger, nutmeg, and cloves.
How do I get clean slices of pie?
Use a sharp knife and wipe it clean between each slice. For the cleanest cuts, refrigerate the pie for at least 4 hours or overnight. A warm pie will be messy. Also, dipping the knife in hot water and drying it before slicing helps glide through the crust.
Pin This Recipe!
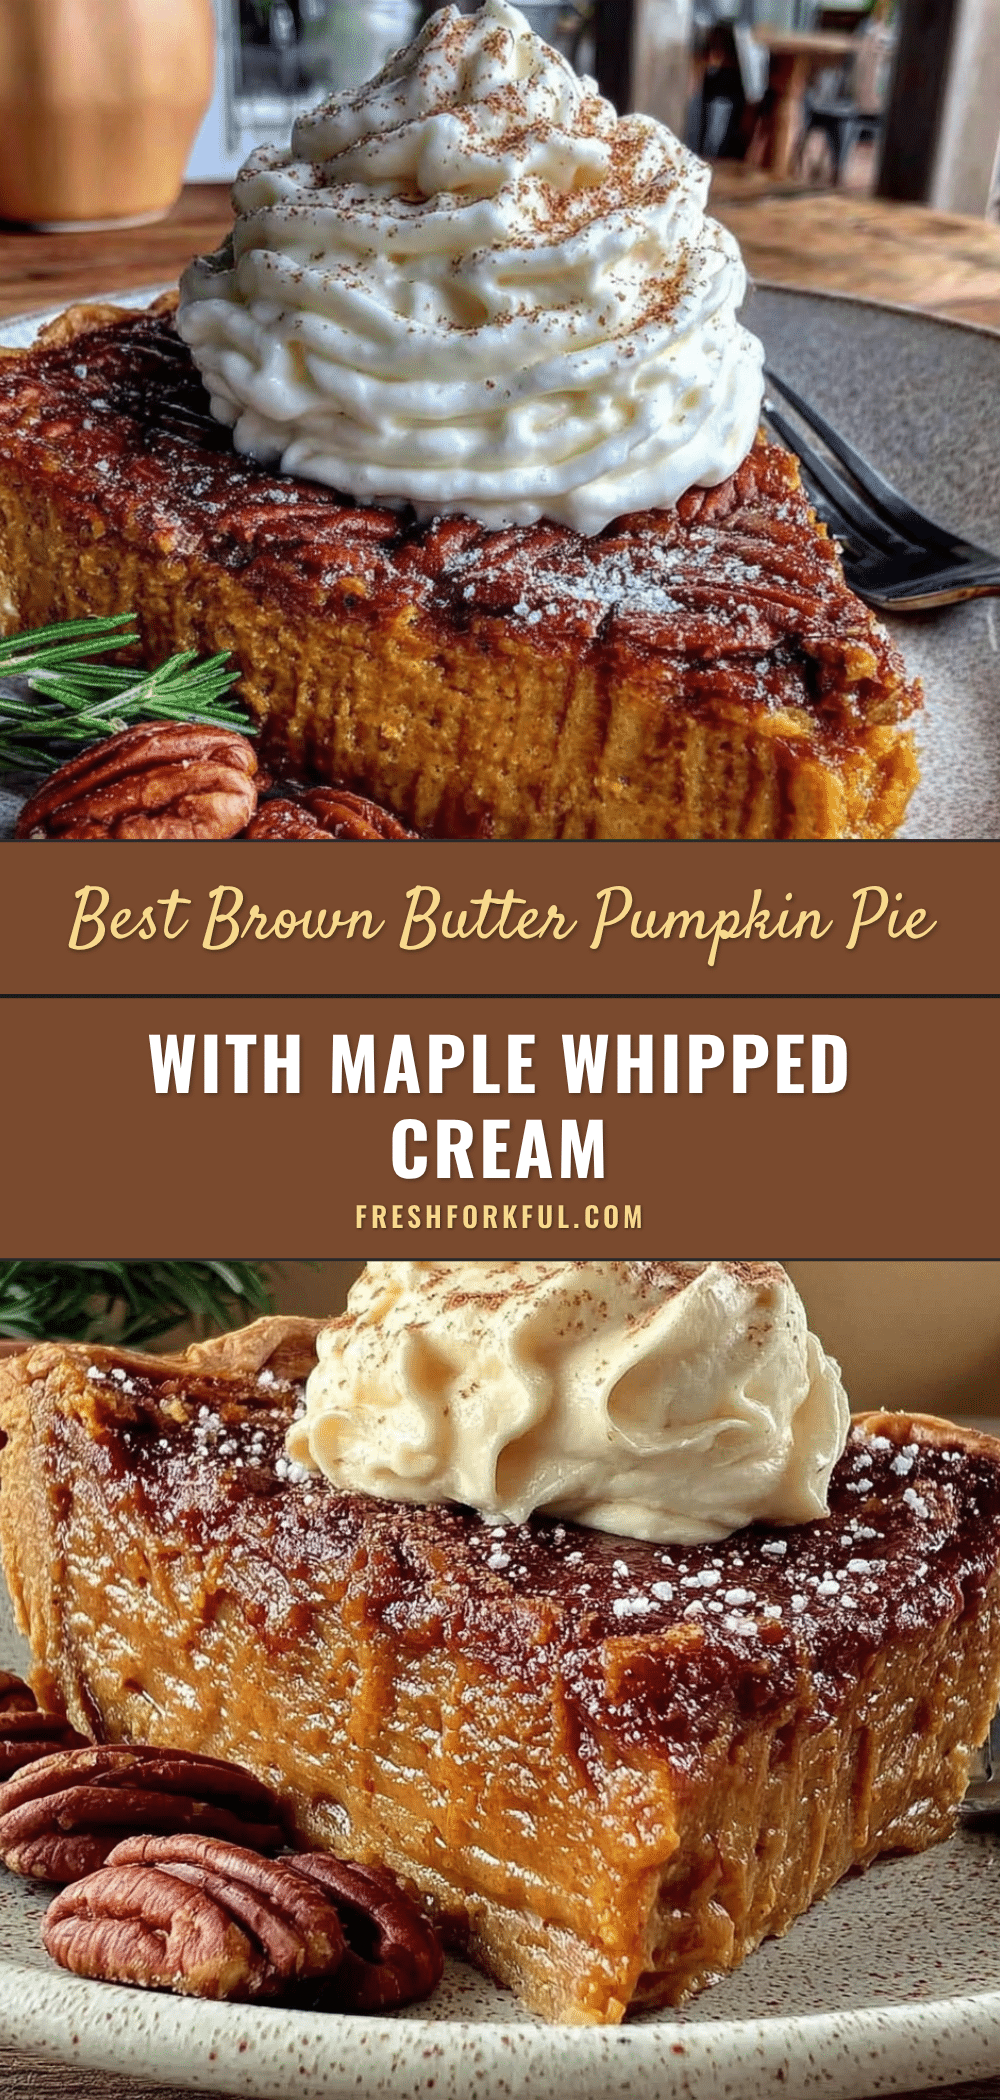
Best Brown Butter Pumpkin Pie with Maple Whipped Cream
This brown butter pumpkin pie with maple whipped cream is a show-stopping dessert that combines deep, nutty flavor with a silky, classic pumpkin filling. Perfect for Thanksgiving or any fall gathering, it’s comfort food reimagined—familiar enough to feel like home, but special enough to feel like an occasion.
- Prep Time: 30 minutes
- Cook Time: 1 hour 10 minutes
- Total Time: 5 hours 40 minutes (includes chilling and cooling)
- Yield: 8 servings 1x
- Category: Dessert
- Cuisine: American
Ingredients
- 1 1/4 cups all-purpose flour (spooned and leveled)
- 1/2 teaspoon salt
- 1 tablespoon granulated sugar
- 1/2 cup cold unsalted butter, cut into small cubes
- 3–4 tablespoons ice water
- 1/2 cup unsalted butter (for browning)
- 1 can (15 oz) pumpkin puree (not pumpkin pie filling)
- 3/4 cup packed light brown sugar
- 1/4 cup granulated sugar
- 2 large eggs, room temperature
- 1 large egg yolk, room temperature
- 1 teaspoon vanilla extract
- 1 1/2 teaspoons pumpkin pie spice
- 1/2 teaspoon ground cinnamon
- 1/4 teaspoon salt
- 1 cup heavy cream (for filling)
- 1 cup heavy cream, cold (for whipped cream)
- 3 tablespoons pure maple syrup
- 1/2 teaspoon vanilla extract (for whipped cream)
- Pinch of salt (for whipped cream)
Instructions
- Make the pie crust: In a large bowl, whisk together flour, salt, and sugar. Add cold butter cubes. Using a pastry cutter or fingertips, work butter into flour until it resembles coarse meal with some pea-sized butter pieces. Sprinkle ice water over mixture, one tablespoon at a time, stirring with a fork until dough just comes together. Flatten into a disc, wrap in plastic wrap, and refrigerate for at least 1 hour (or up to 3 days).
- Brown the butter: Place 1/2 cup butter in a light-colored saucepan over medium heat. Stir constantly until butter melts, foams, and turns golden with brown specks at the bottom and a nutty aroma. Remove from heat immediately and pour into a heat-safe bowl to stop cooking. Let cool slightly.
- Blind bake the crust: Preheat oven to 375°F (190°C). On a lightly floured surface, roll out chilled dough to about 12 inches in diameter. Transfer to a 9-inch pie dish, pressing into bottom and up sides. Trim overhang to 1/2 inch, fold under, and crimp edges. Line with parchment paper and fill with pie weights or dried beans. Bake for 15 minutes. Remove parchment and weights. Prick bottom with a fork and bake for another 8-10 minutes until lightly golden. Set aside to cool slightly. Reduce oven …
- Make the filling: In a large bowl, whisk together browned butter (slightly warm), pumpkin puree, brown sugar, and granulated sugar until smooth. Add eggs and egg yolk one at a time, whisking well after each. Stir in vanilla, pumpkin pie spice, cinnamon, and salt. Slowly pour in heavy cream while whisking gently until smooth and silky.
- Bake the pie: Pour filling into pre-baked crust. Place pie on a baking sheet. Bake at 350°F (175°C) for 50-60 minutes, until edges are set but center still jiggles slightly. If crust edges brown too quickly, tent with foil around 30-minute mark.
- Cool completely: Let pie cool on a wire rack for at least 2 hours at room temperature. Then refrigerate for at least 4 hours, or overnight.
- Make the maple whipped cream: Just before serving, pour cold heavy cream into a chilled bowl. Add maple syrup, vanilla, and pinch of salt. Beat with an electric mixer on medium-high speed until soft peaks form. Spread or pipe over cooled pie, or serve on the side.
Notes
Don’t skip browning the butter—it’s the key to the nutty flavor. Use room temperature eggs to prevent the brown butter from seizing. Chill the pie completely for clean slices. Make the whipped cream fresh for best results. The pie can be made a day ahead and stored in the refrigerator.
Nutrition
- Serving Size: 1 slice (1/8 of pie)
- Calories: 480
- Sugar: 28
- Sodium: 320
- Fat: 32
- Saturated Fat: 19
- Carbohydrates: 42
- Fiber: 3
- Protein: 6
Keywords: brown butter pumpkin pie, maple whipped cream, Thanksgiving pie, fall dessert, pumpkin pie recipe, homemade pie crust


