Love this? Save it for later!
Share the inspiration with your friends
I wasn’t expecting cooking advice from my accountant, but there I was, watching him sort through a mountain of receipts while he described exactly how to make a Christmas tree-shaped dessert dip. It was mid-July, the air conditioning was fighting a losing battle, and we were supposed to be talking about quarterly estimates. Instead, he was drawing a triangle on a napkin and telling me about the brownie dip his wife made for their office holiday party. “You just bake it in a pan,” he said, “then cut it into a tree shape and pile fruit all over it.” I nodded along, half-listening, until he mentioned the fruit part. Fresh strawberries, kiwi, blueberries—arranged like ornaments on a chocolate tree. That image stuck with me. I mean, honestly, I forgot half of what he said about my taxes that day, but I remembered every detail of that dip.
So I went home and tried it. My first attempt was a mess—the brownie spread too thin, the tree shape looked more like a lopsided blob, and I used too much powdered sugar so it looked like a snowstorm hit a construction site. But the taste? Let me tell you, that first bite of warm, fudgy brownie with a cold, juicy strawberry on top was pure magic. I kept tweaking it, batch after batch, until I got it right. Now, this festive Christmas tree brownie dip with fresh fruit has become my signature holiday dish. It shows up at every Christmas party I attend, and people always ask for the recipe. Maybe you’ve been there—trying to find a dessert that looks impressive but doesn’t require hours in the kitchen. This is that recipe. It’s the one that makes you look like a holiday hero with minimal effort.
Why You’ll Love This Recipe
This festive Christmas tree brownie dip with fresh fruit isn’t just another holiday dessert. It’s the kind of thing that makes people stop mid-conversation and walk over to your table. I’ve tested this recipe at least a dozen times across different ovens and with different fruit combinations, and it works every single time. Here’s why you’ll love it too:
- Quick & Easy: Comes together in under 45 minutes, perfect for busy holiday schedules or last-minute party invitations.
- Simple Ingredients: No fancy grocery trips needed. You likely already have flour, sugar, cocoa powder, and eggs in your kitchen right now.
- Perfect for Holiday Gatherings: Great for Christmas parties, cookie exchanges, family dinners, or even as a fun dessert for Christmas morning.
- Crowd-Pleaser: Kids love building their own fruit combinations, and adults appreciate that it’s not overly sweet or complicated.
- Unbelievably Delicious: The contrast between warm, fudgy brownie and cold, fresh fruit is next-level comfort food.
What makes this recipe different from the rest? It’s the texture. Most brownie dips I’ve tried turn out either too cakey or too gooey. This one hits that perfect sweet spot—fudgy enough to scoop with fruit, but sturdy enough to hold its tree shape. I use a specific ratio of butter to cocoa powder that took me three failed attempts to figure out. Plus, the fruit arrangement isn’t just for looks. The acidity of the berries cuts through the richness of the chocolate, making each bite balanced and satisfying.
This recipe isn’t just good—it’s the kind that makes you close your eyes after the first bite. It’s comfort food reimagined for the holidays, with the same soul-soothing satisfaction of a warm brownie but dressed up in its festive best. Perfect for impressing guests without stress, or turning a simple dessert into something memorable.
What Ingredients You Will Need
This festive Christmas tree brownie dip uses simple, wholesome ingredients to deliver that rich chocolate flavor and fudgy texture. Most of these are pantry staples, which makes this recipe perfect for those moments when you need a last-minute holiday dessert.
For the Brownie Base
- Unsalted butter, melted (½ cup or 1 stick) – I use Plugrà for the richest flavor, but any good-quality unsalted butter works
- Granulated sugar (1 cup) – Adds sweetness and helps create that crackly top
- Large eggs (2, room temperature) – Room temperature eggs blend more smoothly into the batter
- Vanilla extract (1 teaspoon) – Pure vanilla makes a difference here; avoid imitation if possible
- All-purpose flour (⅔ cup) – Spoon and level your flour for the best texture
- Unsweetened cocoa powder (⅓ cup) – I prefer Dutch-processed for a deeper, darker chocolate flavor
- Salt (¼ teaspoon) – Enhances the chocolate and balances sweetness
- Baking powder (¼ teaspoon) – Just enough to give it a slight lift without making it cakey
For the Topping & Decoration
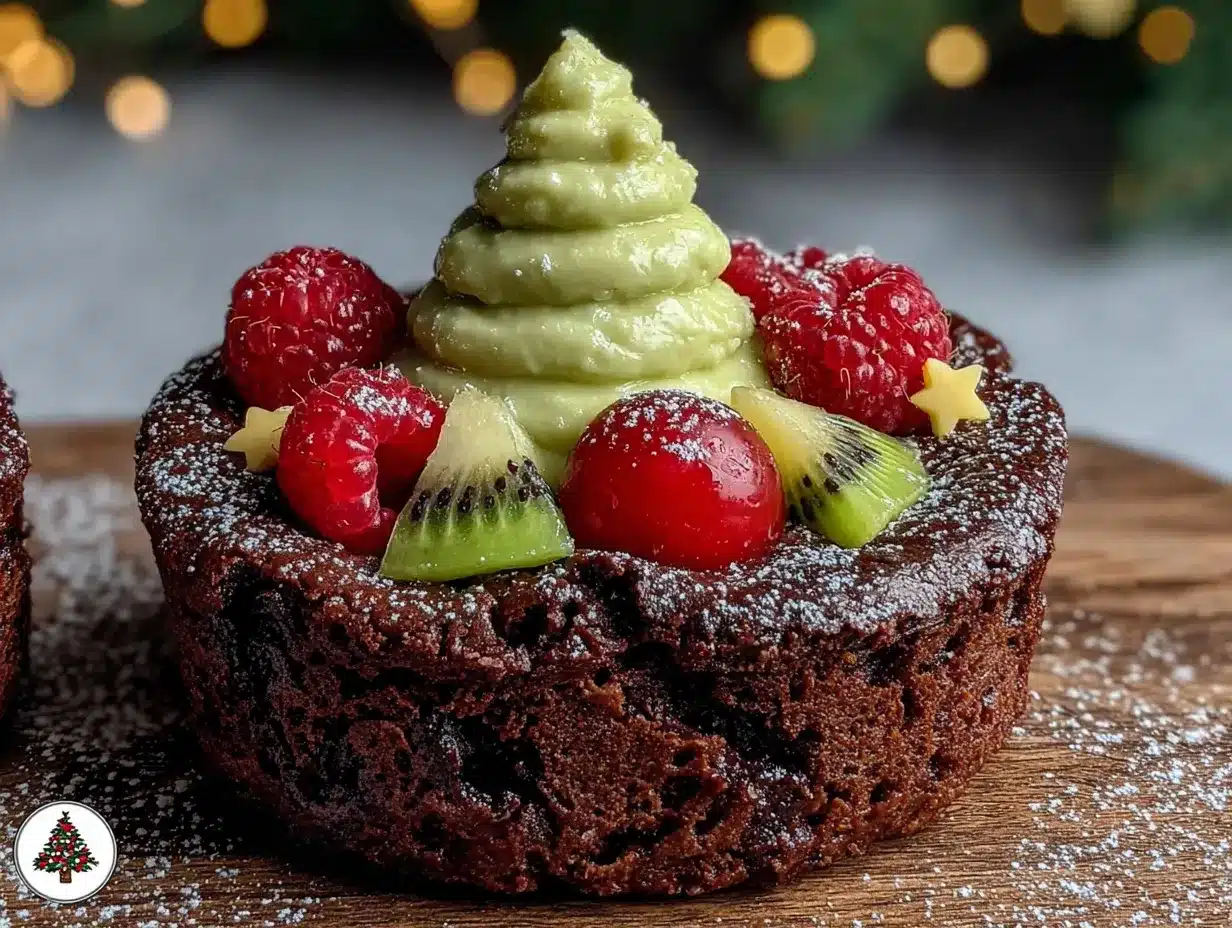
- Fresh strawberries (about 1 cup, hulled and sliced) – Look for bright red, firm berries for the best presentation
- Fresh kiwi (2-3, peeled and sliced into half-moons) – Adds that essential green color for the tree
- Fresh blueberries (½ cup) – These look like little ornaments on the tree
- Powdered sugar (2 tablespoons, for dusting) – Creates a “snow” effect on the tree
- Melted white chocolate (optional, ¼ cup, for drizzling) – Adds a decorative touch and extra sweetness
For Serving
- Graham crackers or pretzel sticks (for dipping) – The salty crunch pairs beautifully with the sweet brownie
- Additional fresh fruit (apple slices, pear slices, or banana chunks) – More options for dipping
When choosing your fruit, go for what’s freshest. In winter, strawberries can be hit or miss, so look for ones that are bright red all the way through with no white shoulders. For the kiwi, give them a gentle squeeze—they should yield slightly but not feel mushy. If you can’t find good fresh fruit, you can use frozen berries, just thaw and pat them dry first so they don’t make the brownie soggy.
For a gluten-free option, substitute the all-purpose flour with a 1:1 gluten-free baking flour. I’ve tried this with Bob’s Red Mill and it works beautifully. Just don’t overmix the batter, as gluten-free flours can get gummy.
Equipment Needed
You don’t need a professional kitchen to make this festive Christmas tree brownie dip. Here’s what you’ll need:
- 9×13 inch baking pan – The standard size works perfectly for getting the right brownie thickness
- Mixing bowls (one large, one medium) – Glass or stainless steel works best
- Whisk – For combining the wet ingredients smoothly
- Rubber spatula – For scraping every last bit of batter into the pan
- Parchment paper – Lining the pan makes removal and cutting so much easier
- Sharp knife or pizza cutter – For cutting the brownie into the tree shape
- Large serving platter or cutting board – To display the finished tree
- Small offset spatula (optional but helpful) – For spreading the batter evenly
If you don’t have a 9×13 pan, you can use two 8×8 square pans and adjust the baking time slightly. I’ve also made this in a disposable aluminum pan for parties, and it works just fine. Just keep an eye on the baking time since metal pans conduct heat differently.
One tip I learned the hard way: use a pizza cutter to cut the tree shape. It’s way easier than trying to navigate a knife around those angled edges. And please, for the love of all things chocolate, let the brownie cool completely before you try to cut it. I ruined my first attempt by rushing this step and ended up with brownie mush.
Preparation Method
- Preheat your oven to 350°F (175°C). Line your 9×13 baking pan with parchment paper, leaving some overhang on the sides. This will help you lift the brownie out later.
- Melt the butter. In a large microwave-safe bowl, melt ½ cup of unsalted butter in 30-second intervals until fully melted. Let it cool for about 2 minutes—you don’t want it hot enough to cook the eggs when you add them.
- Mix the wet ingredients. Add 1 cup of granulated sugar to the melted butter and whisk until well combined. The mixture should look smooth and slightly glossy. Add 2 room-temperature eggs and 1 teaspoon of vanilla extract, then whisk vigorously until the mixture is thick and pale, about 1 minute. This step is important—it creates that crackly top brownies are famous for.
- Combine the dry ingredients. In a separate medium bowl, whisk together ⅔ cup all-purpose flour, ⅓ cup unsweetened cocoa powder, ¼ teaspoon salt, and ¼ teaspoon baking powder. Make sure there are no lumps—cocoa powder loves to clump.
- Fold the dry into the wet. Add the dry ingredients to the wet mixture and fold gently with a rubber spatula. Mix just until you no longer see streaks of flour. Overmixing will make the brownies tough instead of fudgy. The batter should be thick and glossy.
- Bake the brownie. Pour the batter into your prepared pan and spread it evenly with the spatula. Bake for 18-22 minutes, or until a toothpick inserted in the center comes out with a few moist crumbs attached. The edges should look set and slightly pulling away from the pan. I start checking at 18 minutes because ovens vary—you want fudgy, not dry.
- Cool completely. Place the pan on a wire rack and let the brownie cool for at least 30 minutes at room temperature, then refrigerate for another 20 minutes. Chilled brownies cut much cleaner than warm ones. Trust me on this.
- Cut the tree shape. Using the parchment paper, lift the brownie out of the pan and place it on a cutting board. Use a sharp knife or pizza cutter to cut a triangle shape—think of a Christmas tree silhouette. Start by cutting a straight line down the center, then angle your cuts from the top point outward to create the tree shape. Save the scrap pieces for snacking (or crumble them over ice cream later).
- Transfer to serving platter. Carefully move the brownie tree onto your serving platter or cutting board. Position it with the point facing up.
- Decorate with fruit. This is the fun part. Arrange your sliced kiwi half-moons along the edges of the tree to create the “branches.” Place rows of strawberry slices across the tree like ornaments. Dot blueberries randomly throughout. Don’t overthink it—just make it look festive and abundant.
- Add the finishing touches. Dust the entire tree with powdered sugar using a fine-mesh strainer. If you’re using melted white chocolate, drizzle it over the top in zigzag patterns. Serve immediately with graham crackers, pretzel sticks, and extra fruit for dipping.
Cooking Tips & Techniques
After making this festive Christmas tree brownie dip more times than I care to count, I’ve learned a few things the hard way. Let me save you some trouble.
Don’t overbake. This is the number one mistake people make. Brownie dip should be fudgy, not cakey. The toothpick test should show moist crumbs, not a clean stick. If you’re nervous, err on the side of underbaking. You can always pop it back in for a minute, but you can’t undo an overbaked brownie.
Chill before cutting. I know you’re excited. I know the house smells amazing. But warm brownies are fragile, and trying to cut a tree shape out of a warm brownie is like trying to cut Jell-O with a spoon. Refrigerate for at least 20 minutes after cooling to room temperature. The difference is night and day.
Use a template. If you’re nervous about cutting the tree shape freehand, cut a triangle out of parchment paper first and use it as a guide. Place it on top of the brownie and trace around it with a knife. This saved my second attempt from looking like a deformed Christmas tree.
Pat your fruit dry. Wet fruit will make the powdered sugar dissolve and create a mess. After washing your berries and kiwi, pat them thoroughly with paper towels before arranging them on the brownie. This also helps the fruit stay put instead of sliding around.
Make ahead strategy. You can bake the brownie up to two days in advance. Just wrap it tightly in plastic wrap and keep it in the refrigerator. Cut the tree shape and decorate right before serving for the freshest presentation.
I once forgot to add the eggs to the batter. I only realized it after the brownie was in the oven. It turned into a flat, chewy mess that tasted okay but looked terrible. Now I always double-check my ingredients before mixing. Learn from my absent-mindedness.
Variations & Adaptations
One of the best things about this festive Christmas tree brownie dip is how adaptable it is. Here are some variations I’ve tried and loved:
Dairy-Free Version
Substitute the butter with coconut oil or a plant-based butter alternative. Use dairy-free chocolate chips if you’re adding a drizzle. The texture will be slightly different—a bit more cake-like—but it’s still delicious. I made this for a friend with lactose intolerance and she ate half the tree before anyone else got a chance.
Peppermint Twist
Add ½ teaspoon of peppermint extract to the brownie batter along with the vanilla. Crush some candy canes and sprinkle them over the powdered sugar. The mint and chocolate combination is classic holiday magic. Just go easy on the extract—peppermint can easily overpower everything else.
Nutella Swirl
Before baking, drop spoonfuls of Nutella on top of the brownie batter and swirl it with a knife. This adds an extra layer of hazelnut goodness that pairs beautifully with the fruit. I did this for a party once and people kept asking what the “secret ingredient” was.
Summer Berry Version
While this is a Christmas recipe at heart, it works beautifully in summer with fresh raspberries, blackberries, and sliced peaches. Skip the powdered sugar and drizzle with melted dark chocolate instead. It’s a completely different vibe but equally addictive.
Gluten-Free Adaptation
As mentioned earlier, use a 1:1 gluten-free flour blend. I’ve also made this with almond flour, but the texture is denser and more crumbly. If you go that route, add an extra egg to help with binding.
Serving & Storage Suggestions
This festive Christmas tree brownie dip is best served at room temperature or slightly warm. The brownie should be soft and fudgy, while the fruit stays cool and refreshing. I like to set it out about 15 minutes before guests arrive so it loses that refrigerator chill.
For presentation, place the tree on a large wooden cutting board or a white platter to make the colors pop. Arrange extra fruit and dipping items around the base of the tree—graham crackers, pretzel sticks, apple slices, and even marshmallows work great. It creates a beautiful centerpiece that doubles as dessert.
As for beverages, this dip pairs wonderfully with hot cocoa, mulled wine, or a strong cup of coffee. The bitterness of coffee cuts through the sweetness of the brownie perfectly. For a non-alcoholic option, try sparkling apple cider.
Storage: If you have leftovers (which is rare in my house), cover the platter with plastic wrap and refrigerate for up to 3 days. The fruit will release some moisture, so the brownie underneath might get a bit soft. That’s okay—it still tastes great.
Reheating: To bring back that fresh-from-the-oven feel, microwave individual portions for 10-15 seconds. Don’t reheat the whole tree unless you’re serving it again—the fruit will get warm and mushy.
The flavors actually get better after a day in the fridge. The brownie becomes denser and more fudgy, and the fruit juices mingle with the chocolate in a way that’s surprisingly good. Just don’t expect it to look as pretty on day two.
Nutritional Information & Benefits
Let’s be honest—this is a treat, not a health food. But here’s the nutritional breakdown for one serving (about ⅙ of the tree, with fruit but without dipping items):
| Nutrient | Amount per Serving |
|---|---|
| Calories | 285 |
| Total Fat | 14g |
| Saturated Fat | 8g |
| Carbohydrates | 38g |
| Fiber | 3g |
| Sugar | 26g |
| Protein | 4g |
The good news is that the fresh fruit adds fiber, vitamin C, and antioxidants. Strawberries are packed with vitamin C, kiwi has more vitamin C than oranges, and blueberries are loaded with antioxidants. So while you’re indulging in chocolatey goodness, you’re also getting some nutritional benefits.
This recipe contains gluten, dairy, and eggs. For those with allergies, check the variations section above for suitable substitutions. The fruit provides natural sweetness, which means you can reduce the powdered sugar if you’re watching your sugar intake.
From my perspective, this is a dessert meant for celebration. It’s the kind of thing you make for Christmas parties and family gatherings—not for everyday eating. And that’s okay. Food is about joy and connection, and this dip delivers both in spades.
Conclusion
This festive Christmas tree brownie dip with fresh fruit has become more than just a recipe in my kitchen. It’s a tradition now. Every December, I make at least two of these—one for our family Christmas Eve gathering and one for my neighbors. It’s the dessert that makes people smile before they even taste it, and then they smile even wider after that first bite.
I love how forgiving this recipe is. You can tweak the fruit, adjust the sweetness, or change the shape entirely. One year I made it as a star instead of a tree. Another year I added caramel drizzle. It always works because at its heart, it’s just really good brownie with really good fruit. Simple and honest.
So go ahead and give it a try. Make it your own. Use whatever fruit looks best at your grocery store. Add sprinkles or chocolate chips or crushed candy canes. This is your tree now. I’d love to hear how it turns out—drop a comment below and tell me about your version. Did you add something unexpected? Did your kids help decorate it? Did you eat the whole thing before anyone else got a chance? No judgment here.
Happy holidays, and happy dipping!
Frequently Asked Questions
Can I make this festive Christmas tree brownie dip ahead of time?
Absolutely! Bake the brownie up to two days in advance and store it wrapped in the refrigerator. Cut the tree shape and decorate with fresh fruit right before serving for the best presentation.
What if I don’t have a 9×13 pan?
You can use two 8×8 square pans instead. Reduce the baking time by 3-5 minutes since the batter will be thinner. You can also use a disposable aluminum pan—just watch the baking time as metal conducts heat differently.
Can I use frozen fruit instead of fresh?
Yes, but thaw and pat the fruit completely dry before using. Frozen fruit releases more moisture, which can make the brownie soggy and cause the powdered sugar to dissolve. Fresh fruit really does work best here.
How do I get clean cuts when shaping the tree?
Chill the brownie in the refrigerator for at least 20 minutes after it cools to room temperature. Use a sharp knife or pizza cutter, and wipe the blade clean between cuts. A chilled brownie cuts like a dream.
What other dipping items work well besides fruit?
Graham crackers, pretzel sticks, vanilla wafers, shortbread cookies, marshmallows, and even potato chips (trust me on this one) all pair beautifully with the chocolate brownie dip. The salty-sweet combination is irresistible.
Pin This Recipe!
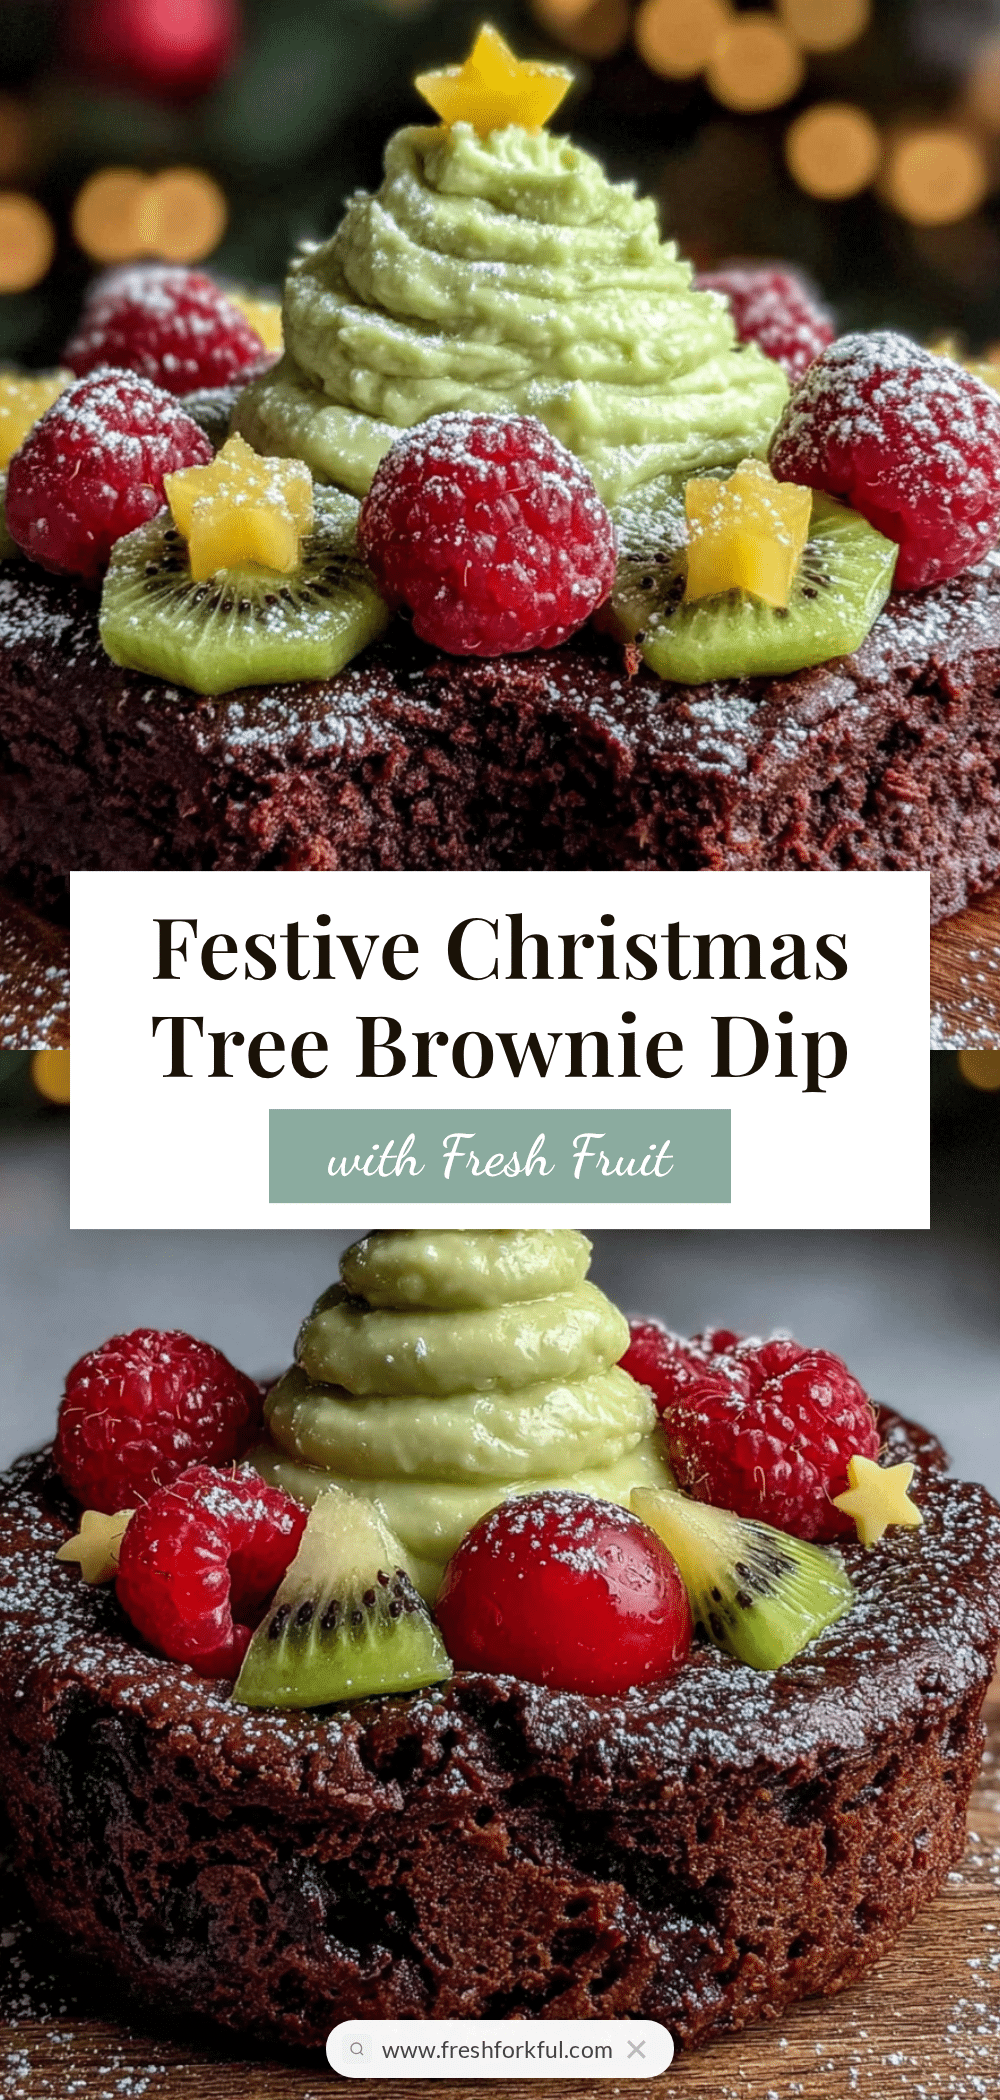
Festive Christmas Tree Brownie Dip: Easy Holiday Dessert
A festive Christmas tree-shaped brownie dip topped with fresh fruit, perfect for holiday gatherings. This easy dessert combines a fudgy brownie base with strawberries, kiwi, and blueberries for a stunning and delicious centerpiece.
- Prep Time: 15 minutes
- Cook Time: 20 minutes
- Total Time: 35 minutes
- Yield: 6 servings 1x
- Category: Dessert
- Cuisine: American
Ingredients
- ½ cup unsalted butter, melted
- 1 cup granulated sugar
- 2 large eggs, room temperature
- 1 teaspoon vanilla extract
- ⅔ cup all-purpose flour
- ⅓ cup unsweetened cocoa powder
- ¼ teaspoon salt
- ¼ teaspoon baking powder
- 1 cup fresh strawberries, hulled and sliced
- 2–3 fresh kiwi, peeled and sliced into half-moons
- ½ cup fresh blueberries
- 2 tablespoons powdered sugar
- ¼ cup melted white chocolate (optional)
- Graham crackers or pretzel sticks (for serving)
- Additional fresh fruit for dipping (apple slices, pear slices, banana chunks)
Instructions
- Preheat oven to 350°F (175°C). Line a 9×13 inch baking pan with parchment paper, leaving overhang on the sides.
- In a large microwave-safe bowl, melt ½ cup unsalted butter in 30-second intervals. Let cool for 2 minutes.
- Add 1 cup granulated sugar to the melted butter and whisk until smooth and glossy. Add 2 room-temperature eggs and 1 teaspoon vanilla extract, whisk vigorously until thick and pale, about 1 minute.
- In a separate medium bowl, whisk together ⅔ cup all-purpose flour, ⅓ cup unsweetened cocoa powder, ¼ teaspoon salt, and ¼ teaspoon baking powder.
- Add dry ingredients to wet mixture and fold gently with a rubber spatula until just combined. Do not overmix.
- Pour batter into prepared pan and spread evenly. Bake for 18-22 minutes, until a toothpick inserted in the center comes out with moist crumbs.
- Cool brownie in pan on a wire rack for 30 minutes at room temperature, then refrigerate for 20 minutes.
- Using parchment paper, lift brownie out of pan and place on a cutting board. Cut into a triangle (Christmas tree) shape using a sharp knife or pizza cutter.
- Transfer brownie tree to a serving platter with the point facing up.
- Decorate with fruit: arrange kiwi half-moons along edges for branches, place strawberry slices across the tree like ornaments, and dot blueberries randomly.
- Dust entire tree with powdered sugar using a fine-mesh strainer. Drizzle with melted white chocolate if desired. Serve immediately with graham crackers, pretzel sticks, and extra fruit for dipping.
Notes
Don’t overbake; brownie should be fudgy. Chill before cutting for clean edges. Pat fruit dry to prevent powdered sugar from dissolving. Can be made ahead: bake brownie up to 2 days in advance, wrap and refrigerate. Cut and decorate just before serving.
Nutrition
- Serving Size: 1/6 of tree
- Calories: 285
- Sugar: 26
- Sodium: 150
- Fat: 14
- Saturated Fat: 8
- Carbohydrates: 38
- Fiber: 3
- Protein: 4
Keywords: Christmas tree brownie dip, holiday dessert, brownie dip, fruit dip, easy dessert, Christmas party dessert


