Love this? Save it for later!
Share the inspiration with your friends
I used to think I had Halloween all figured out. Buy the candy, carve the pumpkin, maybe throw on a costume. But when my daughter came home from school last October clutching a flyer for the class party, I realized I had signed up for the “treat” portion without actually reading the fine print. The note said “homemade treats only, no store-bought packages.” My heart sank. I had two hours, a kitchen full of half-eaten granola bars, and a child who was absolutely certain I could make something spooky and amazing. I stood there staring at the pantry like it might offer up a solution on its own.
Then I saw the bag of marshmallows hiding behind the cereal. And the box of crispy rice cereal that I bought for a breakfast I never got around to making. Honestly, it clicked. Rice Krispie treats are basically the superhero of last-minute desserts. They come together in about ten minutes, they don’t need any fancy equipment, and they take food coloring like a champ. I grabbed the candy eyes I had leftover from a birthday cake disaster (you know, the ones you buy and then forget to use), and I just started throwing things together. It was messy. I got marshmallow stuck to my counter, my hair, and somehow my elbow. But when I pressed those little candy eyes into the orange-tinted mixture, my daughter let out a shriek of pure joy. That right there is why I keep making these.
These Halloween Rice Krispie Treats with Candy Eyes aren’t just a recipe. They’re a rescue mission for busy parents, a quick win for anyone who forgot about the school party, and honestly, they’re just fun. You don’t need to be a pastry chef. You don’t need specialty molds. You just need a few pantry staples and about fifteen minutes. Maybe you’ve been there—standing in your kitchen, staring at the clock, wondering how you’re going to pull off something festive without losing your mind. This is your answer.
Why You’ll Love This Recipe
Let me tell you why these Halloween Rice Krispie Treats with Candy Eyes have become my go-to for every spooky season event. I have tested this recipe at least a dozen times, tweaking the butter-to-marshmallow ratio, experimenting with different food colorings, and even trying out various brands of crispy rice cereal. What I landed on is the perfect balance of chewy, crunchy, and ridiculously easy. This isn’t just another dessert recipe—it is the one that saves you every single time.
- Quick & Easy: From start to finish, these treats take about 15 minutes. That includes melting, mixing, shaping, and decorating. You can literally make them during a commercial break.
- Simple Ingredients: You probably already have butter, marshmallows, and crispy rice cereal in your kitchen. The candy eyes and food coloring are the only special items, and they are super easy to find at any grocery store or online.
- Perfect for Halloween Parties: Whether it is a school event, a office potluck, or just a fun family movie night, these treats fit right in. They are portable, they don’t melt, and kids absolutely go crazy for them.
- Crowd-Pleaser: I have brought these to three different Halloween gatherings now, and every single time, they disappear before the cupcakes. Adults love the nostalgic taste, and kids love the creepy eyes staring back at them.
- Unbelievably Customizable: You can make them orange, green, purple, or even leave them plain white for ghost-themed treats. The candy eyes can be paired with other decorations like pretzel sticks for legs or black licorice for hair.
What makes this recipe different from every other Rice Krispie treat out there is the texture. I use a slightly lower butter ratio than traditional recipes, which keeps the treats from getting greasy or soggy. The marshmallows stay perfectly stretchy, and the cereal stays crunchy even after a day or two. Plus, adding the candy eyes while the mixture is still warm means they sink in just enough to stay put without disappearing. It is comfort food reimagined for Halloween—faster, easier, and way more fun than anything you could buy at the store.
These treats are the kind that make you close your eyes after the first bite. They are buttery, sweet, and just a little bit nostalgic. And honestly, seeing those little eyes peeking out from the orange tinted goodness never gets old.
What Ingredients You Will Need
This recipe uses simple, everyday ingredients to deliver big Halloween flavor without any stress. Most of these are pantry staples, and the few special items are easy to find at your local grocery store or online. Here is everything you need:
For the Treat Base
- 3 tablespoons unsalted butter (I prefer Land O’Lakes for consistent flavor, but any brand works fine. Salted butter can be used if you reduce the added salt elsewhere, but unsalted gives you better control.)
- 1 package (10 ounces) regular marshmallows (About 40 large marshmallows or 4 cups of mini marshmallows. Jet-Puffed is my go-to brand because they melt evenly and don’t leave weird lumps.)
- 6 cups crispy rice cereal (Kellogg’s Rice Krispies are the classic choice, but any generic crispy rice cereal works perfectly. I have tested this with store brands and they turn out just as good.)
- 1/4 teaspoon vanilla extract (Optional but highly recommended. It adds a warm depth that balances the sweetness. Pure vanilla is best, but imitation works in a pinch.)
- 1/4 teaspoon salt (A tiny pinch of salt makes the sweetness pop and prevents the treats from tasting flat. I use fine sea salt for even distribution.)
For the Halloween Theme
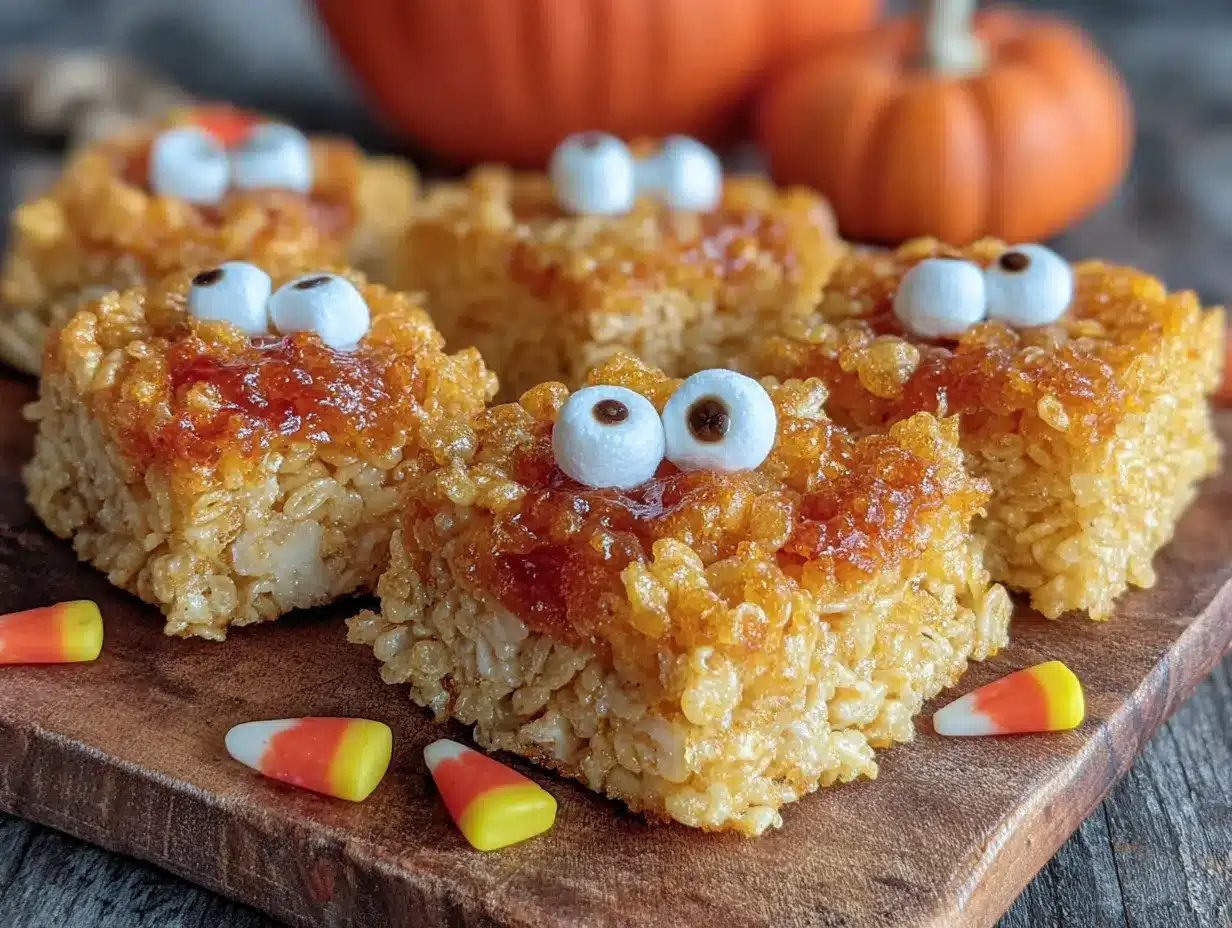
- Orange gel food coloring (Gel coloring is much better than liquid drops because it doesn’t add extra moisture that can make the treats sticky. I use Wilton brand orange gel. You only need a tiny dab—about 1/8 teaspoon.)
- 1/2 cup candy eyes (These are the little white and black edible eyes you find in the baking aisle. Wilton makes a great version, and you can also find them at craft stores or online. I like to mix sizes for variety—some big, some small.)
- Optional: 1-2 drops black gel food coloring (For making spiderweb designs or spooky faces on top. Totally optional but adds a fun touch.)
Ingredient Tips and Substitutions
If you need a dairy-free version, swap the butter for a plant-based butter like Miyoko’s or Earth Balance. The texture will be slightly softer, but the flavor is still great. For a gluten-free option, make sure your crispy rice cereal is certified gluten-free. Most standard brands are naturally gluten-free, but always check the label. If you cannot find candy eyes, you can use mini chocolate chips or even M&Ms with the M printed side facing down. Honestly, I have done that in a pinch and it works fine. Just press them in firmly so they stay.
One more thing: do not skip the salt. I know it seems like a tiny detail, but that pinch of salt is what makes these treats taste professional rather than just sweet. It balances the marshmallow and brings out the buttery flavor. Trust me on this one.
Equipment Needed
You do not need a fancy kitchen to make these Halloween Rice Krispie Treats with Candy Eyes. In fact, you probably already own everything on this list. Here is what you will need:
- Large pot or saucepan (4-quart or larger): You need room to melt the marshmallows and stir in the cereal without spilling everywhere. A nonstick pot is ideal because cleanup is much easier. If you only have stainless steel, just spray it with nonstick cooking spray before you start.
- Rubber spatula or wooden spoon: A silicone spatula is my favorite because it scrapes the sides clean and doesn’t scratch your pot. A wooden spoon works too, but it might leave some marshmallow stuck in the cracks.
- 9×13-inch baking dish: This size gives you treats that are about 3/4 inch thick—perfect for cutting into squares. If you want thicker treats, use an 8×8-inch dish and adjust the cooking time slightly (they will need a few extra minutes to set).
- Parchment paper or wax paper: Lining your baking dish with parchment paper makes lifting the treats out super easy. Leave some overhang on the sides for handles. Wax paper works too, but it is less sturdy.
- Small bowl for candy eyes: Trust me, pour the candy eyes into a bowl before you start. Trying to grab them from the bag with sticky marshmallow fingers is a disaster waiting to happen. I learned this the hard way.
- Measuring cups and spoons: Accurate measurements matter here. Too much cereal and the treats will be dry. Too little and they will be overly gooey.
If you do not have a 9×13-inch dish, you can press the mixture onto a parchment-lined baking sheet and shape it into a rectangle by hand. It is a little messier, but it works. Also, if you have a kitchen scale, weighing the marshmallows is more accurate than counting them. 10 ounces is about 283 grams.
Preparation Method
Alright, let us get into the actual making of these Halloween Rice Krispie Treats with Candy Eyes. I have broken this down into clear steps so you can follow along easily. The whole process takes about 15 minutes of active time, plus 30 minutes for the treats to set. Here we go:
Step 1: Prepare Your Pan
Line your 9×13-inch baking dish with parchment paper. Make sure the paper goes up the sides on two opposite edges so you can lift the treats out later. Lightly spray the parchment paper with nonstick cooking spray. This step is non-negotiable—without it, the treats will stick to the paper and you will end up peeling marshmallow off in sad little pieces. I have forgotten this step before, and let me tell you, it is not fun.
Step 2: Melt the Butter
Place your large pot over medium-low heat. Add the 3 tablespoons of unsalted butter and let it melt slowly. Do not turn the heat up high to speed things up—butter burns easily and burnt butter will ruin the flavor of your treats. Swirl the pot occasionally to help it melt evenly. Once the butter is fully melted, you should see a few tiny bubbles forming around the edges. That is your cue to move to the next step.
Step 3: Melt the Marshmallows
Add the entire package of marshmallows to the melted butter. Stir constantly with your rubber spatula or wooden spoon. The marshmallows will start to puff up and then collapse into a gooey, stretchy mass. Keep stirring until the mixture is completely smooth with no lumps. This usually takes about 4 to 5 minutes. If you see any browning on the bottom of the pot, remove it from the heat immediately—you have gone too far. The marshmallows should be pale and fluffy, not caramel colored.
Step 4: Add Color and Flavor
Remove the pot from the heat. Add the 1/4 teaspoon of vanilla extract, the 1/4 teaspoon of salt, and your orange gel food coloring. I start with a tiny dab on the tip of a toothpick—about 1/8 teaspoon—and stir it in. If the color is not bright enough for you, add a little more. Gel coloring is concentrated, so a little goes a long way. Stir until the color is evenly distributed throughout the marshmallow mixture. You want a vibrant Halloween orange, not a pale pastel. If it looks too light, add one more tiny dab.
Step 5: Add the Cereal
Pour the 6 cups of crispy rice cereal into the pot. Fold it into the marshmallow mixture using a gentle cutting and folding motion. Do not stir vigorously or you will crush the cereal into crumbs. Fold until every piece of cereal is coated in the orange marshmallow. This takes about 1 to 2 minutes. You will see the mixture start to pull away from the sides of the pot—that is how you know it is ready.
Step 6: Press Into the Pan
Scrape the mixture into your prepared baking dish. Spray your spatula with nonstick cooking spray (or rub it with a little butter) and gently press the mixture into an even layer. Do not press too hard—you want the treats to be firm but not compacted like a brick. Pressing too hard makes them hard and difficult to bite. Just spread it out gently and pat it down lightly. If the mixture sticks to your spatula, spray it again.
Step 7: Add the Candy Eyes
While the mixture is still warm and slightly tacky, press the candy eyes into the surface. I like to space them out randomly so every square gets at least two or three eyes. Press them in gently but firmly so they stay put. If you wait too long and the mixture cools, the eyes will just sit on top and fall off when you cut the treats. Work quickly here—you have about 5 minutes before the mixture sets.
Step 8: Let Them Set
Let the treats cool at room temperature for at least 30 minutes. Do not put them in the refrigerator—this can make them hard and brittle. Just let them sit on the counter. Once they are completely cool, lift the whole block out using the parchment paper handles. Place it on a cutting board.
Step 9: Cut and Serve
Use a sharp knife to cut the treats into squares. I usually cut them into 12 large squares or 24 smaller ones, depending on the crowd. Wipe the knife clean between cuts to keep the edges neat. If the knife starts sticking, spray it with a little nonstick cooking spray. Serve immediately or store for later.
Cooking Tips & Techniques
Over the years, I have made plenty of mistakes with Rice Krispie treats. Burnt marshmallows, rock-hard squares, candy eyes that slid off like they were trying to escape. Here are the tips I wish someone had told me when I started:
Low and slow is the rule. Melting the butter and marshmallows over medium-low heat is the single most important thing you can do. High heat makes the marshmallows seize up and turn into a stiff, rubbery mess. If you see steam rising from the pot, you are too hot. Back the heat down immediately.
Wet your hands for shaping. If you prefer to shape the treats by hand instead of using a spatula, lightly wet your fingers with cold water. The marshmallow mixture will not stick to wet hands. This is a game changer if you are making pumpkin-shaped balls or monster faces instead of squares.
Do not overmix the cereal. Once the cereal is coated, stop stirring. Overmixing breaks the cereal into tiny pieces and gives you a dense, crumbly texture. You want the cereal to stay mostly intact so each bite has that satisfying crunch.
Test the color before adding cereal. Stir your food coloring into the marshmallow mixture before you add the cereal. Once the cereal is in, it is much harder to see if the color is even. I learned this the hard way when I ended up with a batch that had white spots scattered throughout. It still tasted fine, but it looked patchy.
Use a sharp knife for cutting. A dull knife will squish the treats rather than slice them cleanly. If you do not have a sharp knife, try using a pizza cutter—it works surprisingly well. For the cleanest cuts, measure and mark your squares before you start slicing.
Timing is everything. The candy eyes need to go on while the mixture is still warm but not hot. If the mixture is too hot, the eyes will sink in and disappear. If it is too cool, they will just sit on top and fall off. The sweet spot is about 2 to 3 minutes after you press the mixture into the pan. Test with one eye first—if it stays on top without sinking, you are good to go.
Variations & Adaptations
One of the best things about these Halloween Rice Krispie Treats with Candy Eyes is how easy they are to customize. Here are some variations I have tried and loved:
Monster Mash Version
Instead of cutting the treats into squares, shape the warm mixture into small balls to make monster heads. Press candy eyes onto each ball and add pretzel stick arms or legs. You can also use black licorice strings for hair. These are perfect for party platters and kids absolutely love them. I made these for my daughter’s Halloween party last year and they were gone in ten minutes.
Spiderweb Design
After pressing the mixture into the pan, drizzle melted white chocolate or vanilla candy melts over the top in a zigzag pattern. Then use a toothpick to drag the lines outward from the center to create a web effect. Place a candy spider (made from a chocolate button and pretzel sticks) in the center. This looks fancy but takes only two extra minutes.
Chocolate Drizzle
Melt 1/2 cup of dark or milk chocolate chips and drizzle it over the cooled treats. The chocolate adds a rich contrast to the sweet marshmallow and makes the treats look even more decadent. Sprinkle a few orange and black sprinkles on top while the chocolate is still wet for extra Halloween flair.
Peanut Butter Swirl
Stir 1/4 cup of creamy peanut butter into the marshmallow mixture right after it melts. Swirl it in gently so you get ribbons of peanut butter throughout. This adds a savory note that balances the sweetness. Just make sure to check for peanut allergies if you are serving these at a school event.
Vegan Option
Use vegan marshmallows (Dandies is my favorite brand) and plant-based butter. The texture will be slightly softer, but the flavor is still fantastic. Everything else in the recipe is naturally vegan-friendly. I have tested this version and it holds together well, just be gentle when cutting.
Serving & Storage Suggestions
These Halloween Rice Krispie Treats with Candy Eyes are best served at room temperature. The texture is perfectly chewy and the candy eyes stay firmly in place. If you are serving them at a party, arrange them on a platter lined with orange or black tissue paper for a festive look. You can also stack them in a clear jar or wrap them individually in cellophane bags tied with ribbon for party favors.
For storage, place the treats in an airtight container at room temperature. They will stay fresh for up to 3 days. Do not refrigerate them—the cold air makes the marshmallows hard and the cereal loses its crunch. If you live in a humid climate, add a piece of bread to the container to absorb excess moisture. The bread will get stale, but your treats will stay perfect.
These treats also freeze beautifully. Wrap each square individually in plastic wrap, then place them in a freezer-safe bag. They will keep for up to 3 months. To thaw, just leave them on the counter for about 30 minutes. The candy eyes might loosen slightly after freezing, so press them back in gently before serving.
One thing I love about these treats is that the flavors actually develop a bit overnight. The marshmallow and butter meld together more fully, and the texture becomes even more uniform. So if you can make them a day ahead, they will taste even better. Just keep them covered tightly so they do not dry out.
Nutritional Information & Benefits
While these treats are definitely a sweet indulgence, here is the estimated nutritional information per serving (based on 12 large squares):
| Nutrient | Amount Per Serving |
|---|---|
| Calories | 195 |
| Total Fat | 5g |
| Saturated Fat | 3g |
| Cholesterol | 10mg |
| Sodium | 135mg |
| Total Carbohydrates | 37g |
| Dietary Fiber | 0g |
| Sugars | 20g |
| Protein | 2g |
The crispy rice cereal provides a small amount of iron and B vitamins, while the butter adds a touch of vitamin A. Of course, these are not health food—they are a fun Halloween treat meant to be enjoyed in moderation. If you are looking to lighten them up, you can use a lower-calorie butter substitute or reduce the marshmallows slightly, but honestly, part of the joy of Halloween is letting yourself indulge a little.
For those with dietary restrictions, note that this recipe contains dairy (butter) and may contain gluten depending on your cereal choice. The candy eyes are typically made from sugar and starch, but always check the label for allergens. If you are serving these at a school event, it is a good idea to label them with the ingredients so parents can make informed choices.
Conclusion
These Halloween Rice Krispie Treats with Candy Eyes are proof that you do not need hours in the kitchen or a drawer full of specialty tools to make something truly special. They are quick, they are fun, and they deliver that perfect combination of nostalgia and novelty that makes Halloween so magical. Whether you are making them for a classroom party, a family movie night, or just because you want to eat something that looks back at you, these treats never disappoint.
I love this recipe because it is forgiving. If you press too hard, it still tastes good. If the color is a little off, it still looks festive. If the eyes end up crooked, honestly, that just makes them creepier. There is no pressure here—just butter, marshmallows, cereal, and a whole lot of silly fun. That is what Halloween should be about, right?
Now I want to hear from you. Have you tried making these? Did you add your own twist? Drop a comment below and let me know how they turned out. And if you snap a photo, tag me so I can see your spooky creations. Happy Halloween, and happy snacking!
Frequently Asked Questions
Can I use mini marshmallows instead of regular sized ones?
Absolutely. Mini marshmallows actually melt faster and more evenly than large ones. If you are using mini marshmallows, use 4 cups instead of the 10-ounce bag. The measurement is slightly different by volume, but it will work perfectly. Just keep stirring until they are completely smooth.
How do I keep the treats from getting too hard?
The key is not to overheat the marshmallows and not to press the mixture too firmly into the pan. Melt everything over low heat and remove the pot from the stove as soon as the marshmallows are smooth. When pressing the mixture into the pan, use a light hand. You want the treats to hold together, not be compacted into dense bricks.
Can I use liquid food coloring instead of gel?
You can, but I do not recommend it. Liquid food coloring adds extra moisture to the marshmallow mixture, which can make the treats sticky and prevent them from setting properly. Gel coloring is much more concentrated and gives you a vibrant color without changing the texture. If liquid is all you have, use just a few drops and be prepared for slightly stickier treats.
How far in advance can I make these treats?
You can make these treats up to 3 days in advance. Store them in an airtight container at room temperature. For best results, add the candy eyes right before serving if you are making them more than a day ahead. The eyes can soften slightly over time as they absorb moisture from the marshmallow. If you want to make them even further ahead, freeze them without the eyes and add the eyes after thawing.
My treats turned out too sticky. What went wrong?
Sticky treats usually mean there is too much moisture in the mixture. This can happen if you used liquid food coloring, if the humidity in your kitchen was high, or if you did not cook the marshmallows long enough to evaporate some of the steam. Next time, try cooking the marshmallow mixture for an extra minute over low heat, and stick with gel food coloring. You can also try adding an extra 1/4 cup of cereal to absorb some of the excess moisture.
Pin This Recipe!
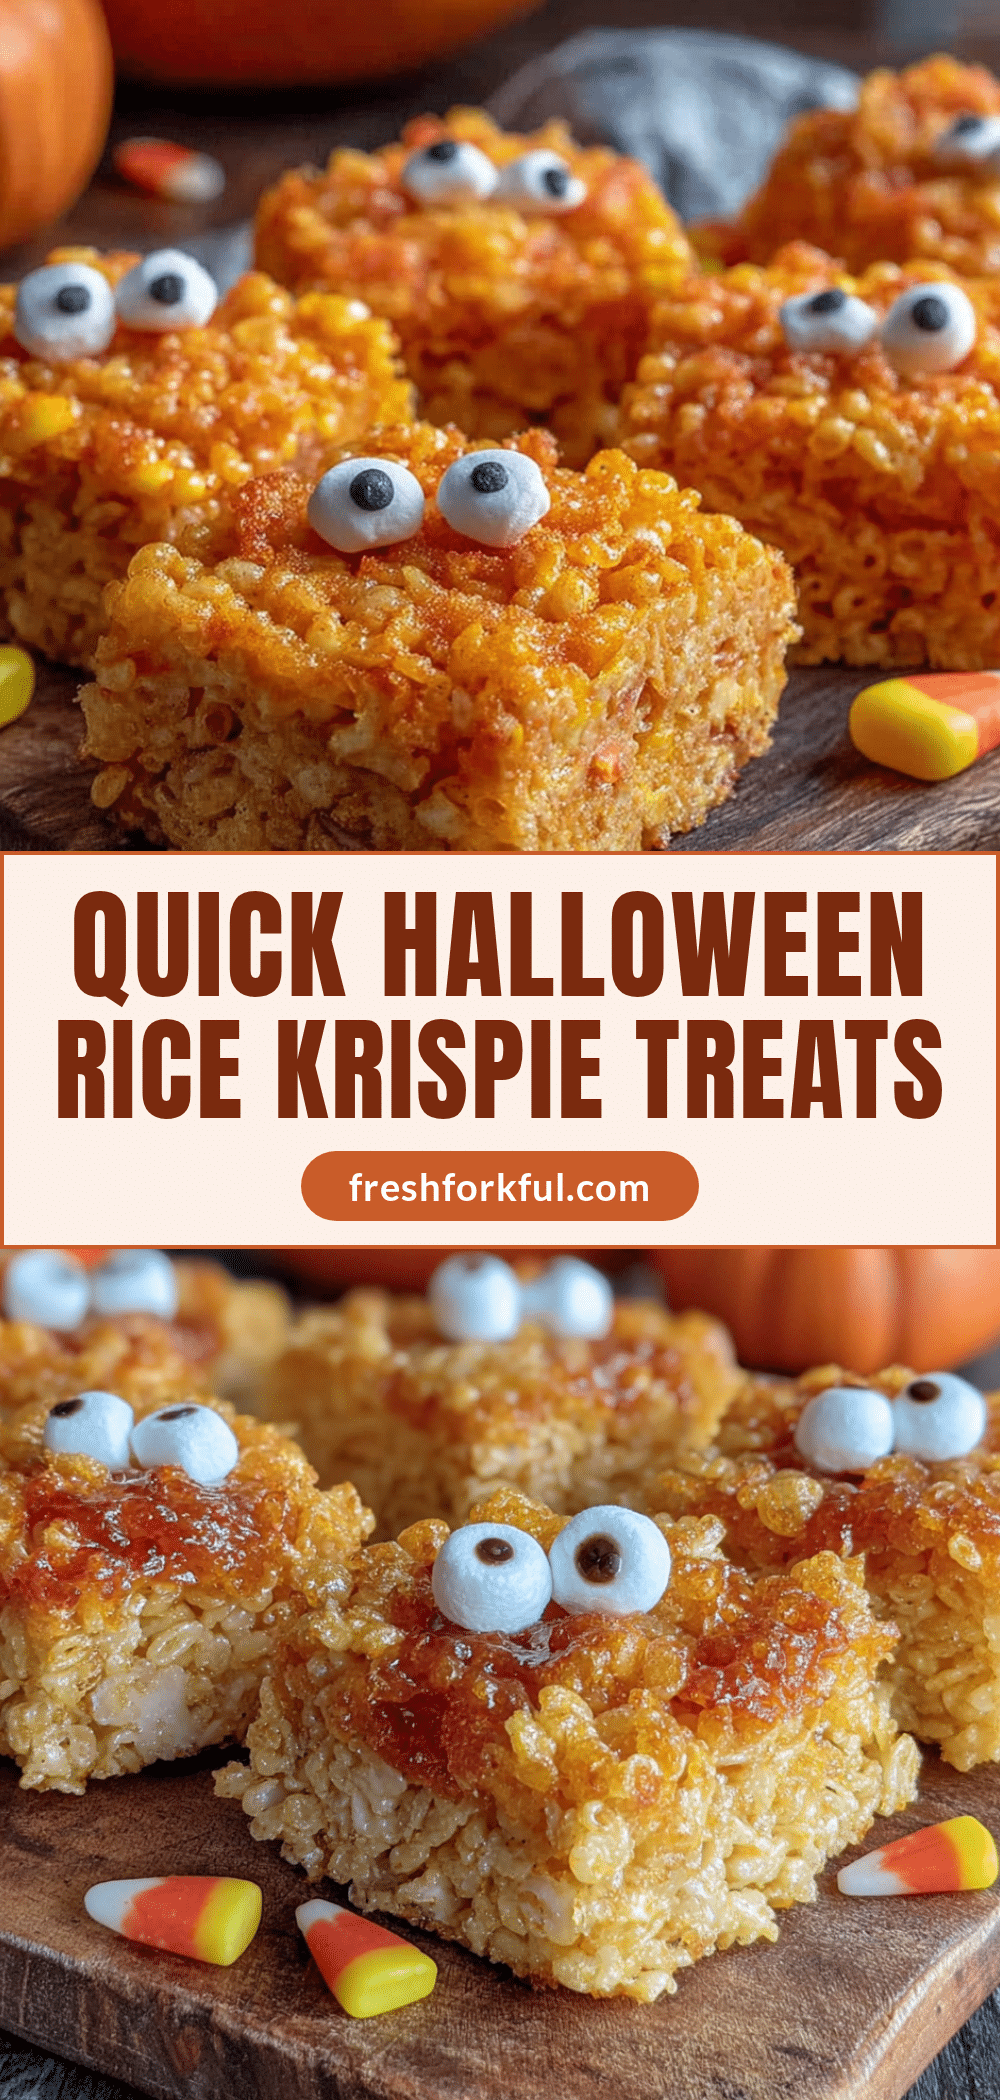
Easy Halloween Rice Krispie Treats with Candy Eyes

These quick and easy Halloween Rice Krispie Treats with Candy Eyes are the perfect last-minute dessert for school parties, family movie nights, or any spooky celebration. Made with simple pantry staples, they come together in about 15 minutes and are sure to be a crowd-pleaser.
- Prep Time: 15 minutes
- Cook Time: 5 minutes
- Total Time: 50 minutes (including 30 minutes setting time)
- Yield: 12 servings 1x
- Category: Dessert
- Cuisine: American
Ingredients
- 3 tablespoons unsalted butter
- 1 package (10 ounces) regular marshmallows (about 40 large or 4 cups mini)
- 6 cups crispy rice cereal
- 1/4 teaspoon vanilla extract (optional)
- 1/4 teaspoon salt
- Orange gel food coloring (about 1/8 teaspoon)
- 1/2 cup candy eyes
- Optional: 1-2 drops black gel food coloring for decorations
Instructions
- Line a 9×13-inch baking dish with parchment paper, leaving overhang on two opposite sides. Lightly spray the parchment with nonstick cooking spray.
- Place a large pot over medium-low heat. Add the butter and melt slowly, swirling occasionally, until fully melted with tiny bubbles around the edges.
- Add the marshmallows to the melted butter. Stir constantly until completely smooth and melted, about 4-5 minutes. Do not let the mixture brown.
- Remove the pot from heat. Stir in the vanilla extract, salt, and orange gel food coloring until evenly distributed. Add more coloring if needed for a vibrant orange.
- Pour the crispy rice cereal into the pot. Fold gently with a rubber spatula until every piece is coated, about 1-2 minutes. Do not overmix.
- Scrape the mixture into the prepared baking dish. Spray the spatula with nonstick spray and gently press the mixture into an even layer. Do not press too hard.
- While the mixture is still warm and tacky (about 2-3 minutes after pressing), press the candy eyes into the surface, spacing them randomly.
- Let the treats cool at room temperature for at least 30 minutes. Do not refrigerate.
- Lift the block out using the parchment handles. Cut into 12 large or 24 small squares using a sharp knife. Wipe the knife clean between cuts.
Notes
Do not refrigerate the treats as it makes them hard. For best texture, use gel food coloring instead of liquid. The candy eyes should be added while the mixture is still warm but not hot. If making ahead, store in an airtight container at room temperature for up to 3 days. For freezing, wrap individually and freeze for up to 3 months; add eyes after thawing.
Nutrition
- Serving Size: 1 large square
- Calories: 195
- Sugar: 20
- Sodium: 135
- Fat: 5
- Saturated Fat: 3
- Carbohydrates: 37
- Protein: 2
Keywords: Halloween treats, Rice Krispie treats, candy eyes, easy dessert, no-bake, kid-friendly, Halloween party, last-minute dessert


