Love this? Save it for later!
Share the inspiration with your friends
My roommate asked why I couldn’t just cook the pasta right in the sauce instead of boiling it separately in a different pot. I started to explain why that wouldn’t work—then stopped. Honestly, I had no good reason. I just always did it that way because that’s how the box said to do it.
It was a Tuesday night during finals week. We were both running on three hours of sleep and whatever caffeine we could scrounge from the vending machine on the third floor. She was stirring a can of evaporated milk into a pot of shredded cheddar while I stood there with a separate pot of boiling water, ready to explain the “proper” method. But the look on her face said she was too tired for a lecture, and honestly, so was I.
So I dumped the dry elbow macaroni right into the cheese mixture. I mean, I was certain it would turn into a gluey, starchy mess. I’d been cooking since I was twelve, and you just don’t do that. But the water was taking forever to boil anyway, and the communal kitchen microwave was broken again. So in went the pasta.
Twenty minutes later, we were eating the creamiest, cheesiest bowl of mac and cheese either of us had ever made. No separate pot. No colander. No draining. Just one pot, a wooden spoon, and a roommate who was too tired to care about culinary rules. I learned more that night than I did in any of my actual classes that semester. And that’s the story of how this Easy One-Pot Dorm Room Mac and Cheese became our go-to study fuel.
You know that feeling when you’re a little bit proud of being wrong? That’s this recipe for me. It’s the kind of thing you make when you’re hungry, broke, and need something that tastes like a hug. Maybe you’ve been there too.
Why You’ll Love This Recipe
This isn’t just another mac and cheese recipe. This is the one I’ve tested in three different dorm kitchens, two different apartments, and one very questionable shared house with a stove that had two working burners. It works every single time. Here is why this one stands out from the rest:
- One Pot, Zero Fuss: No boiling water separately. No colander. No draining. You cook the pasta right in the sauce, which means fewer dishes and less cleanup. Perfect for when your sink is already full of coffee mugs.
- Budget-Friendly Ingredients: You probably have most of these things already. Milk, butter, cheese, pasta. That’s it. No fancy cream cheese, no imported cheddar, no specialty pasta shapes. Just the basics that won’t break your meal plan.
- Ready in 20 Minutes: From the moment you pull out the pot to the moment you’re eating, it’s about twenty minutes. That’s faster than delivery and way cheaper.
- Customizable for Any Pantry: Got leftover hot dogs? Throw them in. Have some frozen peas? Toss them in. This recipe is a blank canvas for whatever you have lying around.
- Creamy Without Being Heavy: The secret is cooking the pasta in the milk and butter mixture. The starch from the pasta thickens everything naturally, giving you a silky sauce without needing heavy cream or processed cheese.
This recipe is the kind that makes you close your eyes after the first bite. It’s comfort food stripped down to its purest form—cheap, fast, and deeply satisfying. Perfect for late-night study sessions, lazy Sundays, or those days when you just need something that feels like home.
What Ingredients You Will Need
This recipe uses simple, pantry-friendly ingredients to deliver big flavor and creamy texture without any complicated steps. Most of these are probably already in your kitchen, which is exactly the point.
- 2 cups elbow macaroni (or any small pasta shape—shells, rotini, or ditalini all work great)
- 2 tablespoons unsalted butter (salted butter works too, just skip the added salt later)
- 2 tablespoons all-purpose flour (this helps thicken the sauce without being gluey)
- 2 cups whole milk (2% works fine, but whole milk gives the creamiest result. Avoid skim—it gets watery)
- 2 cups shredded sharp cheddar cheese (shred it yourself if you can—pre-shredded has anti-caking agents that make the sauce grainy)
- 1/2 teaspoon salt (plus more to taste)
- 1/4 teaspoon black pepper
- 1/4 teaspoon garlic powder (optional, but highly recommended for extra flavor)
- 1/4 teaspoon paprika (optional, adds a nice color and subtle warmth)
Ingredient Tips: I personally prefer Tillamook or Cabot sharp cheddar for the best melt and flavor. If you’re in a dorm without a full kitchen, you can use pre-shredded cheese—just know the texture might be slightly less smooth. For a dairy-free option, use unsweetened oat milk and a good vegan cheddar shred. It won’t be exactly the same, but it still hits the spot.
You can also swap the elbow macaroni for whatever pasta you have. I’ve made this with broken spaghetti, bowties, and even those random pasta shapes from the bulk bin at the grocery store. It all works.
Equipment Needed
The beauty of this recipe is how little equipment you actually need. Here’s what you’ll want to have on hand:
- One medium-sized pot or saucepan (3 to 4 quarts is ideal—big enough to hold the pasta and sauce without boiling over)
- A wooden spoon or silicone spatula (metal utensils can scratch nonstick pots)
- Measuring cups and spoons (or just eyeball it—I won’t tell)
- A cheese grater (if you’re shredding your own cheese)
- A colander (optional—you won’t need it for draining, but it’s handy if you decide to rinse anything)
If you don’t have a proper pot, a deep skillet or even a large microwave-safe bowl can work in a pinch. I’ve made this in a rice cooker before (long story involving a broken stove and a lot of determination). It’s not ideal, but it works. Just stir frequently and adjust the liquid as needed.
One tip: if you’re using a nonstick pot, be gentle with your stirring to avoid scratching the surface. A silicone spatula is your best friend here.
Preparation Method
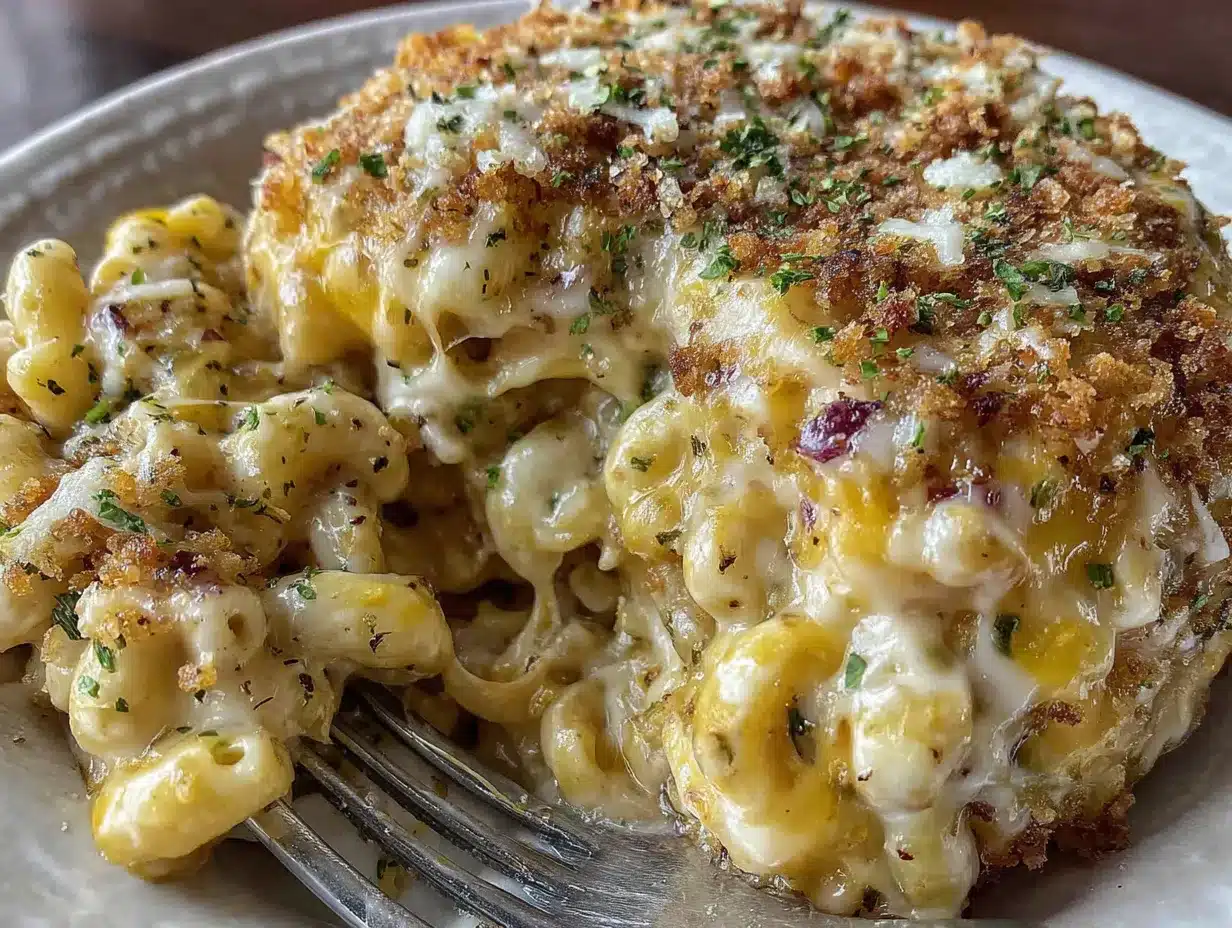
This is where the magic happens. Follow these steps, and you’ll have a creamy, cheesy pot of mac and cheese in about twenty minutes. No separate pot required.
- Melt the butter in your pot over medium heat. Let it foam up a little but don’t let it brown. You want it melted and bubbly, about 1 minute.
- Whisk in the flour. Stir it constantly for about 1 minute. This cooks out the raw flour taste and creates a roux that will thicken your sauce. It should look like a pale paste.
- Slowly pour in the milk while whisking. Keep whisking until the mixture is smooth and starts to thicken, about 2-3 minutes. Don’t walk away—lumps form fast if you stop stirring.
- Add the salt, pepper, garlic powder, and paprika. Stir to combine. Taste the sauce here—it should be well-seasoned because the pasta will absorb some of the salt.
- Add the dry elbow macaroni directly to the pot. Stir it in so every piece is coated in the sauce. This is the step that feels wrong but is so right.
- Bring the mixture to a gentle simmer. You want small bubbles around the edges, not a rolling boil. Too high heat will scorch the milk.
- Cover the pot and reduce the heat to low. Let it cook for 10-12 minutes, stirring every 2-3 minutes. The pasta will absorb the liquid as it cooks. If it looks too thick, add a splash of milk. If it looks too thin, let it cook uncovered for a minute or two.
- Check the pasta for doneness. It should be tender but still have a slight bite. If it’s still hard in the center, add another 2 minutes with the lid on.
- Remove the pot from the heat. Stir in the shredded cheddar cheese until it’s fully melted and the sauce is smooth. This should take about 1 minute. Don’t rush this step—cold cheese added to hot liquid needs a moment to incorporate.
- Let it sit for 2 minutes before serving. This allows the sauce to thicken slightly and the flavors to meld together. The pasta will continue to absorb liquid as it sits.
Sensory Cues: At step 7, you should smell a toasty, milky aroma. The sauce will look like it’s barely covering the pasta—that’s normal. By step 9, the sauce will be thick and glossy, coating each piece of macaroni like a warm blanket. The cheese should stretch a little when you lift the spoon.
Pro Tip: If your sauce looks separated or grainy, you probably added the cheese too quickly or the heat was too high. Take it off the heat, add a splash of cold milk, and whisk vigorously. It usually comes back together.
Cooking Tips & Techniques
I have made this recipe at least thirty times. I’ve burned it, undercooked it, and once made it so salty it was practically a brine. Here is what I learned the hard way so you don’t have to.
Low and slow is your friend. High heat will scorch the milk and give you a grainy, separated sauce. Keep the heat at medium-low once the pasta goes in. Patience pays off here.
Stir more than you think you need to. The pasta releases starch as it cooks, which thickens the sauce. But it also sinks to the bottom and can stick. Every two minutes, give it a good stir, scraping the bottom of the pot.
Don’t overcook the pasta. Remember that the pasta will continue to cook even after you take it off the heat. Pull it off when it’s just tender—al dente, as the fancy folks say. Mushy mac and cheese is sad mac and cheese.
Shred your own cheese. I know, I know, it’s extra work. But pre-shredded cheese is coated in potato starch or cellulose to keep it from clumping, and that coating prevents it from melting smoothly. You’ll get a creamier sauce with fresh shredded cheese. I promise it’s worth the extra two minutes.
Use whole milk for the best texture. I’ve tried this with skim milk, almond milk, and even water in a desperate pinch. Whole milk gives the creamiest, richest result. If you only have 2%, add an extra tablespoon of butter to compensate.
Season in layers. Add salt to the milk mixture early, then taste again after the cheese goes in. Cheese is salty, so you might not need as much as you think. I learned this after making a batch that was so salty I had to eat it with plain bread just to balance it out.
Variations & Adaptations
This recipe is endlessly adaptable. Here are some of my favorite ways to switch it up:
- Spicy Buffalo Mac: Add 2 tablespoons of hot sauce and 1/4 cup of crumbled blue cheese along with the cheddar. Top with chopped green onions. This is my personal favorite when I need something with a kick.
- Loaded Baked Potato Mac: Stir in 1/2 cup of cooked, crumbled bacon, 1/4 cup of sour cream, and a handful of chopped chives right before serving. It’s indulgent but so worth it.
- Veggie-Packed Version: Add 1 cup of frozen peas and carrots during the last 5 minutes of cooking. Or stir in a handful of fresh spinach right at the end until it wilts. Sneaky way to eat more vegetables.
- Gluten-Free Option: Use gluten-free pasta and a gluten-free all-purpose flour blend for the roux. The cooking time might vary slightly, so check the pasta a minute or two earlier than usual.
- Vegan Adaptation: Use plant-based butter, unsweetened oat milk, and your favorite vegan cheddar shreds. Nutritional yeast (about 2 tablespoons) adds a cheesy flavor that really helps. The texture won’t be exactly the same, but it’s still creamy and satisfying.
- Protein Boost: Stir in 1 cup of shredded rotisserie chicken, cooked ground beef, or canned tuna (drained) along with the cheese. Makes it a complete meal in one pot.
I once made a version with leftover chili and crushed tortilla chips on top. It was chaotic and delicious. Don’t be afraid to experiment—that’s half the fun.
Serving & Storage Suggestions
This mac and cheese is best served hot, straight from the pot. But here’s how to handle leftovers and make the most of it.
Serving Temperature: Serve it piping hot, right after the 2-minute rest. The sauce will be at its creamiest point. If it sits too long, it will thicken as the pasta absorbs more liquid.
Presentation Ideas: Spoon it into bowls and top with a sprinkle of paprika or fresh black pepper. A little chopped parsley or chives adds color if you’re feeling fancy. For a crunchy topping, sprinkle buttered breadcrumbs or crushed crackers on top and broil for 2 minutes.
What to Serve With It: A simple green salad with a tangy vinaigrette cuts through the richness perfectly. Roasted broccoli or steamed green beans also pair beautifully. And honestly? A cold beer or a glass of white wine is a lovely companion.
Storage Instructions: Let any leftovers cool completely, then transfer to an airtight container. It will keep in the refrigerator for up to 4 days. The sauce will thicken significantly as it sits, so don’t be alarmed.
Reheating Tips: The best way to reheat is on the stovetop over low heat with a splash of milk. Stir constantly until warmed through. The microwave works too—just add a tablespoon of milk, cover with a damp paper towel, and heat in 30-second bursts, stirring between each. The texture won’t be as silky as fresh, but it’s still delicious.
Freezer Instructions: You can freeze this mac and cheese for up to 2 months. Let it cool completely, then transfer to a freezer-safe container. Thaw overnight in the refrigerator and reheat as directed above. The sauce might be slightly grainier after freezing, but the flavor is still there.
One thing I’ve noticed: the flavors actually deepen after a day in the fridge. It’s almost like the pasta and cheese get to know each other better. So don’t be sad about leftovers—embrace them.
Nutritional Information & Benefits
Let’s be real—this is comfort food, not health food. But here’s what you’re working with per serving (about 1 cup, based on 4 servings):
| Nutrient | Amount Per Serving |
|---|---|
| Calories | 480 |
| Total Fat | 22g |
| Saturated Fat | 13g |
| Cholesterol | 60mg |
| Sodium | 580mg |
| Total Carbohydrates | 48g |
| Dietary Fiber | 2g |
| Sugars | 6g |
| Protein | 20g |
| Calcium | 350mg (35% DV) |
Health Benefits: The cheese provides a good amount of calcium for bone health, and the milk adds protein and vitamin D. The pasta gives you energy in the form of carbohydrates—perfect for fueling a long study session. If you add vegetables or protein, you’ll boost the fiber and nutrient content significantly.
Dietary Considerations: This recipe is vegetarian as written. It contains dairy and gluten, so it’s not suitable for vegan, dairy-free, or gluten-free diets without modifications (see variations above).
I’m not a nutritionist, and I’m not here to tell you this is a superfood. But I will say this: sometimes you need a bowl of something warm and cheesy, and that’s okay. Balance is everything.
Conclusion
This Easy One-Pot Dorm Room Mac and Cheese is more than just a recipe—it’s a survival skill. It’s the meal you make when you’re broke, tired, and need something that tastes like effort without actually requiring any. It’s the dish that taught me that sometimes the best cooking comes from breaking the rules.
I’ve made this in dorm rooms with hot plates, in apartments with broken stoves, and in my own kitchen with all the fancy equipment. It works every single time. And every single time, it makes me think of that Tuesday night during finals week when my roommate proved me wrong in the best possible way.
So go ahead—make a mess, break some rules, and enjoy every cheesy, creamy bite. And when you do, come back and tell me about it. What did you add? What did you change? Did you burn it or nail it on the first try? I want to hear it all.
Drop a comment below or tag me in your photos. Let’s keep this one-pot revolution going. Happy cooking!
Frequently Asked Questions
Can I use a different type of pasta?
Absolutely. Any small pasta shape works well—shells, rotini, bowties, or even broken spaghetti. Just keep an eye on the cooking time, as different shapes cook at different rates. Start checking for doneness around 8 minutes.
Why is my sauce grainy?
Grainy sauce usually happens when the heat is too high or the cheese is added too quickly. Make sure you’re on low heat when adding the cheese, and stir it in gradually. Using pre-shredded cheese can also cause graininess because of the anti-caking agents. Freshly shredded cheese melts much smoother.
Can I make this in a microwave?
Yes, with some adjustments. Cook the pasta in a microwave-safe bowl with enough water to cover it, microwaving in 2-minute intervals until tender. Drain, then stir in butter, milk, and cheese. Microwave in 30-second bursts, stirring between each, until the cheese melts. It won’t be as creamy as the stovetop version, but it works in a pinch.
How do I make it spicier?
Add 1/2 teaspoon of cayenne pepper or red pepper flakes along with the other seasonings. You can also stir in a tablespoon of your favorite hot sauce at the end. For a smoky heat, try chipotle powder or a dash of smoked paprika.
Can I double this recipe?
Yes, but you’ll need a larger pot—at least 6 quarts. The cooking time will be slightly longer, so add 2-3 minutes to the covered cooking time. Make sure to stir well to distribute the heat evenly. You might also need an extra splash of milk if the sauce seems too thick.
Pin This Recipe!
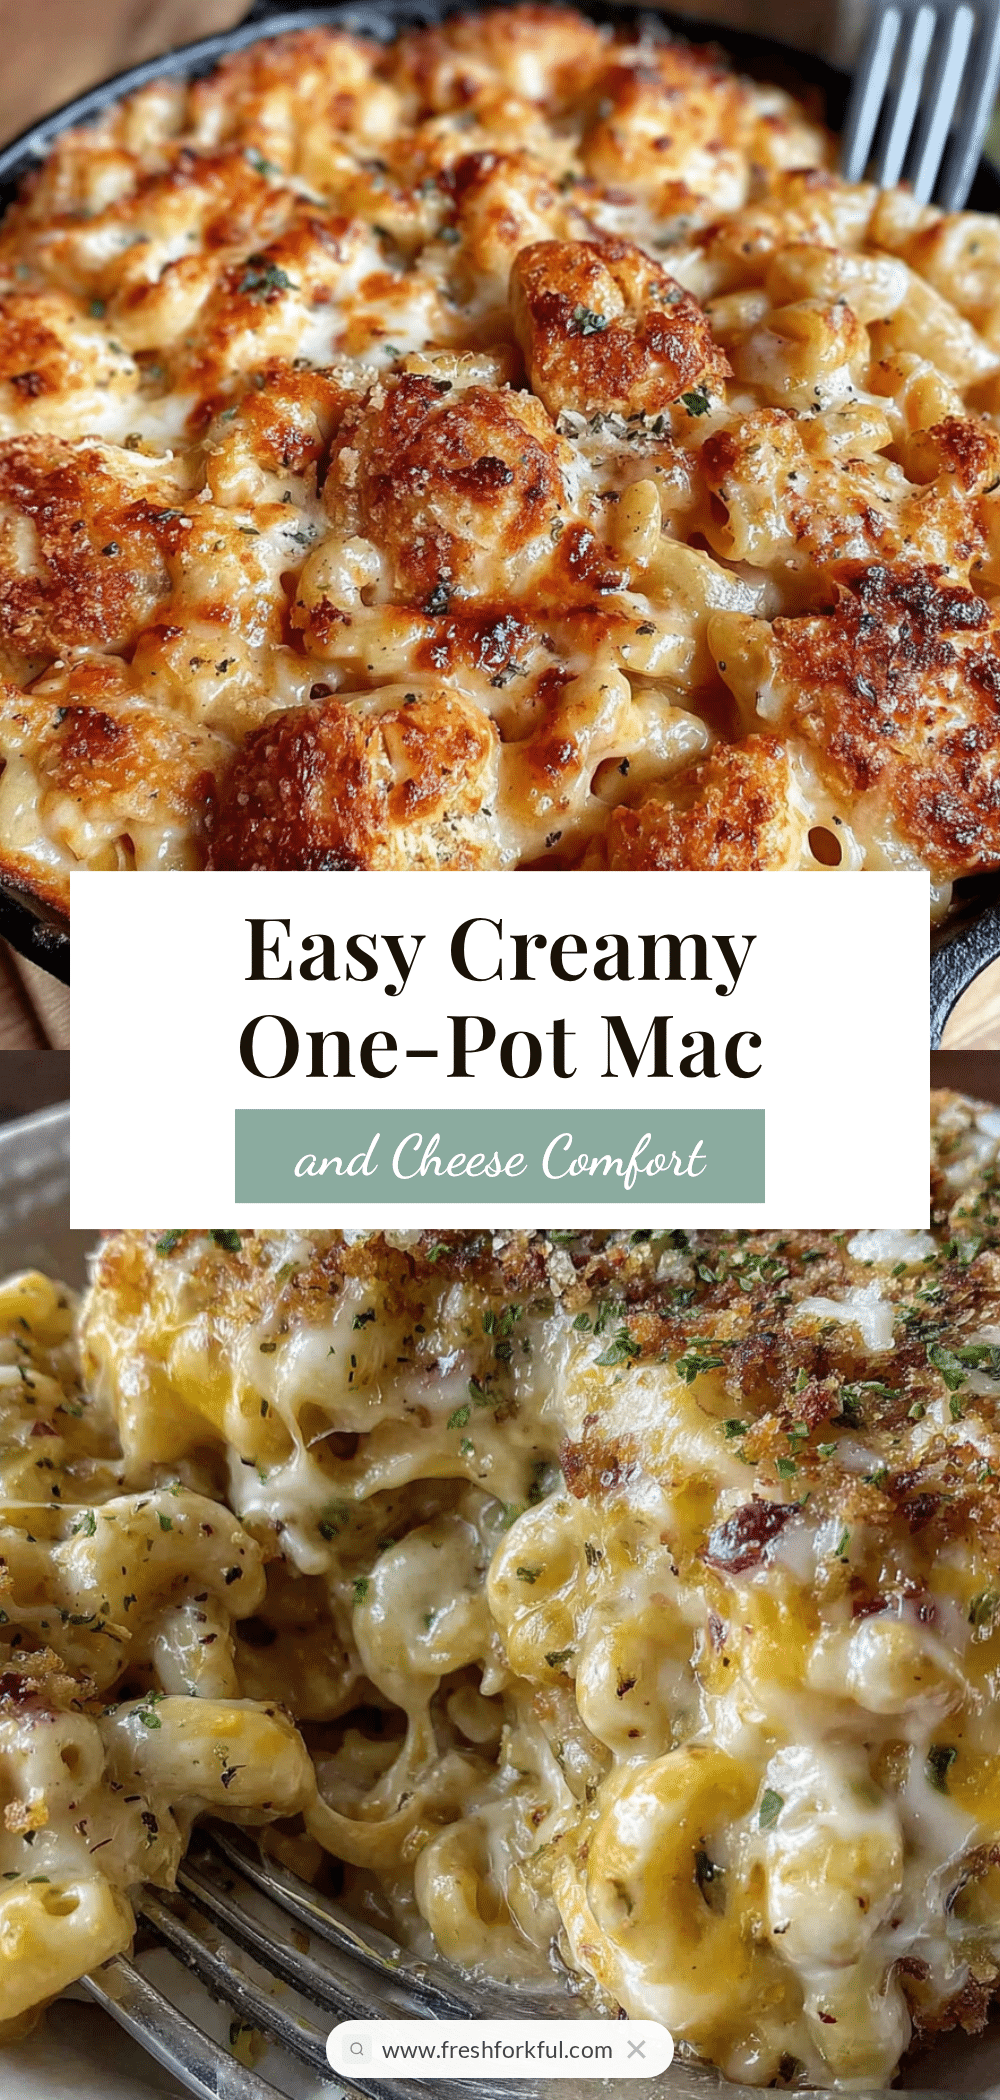
Easy One-Pot Dorm Room Mac and Cheese

This creamy, cheesy mac and cheese is made entirely in one pot—no boiling pasta separately, no draining. Ready in 20 minutes with simple, budget-friendly ingredients, it’s the perfect comfort food for busy students or anyone craving a quick, satisfying meal.
- Prep Time: 5 minutes
- Cook Time: 15 minutes
- Total Time: 20 minutes
- Yield: 4 servings 1x
- Category: Main Course
- Cuisine: American
Ingredients
- 2 cups elbow macaroni (or any small pasta shape)
- 2 tablespoons unsalted butter
- 2 tablespoons all-purpose flour
- 2 cups whole milk
- 2 cups shredded sharp cheddar cheese
- 1/2 teaspoon salt
- 1/4 teaspoon black pepper
- 1/4 teaspoon garlic powder (optional)
- 1/4 teaspoon paprika (optional)
Instructions
- Melt the butter in a medium pot over medium heat until bubbly, about 1 minute.
- Whisk in the flour and cook for 1 minute, stirring constantly, to form a roux.
- Slowly pour in the milk while whisking continuously until smooth and slightly thickened, about 2-3 minutes.
- Stir in the salt, pepper, garlic powder, and paprika.
- Add the dry elbow macaroni directly to the pot and stir to coat with the sauce.
- Bring the mixture to a gentle simmer (small bubbles around the edges).
- Cover the pot, reduce heat to low, and cook for 10-12 minutes, stirring every 2-3 minutes. Add a splash of milk if too thick.
- Check pasta for doneness; it should be tender but still have a slight bite. Cook 2 more minutes if needed.
- Remove from heat and stir in the shredded cheddar cheese until fully melted and smooth, about 1 minute.
- Let sit for 2 minutes before serving to allow the sauce to thicken.
Notes
For the creamiest sauce, shred your own cheddar cheese instead of using pre-shredded. If the sauce becomes grainy, remove from heat and whisk in a splash of cold milk. Leftovers can be stored in an airtight container in the refrigerator for up to 4 days. Reheat on the stovetop with a splash of milk or in the microwave.
Nutrition
- Serving Size: 1 cup
- Calories: 480
- Sugar: 6
- Sodium: 580
- Fat: 22
- Saturated Fat: 13
- Carbohydrates: 48
- Fiber: 2
- Protein: 20
Keywords: one-pot mac and cheese, easy mac and cheese, dorm room recipe, quick mac and cheese, budget-friendly mac and cheese, creamy mac and cheese