Love this? Save it for later!
Share the inspiration with your friends
I was standing in the baking aisle of our local grocery store last October, staring at a bag of marshmallows, when the smell hit me. Not from the store, but from somewhere deep in my memory—that warm, buttery, vanilla-sweet scent of melting marshmallows mixed with crispy cereal. And suddenly I was seven years old, standing on a step stool in my Aunt Carol’s tiny kitchen, my sticky fingers pressing cereal mixture into a greased pan while she laughed and told me not to eat all the marshmallows before they made it into the bowl. Aunt Carol passed away five years ago, and I haven’t thought about those afternoons in her kitchen in ages. But there I was, in the middle of a fluorescent-lit grocery store, tearing up over a bag of marshmallows. I grabbed the box of Rice Krispies, the butter, and a bag of white chocolate chips, and I drove home determined to recreate that feeling. Honestly, I messed up the first batch—too much butter, not enough marshmallows, and they fell apart completely. But the second attempt? That was the one. These Easy Halloween Rice Krispie Ghost Treats aren’t just cute party food. They’re the closest I’ve gotten to that kitchen with Aunt Carol in twenty years. Maybe you’ve had that moment too—that sudden, aching need to make something that feels like a hug from your past.
Why You’ll Love This Recipe
Let me tell you why these Easy Halloween Rice Krispie Ghost Treats have become my absolute go-to for every Halloween gathering, potluck, and party I’ve attended in the last three years. I’ve tested this recipe at least a dozen times—sometimes with different cereal brands, once with homemade marshmallows (don’t do it, honestly, it’s not worth the effort), and even a gluten-free version for my neighbor Sarah’s son. Every single time, they disappear faster than I can arrange them on the platter.
- Quick & Easy: These come together in under 20 minutes, which is perfect when you’re scrambling to get everything ready before guests arrive. I’ve made them between answering the door for trick-or-treaters, and it worked beautifully.
- Simple Ingredients: You probably already have butter, marshmallows, and Rice Krispies in your pantry right now. The only special addition is white chocolate for dipping, and maybe some candy eyes if you want that ghostly look.
- Perfect for Halloween Parties: These are the star of any Halloween spread. I brought them to my friend Marco’s annual Halloween bash last year, and three different people asked for the recipe before the night was over.
- Crowd-Pleaser: Kids absolutely love them, and adults can’t resist either. There’s something about the combination of crispy, chewy, and sweet that hits everyone’s happy button.
- Unbelievably Delicious: The texture is next-level comfort food. The white chocolate adds a creamy sweetness that balances the salty butter and crispy cereal perfectly.
What makes these different from every other Rice Krispie treat recipe out there? It’s the ratio. I spent weeks tweaking the butter-to-marshmallow ratio until I found the sweet spot where the treats hold their shape for dipping but stay soft and chewy when you bite into them. No rock-hard ghosts here, I promise.
What Ingredients You Will Need
This recipe uses simple, wholesome ingredients to deliver that nostalgic flavor and satisfying texture without any fuss. Most of these are pantry staples, which makes this the perfect last-minute Halloween treat.
For the Rice Krispie Base
- 3 tablespoons unsalted butter (I use Kerrygold for the richest flavor, but any unsalted butter works fine)
- 1 package (10 oz) regular marshmallows (about 40 large marshmallows or 4 cups mini marshmallows—I prefer Jet-Puffed for consistent melting)
- 6 cups Rice Krispies cereal (or any crispy rice cereal—just make sure it’s fresh and not stale for the best crunch)
- ¼ teaspoon vanilla extract (pure vanilla, not imitation, if you have it—it makes a subtle but noticeable difference)
- Pinch of salt (this balances the sweetness and is non-negotiable in my opinion)
For the Ghost Decoration
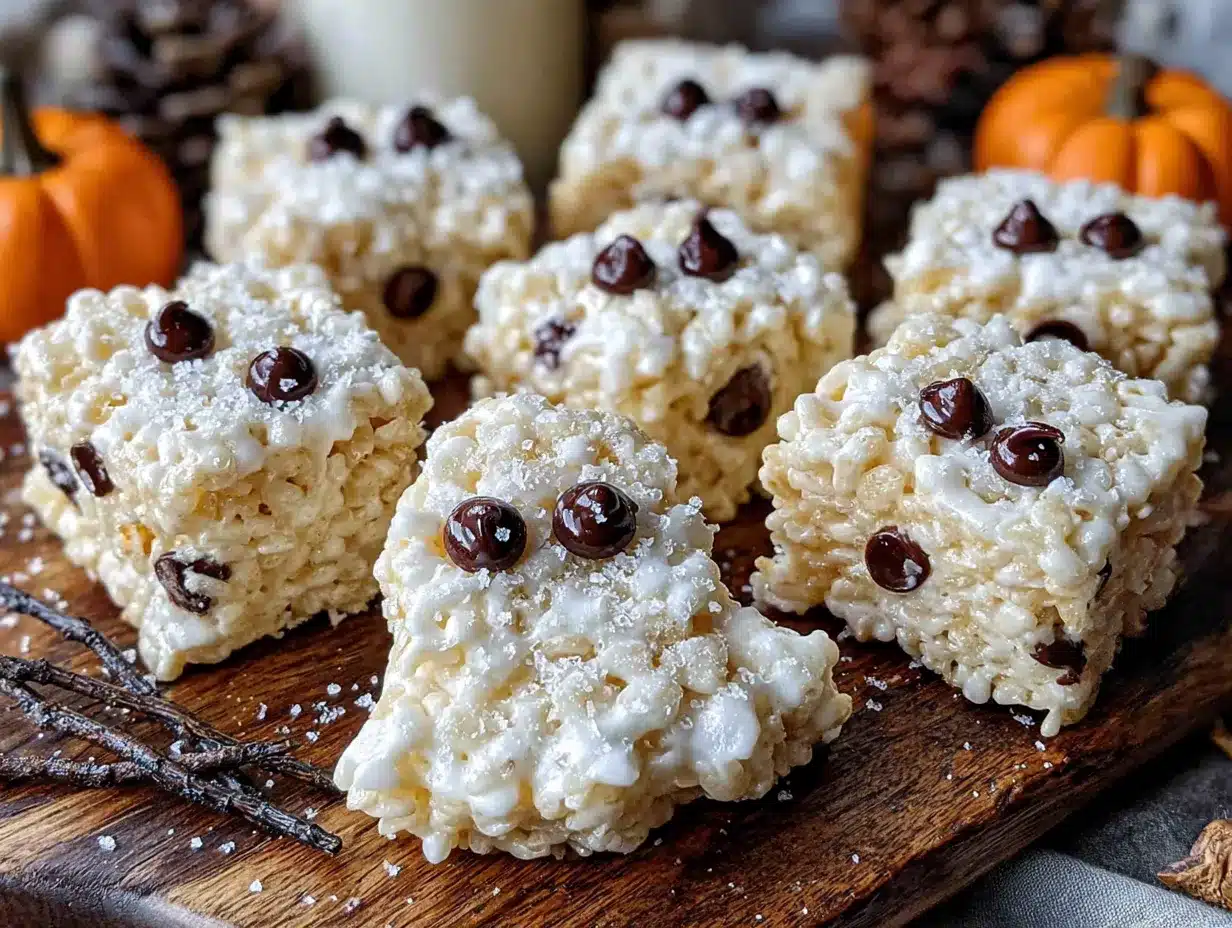
- 1 cup white chocolate chips or melting wafers (I recommend Ghirardelli white chocolate chips—they melt smoothly and don’t seize up as easily as some other brands)
- 1 tablespoon coconut oil or vegetable shortening (this thins the white chocolate for easier dipping and gives a beautiful, glossy finish)
- Candy eyes (the little black and white ones you find in the baking aisle—about 48 of them for 24 ghosts)
- Optional: Orange and black sprinkles (for extra Halloween flair—I like Wilton’s Halloween sprinkle mix)
If you’re making these for a party with dietary restrictions, here are some swaps that work. For a gluten-free version, use certified gluten-free crispy rice cereal—most major brands offer this now. For dairy-free treats, substitute the butter with vegan butter (I’ve had good results with Earth Balance) and use dairy-free white chocolate chips. The texture will be slightly different, but still delicious. For a nut-free option, just make sure your white chocolate is processed in a nut-free facility if that’s a concern for your guests.
One ingredient tip I learned the hard way: don’t use stale marshmallows. If your marshmallows have been sitting in the pantry for months, they won’t melt as smoothly and your treats will turn out grainy. Fresh marshmallows are key for that silky, stretchy texture.
Equipment Needed
You don’t need anything fancy for these Easy Halloween Rice Krispie Ghost Treats, which is part of why I love making them for parties. Here’s what you’ll need:
- Large saucepan or pot (at least 4-quart capacity—you need room to stir everything without spillage)
- Wooden spoon or silicone spatula (wooden spoons are great because they don’t scratch your pots, but silicone works too)
- 9×13-inch baking pan (glass or metal both work—just make sure to grease it well)
- Parchment paper or wax paper (for lining the pan and for cooling the dipped ghosts)
- Small microwave-safe bowl (for melting the white chocolate)
- Fork or dipping tool (a regular dinner fork works perfectly for dipping the ghosts)
- Sharp knife (for cutting the treats into ghost shapes—a serrated knife works best to avoid crushing the cereal)
- Baking sheet (lined with parchment for setting the dipped ghosts)
If you don’t have a 9×13 pan, you can use a 9×9 square pan for thicker ghosts, or even a cookie sheet if you spread the mixture thinner. Just adjust your cutting size accordingly. I’ve also used a round biscuit cutter to make ghost shapes, but honestly, freehand cutting with a knife gives them a more organic, ghost-like shape that I prefer.
Preparation Method
This is where the magic happens. Follow these steps carefully, and you’ll have a platter of adorable ghosts that will steal the show at any Halloween party.
- Prepare your pan: Line a 9×13-inch baking pan with parchment paper, leaving some overhang on the sides for easy lifting later. Lightly grease the parchment with butter or non-stick spray. This step is crucial—I once forgot to grease the parchment and spent 20 minutes chiseling treats off the paper.
- Melt the butter: In a large saucepan over medium-low heat, melt 3 tablespoons of unsalted butter. Swirl the pan occasionally to ensure even melting. Don’t rush this—if the butter burns, your treats will have a bitter, nutty flavor that doesn’t work well with the sweetness.
- Add the marshmallows: Once the butter is fully melted, add the entire package of marshmallows to the pot. Stir constantly with your wooden spoon or spatula until the marshmallows are completely melted and the mixture is smooth. This should take about 5-7 minutes. The mixture will look glossy and stretchy when it’s ready.
- Season the mixture: Remove the pot from heat immediately. Stir in ¼ teaspoon vanilla extract and a pinch of salt. The vanilla adds warmth and depth, while the salt cuts through the sweetness. Give it a quick taste—yes, it’s okay to taste it now, just be careful it’s hot.
- Add the cereal: Pour 6 cups of Rice Krispies into the pot. Fold the cereal into the marshmallow mixture gently but thoroughly. Use a folding motion rather than stirring—this prevents crushing the cereal and keeps those satisfying crispy pieces intact. You want every piece of cereal coated, but you don’t want to break them down into dust.
- Press into the pan: Transfer the mixture to your prepared pan. Here’s a trick I learned from Aunt Carol: lightly grease your hands with butter or non-stick spray, then press the mixture evenly into the pan. The greased hands prevent sticking and allow you to press firmly without burning your fingers. Press until the surface is relatively even—about ½ to ¾ inch thick.
- Cool completely: Let the treats cool at room temperature for at least 30 minutes. Don’t rush this by putting them in the fridge—rapid cooling can make the texture uneven. You want them firm enough to cut cleanly but still soft and chewy inside.
- Cut into ghost shapes: Once cooled, lift the entire block out of the pan using the parchment overhang. Place it on a cutting board. Use a sharp serrated knife to cut into ghost shapes. I like to cut rectangles about 3 inches tall and 2 inches wide, then round off the top edges to create that classic ghost silhouette. You can also use a ghost-shaped cookie cutter if you have one—just press firmly and wiggle slightly to release.
- Melt the white chocolate: In a small microwave-safe bowl, combine 1 cup white chocolate chips with 1 tablespoon coconut oil. Microwave in 30-second intervals, stirring after each, until smooth and fully melted. This usually takes about 1-2 minutes total. Be careful not to overheat—white chocolate burns easily and becomes grainy.
- Dip the ghosts: Line a baking sheet with parchment paper. One by one, dip each ghost treat into the melted white chocolate. Use a fork to lower it in, then lift it out and let the excess drip off. Place the dipped ghost on the prepared baking sheet. The white chocolate should cover about half to two-thirds of each ghost, leaving the bottom visible for that floating ghost effect.
- Add the eyes: While the white chocolate is still wet, press two candy eyes onto each ghost. Place them close together near the top of the dipped portion. If the chocolate starts to set before you add the eyes, just dab a tiny bit of melted chocolate on the back of each eye to glue it in place.
- Set completely: Let the dipped ghosts set at room temperature for about 20-30 minutes, or pop them in the refrigerator for 10 minutes if you’re in a rush. The white chocolate should be firm to the touch before you move them.
Cooking Tips & Techniques
After making these Easy Halloween Rice Krispie Ghost Treats more times than I can count, I’ve collected a few tricks that make the process smoother and the results more consistent. Let me share what I’ve learned the hard way.
The marshmallow timing is everything. I ruined my first three batches by either under-melting or over-melting the marshmallows. Under-melted marshmallows leave white streaks in your treats, and over-melted ones turn into a hard, brittle mess. The sweet spot is when the marshmallows have just barely melted into a smooth, glossy liquid. Remove the pot from heat the second you stop seeing individual marshmallow shapes.
Don’t skip the salt. I know it seems weird to add salt to something this sweet, but trust me on this one. A tiny pinch balances the sugar and makes the flavors pop. Without it, the treats taste flat and one-dimensional.
Work quickly but carefully. Once you add the cereal to the melted marshmallows, you have about 2-3 minutes before the mixture starts to set. If you’re slow, you’ll end up with unevenly coated cereal and a lumpy texture. Have everything ready before you start melting.
For perfectly shaped ghosts, chill the cut treats before dipping. I learned this trick from a pastry chef friend. After cutting the ghosts, pop them in the freezer for 10 minutes. This firms them up so they don’t crumble or fall apart when you dip them in the warm white chocolate. It’s a game-changer, honestly.
If your white chocolate seizes up (turns thick and grainy), don’t panic. Add another tablespoon of coconut oil and microwave for 10 seconds, then stir vigorously. This usually smooths it right out. If it’s still lumpy, strain it through a fine-mesh sieve—you’ll lose a little chocolate, but the texture will be silky.
Make extra white chocolate coating. I always make a little more than I think I need because dipping can be messy, and having extra means I don’t have to stress about running out halfway through. Leftover white chocolate can be drizzled over popcorn or pretzels for an easy snack.
Variations & Adaptations
One of the best things about this recipe is how easily you can adapt it to fit different tastes, dietary needs, or occasions. Here are some variations I’ve tried and loved.
Spooky Spider Variation
Instead of making ghosts, shape the Rice Krispie mixture into small balls (about 1 inch in diameter). Dip them in melted dark chocolate instead of white, then add candy eyes and press eight pretzel stick legs into each side. These spider treats are a huge hit with kids and look terrifyingly cute on a platter.
Pumpkin Patch Treats
For a non-spooky Halloween option, shape the mixture into small balls, then roll them in orange sanding sugar. Add a small green candy or a piece of green licorice on top for the stem. These look adorable and taste just as good as the ghosts. I made these for my niece’s Halloween party last year, and they were the first thing to disappear.
Gluten-Free Ghosts
Use certified gluten-free crispy rice cereal and double-check that your white chocolate is also gluten-free. The texture is identical to the original, and no one at your party will notice the difference. My gluten-free friend Lisa brings these to every gathering now.
Chocolate-Dipped Ghosts
Swap the white chocolate for dark or milk chocolate for a richer flavor. I personally love dark chocolate ghosts with a sprinkle of sea salt on top—the salty-sweet combination is absolutely addictive. Just use the same melting method with coconut oil to keep the chocolate smooth.
Fruity Ghosts
For a colorful twist, substitute half the Rice Krispies with Fruity Pebbles cereal. The pink and purple hues create a fun, whimsical look that’s perfect for kids’ parties. The flavor is fruity and sweet, and the ghosts end up looking like pastel-colored apparitions.
Serving & Storage Suggestions
These Easy Halloween Rice Krispie Ghost Treats are best served at room temperature, which means you can make them ahead of time and have them ready when your guests arrive. That’s the beauty of this recipe—no last-minute fussing.
For presentation, arrange the ghosts on a large platter or serving board. I like to scatter some orange and black sprinkles around them for a festive touch. You can also place them on a bed of crushed chocolate cookies to look like dirt, or stand them upright in a shallow bowl of white frosting for a spooky graveyard effect. For a dinner party, I arrange them on a cake stand with a few fake spider webs draped around the base—it looks dramatic and takes about 30 seconds to set up.
What to serve alongside: These ghosts pair beautifully with other Halloween treats like pumpkin cupcakes, caramel apples, or a bowl of warm apple cider. For a savory balance, offer some cheese straws or spiced nuts on the same platter. The sweetness of the ghosts contrasts nicely with salty or spicy snacks.
Storage instructions: Store the ghosts in an airtight container at room temperature for up to 5 days. Layer them between sheets of parchment paper to prevent sticking. Do not refrigerate them—the cold can make the Rice Krispies soggy and the white chocolate can develop condensation that ruins the texture.
Freezing instructions: These freeze beautifully for up to 3 months. Place the undipped treats in a single layer on a baking sheet and freeze until solid, then transfer to a freezer-safe bag. When you’re ready to serve, thaw them at room temperature for about 30 minutes, then dip in white chocolate and add the eyes. The texture stays perfect.
Reheating tips: If your treats have gone a little stale (unlikely, but possible), pop them in a 300°F oven for 3-4 minutes. This revives the crispiness and makes them taste freshly made. Just watch them carefully—they can burn quickly.
Flavor development: Honestly, these taste best on the second day. Something about the flavors melding together overnight makes them even more delicious. The marshmallow sweetness settles, the vanilla becomes more pronounced, and the texture reaches that perfect chewy-crispy balance. So feel free to make them a day ahead!
Nutritional Information & Benefits
Let’s be real—these are a treat, not a health food. But that doesn’t mean they don’t have some redeeming qualities. Here’s the breakdown for one ghost treat (based on 24 servings):
| Nutrient | Amount per serving |
|---|---|
| Calories | 145 |
| Total Fat | 6g |
| Saturated Fat | 4g |
| Cholesterol | 8mg |
| Sodium | 95mg |
| Total Carbohydrates | 22g |
| Sugars | 14g |
| Protein | 1g |
The Rice Krispies themselves are fortified with iron and B vitamins, so there’s a tiny nutritional boost there. The butter adds a small amount of vitamin A, and the white chocolate contributes calcium. But honestly, these are about joy and celebration, not daily nutrition.
Dietary considerations: This recipe contains dairy (butter, white chocolate) and gluten (Rice Krispies). For a dairy-free version, use vegan butter and dairy-free white chocolate. For gluten-free, use certified gluten-free cereal. Always check labels if you’re serving guests with allergies—some white chocolate brands process on shared equipment with nuts.
My personal perspective: I believe treats like these have a place in a balanced lifestyle. They’re not everyday snacks, but for special occasions like Halloween parties, they bring so much joy that the indulgence is absolutely worth it. Plus, making them yourself means you control the ingredients and portion sizes.
Conclusion
These Easy Halloween Rice Krispie Ghost Treats have become a staple in my Halloween rotation for good reason. They’re quick, simple, and absolutely adorable—everything you want in a party treat. Every time I make them, I think about Aunt Carol and those sticky-fingered afternoons in her kitchen, and I feel like I’m carrying a little piece of her into my own celebrations.
I encourage you to make these your own. Add different sprinkles, try different shapes, or experiment with the variations I shared. The beauty of this recipe is how forgiving and flexible it is. Whether you’re hosting a big Halloween bash or just want something fun to share with your family, these ghosts will deliver smiles every single time.
Have you made these? I’d love to hear how they turned out! Leave a comment below and let me know what variations you tried, or tag me in your photos on social media. Your feedback helps other readers, and honestly, I just love seeing your creations. Happy Halloween, and happy cooking!
Frequently Asked Questions
Can I make these ahead of time for a party?
Absolutely! These ghosts can be made up to 2 days in advance. Store them in an airtight container at room temperature, layered between parchment paper. If you want them to look their freshest, add the candy eyes right before serving—they can sometimes slide off if the white chocolate sets completely.
Why did my Rice Krispie treats turn out hard?
This usually happens when the marshmallow mixture is cooked too long or at too high a heat. The sugar in the marshmallows can crystallize, making the treats tough. Always melt marshmallows over medium-low heat and remove from heat as soon as they’re smooth. Also, pressing the mixture too firmly into the pan can make them dense and hard.
Can I use homemade marshmallows for this recipe?
You can, but I honestly don’t recommend it. Homemade marshmallows have a different moisture content and don’t melt as smoothly as store-bought ones. The texture of your treats will be gummier and less consistent. Save the homemade marshmallows for s’mores or hot chocolate.
How do I prevent the white chocolate from cracking when I cut the ghosts?
Let the white chocolate set completely before cutting, and use a sharp serrated knife with a gentle sawing motion. If the chocolate is too thick, it can crack. For best results, dip the ghosts in a thin, even layer of white chocolate—the coconut oil helps with this by thinning the coating.
Can I double this recipe for a large party?
Yes! This recipe doubles beautifully. Just make sure you have a large enough pot to hold everything—I use a 6-quart Dutch oven when I’m making a double batch. You’ll also need two 9×13 pans or one large sheet pan. The cooking time stays the same, but you may need a few extra minutes to press everything into the pans.
Pin This Recipe!
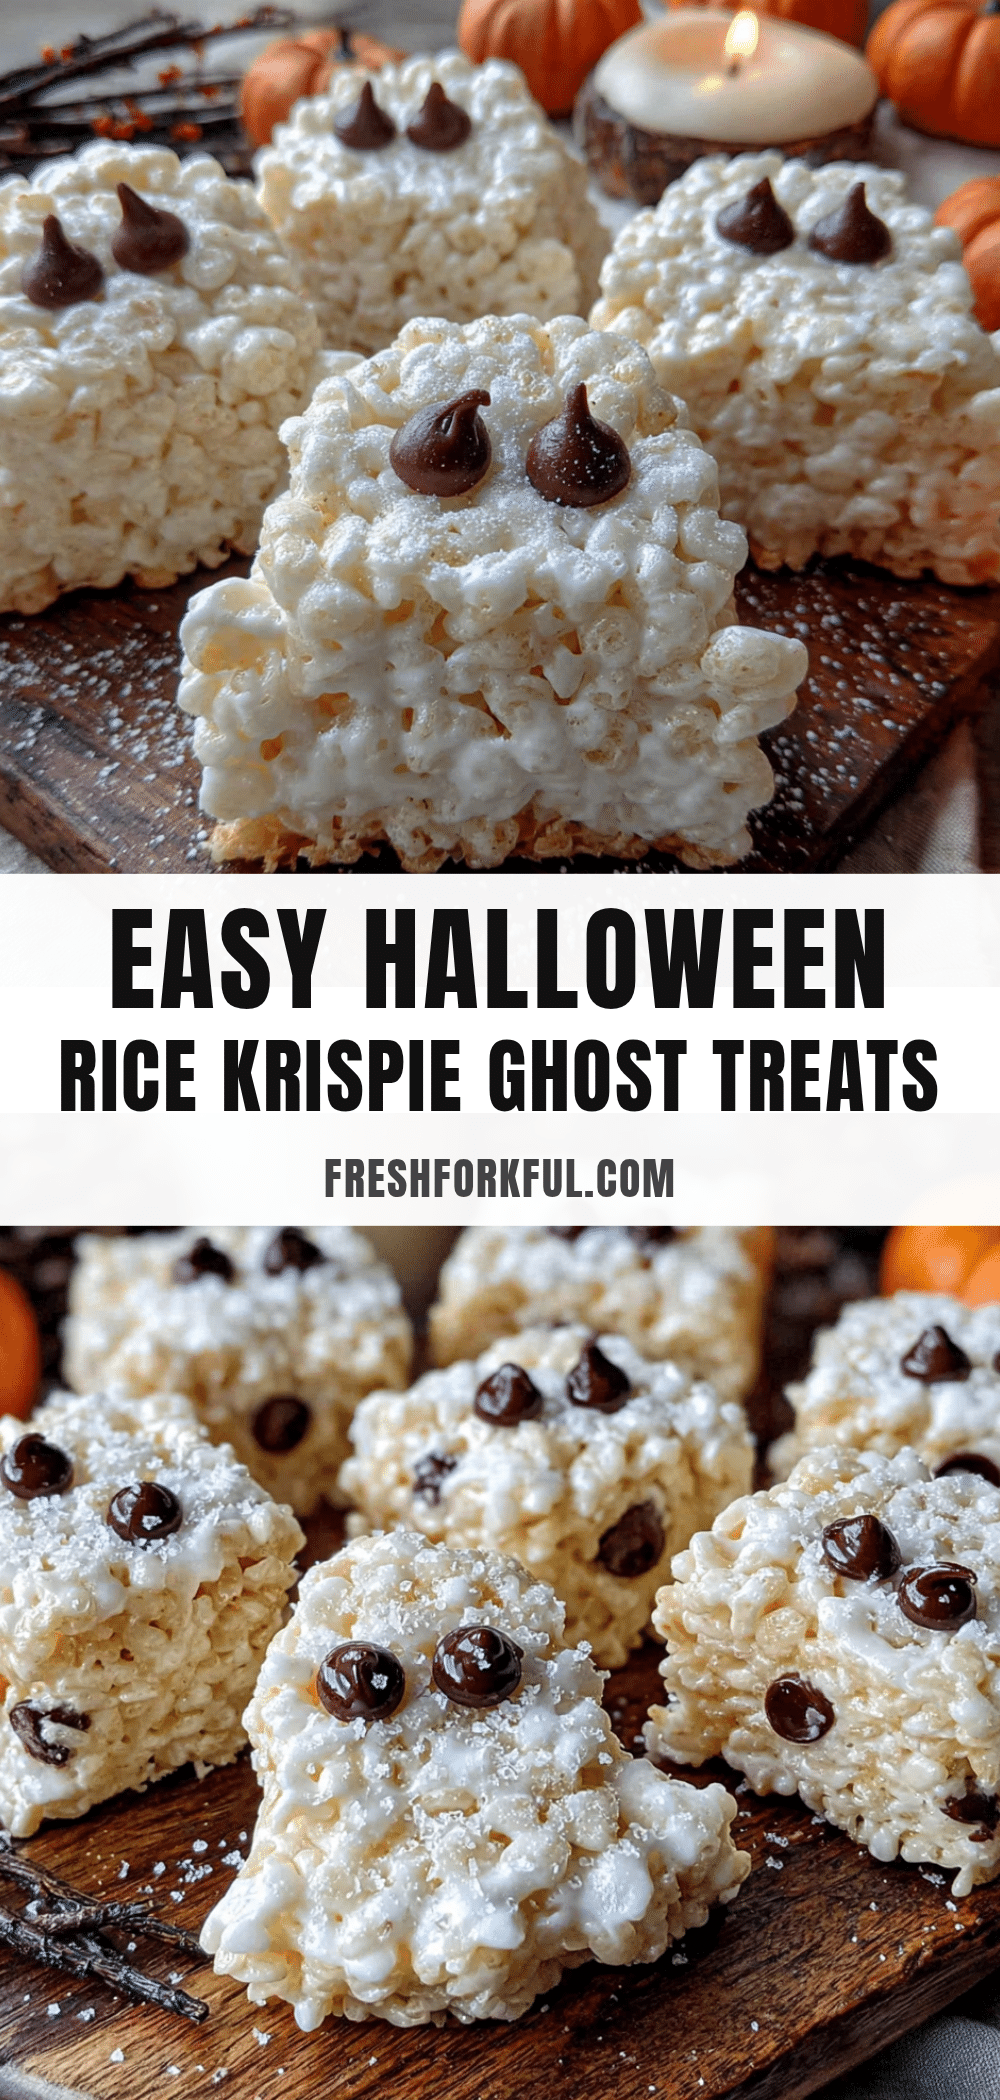
Easy Halloween Rice Krispie Ghost Treats: Best Party Favorite
These adorable ghost-shaped Rice Krispie treats are dipped in white chocolate and decorated with candy eyes, making them the perfect quick and easy Halloween party snack. They come together in under 20 minutes and are a guaranteed crowd-pleaser.
- Prep Time: 15 minutes
- Cook Time: 5 minutes
- Total Time: 20 minutes
- Yield: 24 servings 1x
- Category: Dessert
- Cuisine: American
Ingredients
- 3 tablespoons unsalted butter
- 1 package (10 oz) regular marshmallows (about 40 large or 4 cups mini)
- 6 cups Rice Krispies cereal
- ¼ teaspoon vanilla extract
- Pinch of salt
- 1 cup white chocolate chips or melting wafers
- 1 tablespoon coconut oil or vegetable shortening
- Candy eyes (about 48 for 24 ghosts)
- Optional: Orange and black sprinkles
Instructions
- Line a 9×13-inch baking pan with parchment paper, leaving overhang. Lightly grease the parchment with butter or non-stick spray.
- In a large saucepan over medium-low heat, melt 3 tablespoons unsalted butter.
- Add the marshmallows and stir constantly until completely melted and smooth, about 5-7 minutes.
- Remove from heat and stir in ¼ teaspoon vanilla extract and a pinch of salt.
- Pour in 6 cups Rice Krispies cereal and fold gently until every piece is coated.
- Transfer mixture to prepared pan. Lightly grease your hands and press the mixture evenly to about ½ to ¾ inch thick.
- Cool at room temperature for at least 30 minutes until firm.
- Lift the block out using parchment overhang. Cut into ghost shapes (about 3×2 inches) with a serrated knife, rounding the top edges.
- In a small microwave-safe bowl, combine 1 cup white chocolate chips and 1 tablespoon coconut oil. Microwave in 30-second intervals, stirring after each, until smooth (1-2 minutes total).
- Line a baking sheet with parchment. Dip each ghost into the melted white chocolate using a fork, covering about half to two-thirds. Let excess drip off, then place on the baking sheet.
- While the white chocolate is still wet, press two candy eyes onto each ghost near the top of the dipped portion.
- Let set at room temperature for 20-30 minutes, or refrigerate for 10 minutes until firm.
Notes
For perfectly shaped ghosts, chill the cut treats in the freezer for 10 minutes before dipping. If white chocolate seizes, add another tablespoon of coconut oil and microwave for 10 seconds, then stir. Store in an airtight container at room temperature for up to 5 days. Freeze undipped treats for up to 3 months.
Nutrition
- Serving Size: 1 ghost treat
- Calories: 145
- Sugar: 14
- Sodium: 95
- Fat: 6
- Saturated Fat: 4
- Carbohydrates: 22
- Protein: 1
Keywords: Halloween treats, Rice Krispie treats, ghost treats, easy Halloween recipe, no-bake dessert, party snacks


