Love this? Save it for later!
Share the inspiration with your friends
There used to be a tiny café tucked on a side street in Portland called The Early Lark that made overnight oats that ruined me for all other breakfasts. When they closed their doors three years ago—just a handwritten sign on the door one Tuesday—I actually stood there for a minute feeling genuinely lost. After 17 tries—some so watery they belonged in a glass, others so thick you could stand a spoon up in them—I finally got it. The secret wasn’t some fancy ingredient either. It was the ratio, the patience, and realizing that you don’t need a dozen bowls and a sink full of dishes to make breakfast magic happen.
Honestly, I almost gave up after attempt number twelve. I mean, I’d texted my friend Maria a photo of what looked like oatmeal soup and she responded with a single question mark. But then I remembered the way those oats at The Early Lark felt in your mouth—creamy but not mushy, substantial but not heavy—and I went back to the kitchen. The answer, let me tell you, was embarrassingly simple. It’s all about how you layer the ingredients and giving the oats enough time to actually do their thing. Maybe you’ve been there, staring at a jar of sad-looking oats wondering what you did wrong.
I keep making these because they changed my mornings. No more standing over a stove while half asleep. No more deciding what to eat before I’ve had my coffee. And the best part? I can have five different flavors ready for the week without making a single extra trip to the store. These overnight oats are the breakfast that finally made me stop skipping the most important meal of the day.
Why You’ll Love This Recipe
Let’s be real for a second. Most overnight oat recipes online are either too complicated or they turn into a sad, gluey mess by morning. I’ve tested this base recipe more times than I care to admit, and I can say with confidence—this one works. Every single time.
- Quick & Easy: Five minutes of prep time. That’s it. Mix everything in one bowl, pop it in the fridge, and breakfast is ready when you wake up. No cooking, no stirring, no fuss.
- Simple Ingredients: You probably have everything in your kitchen right now. Rolled oats, milk, yogurt, a little sweetener. No weird health food store trips required.
- Perfect for Meal Prep: Make a batch on Sunday and you’ve got breakfast sorted for the whole week. Each flavor variation stays good for up to five days in the fridge.
- Crowd-Pleaser: I’ve served these to picky kids, health-conscious friends, and my dad who swears he doesn’t like “healthy breakfast stuff.” Everyone asks for the recipe.
- Unbelievably Customizable: The five variations I’m sharing are just the beginning. Once you nail the base, you can mix in practically anything you have on hand.
What makes this recipe different from the hundreds of others out there? It’s the texture. I spent months perfecting the liquid-to-oat ratio so you get that perfect creamy bite without any mushiness. Plus, I figured out that adding a pinch of salt—something most recipes skip—makes a world of difference in flavor. This isn’t just another overnight oats recipe. It’s the one that finally made me look forward to waking up.
What Ingredients You Will Need
This recipe uses simple, wholesome ingredients that work together to create a creamy, satisfying breakfast without any complicated techniques. Here’s what you’ll need for the base recipe, plus notes on each variation.
For the Base Overnight Oats
- Rolled oats, 1 cup (use old-fashioned rolled oats, not quick oats or steel-cut—they get the best texture)
- Milk, 1 cup (dairy or any plant-based milk works; I prefer oat milk for extra creaminess)
- Plain Greek yogurt, 1/2 cup (adds protein and that tangy richness; dairy-free yogurt works too)
- Chia seeds, 1 tablespoon (helps thicken the oats and adds omega-3s; you can skip these but the texture won’t be as good)
- Maple syrup or honey, 1-2 tablespoons (adjust based on how sweet you like things)
- Vanilla extract, 1/2 teaspoon (pure extract makes a difference, but imitation works in a pinch)
- Salt, a pinch (trust me on this one—it makes everything taste more like itself)
For the 5 Flavor Variations
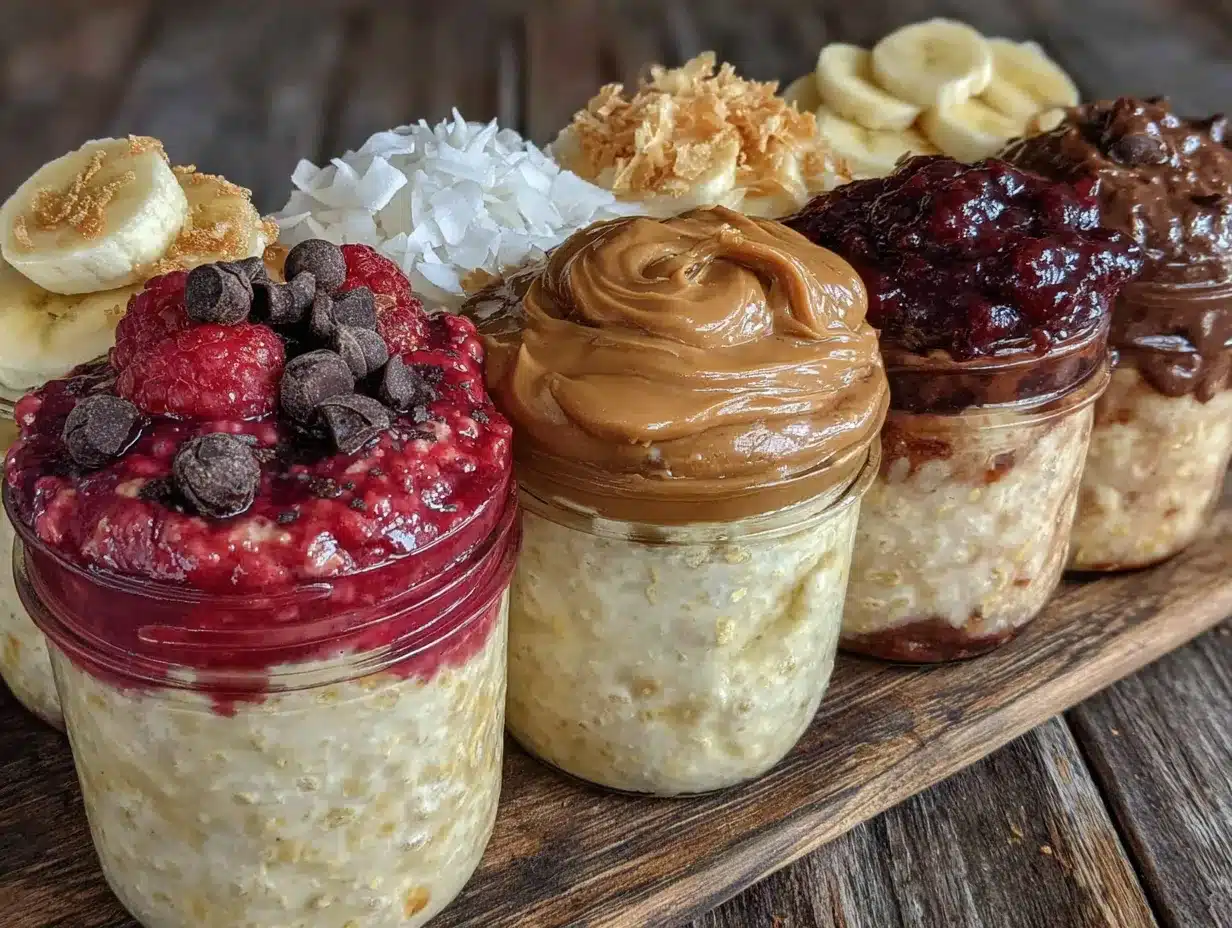
1. Classic Berry & Honey
- 1/2 cup mixed berries (fresh or frozen—no need to thaw)
- 1 tablespoon extra honey for drizzling
- Optional: lemon zest from half a lemon (brightens everything up)
2. Peanut Butter & Banana
- 2 tablespoons creamy peanut butter (I recommend Justin’s or Smucker’s Natural)
- 1 ripe banana, mashed or sliced
- 1 tablespoon mini chocolate chips (optional but highly recommended)
3. Apple Cinnamon
- 1 small apple, diced small (Honeycrisp or Fuji hold up best)
- 1 teaspoon ground cinnamon
- 2 tablespoons chopped walnuts or pecans
- 1 extra tablespoon maple syrup
4. Tropical Coconut & Mango
- 1/2 cup diced mango (fresh or frozen)
- 2 tablespoons shredded coconut (unsweetened or sweetened, your call)
- 1 tablespoon lime juice (fresh is noticeably better here)
- Optional: 1 tablespoon chopped macadamia nuts for crunch
5. Chocolate Cherry
- 1 tablespoon cocoa powder (unsweetened)
- 1/4 cup cherries, pitted and halved (fresh or frozen)
- 1 tablespoon dark chocolate chips or chopped dark chocolate
- 1 extra tablespoon maple syrup
Ingredient Selection Tips: Look for rolled oats that are labeled “old-fashioned” for the best texture. Quick oats will turn mushy, and steel-cut oats won’t soften enough overnight. For the yogurt, I recommend full-fat Greek yogurt for the creamiest results, but 2% works fine too. If you’re dairy-free, Siggi’s plant-based yogurt or So Delicious coconut yogurt are solid choices.
Equipment Needed
One of the reasons I love this recipe so much is the minimal cleanup. Here’s everything you actually need:
- One medium mixing bowl (any size between 2-3 quarts works perfectly)
- A whisk or fork for mixing everything together
- Measuring cups and spoons (though after a few times, you’ll probably eyeball it)
- Four to five jars or containers with lids (mason jars are perfect, but any airtight container works)
- A sharp knife and cutting board if you’re prepping fruit for the variations
That’s it. No blender, no stove, no special equipment. If you don’t have mason jars, I’ve used old pasta sauce jars (washed and dried, obviously) and even small Pyrex bowls with plastic wrap on top. The key is just having something with a lid so the oats can sit undisturbed. Honestly, I’ve made these in a large measuring cup and poured the mixture directly into jars. The less dishes, the better in my book.
Preparation Method
This is where the magic happens. Follow these steps exactly the first time, and you’ll have perfect overnight oats. After that, feel free to experiment.
- Combine the dry ingredients first. In your mixing bowl, add 1 cup rolled oats, 1 tablespoon chia seeds, and a pinch of salt. Whisk them together so everything is evenly distributed. This step matters more than you think—if you dump everything in at once, the chia seeds clump together and you end up with weird gelatinous pockets. Learn from my mistakes.
- Add the wet ingredients. Pour in 1 cup milk, 1/2 cup Greek yogurt, 1-2 tablespoons maple syrup or honey, and 1/2 teaspoon vanilla extract. Whisk everything together until the mixture is smooth and uniform. The yogurt should be fully incorporated—no white streaks remaining. The mixture will look thin at this point, and that’s totally fine. The oats and chia seeds need that liquid to absorb overnight.
- Stir in your chosen flavor additions. This is where you pick one of the five variations. For the berry version, gently fold in the berries. For the peanut butter banana, swirl in the peanut butter and mashed banana. For apple cinnamon, stir in the diced apple, cinnamon, and nuts. Make sure everything is evenly distributed throughout the mixture, but don’t overmix—you want some texture and variation.
- Divide into containers. Pour the mixture evenly into your jars or containers. I usually get about 4 servings from this recipe, but if you like heartier portions, 3 larger jars work too. Leave about half an inch of space at the top of each container—the oats will expand slightly as they absorb the liquid.
- Seal and refrigerate. Put the lids on your containers and place them in the refrigerator. Here’s the important part: let them sit for at least 6 hours, but overnight (8-12 hours) is ideal. The oats need time to soften and absorb all that creamy goodness. I’ve tried rushing this at the 4-hour mark, and the texture just isn’t the same.
- Enjoy in the morning. When you’re ready to eat, grab a jar from the fridge. Give it a good stir—the chia seeds tend to settle at the bottom. If the mixture seems too thick, stir in a splash of milk to loosen it up. Top with any extra toppings you like (more fresh fruit, a drizzle of nut butter, a sprinkle of granola) and dig in. These are delicious cold straight from the fridge, but you can also microwave them for 30-45 seconds if you prefer warm oats.
Prep Note: If you’re making multiple variations at once, I recommend making the base mixture first, then dividing it into separate bowls before adding the flavor ingredients. That way you don’t have to wash the bowl between variations. Efficiency is the name of the game here.
Cooking Tips & Techniques
After making overnight oats more times than I can count, I’ve picked up some tricks that make a real difference. Here are the ones I wish someone had told me from the start.
The ratio matters more than anything. The perfect overnight oats use a 1:1 ratio of oats to liquid, plus the yogurt for extra creaminess. Too much liquid and you get soup. Too little and you get a dry, crumbly mess. The recipe I’m sharing has been tested more than a dozen times, and the ratios are spot-on. Trust them before you start tweaking.
Don’t skip the chia seeds. I know they’re an extra ingredient you might not have on hand, but they’re not optional if you want that perfect texture. Chia seeds absorb liquid and create a gel-like consistency that gives overnight oats their signature creamy-but-not-soggy texture. If you absolutely can’t find them, you can substitute ground flax seeds, but the texture will be slightly different.
Salt is not optional. I made this mistake for weeks. Without salt, overnight oats taste flat and one-dimensional. A tiny pinch brings out the sweetness of the maple syrup and the richness of the yogurt. It’s the difference between “these are fine” and “I can’t stop eating these.”
My biggest failure: I once tried using steel-cut oats because I thought they’d be “healthier.” Don’t do it. After 12 hours in the fridge, they were still crunchy and hard. Steel-cut oats need heat to soften properly. Stick with rolled oats for overnight preparations.
Timing tip: Make these right after dinner while you’re cleaning up the kitchen. It takes five minutes, and then breakfast is done before you’ve even had your evening tea. I’ve been doing this for months now, and it’s become such a habit that I feel weird if I don’t prep my oats the night before.
Variations & Adaptations
The five variations I’ve shared are just the beginning. Once you understand the base formula, you can create endless combinations. Here are some more ideas I’ve tried and loved.
Vegan Version: Use plant-based milk and dairy-free yogurt. I’ve had great results with oat milk and Kite Hill plain unsweetened yogurt. The texture is slightly less thick than dairy-based, but still delicious. Swap maple syrup for honey to keep it fully plant-based.
High-Protein Version: Add an extra 1/4 cup Greek yogurt and a scoop of your favorite vanilla protein powder. Mix the protein powder with a little milk first to make a paste before stirring it in—this prevents clumps. I do this on mornings when I know I have a long workout ahead.
Low-Sugar Version: Skip the maple syrup or honey entirely and use mashed banana or unsweetened applesauce as your sweetener. The banana version is naturally sweet enough that I rarely add extra sweetener. Stevia drops work too, but start with just a few drops—they’re potent.
Seasonal Variations: In fall, try pumpkin spice overnight oats with 1/4 cup pumpkin puree, 1 teaspoon pumpkin pie spice, and a tablespoon of maple syrup. In summer, use fresh peaches and a splash of almond extract. Winter calls for gingerbread-inspired oats with molasses, ginger, and cinnamon.
Nut-Free Option: Swap peanut butter for sunflower seed butter or tahini. Use seeds instead of nuts for crunch—pumpkin seeds or sunflower seeds work great. This version is also school-safe if you’re packing lunches.
Serving & Storage Suggestions
These overnight oats are best served cold, straight from the fridge. I love eating them on my porch on summer mornings when the air is still cool. But if you’re like my husband who can’t stand cold breakfast foods, they microwave beautifully. Just remove the lid, microwave for 30-45 seconds, stir, and enjoy.
Storage: Keep your overnight oats in airtight containers in the refrigerator for up to 5 days. I usually make a batch on Sunday night and eat them Monday through Friday. The texture stays consistent throughout the week, though the fruit variations (especially banana) will soften more over time. If you’re meal prepping for the whole week, I recommend keeping the fruit separate and adding it fresh each morning for the best texture.
Freezer Instructions: Yes, you can freeze overnight oats! Portion them into freezer-safe containers (leave a little room for expansion) and freeze for up to 3 months. Thaw overnight in the refrigerator before eating. The texture will be slightly different after freezing—a bit softer—but they’re still delicious. I do this when I find berries on sale and want to preserve them in oat form.
Toppings to keep on hand: A sprinkle of granola adds wonderful crunch. A drizzle of nut butter makes everything better. Fresh fruit on top brightens up the whole bowl. And honestly? A few chocolate chips on top of the chocolate cherry version is never a bad idea.
Flavor development note: These oats actually taste better on day two or three. The flavors have more time to meld together, and the texture gets even creamier. If you can resist eating them all on day one, you’re in for a treat later in the week.
Nutritional Information & Benefits
Here’s the approximate nutritional breakdown for one serving of the base overnight oats (without additional toppings or flavor variations):
| Nutrient | Amount per Serving |
|---|---|
| Calories | 290 |
| Protein | 14g |
| Carbohydrates | 42g |
| Fiber | 7g |
| Sugar | 12g (naturally occurring) |
| Fat | 8g |
| Calcium | 20% DV |
| Iron | 10% DV |
These numbers will vary based on your milk choice, yogurt type, and added flavor ingredients. The protein content jumps significantly with the peanut butter version, and the fiber content increases with the apple cinnamon variation.
Health Benefits: Rolled oats are packed with beta-glucan, a type of soluble fiber that helps lower cholesterol and keeps you full for hours. The Greek yogurt adds probiotics for gut health and protein for muscle repair. Chia seeds are tiny nutritional powerhouses loaded with omega-3 fatty acids, fiber, and antioxidants. This breakfast honestly keeps me going until lunch without any mid-morning snack attacks.
Dietary Considerations: This recipe is naturally vegetarian and can easily be made vegan, gluten-free (use certified gluten-free oats), dairy-free, and nut-free. It’s also low in added sugar if you use the banana or apple variations for sweetness. The main allergens to watch for are dairy and gluten, but both have easy substitutions.
Conclusion
Look, I know overnight oats aren’t exactly groundbreaking. But finding a version that actually works—that delivers on texture, flavor, and convenience—that’s worth sharing. These overnight oats have genuinely changed my mornings. No more skipping breakfast because I didn’t have time. No more sad bowls of instant oatmeal that leave me hungry an hour later.
The five flavor variations are just suggestions. The real magic is in the base recipe—that perfect 1:1 ratio of oats to liquid, that pinch of salt you didn’t know you needed, those tiny chia seeds that make everything creamy. Once you’ve got that down, you can mix in whatever you have on hand. Leftover berries? Toss them in. Half a banana? Perfect. A spoonful of Nutella? I won’t tell anyone.
I’d love to hear what variations you come up with. Drop a comment below and tell me your favorite combination. Or if you try one of my five versions, let me know how it turned out. And if you know someone who swears they don’t like breakfast, make them a jar of the peanut butter banana version. I’m telling you—it’s a game-changer.
Happy prepping, and here’s to mornings that actually taste good.
Frequently Asked Questions
Can I use quick oats instead of rolled oats?
You can, but the texture will be noticeably softer and almost mushy. Quick oats are cut smaller and absorb liquid faster, so they break down more overnight. If quick oats are all you have, reduce the milk by 2 tablespoons and only let them sit for 4-6 hours instead of overnight. Rolled oats really are the best choice for that perfect chewy-creamy texture.
Why are my overnight oats watery?
This usually happens for one of two reasons. Either you used too much liquid (double-check your ratios) or you didn’t let them sit long enough. The oats and chia seeds need time to absorb the liquid—at least 6 hours. If you’re in a rush, try adding an extra tablespoon of chia seeds to help thicken things up faster. Also, make sure you’re using Greek yogurt, not regular yogurt, which has more liquid.
Can I make these without yogurt?
Absolutely. Replace the yogurt with an equal amount of milk or a dairy-free alternative. The texture will be slightly less creamy and you’ll lose some protein, but they’ll still be good. I’ve made them with coconut milk instead of yogurt for a dairy-free version, and the coconut flavor pairs beautifully with the tropical variation.
How long do overnight oats last in the fridge?
They’ll keep for up to 5 days in an airtight container. I usually make a batch on Sunday and eat them through Thursday. After day 5, the texture starts to get a bit too soft for my liking, and the fruit variations can become watery. If you’re prepping for the whole week, consider adding fresh fruit each morning instead of mixing it in from the start.
Can I eat overnight oats warm?
Yes! If you prefer warm oats, just microwave your jar (without the metal lid) for 45-60 seconds, stirring halfway through. You can also transfer them to a small saucepan and warm them on the stove over medium-low heat for 3-4 minutes. The texture will be slightly different from freshly cooked oatmeal—creamier and less fluffy—but it’s a cozy option for cold mornings.
Pin This Recipe!
5 Easy One-Bowl Overnight Oats with 5 Flavor Variations

A foolproof base recipe for creamy, perfectly textured overnight oats with five delicious flavor variations. Ready in 5 minutes with simple ingredients, perfect for meal prep and customizable to your taste.
- Prep Time: 5 minutes
- Cook Time: 0 minutes
- Total Time: 5 minutes (plus 6-12 hours refrigeration)
- Yield: 4 servings 1x
- Category: Breakfast
- Cuisine: American
Ingredients
- 1 cup rolled oats (old-fashioned)
- 1 cup milk (dairy or plant-based)
- 1/2 cup plain Greek yogurt
- 1 tablespoon chia seeds
- 1–2 tablespoons maple syrup or honey
- 1/2 teaspoon vanilla extract
- Pinch of salt
- For Classic Berry & Honey: 1/2 cup mixed berries, 1 tablespoon extra honey, optional lemon zest
- For Peanut Butter & Banana: 2 tablespoons creamy peanut butter, 1 ripe banana (mashed or sliced), 1 tablespoon mini chocolate chips (optional)
- For Apple Cinnamon: 1 small apple (diced), 1 teaspoon ground cinnamon, 2 tablespoons chopped walnuts or pecans, 1 extra tablespoon maple syrup
- For Tropical Coconut & Mango: 1/2 cup diced mango, 2 tablespoons shredded coconut, 1 tablespoon lime juice, optional 1 tablespoon chopped macadamia nuts
- For Chocolate Cherry: 1 tablespoon unsweetened cocoa powder, 1/4 cup pitted cherries (halved), 1 tablespoon dark chocolate chips, 1 extra tablespoon maple syrup
Instructions
- Combine the dry ingredients first: In a mixing bowl, whisk together 1 cup rolled oats, 1 tablespoon chia seeds, and a pinch of salt.
- Add the wet ingredients: Pour in 1 cup milk, 1/2 cup Greek yogurt, 1-2 tablespoons maple syrup or honey, and 1/2 teaspoon vanilla extract. Whisk until smooth and uniform.
- Stir in your chosen flavor additions: Gently fold in the ingredients for one of the five variations (e.g., berries and honey, peanut butter and banana, etc.).
- Divide into containers: Pour the mixture evenly into 4 jars or containers, leaving about half an inch of space at the top.
- Seal and refrigerate: Put lids on containers and refrigerate for at least 6 hours, preferably 8-12 hours (overnight).
- Enjoy in the morning: Stir well, add a splash of milk if too thick, and top with extra toppings if desired. Serve cold or microwave for 30-45 seconds for warm oats.
Notes
The ratio of oats to liquid is key: 1:1 oats to milk plus yogurt. Don’t skip the chia seeds or salt—they are essential for texture and flavor. For best results, let oats sit 8-12 hours. Make the base first, then divide into separate bowls for different flavors to minimize dishes. Oats keep up to 5 days in the fridge and can be frozen for up to 3 months.
Nutrition
- Serving Size: 1 jar (about 1 cup)
- Calories: 290
- Sugar: 12
- Sodium: 150
- Fat: 8
- Saturated Fat: 2
- Carbohydrates: 42
- Fiber: 7
- Protein: 14
Keywords: overnight oats, easy breakfast, meal prep, healthy breakfast, rolled oats, chia seeds, Greek yogurt, berry, peanut butter banana, apple cinnamon, tropical coconut mango, chocolate cherry


