Love this? Save it for later!
Share the inspiration with your friends
Introduction
“You know that moment when you’re staring at the clock, and suddenly, you realize dinner is hours away but hunger is knocking loud and clear? That was me one Wednesday evening last fall. I was rummaging through the fridge, hoping for a miracle, when my friend Mia popped over unexpectedly. She brought along this little parcel of magic wrapped in parchment paper — crispy homemade pizza rolls. Honestly, I wasn’t expecting much, but the smell alone had me hooked. It wasn’t just any snack; it was like a pizza party in one bite, perfectly crunchy on the outside and bursting with gooey cheese and tangy sauce inside. That night, while we chatted away with the oven timer ticking, I knew I had to crack this recipe myself. Maybe you’ve been there too—those evenings when you want something quick, tasty, and a little bit nostalgic. These pizza rolls have stuck with me since, becoming my go-to snack whenever hunger strikes or company drops by unexpectedly. Let me tell you, once you try making these at home, you’ll wonder how you ever lived without them.”
Why You’ll Love This Recipe
Making crispy homemade pizza rolls is honestly a joy and one of those recipes that keeps on giving. After countless trials and a few kitchen mess-ups, I’ve nailed down a version that hits all the right notes.
- Quick & Easy: Ready in about 10 minutes of active prep, perfect for those last-minute cravings or busy weeknights.
- Simple Ingredients: You likely already have all the pantry staples and fresh bits needed, no fancy shopping trips involved.
- Perfect for Sharing: Whether it’s a casual hangout or a potluck, these rolls disappear fast because everyone loves them.
- Crowd-Pleaser: Kids, adults, picky eaters alike give these pizza rolls a thumbs up every time.
- Unbelievably Delicious: The crispy crust combined with the melty cheese and flavorful sauce is pure comfort food magic.
What sets this recipe apart? It’s all about the technique—wrapping the filling just right so the rolls stay sealed and crisp while baking, and using a blend of cheeses for that perfect gooey texture. Plus, I toss in a pinch of Italian herbs into the sauce to give it that homemade vibe that’s way better than anything store-bought. Honestly, this isn’t just another snack recipe—it’s one that makes you close your eyes after the first bite and smile. It’s the kind of treat that feels indulgent but isn’t a hassle, and you can whip it up anytime you want a little pizza joy without the fuss of ordering out or rolling dough from scratch.
What Ingredients You Will Need
This recipe calls for straightforward, wholesome ingredients that come together to create that irresistible crispy homemade pizza rolls experience. Most are pantry staples, with a couple of fresh touches to keep things bright and tasty.
- For the dough:
- 1 package (about 250g) refrigerated pizza dough (I prefer Trader Joe’s for its texture)
- All-purpose flour, for dusting (keeps the dough from sticking)
- For the filling:
- 1/2 cup marinara sauce (homemade or store-bought; I recommend Rao’s for richer flavor)
- 1 cup shredded mozzarella cheese (whole milk mozzarella melts best)
- 1/4 cup grated Parmesan cheese (adds sharpness)
- 1/4 cup mini pepperoni slices or diced pepperoni (optional, can substitute with cooked sausage or veggies)
- 1 tablespoon Italian seasoning (blend of oregano, basil, thyme)
- 1/2 teaspoon garlic powder (for subtle depth)
- Fresh basil leaves, chopped (optional, adds freshness)
- For brushing:
- 1 tablespoon olive oil or melted butter (helps achieve that golden crust)
- Coarse sea salt (optional, for sprinkling on top)
If you need a gluten-free option, almond flour crusts or gluten-free pizza dough mixes work well, though the texture changes slightly. For a dairy-free version, swap mozzarella with vegan cheese and use a dairy-free butter alternative for brushing. And if you want to add a veggie twist, diced bell peppers, mushrooms, or olives mix nicely with the pepperoni filling.
Equipment Needed

To make these crispy homemade pizza rolls, you don’t need much, which is part of the charm. Here’s what you’ll want handy:
- A baking sheet or pizza stone (I lean toward baking sheets lined with parchment paper for easy cleanup)
- Rolling pin (or a clean wine bottle works fine if you don’t have one)
- Sharp knife or pizza cutter (to slice the rolls evenly)
- Pastry brush (for brushing oil or butter on the rolls)
- Mixing bowls (for combining filling ingredients)
If you’re short on specialty kitchen tools, no worries. A clean kitchen towel can substitute for a rolling pin, and a fork can help seal the edges of the rolls if you want that extra crunch. For maintenance, keep your pizza cutter sharp and clean—it makes slicing much smoother and safer. Budget-wise, most of these items are basic kitchen staples, so you won’t need to invest in anything new unless you want to upgrade for convenience.
Preparation Method
- Preheat your oven to 425°F (220°C). This temperature helps achieve that perfect crispy exterior without drying out the filling. Line your baking sheet with parchment paper to prevent sticking.
- Prepare the filling. In a medium bowl, mix the marinara sauce, shredded mozzarella, Parmesan, pepperoni slices, Italian seasoning, garlic powder, and chopped basil if using. Stir gently to combine all the flavors without crushing the cheese. Set aside.
- Roll out the pizza dough. Lightly dust your work surface with flour, then roll the dough into a roughly 12×10-inch rectangle. Don’t stress about perfect shapes; a rustic look is charming here. The dough should be about 1/8-inch thick—thin enough to get crisp but sturdy enough to hold the filling.
- Spread the filling evenly. Using a spoon, spread the filling mixture in a thin, even layer over the dough, leaving about a 1-inch border on all sides free of filling. This helps seal the rolls later.
- Roll up the dough tightly. Starting from one long edge, carefully roll the dough into a tight log, pressing gently to keep the filling snug inside. Use a sharp knife or pizza cutter to slice the log into 1-inch pieces. (I sometimes forget to dust the cutter first—be sure to do it to avoid squashing the rolls!)
- Place rolls seam side down. Arrange the rolls on the parchment-lined baking sheet, leaving about an inch between each so they crisp evenly.
- Brush with oil or melted butter. This step is key for that golden-brown color and crispy finish. Sprinkle a pinch of coarse sea salt on top if you like a little extra flavor punch.
- Bake for 12-15 minutes. Keep an eye on them from about 10 minutes onward—you’re looking for bubbly cheese and golden, crisp edges. Oven temps vary, so if they brown too fast, reduce heat slightly.
- Cool slightly before serving. Let the pizza rolls rest for 3-5 minutes once out of the oven. This helps the cheese set just enough so it’s melty but won’t burn your mouth on the first bite.
If you want an extra crispy finish, pop them under the broiler for 1-2 minutes, but watch closely to avoid burning. Trust me, the smell while baking is pure magic—your kitchen will smell like a cozy pizzeria!
Cooking Tips & Techniques
Making these pizza rolls crispy and flavorful can be a bit of an art, but a few tricks go a long way:
- Don’t overload the filling. It’s tempting to pile on cheese and sauce, but too much moisture can make the dough soggy. A thin layer ensures crispness and perfect bite-sized pockets of gooey goodness.
- Seal edges well. Press the dough edges firmly before slicing to prevent leaks. If you notice oozing, try crimping the edges with a fork for extra hold.
- Use room temperature ingredients. Mozzarella and sauce at room temp blend better and melt evenly inside the dough, making the rolls more uniform.
- Temperature matters. Baking at too low a heat results in chewy rolls, while too high can burn the outside before melting the cheese. 425°F or 220°C is a sweet spot.
- Multitask while baking. These rolls cook fast, so prep your cleanup or dipping sauce during the bake time to save minutes.
- Try different cheeses. Mixing mozzarella with provolone or fontina can add complexity, but keep mozzarella as the base for melt quality.
One time, I accidentally left the oven a bit ajar during baking and the rolls took longer but got an unexpected extra crunch! Happy accidents like that sometimes happen—just don’t leave your kitchen unattended too long.
Variations & Adaptations
Feel free to customize this recipe to your taste or dietary needs. Here are some ideas I’ve tried or want to try:
- Vegetarian version: Skip the pepperoni and add sautéed mushrooms, spinach, or caramelized onions for rich flavor without meat.
- Spicy twist: Add red pepper flakes or swap the marinara for a spicy arrabbiata sauce for some heat.
- Gluten-free: Use a gluten-free pizza dough or a cauliflower crust rolled thinly. Texture won’t be quite the same, but still tasty.
- Air fryer adaptation: Place rolls in a single layer in the air fryer basket and cook at 375°F (190°C) for 8-10 minutes, shaking halfway through for even crispiness.
- Cheese blend: Swap half the mozzarella for ricotta stirred with fresh herbs for a creamy surprise inside.
Personally, I once made a batch with leftover BBQ chicken and red onions instead of pepperoni, and it was a surprising hit with friends. The key is balancing moisture and not overloading, no matter the filling.
Serving & Storage Suggestions
These crispy homemade pizza rolls are best enjoyed warm straight from the oven, when the cheese is melty and the crust is at peak crunchiness. Serve them with a small bowl of extra marinara sauce or ranch dressing for dipping—it’s a crowd favorite combo.
They make a fantastic finger food for casual gatherings, game nights, or even a fun lunchbox treat. Pairing them with a fresh green salad or roasted veggies adds a fresh contrast to the richness.
If you have leftovers, store them in an airtight container in the refrigerator for up to 3 days. To reheat, pop them in a preheated oven at 375°F (190°C) for 8-10 minutes or use a toaster oven to crisp them back up. Avoid microwaving if you want to keep that crunch; it tends to make them soggy.
Over time, the flavors in the rolls deepen, especially if you make them a day ahead, but the crust will lose crispness. Reheating properly brings back a lot of that fresh-baked magic.
Nutritional Information & Benefits
Each crispy homemade pizza roll (about 1 inch piece) roughly contains:
| Nutrient | Amount |
|---|---|
| Calories | 120 kcal |
| Protein | 6 g |
| Fat | 7 g |
| Carbohydrates | 10 g |
| Fiber | 1 g |
Using whole milk mozzarella provides a good source of calcium and protein, while the marinara sauce adds lycopene, an antioxidant. The recipe can be adapted for low-carb or gluten-free diets by swapping dough types. Be mindful the recipe contains dairy and gluten by default, with pepperoni adding pork-based ingredients—substitutions can accommodate allergies or preferences.
From a wellness standpoint, this recipe strikes a nice balance between indulgence and portion control, especially if served with a side of veggies or salad. It’s a snack that feels satisfying without going overboard.
Conclusion
Honestly, this crispy homemade pizza rolls recipe is one of those kitchen wins that feels simple but delivers seriously satisfying results. Whether you’re craving a quick snack, feeding a crowd, or just want to impress yourself with a fun, hands-on treat, these rolls have you covered. I love how flexible they are—you can make them your own with different fillings or tweak the seasoning to suit your mood. Plus, they come together in almost no time, which is a lifesaver on busy days.
Give this recipe a try, and don’t be shy about experimenting with your favorite pizza toppings. I’d love to hear how your version turns out or what creative spins you add. Drop a comment below or share your pizza roll stories. Happy baking, and may your kitchen always smell like fresh-baked pizza!
FAQs About Crispy Homemade Pizza Rolls
Can I freeze these pizza rolls for later?
Yes! Freeze the uncooked rolls on a baking sheet until firm, then transfer to a freezer bag. Bake from frozen, adding a few extra minutes to the baking time.
What’s the best way to keep pizza rolls crispy after baking?
Serve immediately or reheat in the oven or air fryer to restore crispness. Avoid microwaving as it makes them soggy.
Can I make these without pepperoni?
Absolutely! They’re delicious with just cheese and sauce or with veggies like mushrooms and spinach.
Is it possible to make these vegan?
Yes, use vegan cheese and dairy-free butter alternatives, and choose a vegan pizza dough. Adjust fillings accordingly.
How do I prevent the rolls from leaking sauce during baking?
Don’t overfill, seal edges well by pressing firmly, and consider crimping edges with a fork to keep filling inside.
By the way, if you enjoy pizza-inspired snacks, you might want to try my crispy garlic chicken recipe that pairs wonderfully with these rolls for a full meal experience.
Pin This Recipe!
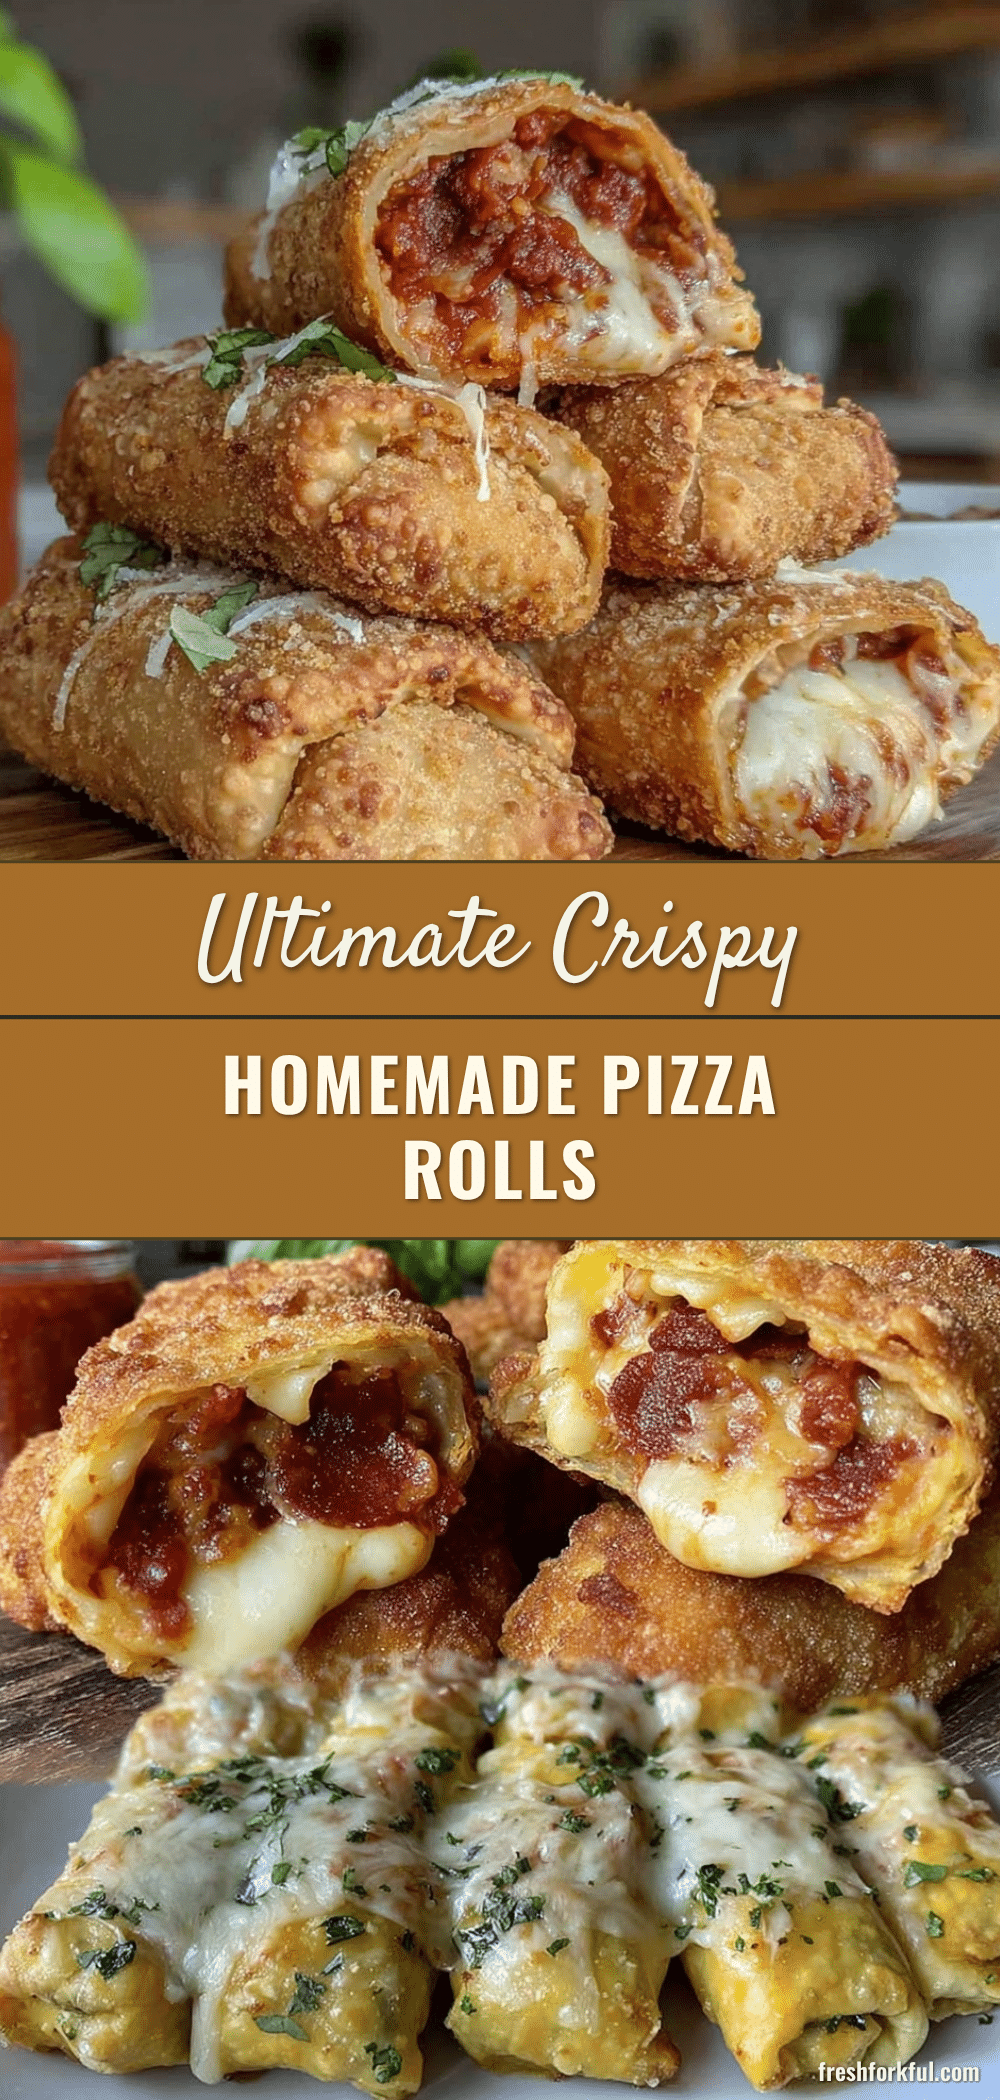
Crispy Homemade Pizza Rolls

These crispy homemade pizza rolls are a quick and easy snack that combines a crunchy crust with gooey cheese and flavorful sauce, perfect for last-minute cravings or casual gatherings.
- Prep Time: 10 minutes
- Cook Time: 15 minutes
- Total Time: 25 minutes
- Yield: 12 servings 1x
- Category: Snack
- Cuisine: Italian-American
Ingredients
- 1 package (about 8.8 oz / 250g) refrigerated pizza dough
- All-purpose flour, for dusting
- 1/2 cup marinara sauce
- 1 cup shredded mozzarella cheese (whole milk mozzarella preferred)
- 1/4 cup grated Parmesan cheese
- 1/4 cup mini pepperoni slices or diced pepperoni (optional)
- 1 tablespoon Italian seasoning (oregano, basil, thyme blend)
- 1/2 teaspoon garlic powder
- Fresh basil leaves, chopped (optional)
- 1 tablespoon olive oil or melted butter
- Coarse sea salt (optional)
Instructions
- Preheat your oven to 425°F (220°C). Line a baking sheet with parchment paper.
- In a medium bowl, mix marinara sauce, shredded mozzarella, Parmesan, pepperoni slices, Italian seasoning, garlic powder, and chopped basil if using. Stir gently to combine.
- Lightly dust your work surface with flour. Roll the pizza dough into a roughly 12×10-inch rectangle about 1/8-inch thick.
- Spread the filling evenly over the dough, leaving about a 1-inch border on all sides free of filling.
- Starting from one long edge, roll the dough tightly into a log, pressing gently to keep the filling snug inside.
- Use a sharp knife or pizza cutter to slice the log into 1-inch pieces.
- Place the rolls seam side down on the parchment-lined baking sheet, leaving about an inch between each.
- Brush the rolls with olive oil or melted butter and sprinkle with coarse sea salt if desired.
- Bake for 12-15 minutes until cheese is bubbly and edges are golden and crisp.
- Let the pizza rolls cool for 3-5 minutes before serving.
Notes
Do not overload the filling to prevent soggy dough. Seal edges well by pressing firmly or crimping with a fork. Use room temperature ingredients for better melting. For extra crispiness, broil for 1-2 minutes watching closely. Avoid microwaving leftovers to maintain crispness.
Nutrition
- Serving Size: 1 pizza roll (about
- Calories: 120
- Fat: 7
- Carbohydrates: 10
- Fiber: 1
- Protein: 6
Keywords: pizza rolls, homemade pizza rolls, crispy pizza rolls, easy snack, quick pizza snack, pizza appetizer