Love this? Save it for later!
Share the inspiration with your friends
My neighbor Maria wasn’t throwing a Halloween party or anything. I’d stopped by to return her slow cooker—the one she’d loaned me three weeks ago that I honestly kept forgetting to give back—and the smell of chocolate hit me before I even made it past her welcome mat. It was early October, still warm outside, but her kitchen felt like November already. She had a bowl of crushed Oreos on the counter, a package of gummy worms sitting next to it like they belonged there, and she was layering something into little plastic cups with this completely unbothered expression on her face.
“Oh, these?” she said when I asked. “Just something for the kids’ school party.” Just something. She said it like she was making toast. But I stood there watching her for a good ten minutes—I mean, I was supposed to be in a hurry, but come on. The way she layered that dark chocolate pudding over the crushed cookies, the way she tucked those gummy worms in so they looked like they were crawling up through the dirt… it was honestly kind of magical. And she was doing it while half-listening to a podcast and sipping cold coffee. That level of casual genius is something I will never achieve, but I can sure try to copy it.
So I asked her for the recipe, and she literally shrugged and said, “It’s just pudding and cookies, honey.” Just pudding and cookies. Let me tell you, that is the most humble brag I have ever heard in my life. Because these Halloween Oreo dirt cups with gummy worms are not “just” anything. They are the kind of dessert that makes kids light up and adults pretend they’re too old for it while sneaking a second one when nobody’s looking. Maybe you’ve been there—standing in a kitchen, watching someone make something extraordinary look effortless, and thinking, I need to learn how to do that.
Well, here we are. This is that recipe. And honestly? It’s as easy as Maria made it look.
Why You’ll Love This Recipe
Let me be real with you for a second. I have tested this recipe about seven times since that day at Maria’s house. Seven times. And you know what I learned? It’s basically impossible to mess up. That is not something I say lightly—I have burned toast. I have undercooked chicken. But these Halloween Oreo dirt cups with gummy worms? They are forgiving, they are fast, and they are the kind of dessert that makes you look like a kitchen hero without actually having to work for it.
- Quick & Easy: You can have these assembled in under 20 minutes. No baking, no complicated steps, no waiting around. Just layer, chill, and serve.
- Simple Ingredients: Oreos, instant pudding mix, milk, cream cheese, whipped topping, and gummy worms. That is it. You probably have half of these in your pantry right now.
- Perfect for Halloween Parties: Whether it is a classroom celebration, a family movie night, or a grown-up Halloween get-together, these little cups fit right in. They are festive without being fussy.
- Crowd-Pleaser: I have watched kids inhale these in under two minutes. I have also watched adults pretend they are “just having a bite” and then finish the whole cup. No judgment here.
- Unbelievably Delicious: The combination of creamy pudding, crunchy Oreo crumbs, and that slight chewiness from the gummy worms is pure comfort food magic. It is sweet, it is rich, and it hits every single texture note your brain craves.
What makes this recipe different from all the other dirt cup recipes out there? The cream cheese. A lot of versions skip it, but Maria’s secret—and now mine—is folding softened cream cheese into the pudding mixture. It adds this subtle tanginess that balances the sweetness and gives the pudding a thicker, almost mousse-like texture. It is the difference between a good dirt cup and a memorable one. Trust me on this.
This is comfort food reimagined for the Halloween season. It is nostalgic, it is silly in the best way, and it is the kind of dessert that makes you close your eyes after the first bite. You deserve that. Especially if October has been a little chaotic.
What Ingredients You Will Need
This recipe uses simple, everyday ingredients to deliver maximum Halloween fun without the stress. Most of these are pantry staples or easy to find at any grocery store, and I have included a few substitution notes so you can make it work with whatever you have on hand.
- 1 package (3.9 oz) instant chocolate pudding mix (I prefer Jell-O brand for consistent texture, but any brand works fine. Make sure it is instant, not cook-and-serve.)
- 2 cups cold milk (Whole milk gives the richest texture, but 2% works great too. For a dairy-free version, use unsweetened almond or oat milk.)
- 4 oz cream cheese, softened (This is the secret ingredient. Let it sit out for about 30 minutes before you start so it blends smoothly. Neufchâtel or low-fat cream cheese works if you want to cut calories.)
- 1/4 cup powdered sugar (Just a little sweetness to balance the tang of the cream cheese. You can skip this if you prefer a less sweet pudding layer.)
- 1 cup whipped topping, thawed (Cool Whip is the classic choice, but homemade whipped cream works beautifully too. If using homemade, stabilize it with a tablespoon of powdered sugar.)
- 1 package (14.3 oz) Oreo cookies (Regular Oreos are perfect. Double Stuf works too, but you might want to scrape out some of the filling so the crumbs aren’t too sweet. Golden Oreos make a fun “sand” variation for a non-chocolate version.)
- 1/2 cup gummy worms (Any brand works. I like the sour ones for an extra flavor kick, but classic gummy worms are great too. You can also use gummy spiders or bugs for variety.)
- Optional: Halloween sprinkles or candy eyes (For extra decoration. Totally optional, but kids love them.)
A quick note on the Oreos: You will need about 20 cookies for the crumb layer. I recommend crushing them in a zip-top bag with a rolling pin—it is faster than a food processor and gives you more control over the texture. You want some fine crumbs and some slightly chunkier bits for that “dirt” look. If you go too fine, it looks more like sand than soil.
For the gummy worms, buy a little extra because someone will inevitably eat them before you get to the assembly stage. I speak from experience. My son ate half the bag while I was crushing Oreos, and I had to make an emergency trip to the corner store.
Equipment Needed
You do not need anything fancy for these Halloween Oreo dirt cups with gummy worms. That is part of the beauty. Here is what you will need:
- Small cups or clear plastic cups (I use 7-ounce clear plastic cups from the party supply store—they show off the layers beautifully. Small mason jars work great too, and they are reusable.)
- Mixing bowls (One medium bowl for the pudding, one small bowl for the cream cheese mixture.)
- Whisk or electric mixer (A whisk works fine for the pudding, but an electric mixer makes the cream cheese mixture much smoother. Hand mixer is perfect.)
- Zip-top bag and rolling pin (For crushing the Oreos. You can also use a food processor, but the bag method is easier to clean up.)
- Spatula (For folding the whipped topping into the pudding. A rubber spatula works best.)
- Measuring cups and spoons (Standard set—nothing special needed.)
If you do not have clear cups, you can use small bowls or even ramekins. The presentation is not quite as dramatic, but the taste is exactly the same. I have also made these in a single 8×8 dish for a party, and it worked perfectly—just serve it with a spoon and let everyone dig in.
Preparation Method
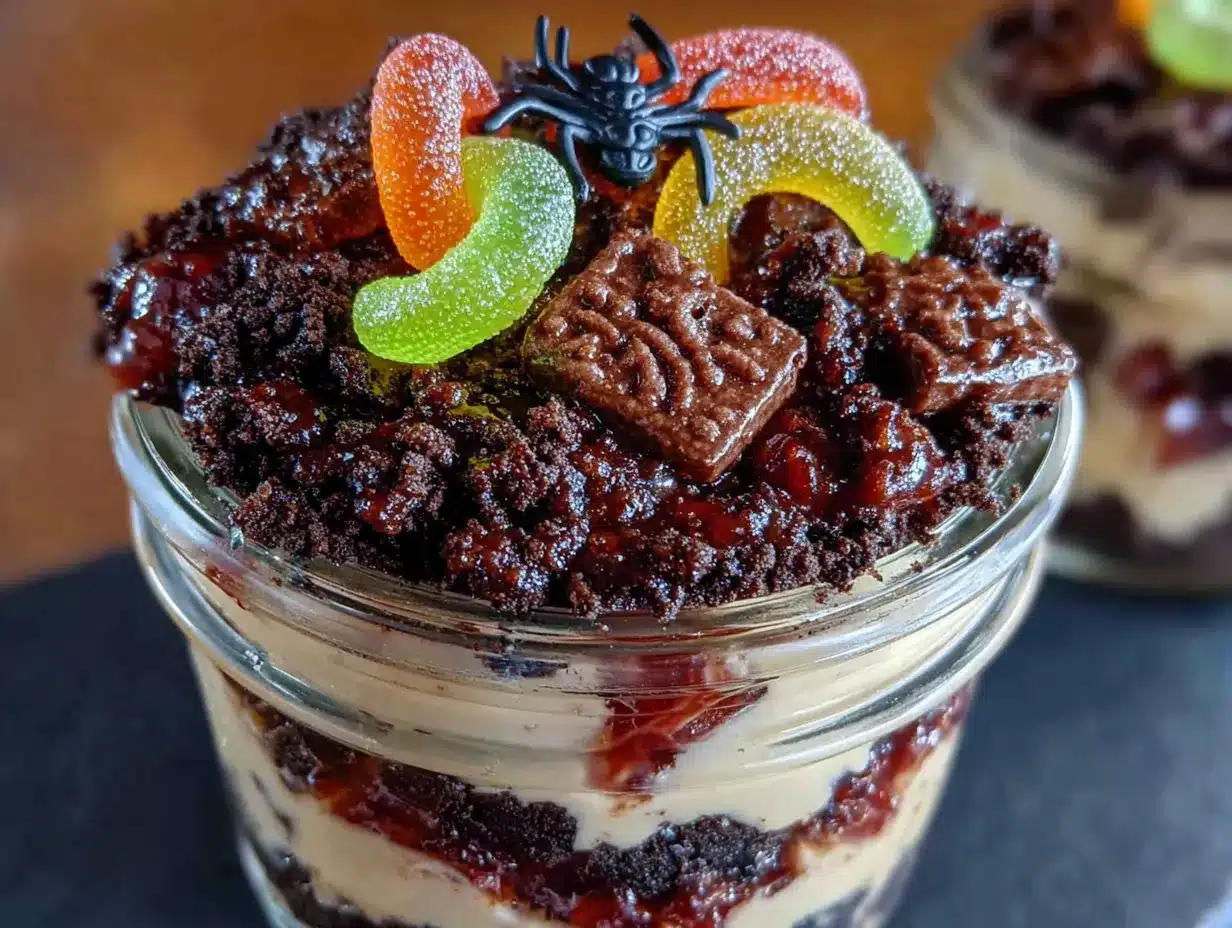
Alright, let us make some dirt cups. This is going to be fast, so read through the steps once before you start. Trust me, it helps.
- Crush the Oreos. Place 20 Oreo cookies in a large zip-top bag. Seal it, then use a rolling pin to crush them into fine crumbs with some small chunks. You want a mix of textures—think garden soil, not beach sand. Set the bag aside. (Pro tip: Let the kids do this part. It is satisfying and keeps them busy while you handle the pudding.)
- Make the pudding. In a medium mixing bowl, whisk together the instant chocolate pudding mix and 2 cups cold milk. Whisk for about 2 minutes until it starts to thicken. It will be loose at first, then suddenly it will get thick and glossy. Set it aside for about 5 minutes to let it set up fully.
- Prepare the cream cheese mixture. In a separate small bowl, beat the softened cream cheese with 1/4 cup powdered sugar until smooth. Use an electric mixer if you have one—it makes a big difference. You want it completely lump-free. If your cream cheese is still a little cold, microwave it for about 10 seconds to soften it more.
- Combine the mixtures. Gently fold the cream cheese mixture into the chocolate pudding using a rubber spatula. Stir until it is fully combined and no white streaks remain. The color should be an even, rich chocolate brown.
- Fold in the whipped topping. Add the thawed whipped topping to the pudding mixture. Fold it in gently—do not stir vigorously or you will deflate it. You want to keep that light, airy texture. Fold until just combined, with no white streaks visible.
- Layer the cups. Spoon about 2 tablespoons of the Oreo crumbs into the bottom of each cup. Press them down lightly with the back of the spoon to create an even base layer. Then spoon the pudding mixture on top, filling each cup about three-quarters full. Leave some room for the top crumb layer.
- Top with more crumbs. Sprinkle the remaining Oreo crumbs over the pudding layer. You want a generous, even coating that completely covers the pudding. This is the “dirt” layer, so do not be shy with it.
- Add the gummy worms. Gently poke 2-3 gummy worms into the top of each cup so they look like they are crawling out of the dirt. You can leave some partially buried and some fully visible for a more dramatic effect. Get creative with it—some wiggling out, some diving in.
- Chill for at least 30 minutes. Refrigerate the cups for at least 30 minutes before serving. This lets the flavors meld and the pudding set up firm. They are actually better after an hour or two, so do not rush this step.
A few things to watch for: If your pudding seems too thin, give it another minute or two to set. Instant pudding can be finicky about timing. If your cream cheese is lumpy, you did not soften it enough—next time, let it sit out for a full hour. And if you accidentally overfill the cups and the gummy worms fall over, just scoop a little off the top and try again. No big deal.
Cooking Tips & Techniques
I have learned a few things the hard way so you do not have to. Here are my best tips for perfect Halloween Oreo dirt cups with gummy worms every single time.
Chill your mixing bowl. This is weird, I know, but if you pop your mixing bowl in the fridge for 10 minutes before you start, the whipped topping folds in much more smoothly. I forgot to do this once and ended up with a slightly grainy texture. Not ruined, just not as silky.
Do not overmix the pudding. Once the pudding starts to thicken, stop whisking. Overmixing can break down the structure and make it watery. You want it just thick enough to hold its shape when you spoon it into the cups.
Crush the Oreos in batches. If you try to crush all 20 cookies at once, the bottom of the bag will explode. I learned this the messy way. Do it in two batches of 10, or use a food processor if you have one. The food processor gives you a more uniform crumb, which looks nice, but the bag method gives you those perfect chunky bits.
Let the cream cheese really soften. This is non-negotiable. Cold cream cheese will leave lumps in your pudding that you cannot whisk out. Set it on the counter for at least 30 minutes, or microwave it in 10-second bursts until it is soft to the touch. Your future self will thank you.
Make extra crumb mixture. Seriously. You will want a little extra to sprinkle on top right before serving. The crumbs on top tend to get a little soggy after a few hours in the fridge, so a fresh sprinkle makes them look and taste amazing.
Timing is everything. These are best made the day you plan to serve them, but they hold up well for about 24 hours in the fridge. After that, the Oreo crumbs start to soften too much and lose that satisfying crunch. If you need to prep ahead, make the pudding mixture and crush the Oreos separately, then assemble the cups right before serving.
Variations & Adaptations
One of the best things about this recipe is how easy it is to customize. Here are some variations I have tried and loved.
Peanut Butter Dirt Cups: Add 1/4 cup creamy peanut butter to the cream cheese mixture before folding it into the pudding. It adds a salty, nutty depth that pairs beautifully with the chocolate. Just make sure your peanut butter is well-stirred and at room temperature so it blends smoothly.
Mint Chocolate Version: Use mint Oreos instead of regular ones, and add 1/4 teaspoon peppermint extract to the pudding mixture. It tastes like a Thin Mint in cup form. Perfect for a Christmas-themed party, honestly.
Gluten-Free Option: Use gluten-free chocolate sandwich cookies (like Glutino or Kinnikinnick brand) in place of regular Oreos. The rest of the ingredients are naturally gluten-free, so this is an easy swap. Just double-check that your pudding mix is certified gluten-free—most are, but it is worth confirming.
Vegan Version: Use dairy-free cream cheese (like Kite Hill or Tofutti), unsweetened almond milk, and a vegan whipped topping (like CocoWhip). Oreos are actually vegan, so you are good there. The texture will be slightly different—a little less rich—but still delicious.
Halloween Candy Swap: Instead of gummy worms, try chopped candy corn, candy pumpkins, or even crushed Reese’s cups. I made a batch with chopped Heath bars once, and it was incredible. The toffee adds a nice crunch.
My personal favorite variation? I add a layer of crushed pretzels between the Oreo crumbs and the pudding. The salty crunch is addictive. My kids think I am a genius, and honestly, I am not going to correct them.
Serving & Storage Suggestions
These Halloween Oreo dirt cups with gummy worms are best served cold, straight from the fridge. The contrast between the cool, creamy pudding and the crunchy Oreo crumbs is part of the magic.
Serving: Set the cups out on a tray for a Halloween party, or hand them out individually for a classroom treat. If you are serving adults, you can dress them up with a dollop of fresh whipped cream and a sprinkle of cocoa powder on top. For kids, add a few extra gummy worms on the side—they will lose their minds.
Pairing Suggestions: These pair beautifully with a hot cup of coffee or a glass of cold milk. For a Halloween movie night, serve them alongside a bowl of popcorn and some apple cider. The sweetness of the dirt cups balances the tartness of the cider perfectly.
Storage: Cover each cup with plastic wrap or a lid and refrigerate for up to 2 days. After that, the Oreo crumbs start to get soggy and the gummy worms lose their chewiness. If you need to store them longer, keep the crumb mixture and gummy worms separate and assemble right before serving.
Reheating: Do not reheat these. They are meant to be served cold. If they have been in the fridge for a while and seem a little dry, let them sit at room temperature for about 10 minutes before serving. That usually brings back the creamy texture.
A note on flavor development: These actually taste better after a few hours in the fridge. The pudding sets up fully, the flavors meld together, and the whole thing becomes more cohesive. So do not stress about making them the day of—they are actually better if you make them the night before.
Nutritional Information & Benefits
Let me be honest: these are a treat, not a health food. But that does not mean they cannot fit into a balanced lifestyle. Here is the estimated nutritional breakdown for one serving (based on 6 servings per recipe):
| Nutrient | Amount per Serving |
|---|---|
| Calories | 380 |
| Total Fat | 18g |
| Saturated Fat | 10g |
| Cholesterol | 25mg |
| Sodium | 420mg |
| Total Carbohydrates | 52g |
| Dietary Fiber | 2g |
| Sugars | 36g |
| Protein | 5g |
Health Benefits: The cream cheese adds a small amount of protein and calcium. The cocoa in the pudding contains antioxidants called flavonoids, which are good for heart health. And the Oreos? Well, they bring joy, and that counts for something.
Dietary Considerations: This recipe contains dairy and gluten. For a dairy-free version, use the substitutions listed in the variations section. For a gluten-free version, use certified gluten-free sandwich cookies. This recipe is not suitable for a low-carb or keto diet due to the sugar content.
My personal take? Life is about balance. If you eat vegetables all week, you have earned a dirt cup on Friday night. That is my official stance.
Conclusion
So there you have it—the recipe that stopped me in my tracks at Maria’s front door. These Halloween Oreo dirt cups with gummy worms are everything you want in a holiday dessert: fun, easy, and absolutely delicious. They take almost no effort, use ingredients you probably already have, and they make people smile. What more could you ask for?
I love this recipe because it reminds me that you do not need to be a professional baker to create something memorable. You just need a little creativity, a few simple ingredients, and the willingness to have fun with your food. That is what Halloween is all about, right?
Now I want to hear from you. Are you making these for a party? A family movie night? Just because you need a little chocolate in your life? Drop a comment below and let me know how they turn out. And if you come up with a fun variation—like adding caramel or swapping in different candies—share that too. I am always looking for new ideas.
Go make some dirt cups. You have got this.
Frequently Asked Questions
Can I make these dirt cups ahead of time?
Yes, you can assemble them up to 24 hours in advance. Just keep them covered in the refrigerator. The Oreo crumbs will soften slightly over time, but they will still taste great. For the crunchiest texture, add the top crumb layer and gummy worms right before serving.
Can I use homemade pudding instead of instant?
You can, but the texture will be different. Homemade pudding is thinner and less stable, so it may not hold its layers as well. If you want to use homemade, cook it until it is very thick and let it cool completely before layering. You may also need to add a little cornstarch to help it set.
How many servings does this recipe make?
This recipe makes 6 servings if you use 7-ounce cups. If you use smaller cups (like 4-ounce dessert cups), you will get about 8-10 servings. Adjust the layering amounts accordingly—you want each cup to be about three-quarters full of pudding.
Can I freeze these dirt cups?
I do not recommend freezing them. The pudding will become watery when thawed, and the Oreo crumbs will turn into a soggy mess. These are best enjoyed fresh or within 2 days of refrigeration. If you have leftovers, just keep them in the fridge.
What if I cannot find gummy worms?
No problem! You can use any Halloween-themed candy. Gummy spiders, candy corn, candy pumpkins, or even chopped chocolate bars work great. For a non-Halloween version, try using fresh berries or crushed cookies. The gummy worms are mostly for the visual effect, so feel free to get creative.
Pin This Recipe!
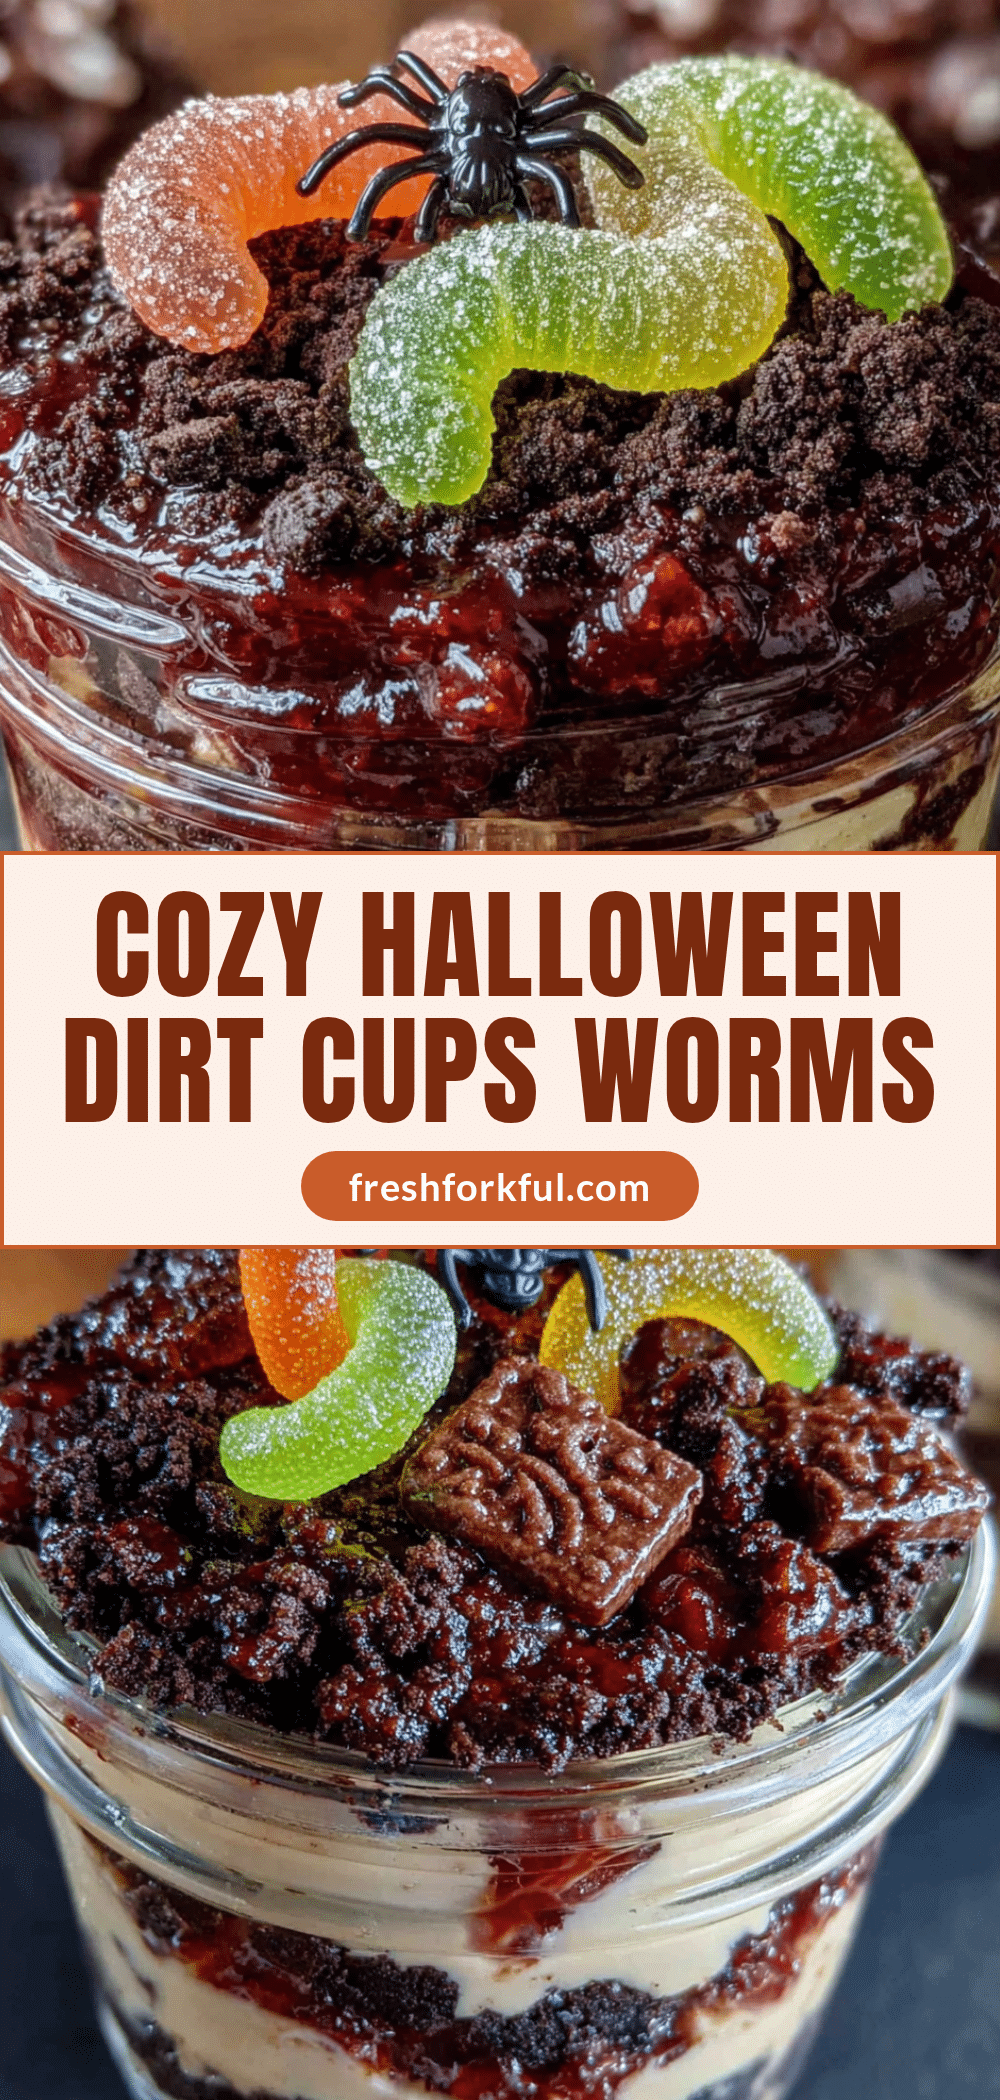
Easy Halloween Oreo Dirt Cups with Gummy Worms
These no-bake Halloween Oreo dirt cups with gummy worms are quick, easy, and perfect for parties. Creamy chocolate pudding layered with crushed Oreos and topped with gummy worms creates a fun, spooky treat that kids and adults love.
- Prep Time: 20 minutes
- Cook Time: 0 minutes
- Total Time: 50 minutes (includes 30 minutes chilling)
- Yield: 6 servings 1x
- Category: Dessert
- Cuisine: American
Ingredients
- 1 package (3.9 oz) instant chocolate pudding mix
- 2 cups cold milk
- 4 oz cream cheese, softened
- 1/4 cup powdered sugar
- 1 cup whipped topping, thawed
- 1 package (14.3 oz) Oreo cookies (about 20 cookies)
- 1/2 cup gummy worms
- Optional: Halloween sprinkles or candy eyes
Instructions
- Crush the Oreos: Place 20 Oreo cookies in a large zip-top bag. Seal it, then use a rolling pin to crush them into fine crumbs with some small chunks. Set aside.
- Make the pudding: In a medium mixing bowl, whisk together the instant chocolate pudding mix and 2 cups cold milk for about 2 minutes until it starts to thicken. Set aside for 5 minutes to let it set up fully.
- Prepare the cream cheese mixture: In a separate small bowl, beat the softened cream cheese with 1/4 cup powdered sugar until smooth.
- Combine the mixtures: Gently fold the cream cheese mixture into the chocolate pudding using a rubber spatula until fully combined and no white streaks remain.
- Fold in the whipped topping: Add the thawed whipped topping to the pudding mixture and fold gently until just combined.
- Layer the cups: Spoon about 2 tablespoons of the Oreo crumbs into the bottom of each cup. Press down lightly. Then spoon the pudding mixture on top, filling each cup about three-quarters full.
- Top with more crumbs: Sprinkle the remaining Oreo crumbs over the pudding layer to completely cover it.
- Add the gummy worms: Gently poke 2-3 gummy worms into the top of each cup so they look like they are crawling out of the dirt.
- Chill for at least 30 minutes: Refrigerate the cups for at least 30 minutes before serving.
Notes
For best results, let cream cheese soften at room temperature for 30 minutes. Crush Oreos in batches to avoid bag explosion. These are best made the day of serving but hold up well for 24 hours in the fridge. For a crunchier top, add fresh crumbs right before serving.
Nutrition
- Serving Size: 1 cup
- Calories: 380
- Sugar: 36
- Sodium: 420
- Fat: 18
- Saturated Fat: 10
- Carbohydrates: 52
- Fiber: 2
- Protein: 5
Keywords: Halloween, Oreo dirt cups, gummy worms, no-bake dessert, chocolate pudding, easy Halloween treat


