Love this? Save it for later!
Share the inspiration with your friends
There used to be a tiny bakery tucked between a laundromat and a used bookstore on the corner of Elm and 3rd that made the most incredible sugar cookies. Every October, they’d fill their window with these perfectly iced Halloween shapes—ghosts with lopsided grins, pumpkins so orange they practically glowed, and bats with wings that looked like they were mid-flight. When they closed their doors two years ago, I was genuinely heartbroken. I mean, I actually stood there staring at the “For Lease” sign like I’d lost a friend. After twelve tries—twelve!—I finally got it. This quick Halloween sugar cookies with royal icing recipe is the one that tastes exactly like those bakery cookies. The texture is the same, the icing sets up just right, and honestly, I think mine might even be a little cuter. Maybe you’ve been there—that feeling when a specific bakery treat becomes part of your fall tradition, and then poof, it’s gone. This is for you.
Let me tell you, I had some disasters along the way. I once made a batch that spread so much in the oven, my ghost cookies looked more like puddles. Another time, my royal icing was so runny, it dripped right off the cookies and pooled on the counter. It was a mess. But I kept at it, tweaking the butter temperature, the flour ratio, the icing consistency. The final version? It’s quick, it’s reliable, and it gives you that perfect, crisp-yet-tender cookie that holds its shape and a glossy, smooth icing that hardens beautifully. This recipe has become my go-to for Halloween parties, school bake sales, and even just a fun weekend activity with the kids. It’s the kind of recipe that makes you look like a pro without spending all day in the kitchen.
Why You’ll Love This Recipe
I’ve tested this recipe more times than I care to count, and I can tell you with confidence: this is the one. It’s not just another sugar cookie recipe that promises the world and delivers a flat, boring disc. This one works. Here’s why you’re going to love it:
- Quick & Easy: From start to finish, you can have these cookies on the table in under an hour. The dough doesn’t need to chill for hours—just 30 minutes in the fridge, and you’re good to go. Perfect for those last-minute Halloween cravings or when you realize the school party is tomorrow.
- Simple Ingredients: You probably have everything you need in your pantry right now. Butter, sugar, eggs, flour—nothing fancy. No weird extracts or hard-to-find specialty flours. It’s all basic, honest ingredients.
- Perfect for Halloween: Whether you’re making them for a spooky party, a classroom treat, or just to get into the Halloween spirit, these cookies are a hit. They hold their shape beautifully, so you can use any cookie cutter you have.
- Crowd-Pleaser: I’ve brought these to parties and watched them disappear. Kids love the icing and sprinkles, and adults love the classic, buttery flavor. It’s a win-win.
- Unbelievably Delicious: The texture is what sets these apart. They’re crisp on the edges, soft in the center, and the royal icing adds that perfect snap when you bite into it. It’s next-level comfort food in cookie form.
What makes this recipe different from the rest? It’s the technique. I use a slightly higher ratio of butter to flour than most recipes, which gives the cookies that rich, melt-in-your-mouth texture. And the royal icing? I’ve found the perfect balance of meringue powder and sugar that creates a glossy, non-sticky finish that dries hard enough to stack. This isn’t just another version of Halloween cookies—it’s my best version, and I’m excited to share it with you.
What Ingredients You Will Need
This recipe uses simple, wholesome ingredients to create cookies that are both delicious and beautiful. The key is using the right kind of each ingredient to get that perfect texture and flavor. Here’s what you’ll need:
For the Cookies
- Unsalted butter, softened: 1 cup (2 sticks, or 226 grams). I always use unsalted so I can control the salt level. Let it sit out for about 30 minutes until it’s soft but not melted.
- Granulated sugar: 1 cup (200 grams). Regular white sugar works best here. It gives the cookies that nice, crisp edge.
- Large egg: 1, at room temperature. This helps the dough come together smoothly. If you forgot to take it out of the fridge, just place it in a bowl of warm water for 5 minutes.
- Vanilla extract: 1 teaspoon. I prefer pure vanilla extract over imitation—it makes a real difference in flavor. But if all you have is imitation, it’ll still work.
- All-purpose flour: 2 ½ cups (312 grams). Spoon and level your flour—don’t scoop directly from the bag, or you’ll end up with too much and dry cookies.
- Baking powder: ½ teaspoon. This gives the cookies a little lift without making them puffy.
- Salt: ½ teaspoon. Balances the sweetness and enhances the butter flavor.
For the Royal Icing

- Meringue powder: 3 tablespoons. This is the secret to royal icing that dries hard and glossy. You can find it at most craft stores or online. I recommend the Wilton brand—it’s reliable.
- Powdered sugar: 4 cups (480 grams). Sift it first to avoid lumps in your icing.
- Warm water: 5-6 tablespoons. The amount you need will vary depending on humidity. Start with 5 and add more if needed.
- Vanilla extract: ½ teaspoon. For a hint of flavor. You can also use almond extract for a different twist.
- Gel food coloring: In Halloween colors like orange, purple, green, and black. Gel is better than liquid because it doesn’t thin out the icing.
- Optional: Sprinkles, sanding sugar, or edible glitter for decorating.
Equipment Needed
You don’t need a ton of fancy equipment to make these cookies, but having the right tools makes the job a whole lot easier. Here’s what I use:
- Stand mixer or hand mixer: A stand mixer with the paddle attachment is my preference because it creams the butter and sugar perfectly. But a hand mixer works just as well—just be prepared to hold it for a few minutes.
- Rolling pin: I have a standard wooden rolling pin, but you can use any kind. If you don’t have one, a wine bottle works in a pinch—just make sure it’s clean!
- Cookie cutters: Halloween shapes like ghosts, pumpkins, bats, and cats. I bought a set online for about $10, and it comes with all the classics.
- Baking sheets: Two large, rimmed baking sheets. I line mine with parchment paper for easy cleanup and to prevent sticking.
- Piping bags and tips: For the royal icing. I use disposable piping bags and a small round tip (#2 or #3). If you don’t have piping bags, a zip-top bag with a tiny corner snipped off works just fine.
- Cooling rack: Essential for letting the cookies cool completely before icing.
One tip: if you’re on a budget, skip the fancy piping tips and just use a zip-top bag. It’s not as precise, but it gets the job done. I’ve done it many times, and the cookies still look great.
Preparation Method
Alright, let’s get to the fun part. I’ve broken this down into clear, numbered steps so you can follow along without any confusion. Take your time, and don’t rush—especially with the icing.
Step 1: Make the Cookie Dough
In a large mixing bowl, cream together the softened butter and granulated sugar until it’s light and fluffy. This should take about 2-3 minutes with a mixer on medium speed. You want the mixture to look pale and airy. Add the egg and vanilla extract, and beat until everything is well combined. The mixture might look a little curdled at this point—don’t worry, that’s normal.
In a separate bowl, whisk together the flour, baking powder, and salt. Gradually add the dry ingredients to the wet mixture, mixing on low speed until a soft dough forms. Be careful not to overmix—once you don’t see any more streaks of flour, stop. If the dough feels too sticky, add a tablespoon more of flour. If it feels too dry, add a teaspoon of milk.
Step 2: Chill the Dough
Divide the dough in half and shape each half into a disk about 1 inch thick. Wrap them in plastic wrap and refrigerate for at least 30 minutes. This step is crucial—it firms up the butter and prevents the cookies from spreading in the oven. I once skipped this step because I was in a hurry, and my cookies turned into sad, shapeless blobs. Don’t be like me. Chill the dough.
Step 3: Roll and Cut
Preheat your oven to 350°F (175°C). Line your baking sheets with parchment paper. On a lightly floured surface, roll out one disk of dough to about ¼-inch thickness. I like to use a rolling pin with guide rings to keep the thickness even. If you don’t have those, just eyeball it and try to roll as evenly as possible.
Cut out your Halloween shapes using the cookie cutters. Place them about 1 inch apart on the prepared baking sheets. Gather the scraps, re-roll, and cut more cookies until you’ve used all the dough.
Step 4: Bake
Bake the cookies for 8-10 minutes, or until the edges are just barely golden. The centers should still look pale and slightly soft. I start checking at the 8-minute mark because ovens vary. Let the cookies cool on the baking sheet for 5 minutes, then transfer them to a cooling rack to cool completely. Do not try to ice them while they’re still warm—the icing will just melt and slide off.
Step 5: Make the Royal Icing
While the cookies are cooling, make the icing. In a large bowl, combine the meringue powder and 5 tablespoons of warm water. Whisk until the powder is dissolved and the mixture is frothy. Add the sifted powdered sugar and vanilla extract, and beat on low speed until the sugar is incorporated. Then, turn the mixer to medium-high and beat for 3-4 minutes, until the icing is thick, glossy, and forms stiff peaks. If the icing is too thick, add more water, one teaspoon at a time. If it’s too thin, add more powdered sugar, one tablespoon at a time.
Step 6: Color and Ice
Divide the icing into separate bowls for each color you want to use. Add gel food coloring a little at a time until you reach your desired shade. Transfer each color to a piping bag fitted with a small round tip. Outline each cookie first, then fill in the center with a slightly thinner icing. You can thin the filling icing by adding a few drops of water until it’s the consistency of honey. Use a toothpick to spread the icing into the corners and pop any air bubbles.
Add sprinkles or decorations while the icing is still wet. Let the cookies sit at room temperature for at least 2 hours, or until the icing is completely hard and dry.
Cooking Tips & Techniques
Over the years, I’ve learned a few things the hard way. Here are my best tips to save you from the same mistakes:
- Don’t overwork the dough. I know it’s tempting to keep mixing until it’s perfectly smooth, but overmixing develops the gluten and makes the cookies tough. Mix just until the flour disappears.
- Use a light hand with the flour. When rolling out the dough, use just enough flour to prevent sticking. Too much flour will dry out the cookies. I keep a small bowl of flour nearby and dip my rolling pin in it as needed.
- Chill the cut-out shapes. If your kitchen is warm, the cut-out cookies might start to soften. Pop the baking sheet in the fridge for 10 minutes before baking. This helps them hold their shape even better.
- Test the icing consistency. Before you start piping, do a quick test. Spoon a small amount of icing onto a plate. If it holds its shape and doesn’t spread, it’s perfect for outlining. If it slowly flattens into a smooth puddle, it’s perfect for filling.
- Work in batches. When coloring the icing, only color as much as you need for one batch of cookies. The icing can start to dry out if it sits too long. I cover my piping bags with a damp paper towel to keep them from crusting over.
I once made the mistake of trying to ice cookies in a humid kitchen. The icing never dried properly, and I ended up with sticky, smudged messes. So, if it’s a rainy day, maybe wait until the weather clears. Trust me on this one.
Variations & Adaptations
One of the best things about this recipe is how easy it is to adapt. Here are a few ways you can switch it up:
- Gluten-Free: Substitute the all-purpose flour with a 1:1 gluten-free baking flour blend. I’ve used the King Arthur brand with great success. The cookies might be a little more delicate, so handle them gently.
- Vegan: Use vegan butter (like Earth Balance) and a flax egg (1 tablespoon ground flaxseed mixed with 3 tablespoons water, let sit for 5 minutes). For the royal icing, use aquafaba (the liquid from a can of chickpeas) instead of meringue powder. It works surprisingly well!
- Flavor Variations: Add a teaspoon of lemon or orange zest to the dough for a citrusy twist. Or, swap the vanilla extract for almond extract in both the cookies and the icing. It gives a lovely, nutty flavor that pairs beautifully with the sweetness.
- Different Holidays: These cookies aren’t just for Halloween! Use heart-shaped cutters for Valentine’s Day, Christmas trees for December, or flowers for spring. The dough is versatile enough for any occasion.
- No Icing: If you’re short on time, you can skip the royal icing altogether. Just sprinkle the cookies with colored sanding sugar before baking. They’ll still look festive and taste delicious.
I’ve tried the lemon zest variation, and let me tell you—it’s amazing. The bright citrus flavor cuts through the sweetness of the icing perfectly. It’s become my go-to for springtime cookies.
Serving & Storage Suggestions
These cookies are best served at room temperature. The royal icing should be completely dry and hard to the touch, which gives them a nice snap when you bite into them. I like to arrange them on a platter with some Halloween-themed napkins or a spooky tablecloth. They’re perfect for parties, but honestly, they’re just as good for a quiet afternoon treat with a cup of coffee.
For storage, place the cookies in an airtight container at room temperature. They’ll stay fresh for up to two weeks—if they last that long! The royal icing keeps them from getting stale. If you need to stack them, place a piece of parchment paper between each layer to prevent the icing from scratching.
You can also freeze the un-iced cookies for up to three months. Just bake and cool them completely, then place them in a freezer-safe bag with the air squeezed out. When you’re ready to decorate, thaw them at room temperature and ice as usual. The flavor doesn’t suffer at all. I often make a double batch and freeze half for last-minute Halloween emergencies.
One thing I’ve noticed: the flavors actually develop a little over time. The cookies taste even better the day after they’re made, once the butter and vanilla have had a chance to meld together. So don’t be afraid to make them a day ahead.
Nutritional Information & Benefits
Let’s be real—these are sugar cookies with royal icing. They’re a treat, not a health food. But I believe in enjoying life’s little pleasures in moderation. Here’s a rough estimate of the nutritional values per cookie (based on a batch of 24 cookies):
- Calories: Approximately 180 per cookie
- Fat: 8 grams
- Carbohydrates: 26 grams
- Protein: 2 grams
- Sugar: 18 grams
The butter in these cookies provides a small amount of vitamin A, and the egg adds a bit of protein. But honestly, the real benefit here is the joy they bring. Baking these cookies with your family is a wonderful way to spend time together, and decorating them lets everyone get creative. Plus, there’s something incredibly satisfying about making something beautiful with your own hands. So go ahead, indulge a little. You deserve it.
For those with dietary restrictions, the gluten-free and vegan variations I mentioned earlier are great alternatives. Just keep in mind that the nutritional values will change slightly.
Conclusion
These quick Halloween sugar cookies with royal icing are more than just a recipe—they’re a way to bring a little magic into your kitchen. They’re easy enough for a weeknight project but impressive enough to wow a crowd. I promise you, after the first batch, you’ll never buy store-bought Halloween cookies again. The buttery, tender cookie paired with the glossy, sweet icing is a combination that’s hard to beat.
I’d love to see how yours turn out! Leave a comment below and let me know what shapes you chose, what colors you used, or if you came up with a fun variation of your own. Don’t forget to share this post with your friends—after all, everyone deserves a little Halloween sweetness. Happy baking, and may your cookies always hold their shape!
Frequently Asked Questions
Can I make the dough ahead of time?
Absolutely! You can prepare the dough up to 3 days in advance. Just wrap it tightly in plastic wrap and keep it in the fridge. Let it sit at room temperature for about 10 minutes before rolling it out so it’s easier to work with.
Why did my cookies spread in the oven?
This usually happens if the dough wasn’t chilled long enough or if the butter was too soft. Make sure you chill the dough for at least 30 minutes, and if your kitchen is warm, pop the cut-out cookies in the fridge for 10 minutes before baking.
How long does the royal icing take to dry?
It depends on the humidity. In a dry environment, it can take 2-4 hours. In a humid environment, it might take 6-8 hours or longer. To speed things up, you can place the cookies in a cool, dry room with a fan running.
Can I use liquid food coloring instead of gel?
You can, but I don’t recommend it. Liquid food coloring will thin out your icing, making it harder to control. Gel food coloring gives you vibrant colors without affecting the consistency. It’s worth the extra couple of dollars.
What’s the best way to store decorated cookies?
Store them in an airtight container at room temperature, with parchment paper between layers. Do not refrigerate them, as the humidity in the fridge can make the icing sticky. They’ll stay fresh for up to two weeks.
Pin This Recipe!
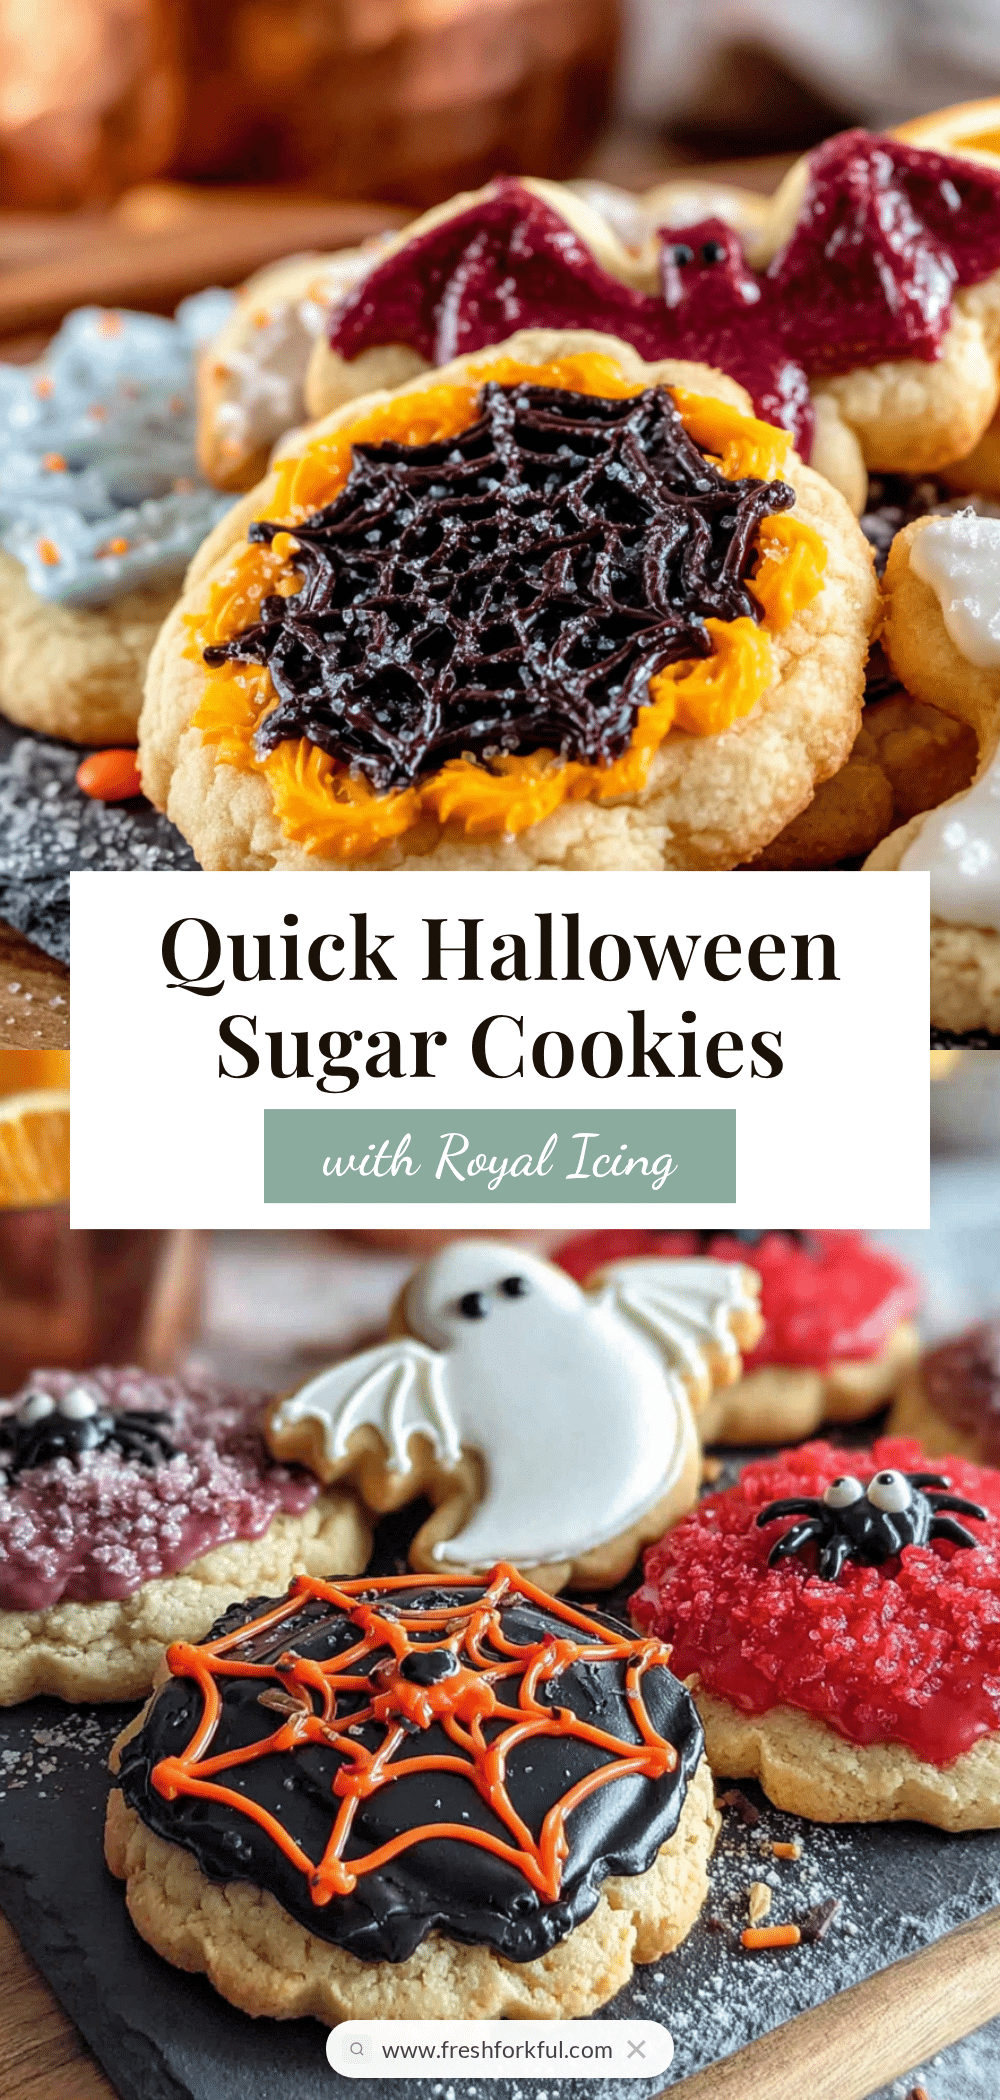
Quick Halloween Sugar Cookies: Easy Royal Icing Recipe

These quick Halloween sugar cookies with royal icing are buttery, tender, and hold their shape perfectly. The glossy icing dries hard and glossy, making them perfect for parties, bake sales, or a fun family activity.
- Prep Time: 15 minutes
- Cook Time: 10 minutes
- Total Time: 55 minutes (includes 30 minutes chilling)
- Yield: 24 servings 1x
- Category: Dessert
- Cuisine: American
Ingredients
- 1 cup (2 sticks, 226 grams) unsalted butter, softened
- 1 cup (200 grams) granulated sugar
- 1 large egg, at room temperature
- 1 teaspoon vanilla extract
- 2 ½ cups (312 grams) all-purpose flour
- ½ teaspoon baking powder
- ½ teaspoon salt
- 3 tablespoons meringue powder
- 4 cups (480 grams) powdered sugar, sifted
- 5–6 tablespoons warm water
- ½ teaspoon vanilla extract
- Gel food coloring (orange, purple, green, black)
- Optional: Sprinkles, sanding sugar, or edible glitter
Instructions
- Make the cookie dough: In a large mixing bowl, cream together the softened butter and granulated sugar until light and fluffy, about 2-3 minutes on medium speed. Add the egg and vanilla extract, and beat until well combined. In a separate bowl, whisk together the flour, baking powder, and salt. Gradually add the dry ingredients to the wet mixture, mixing on low speed until a soft dough forms. Do not overmix.
- Chill the dough: Divide the dough in half and shape each half into a 1-inch thick disk. Wrap in plastic wrap and refrigerate for at least 30 minutes.
- Roll and cut: Preheat oven to 350°F (175°C). Line baking sheets with parchment paper. On a lightly floured surface, roll out one disk of dough to about ¼-inch thickness. Cut out Halloween shapes using cookie cutters. Place cookies 1 inch apart on prepared baking sheets. Gather scraps, re-roll, and cut more cookies.
- Bake: Bake for 8-10 minutes, until edges are just barely golden. Centers should still look pale and slightly soft. Cool on baking sheet for 5 minutes, then transfer to a cooling rack to cool completely.
- Make the royal icing: In a large bowl, combine meringue powder and 5 tablespoons warm water. Whisk until dissolved and frothy. Add sifted powdered sugar and ½ teaspoon vanilla extract. Beat on low speed until incorporated, then on medium-high for 3-4 minutes until thick, glossy, and forms stiff peaks. Adjust consistency with more water or powdered sugar as needed.
- Color and ice: Divide icing into bowls and add gel food coloring. Transfer each color to a piping bag fitted with a small round tip. Outline each cookie, then fill in with slightly thinner icing (add a few drops of water to thin). Use a toothpick to spread icing and pop bubbles. Add sprinkles while wet. Let sit at room temperature for at least 2 hours until icing is hard and dry.
Notes
Chill the dough for at least 30 minutes to prevent spreading. For best results, use gel food coloring instead of liquid to avoid thinning the icing. If the kitchen is humid, the icing may take longer to dry. Store cookies in an airtight container at room temperature for up to two weeks.
Nutrition
- Serving Size: 1 cookie
- Calories: 180
- Sugar: 18
- Sodium: 75
- Fat: 8
- Saturated Fat: 5
- Carbohydrates: 26
- Protein: 2
Keywords: Halloween sugar cookies, royal icing, quick sugar cookies, easy Halloween cookies, decorated sugar cookies


