Love this? Save it for later!
Share the inspiration with your friends
My neighbor, Mrs. Kowalski, wasn’t trying to impress anyone. I’d stopped by to borrow a cup of sugar—a cliché, I know, but my baking cabinet was bare—and this sweet, buttery smell hit me before I even knocked. It was a Tuesday night in October, nothing special. She opened the door with flour on her cheek and a piping bag in her hand, completely unfazed by the fact that she was creating something that looked like it belonged on a magazine cover. “Oh, just some ghost cupcakes for the kids’ school party,” she said, waving her hand like it was nothing. But let me tell you, those little vanilla ghosts were everything. They were perfectly puffed, lightly golden, and topped with a swirl of white frosting that looked like a friendly little spirit floating right off the wrapper. I stood there, sugar forgotten, watching her pipe those ghosts with the kind of casual confidence you only get from years of practice—or in her case, from just not caring if it was perfect.
Honestly, I think that’s the secret to the best baking. The moment you stop trying to be a perfectionist, the magic happens. Mrs. Kowalski didn’t have a fancy kitchen or a stand mixer that cost more than my rent. She had a whisk, a muffin tin, and a bag of powdered sugar. And she was making the cutest Halloween treats I had ever seen in under thirty minutes. I mean, how is that even possible? I left her house that night with a cupcake in one hand and a new mission in my head: I had to learn how to make these ghost-shaped vanilla cupcakes myself.
So I went home, threw out my complicated plans for a three-layer pumpkin cake, and got to work. I wanted a recipe that was fast, foolproof, and still looked like you spent hours on it. Maybe you’ve been there—wanting to bring something fun to a party or make your kids’ Halloween special, but you just don’t have the energy for a full-blown baking project. These ghost cupcakes are your answer. They use basic pantry ingredients, come together in a flash, and the decorating is so simple that even my five-year-old nephew can do it (and he usually just eats the sprinkles straight from the jar). This recipe stayed with me because it proved that you don’t need to be a professional baker to create something that stops people in their tracks. You just need a little vanilla, a little patience, and the willingness to have fun with your food.
Why You’ll Love This Recipe
Let me tell you why these ghost-shaped vanilla cupcakes have become my go-to for every Halloween event, last-minute school party, or just a random Tuesday when I need a little spooky fun in my life.
- Quick & Easy: From start to finish, these cupcakes are ready in under 30 minutes. That’s not a typo. You can have them mixed, baked, cooled, and decorated faster than you can watch one episode of your favorite show. Perfect for those “I forgot about the school bake sale” moments.
- Simple Ingredients: You probably have everything you need in your kitchen right now. Butter, sugar, eggs, flour, vanilla, and baking powder. No weird specialty ingredients or a trip to three different stores. I tested this with basic all-purpose flour and it worked like a charm.
- Perfect for Halloween Fun: These are great for classroom parties, trunk-or-treat events, or just making your family smile. They’re spooky but not scary—even the littlest ghosts will love them.
- Crowd-Pleaser: I brought these to a neighborhood potluck and they disappeared before the chili. Kids love the ghost shape, and adults love the classic vanilla flavor that reminds them of birthday parties from childhood.
- Unbelievably Delicious: The texture is light, fluffy, and moist—not dry like some cupcakes can be. The vanilla flavor is front and center, and the creamy frosting is the perfect sweet finish. It’s comfort food in cupcake form.
What makes this recipe different from all the other Halloween cupcake recipes out there? It’s the method. I use a technique where you cream the butter and sugar for a full three minutes—not just until it’s combined. This creates tiny air pockets that make the cupcakes rise beautifully and stay tender. Plus, I add a touch of sour cream to the batter, which keeps them moist for days. This isn’t just another Halloween recipe—it’s your new favorite vanilla cupcake recipe that happens to look like a ghost. It’s comfort food reimagined for the holiday season: faster, simpler, but with the same soul-soothing satisfaction. Perfect for impressing guests without stress, or turning a simple weeknight into something memorable.
What Ingredients You Will Need
This recipe uses simple, wholesome ingredients to deliver a bold vanilla flavor and a light, fluffy texture without any fuss. Most of these are pantry staples you likely already have on hand.
For the Cupcakes
- 1 ½ cups all-purpose flour (spooned and leveled—don’t scoop directly from the bag or you’ll pack it down)
- 1 cup granulated sugar
- ½ cup unsalted butter, softened to room temperature (I prefer Kerrygold for its rich flavor, but any good unsalted butter works)
- 2 large eggs, room temperature (cold eggs can make the batter seize up)
- ½ cup whole milk (or 2%—just avoid skim, it makes the cupcakes a bit drier)
- ¼ cup sour cream (this is my secret ingredient for extra moisture—use full-fat if you can)
- 2 teaspoons vanilla extract (use pure vanilla extract, not imitation—it makes a real difference in flavor)
- 1 ½ teaspoons baking powder
- ¼ teaspoon salt
For the Ghost Frosting
- 1 cup unsalted butter, softened (for the frosting)
- 3 cups powdered sugar, sifted (sifting prevents lumps—trust me on this one)
- 2 teaspoons vanilla extract
- 2-3 tablespoons heavy cream (or whole milk if that’s what you have)
- Pinch of salt
For Decorating
- Mini chocolate chips or black gel food coloring (for the ghost eyes)
- Optional: white sanding sugar or edible glitter for a sparkly ghost effect
I recommend using a good quality vanilla extract—my personal favorite is Nielsen-Massey, but any pure vanilla will work. If you’re in a pinch, you can use vanilla bean paste for those beautiful little vanilla specks in the batter. For the sour cream, look for a full-fat version for the best texture. If you don’t have sour cream, full-fat Greek yogurt works as a substitute. For a dairy-free option, use plant-based butter and oat milk, but note the texture will be slightly denser.
Equipment Needed
You don’t need a professional bakery setup for these ghost cupcakes. Here’s what you’ll need:
- Standard 12-cup muffin tin (non-stick is great, but any will work with liners)
- Paper cupcake liners (white or orange for Halloween vibes—I like the foil-lined ones because they hold their shape better)
- Large mixing bowl and a medium mixing bowl
- Electric hand mixer or stand mixer (you can do this by hand with a whisk, but your arm will get a workout—I’ve done it both ways)
- Rubber spatula for scraping down the bowl
- Wire cooling rack (a must for even cooling—don’t skip this or the bottoms will get soggy)
- Piping bag with a large round tip (Wilton 1A or similar) or a sturdy zip-top bag with the corner snipped off
- Small offset spatula (optional, but helpful for smoothing frosting)
If you don’t have a piping bag, don’t worry. A zip-top bag works perfectly fine—just fill it with frosting, snip off about ½ inch from one corner, and you’re good to go. I’ve also used a spoon to dollop the frosting and then shaped it with the back of the spoon. It’s not as precise, but it still looks cute. For the muffin tin, I’ve used both non-stick and old-school metal tins, and both work great. Just make sure you use liners to prevent sticking.
Preparation Method
Let’s get to the fun part—making these ghost-shaped vanilla cupcakes. Follow these steps carefully, and you’ll have a batch of adorable ghosts in no time.
- Preheat and Prep: Preheat your oven to 350°F (175°C). Line your muffin tin with 12 paper liners. This is non-negotiable—don’t grease the tin directly or the ghosts won’t pop out cleanly. Set the tin aside while you make the batter.
- Cream the Butter and Sugar: In your large mixing bowl, beat the softened butter and granulated sugar together on medium-high speed for a full 3 minutes. I know it feels like forever, but this is the step that makes your cupcakes light and fluffy. Scrape down the sides of the bowl with your spatula halfway through. The mixture should look pale, fluffy, and almost like a thick paste. If it still looks grainy, keep beating for another minute.
- Add the Eggs and Vanilla: Add the eggs one at a time, beating well after each addition (about 30 seconds each). Then add the vanilla extract and beat until combined. The batter might look a little curdled at this point—that’s totally normal. Don’t panic. The sour cream and flour will bring it back together.
- Mix the Dry Ingredients: In a separate medium bowl, whisk together the flour, baking powder, and salt. This ensures the baking powder is evenly distributed so you don’t get one cupcake that rises like a balloon and another that stays flat. I learned this the hard way after making a batch of lopsided cupcakes for a birthday party.
- Alternate Adding Dry and Wet: With the mixer on low speed, add about one-third of the flour mixture to the butter mixture. Beat just until combined—maybe 10 seconds. Then add half of the milk and the sour cream. Beat again. Repeat with another third of flour, then the remaining milk, then the final third of flour. Stop mixing as soon as the last streak of flour disappears. Overmixing at this stage will make your cupcakes tough and dense. Trust me, I’ve done it. You want a smooth, thick batter that looks like a very soft cookie dough.
- Fill the Liners: Divide the batter evenly among the 12 liners. I use a cookie scoop (about 3 tablespoons) to get consistent portions. Fill each liner about two-thirds full—don’t overfill or the ghosts will have flat tops instead of nice domes. If you have a kitchen scale, each liner should have about 45-50 grams of batter.
- Bake to Perfection: Bake for 15-18 minutes, or until a toothpick inserted into the center of a cupcake comes out clean or with a few moist crumbs. My oven runs hot, so I start checking at 14 minutes. The tops should be lightly golden and spring back when you gently press them. Let the cupcakes cool in the tin for exactly 5 minutes—no longer, or the bottoms will get soggy from the steam. Then transfer them to a wire cooling rack to cool completely. This is important: do not frost warm cupcakes or your frosting will melt into a puddle. I speak from experience.
- Make the Frosting: While the cupcakes cool, make the ghost frosting. In a clean mixing bowl, beat the softened butter on medium speed until smooth and creamy (about 2 minutes). Add the sifted powdered sugar one cup at a time, beating on low speed after each addition to avoid a sugar cloud. Add the vanilla extract, heavy cream, and a pinch of salt. Increase the speed to medium-high and beat for 3-4 minutes until the frosting is light, fluffy, and spreadable. If it’s too thick, add another tablespoon of cream. If it’s too thin, add a little more powdered sugar.
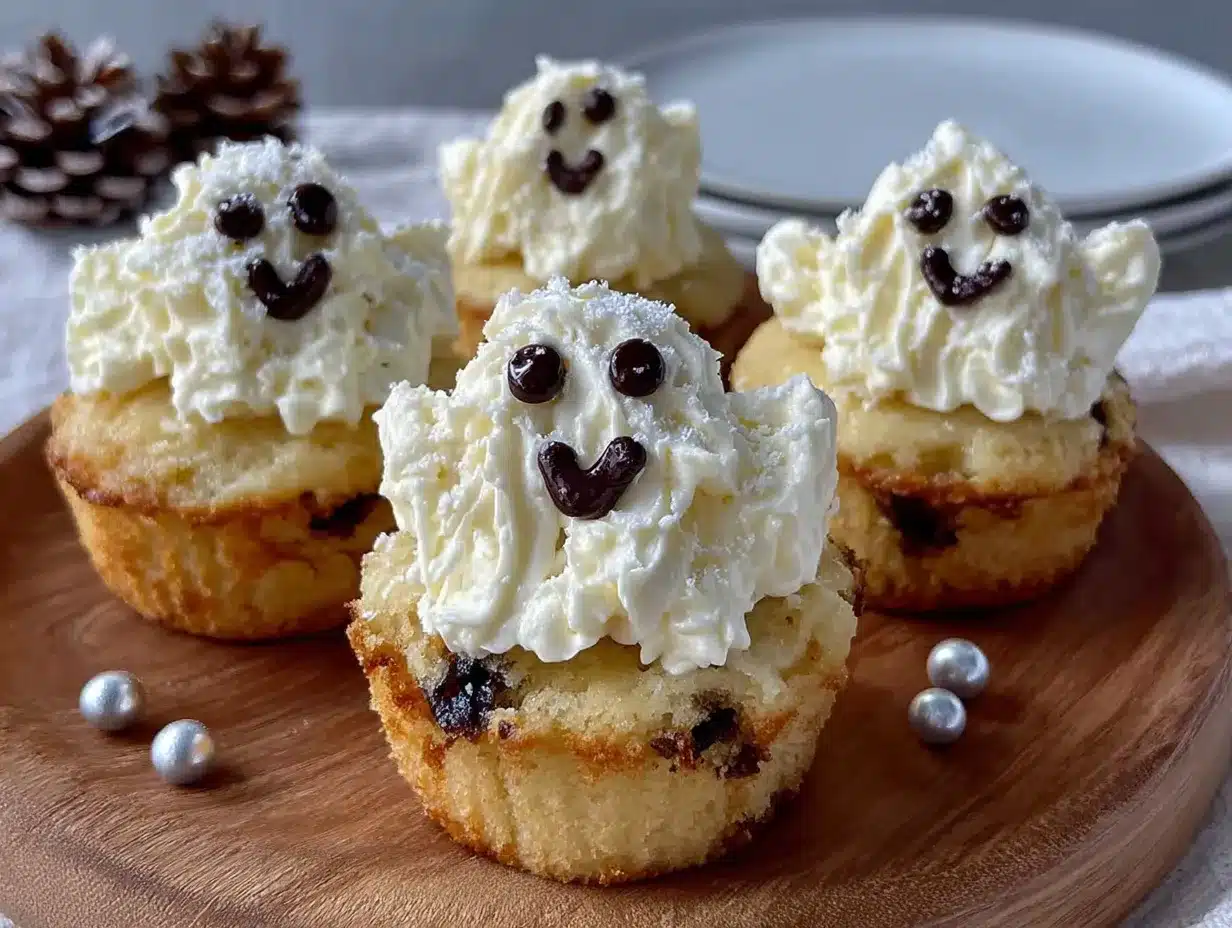
- Pipe the Ghosts: Transfer the frosting to your piping bag fitted with a large round tip. Hold the bag straight up over a cooled cupcake. Squeeze a generous mound of frosting in the center—this is the ghost’s body. Then, as you pull the bag upward, slowly release pressure to create a little peak at the top (this becomes the ghost’s head). It should look like a soft-serve ice cream swirl. Don’t worry if it’s not perfect—ghosts are supposed to be a little irregular. That’s the charm.
- Add the Faces: While the frosting is still soft, press two mini chocolate chips into the “face” area for eyes. You can also use black gel food coloring to paint on a little mouth, but I find the chocolate chip eyes are cuter and easier. If you’re feeling fancy, add a tiny dot of frosting for a little cheek blush. Let the decorated cupcakes sit at room temperature for about 10 minutes to let the frosting set slightly before serving.
Cooking Tips & Techniques
After making these ghost cupcakes about a dozen times (I’m not kidding—I became obsessed), I’ve picked up a few tricks that make the process even smoother.
Room Temperature Ingredients Matter: I know it’s tempting to use cold eggs straight from the fridge, but trust me on this one. Cold ingredients don’t emulsify properly, which means your batter can be lumpy and your cupcakes won’t rise as nicely. Take your eggs, butter, and milk out of the fridge about 30 minutes before you start baking. If you forgot, place the eggs in a bowl of warm water for 5 minutes, and microwave the milk for 15 seconds. The butter should be soft enough that you can press your finger into it easily.
Don’t Overmix the Batter: This is the number one mistake I see home bakers make. Once you add the flour, mix only until it’s just combined. A few tiny lumps are totally fine. Overmixing develops gluten, which makes cupcakes tough and rubbery. I ruined my first three batches this way. Now I stop the mixer the second I don’t see any more dry flour and finish folding by hand with a spatula.
Use an Ice Cream Scoop for Batter: For perfectly even cupcakes, use a medium cookie scoop or ice cream scoop to portion the batter. This ensures they all bake at the same rate and look uniform. Plus, it’s way less messy than pouring from a bowl.
Cool Completely Before Frosting: I know you’re excited, but warm cupcakes will turn your beautiful buttercream into a sad, greasy mess. Let them cool on a wire rack for at least 20-30 minutes. If you’re in a hurry, you can pop them in the fridge for 10 minutes to speed things up.
Pipe with Confidence: When piping the ghost shape, don’t be shy. You want a generous amount of frosting. The ghost should look plump and happy, not flat and sad. If you mess up, just scrape the frosting off with a spatula and start over. The frosting can be reused—no waste!
Storage Tip: If you’re making these ahead of time, store the unfrosted cupcakes in an airtight container at room temperature for up to two days. Make the frosting fresh on the day you plan to serve them. Frosted cupcakes can be stored in the fridge for up to three days, but let them sit at room temperature for 20 minutes before serving for the best texture.
Variations & Adaptations
One of the best things about this recipe is how easy it is to customize. Here are some variations I’ve tried and loved:
Chocolate Ghost Cupcakes: Swap out ¼ cup of the all-purpose flour for ¼ cup of unsweetened cocoa powder. Add an extra tablespoon of milk to compensate for the dry cocoa. The chocolate version is rich and delicious—my nephew calls them “chocolate ghosts” and insists they taste better than the vanilla ones. I’m not sure I agree, but he’s the boss.
Gluten-Free Ghosts: Use a 1:1 gluten-free baking flour blend (I like King Arthur’s Measure for Measure). Add 1 teaspoon of xanthan gum if your blend doesn’t already include it. The texture is slightly more tender, but still delicious. I made these for a friend with celiac disease and she said they were the best cupcakes she’d had in years.
Vegan Vanilla Ghosts: Substitute the butter with vegan butter (I use Earth Balance), the eggs with 2 flax eggs (2 tablespoons ground flaxseed mixed with 6 tablespoons water, let sit for 5 minutes), and the milk with oat milk. Use vegan cream cheese in the frosting instead of butter. They’re not quite as fluffy, but they’re still tasty and perfect for vegan Halloween parties.
Spooky Spider Web Variation: Instead of ghost faces, pipe a thin layer of white frosting on top, then use a toothpick to drag black gel food coloring into a web pattern. It’s surprisingly easy and looks really impressive. My daughter loves making these for her Halloween sleepovers.
Mini Ghosts: Use a mini muffin tin and reduce the baking time to 10-12 minutes. These are perfect for parties where people want to try a little bit of everything. Plus, mini ghosts are just adorable.
Serving & Storage Suggestions
These ghost-shaped vanilla cupcakes are best served at room temperature. I like to arrange them on a white platter or a cake stand for a spooky but cute presentation. For Halloween parties, I sometimes add a few fake spider webs or plastic spiders around the platter for extra effect. My kids love when I dust the plate with a little powdered sugar to look like “ghost dust.”
For beverages, these cupcakes pair beautifully with a cold glass of milk, a warm cup of hot chocolate, or a pumpkin spice latte for the adults. If you’re serving them at a party, set up a cupcake decorating station where guests can add their own ghost faces using chocolate chips, candy eyes, or black frosting.
To store leftover cupcakes, place them in an airtight container in a single layer. If you need to stack them, place a sheet of parchment paper between layers to prevent the frosting from smudging. They’ll keep at room temperature for up to two days, or in the fridge for up to five days. The flavors actually develop a bit overnight—the vanilla becomes more pronounced and the texture stays moist.
For freezing, I recommend freezing the unfrosted cupcakes. Wrap each one individually in plastic wrap, then place them in a freezer-safe bag. They’ll keep for up to three months. When you’re ready to serve, thaw them at room temperature (about 1-2 hours), then make the frosting fresh and decorate. Frosted cupcakes can also be frozen, but the frosting might lose some of its fluffiness. If you do freeze frosted ones, place them in the freezer uncovered for an hour until the frosting hardens, then wrap them individually. Thaw in the fridge overnight.
For reheating, I don’t recommend microwaving frosted cupcakes (the frosting will melt). Instead, if you want a warm cupcake, microwave an unfrosted one for 10-15 seconds, then add the frosting after.
Nutritional Information & Benefits
While these ghost cupcakes are definitely a treat, I believe in enjoying food without guilt. Here’s the approximate nutritional breakdown per cupcake (based on 12 servings):
| Nutrient | Amount |
|---|---|
| Calories | 385 |
| Total Fat | 22g |
| Saturated Fat | 14g |
| Cholesterol | 85mg |
| Sodium | 180mg |
| Total Carbohydrates | 45g |
| Dietary Fiber | 0.5g |
| Sugars | 34g |
| Protein | 3g |
Key ingredients like butter and eggs provide essential vitamins like A and D, as well as healthy fats that help your body absorb nutrients. The vanilla extract contains small amounts of antioxidants, and the sour cream adds a touch of calcium. Of course, these are meant to be enjoyed in moderation as part of a balanced diet. I always tell my readers: life is too short to skip dessert, especially when it’s this cute.
For those with dietary concerns, this recipe contains dairy, gluten, and eggs. For a dairy-free version, use plant-based butter and milk as suggested in the variations section. For a gluten-free option, use a certified gluten-free flour blend. Always check your ingredient labels if you’re serving someone with allergies.
Conclusion
These easy ghost-shaped vanilla cupcakes have become a Halloween tradition in my house, and I hope they become one in yours too. They’re proof that you don’t need hours of free time or a pastry chef diploma to create something that makes people smile. The recipe is forgiving, the decorating is fun, and the result is genuinely delicious. Whether you’re making them for a school party, a neighborhood gathering, or just to surprise your kids on a random October evening, these ghosts deliver every time.
I love this recipe because it reminds me of that night at Mrs. Kowalski’s house—how something so simple could feel so special. It’s not about perfection. It’s about sharing a little joy, one ghost-shaped cupcake at a time. So go ahead, get a little flour on your cheek, and make some ghosts. I promise you’ll be glad you did.
If you make these, I’d love to hear about it! Leave a comment below and tell me how your ghosts turned out. Did you add any fun variations? Did your kids help with the decorating? Share your photos on Pinterest and tag me—I love seeing your creations. And if you’re looking for more easy Halloween recipes, don’t forget to check out my spider web dip and pumpkin spice cookies for a full spooky spread. Happy baking, friends!
Frequently Asked Questions
Can I make these ghost cupcakes ahead of time?
Absolutely! You can bake the cupcakes up to two days in advance and store them in an airtight container at room temperature. Make the frosting fresh on the day you plan to serve for the best texture. If you need to prepare even further ahead, freeze the unfrosted cupcakes for up to three months.
Why did my cupcakes turn out dry?
Dry cupcakes usually come from overmixing the batter or overbaking. Make sure you stop mixing as soon as the flour disappears, and check your cupcakes at the 15-minute mark. Every oven is different, so use the toothpick test rather than relying solely on the timer. Also, make sure you’re using room temperature ingredients—cold ingredients can lead to a denser, drier texture.
Can I use a different frosting flavor?
Of course! While vanilla buttercream is classic for ghosts, you can use cream cheese frosting for a tangier flavor, or chocolate buttercream for a spooky twist. For a lighter option, try a stabilized whipped cream. Just keep in mind that the frosting should be thick enough to hold the ghost shape when piped.
How do I get the ghost shape to look right?
The key is using a large round piping tip and applying steady pressure. Start with a generous mound in the center of the cupcake, then slowly pull upward while releasing pressure to create a peak. If it doesn’t look perfect on the first try, just scrape it off and try again. Practice makes perfect, and even imperfect ghosts are still adorable!
Can I make these without a piping bag?
Yes! You can use a sturdy zip-top bag with a corner snipped off, or simply use a spoon to dollop the frosting and shape it with the back of the spoon. It won’t be as precise, but it will still look cute. You can also use a butter knife to spread the frosting into a ghost-like shape—think of it as a more rustic ghost!
Pin This Recipe!
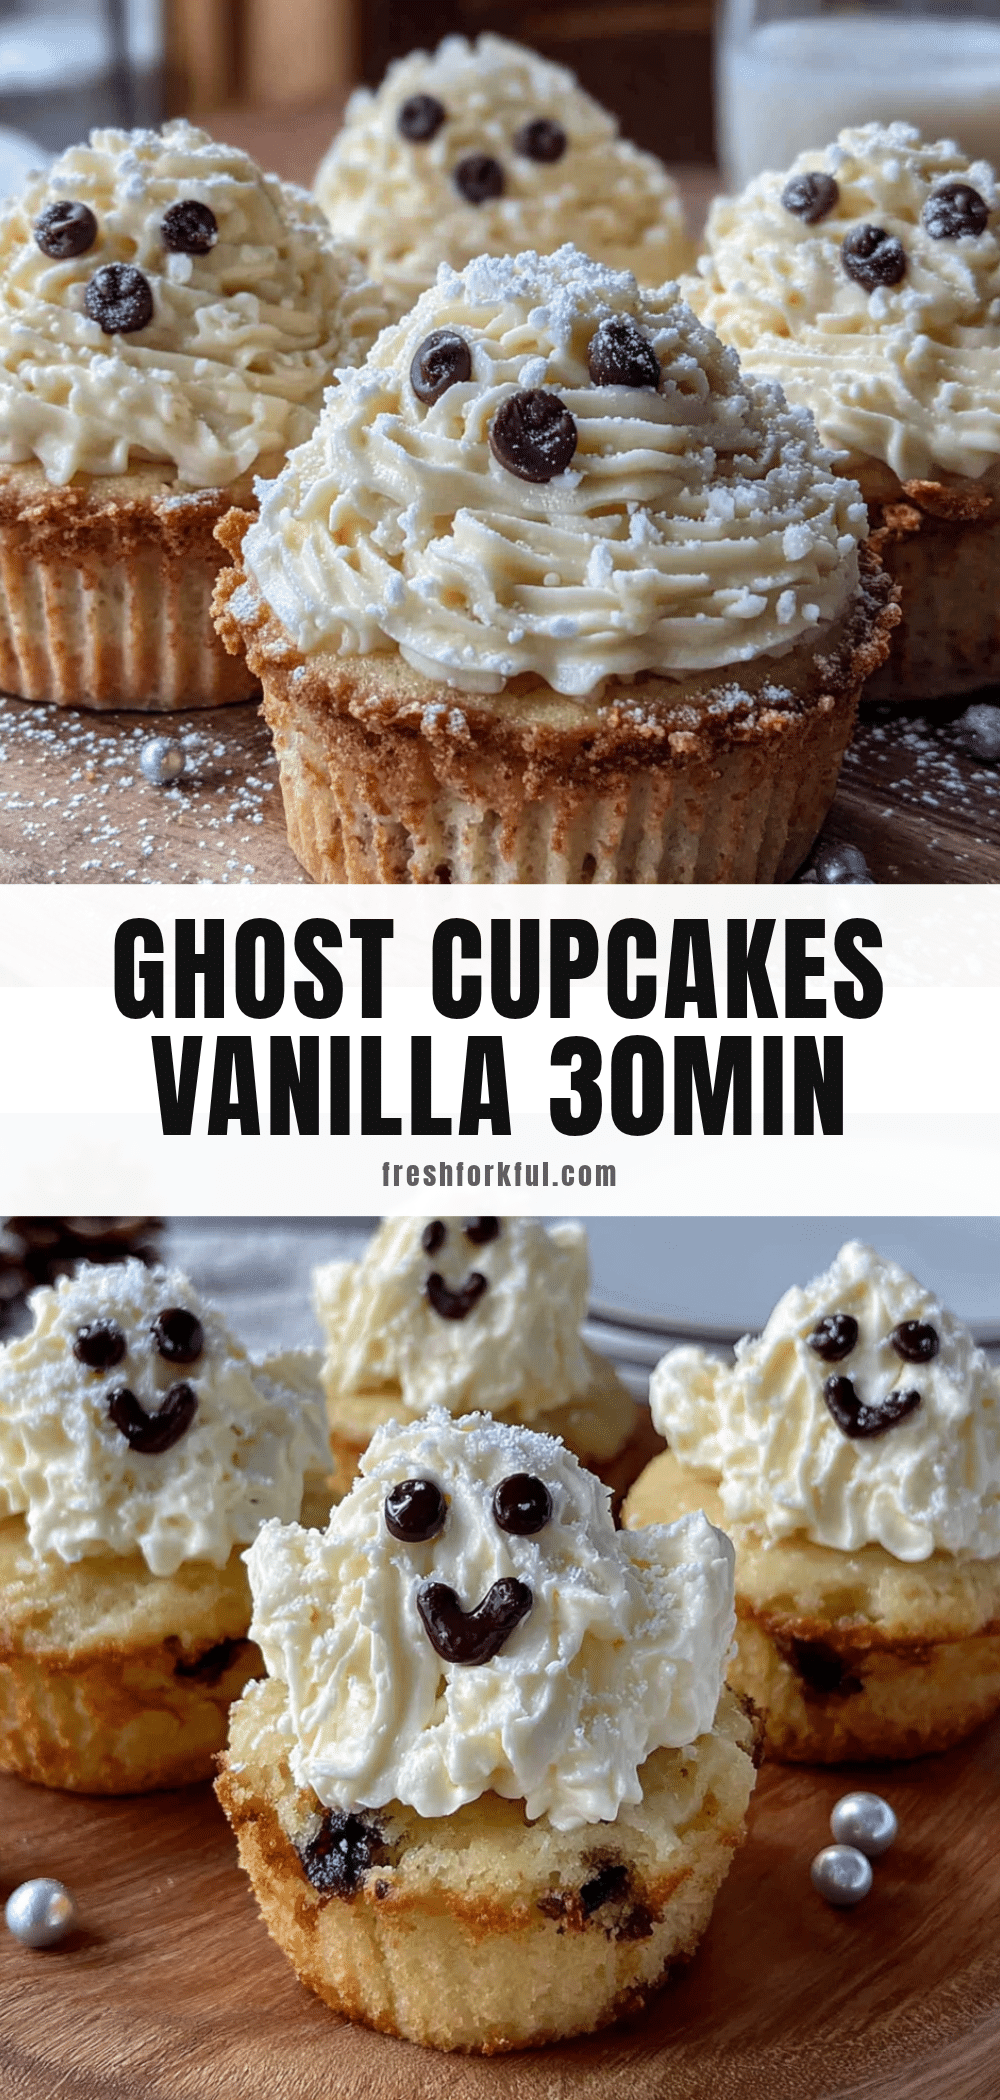
Easy Ghost Vanilla Cupcakes Ready in 30 Minutes
These ghost-shaped vanilla cupcakes are quick, easy, and perfect for Halloween. With a light, fluffy texture and creamy vanilla frosting, they come together in under 30 minutes using simple pantry ingredients.
- Prep Time: 10 minutes
- Cook Time: 18 minutes
- Total Time: 28 minutes
- Yield: 12 cupcakes 1x
- Category: Dessert
- Cuisine: American
Ingredients
- 1 ½ cups all-purpose flour (spooned and leveled)
- 1 cup granulated sugar
- ½ cup unsalted butter, softened
- 2 large eggs, room temperature
- ½ cup whole milk (or 2%)
- ¼ cup sour cream (full-fat preferred)
- 2 teaspoons vanilla extract (pure)
- 1 ½ teaspoons baking powder
- ¼ teaspoon salt
- 1 cup unsalted butter, softened (for frosting)
- 3 cups powdered sugar, sifted
- 2 teaspoons vanilla extract (for frosting)
- 2–3 tablespoons heavy cream (or whole milk)
- Pinch of salt (for frosting)
- Mini chocolate chips or black gel food coloring (for eyes)
- Optional: white sanding sugar or edible glitter
Instructions
- Preheat oven to 350°F (175°C). Line a 12-cup muffin tin with paper liners.
- In a large bowl, beat softened butter and granulated sugar on medium-high speed for 3 minutes until pale and fluffy. Scrape down sides halfway through.
- Add eggs one at a time, beating well after each addition. Add vanilla extract and beat until combined.
- In a separate bowl, whisk together flour, baking powder, and salt.
- With mixer on low, add one-third of the flour mixture to the butter mixture, beating just until combined. Add half of the milk and sour cream, beat again. Repeat with another third of flour, remaining milk, then final third of flour. Stop mixing when no streaks of flour remain.
- Divide batter evenly among liners, filling each about two-thirds full (about 3 tablespoons or 45-50 grams each).
- Bake for 15-18 minutes, until a toothpick inserted in the center comes out clean or with a few moist crumbs. Cool in tin for 5 minutes, then transfer to a wire rack to cool completely.
- For frosting: In a clean bowl, beat softened butter on medium speed until smooth (about 2 minutes). Add sifted powdered sugar one cup at a time, beating on low. Add vanilla, heavy cream, and salt. Beat on medium-high for 3-4 minutes until light and fluffy.
- Transfer frosting to a piping bag fitted with a large round tip. Pipe a generous mound of frosting on each cooled cupcake, pulling upward to create a peak for the ghost’s head.
- While frosting is soft, press two mini chocolate chips into the face area for eyes. Let set for 10 minutes before serving.
Notes
Room temperature ingredients are crucial for proper emulsification. Do not overmix the batter once flour is added. Cool cupcakes completely before frosting to prevent melting. For a dairy-free version, use plant-based butter and oat milk. For gluten-free, use a 1:1 gluten-free flour blend with xanthan gum if needed.
Nutrition
- Serving Size: 1 cupcake
- Calories: 385
- Sugar: 34
- Sodium: 180
- Fat: 22
- Saturated Fat: 14
- Carbohydrates: 45
- Fiber: 0.5
- Protein: 3
Keywords: ghost cupcakes, Halloween cupcakes, vanilla cupcakes, easy Halloween treats, ghost-shaped cupcakes


