Love this? Save it for later!
Share the inspiration with your friends
I was standing in line at the post office—honestly, one of those days where you’re just trying to get through your to-do list—when the woman ahead of me started talking about deviled eggs. Not just any deviled eggs, mind you. She was describing how she makes them every year for her son’s Halloween party, and she kept saying “the spiders” like it was the most normal thing in the world. I mean, I’d seen the olive spider thing floating around on Pinterest, sure. But the way she talked about it? Like it was this treasured family tradition that started completely by accident because she forgot to buy hot dogs for pigs in a blanket. She laughed about it, told me her son was nine now and would be devastated if she showed up without “the creepy eggs.” I was holding a package I needed to ship to my sister, and I just stood there, letting my package wait, because I needed to know exactly how she made the filling so creamy without being heavy. She told me her secret—Greek yogurt instead of half the mayo—and I swear, I almost forgot to mail the package. That’s the thing about unexpected recipe advice from strangers in line at the post office: sometimes it’s the best kind. I’ve been making these lightened-up Halloween deviled eggs with olive spiders ever since, and let me tell you, they’ve become my go-to for every spooky season gathering. Maybe you’ve been there—standing in a random line, overhearing something that changes the way you cook forever.
Why You’ll Love This Recipe
These lightened-up Halloween deviled eggs with olive spiders aren’t just another party appetizer. They’re the kind of recipe that makes people stop and smile—then go back for seconds without feeling guilty. Here’s why they deserve a spot on your Halloween menu:
- Quick & Easy: You can have these ready in under 30 minutes, which is perfect when you’re juggling costumes, candy bowls, and last-minute decorations.
- Simple Ingredients: Eggs, Greek yogurt, mustard, and olives. That’s it. No fancy grocery store trips required.
- Perfect for Halloween Parties: These are the star of any spooky spread—kids love the creepy spiders, and adults appreciate the lighter twist.
- Crowd-Pleaser: I’ve brought these to potlucks and Halloween gatherings, and they disappear faster than the candy bowl. Seriously.
- Unbelievably Delicious: The filling is creamy, tangy, and satisfying without being heavy. You won’t miss the extra mayo one bit.
What makes this recipe different from the rest? It’s the yogurt trick. By swapping half the traditional mayonnaise for plain Greek yogurt, you cut the calories and add a lovely tangy brightness that pairs perfectly with the rich yolk. Plus, the olive spiders are just fun—they turn a classic deviled egg into a conversation starter. This is comfort food reimagined: healthier, faster, but with the same soul-soothing satisfaction. Perfect for impressing guests without stress, or turning a simple Halloween snack into something memorable.
What Ingredients You Will Need
This recipe uses simple, wholesome ingredients to deliver bold flavor and satisfying texture without the fuss. Most of these are pantry staples, which makes this recipe even easier to whip up on a whim.
- Large eggs (6 eggs, hard-boiled and peeled) — Look for eggs that are a week or two old for easier peeling. Fresh eggs are harder to peel cleanly.
- Plain Greek yogurt (3 tablespoons) — I prefer full-fat Greek yogurt for the creamiest texture, but 2% works well too. Avoid non-fat, as it can be too thin. My go-to brand is Fage or Chobani.
- Mayonnaise (2 tablespoons) — Use a good-quality mayo like Hellmann’s or Duke’s. The yogurt-mayo combo is the secret to the lightened-up filling.
- Dijon mustard (1 teaspoon) — Adds a subtle tang and helps emulsify the filling. You can use yellow mustard in a pinch, but Dijon gives a more sophisticated flavor.
- White vinegar (1/2 teaspoon) — Just a splash brightens everything up. Apple cider vinegar works too for a slightly fruitier note.
- Salt (1/4 teaspoon) — Fine sea salt dissolves best into the filling.
- Black pepper (1/8 teaspoon, freshly ground) — A little goes a long way.
- Paprika (for garnish, about 1/2 teaspoon) — Smoked paprika adds a lovely depth, but sweet paprika is classic. I often use smoked for Halloween—it feels a little more mysterious.
- Large black olives (12 olives, pitted) — You’ll use these to make the spider bodies. Look for jumbo or colossal pitted black olives for the best effect. The larger the olive, the easier they are to slice into spiders.
- Chives or fresh dill (optional, for garnish) — A few snipped chives can look like spider legs or just add a pretty pop of green. Totally optional but fun.
Ingredient Selection Tips: For the olives, avoid sliced olives—you need whole pitted olives to create the spider shape. If you can only find olives with pimento, gently remove the pimento before slicing. Also, make sure your eggs are at room temperature before boiling for the most even cooking.
Substitution Guidance: For a dairy-free version, use a dairy-free yogurt alternative like coconut-based yogurt (unsweetened and plain). For a whole30 or paleo option, swap the Greek yogurt for an additional 2 tablespoons of avocado oil mayo and add a teaspoon of lemon juice for tang. You can also use vegan mayo to keep it egg-free, though the texture will be slightly different.
Equipment Needed
You don’t need much for this recipe, which is part of its charm. Here’s what you’ll want on hand:
- Medium saucepan (with a lid) — For boiling the eggs. I prefer a stainless steel pan for even heating.
- Large bowl with ice water — For the ice bath after boiling. This stops the cooking and makes peeling easier.
- Sharp knife and cutting board — For halving the eggs and slicing the olives. A paring knife works best for the olive detail work.
- Small mixing bowl — For mashing the yolks and mixing the filling.
- Fork or potato masher — For mashing the yolks to a smooth consistency. I actually prefer a fork—it gives me more control.
- Piping bag or zip-top bag — For piping the filling into the egg whites. A zip-top bag with the corner snipped off works perfectly if you don’t have a piping bag. I’ve used both, and honestly, the zip-top bag is less fuss to clean.
- Small spoon or offset spatula — For filling the eggs if you’re not piping. A small spoon works fine, but piping gives a prettier result.
- Plate or deviled egg tray — For serving. I love my ceramic deviled egg plate, but a regular plate works just fine.
Budget-Friendly Options: Don’t have a piping bag? No problem. A sturdy zip-top bag is a great alternative. Also, if you don’t have an egg plate, just arrange the eggs on a regular serving platter—they’ll still look fantastic.
Preparation Method
- Hard-boil the eggs. Place the 6 eggs in a medium saucepan and cover them with cold water by about an inch. Bring the water to a rolling boil over high heat. Once boiling, cover the pan, remove it from the heat, and let it sit for exactly 10 minutes. This is my tried-and-true method for perfectly cooked yolks—no green rings, I promise. While the eggs are sitting, prepare an ice bath in a large bowl.
- Ice bath and peel. After 10 minutes, transfer the eggs to the ice bath using a slotted spoon. Let them cool for at least 5 minutes—this stops the cooking and makes peeling so much easier. Gently tap each egg on the counter to crack the shell, then peel under cool running water. I find starting at the wider end (where the air pocket is) helps the shell come off in larger pieces. Pat the peeled eggs dry with a paper towel.
- Halve the eggs. Using a sharp knife, slice each egg in half lengthwise. Carefully pop the yolks out into a small mixing bowl. Arrange the egg white halves on your serving plate, cut-side up. Set them aside while you make the filling.
- Mash the yolks. Add the 3 tablespoons Greek yogurt, 2 tablespoons mayonnaise, 1 teaspoon Dijon mustard, 1/2 teaspoon white vinegar, 1/4 teaspoon salt, and 1/8 teaspoon black pepper to the bowl with the yolks. Mash everything together with a fork until the mixture is smooth and creamy. Taste it—you might want a pinch more salt or a dash more mustard. I usually add an extra tiny splash of vinegar because I love the tang.
- Pipe the filling. Spoon the yolk mixture into a piping bag fitted with a star tip, or into a zip-top bag. If using a zip-top bag, squeeze the mixture into one corner, then snip off about 1/2 inch from the corner. Pipe the filling into the egg white halves, dividing it evenly among all 12 halves. I like to pipe in a circular motion starting from the center and working outward—it gives a nice rosette look. If you don’t want to pipe, just spoon the filling in and smooth the top with a small spoon.
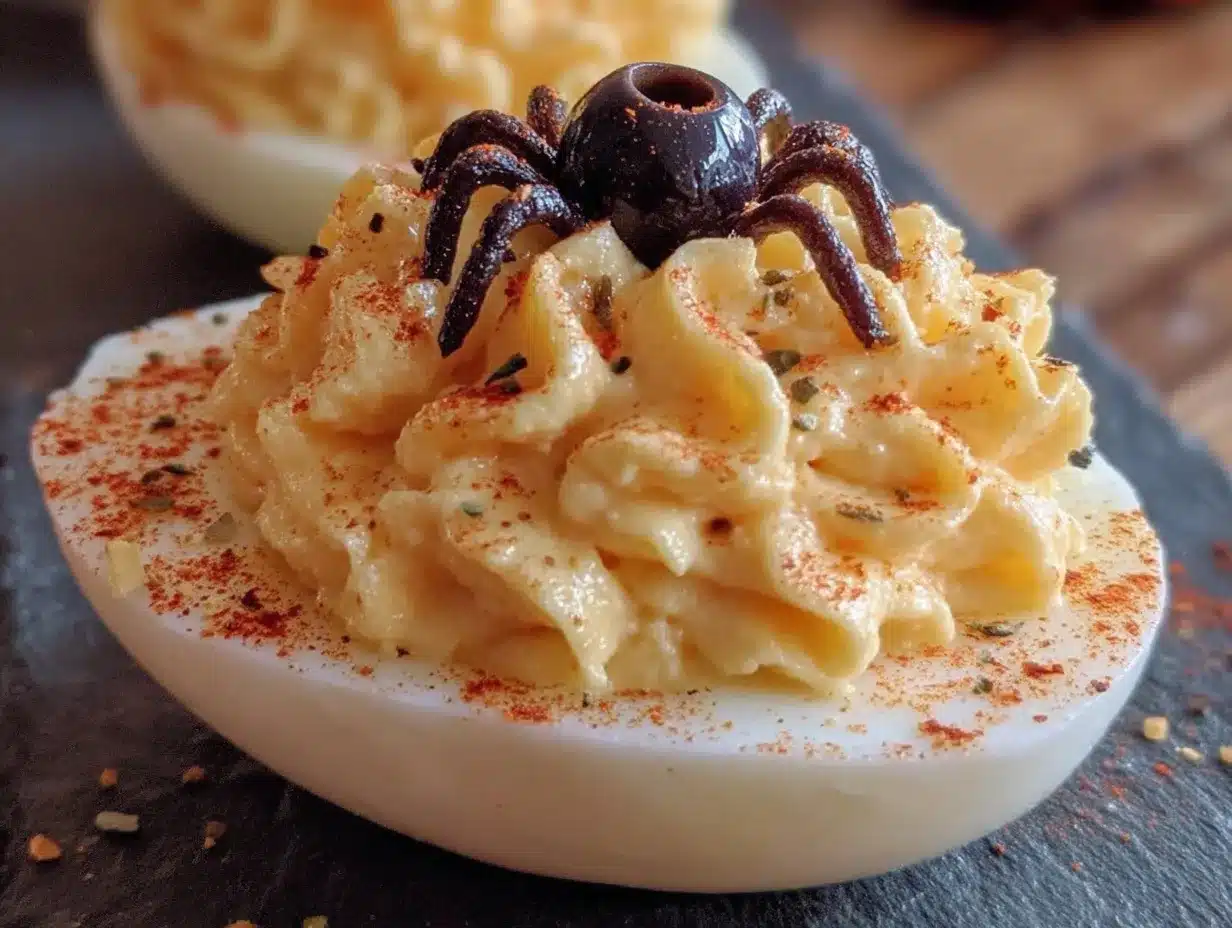
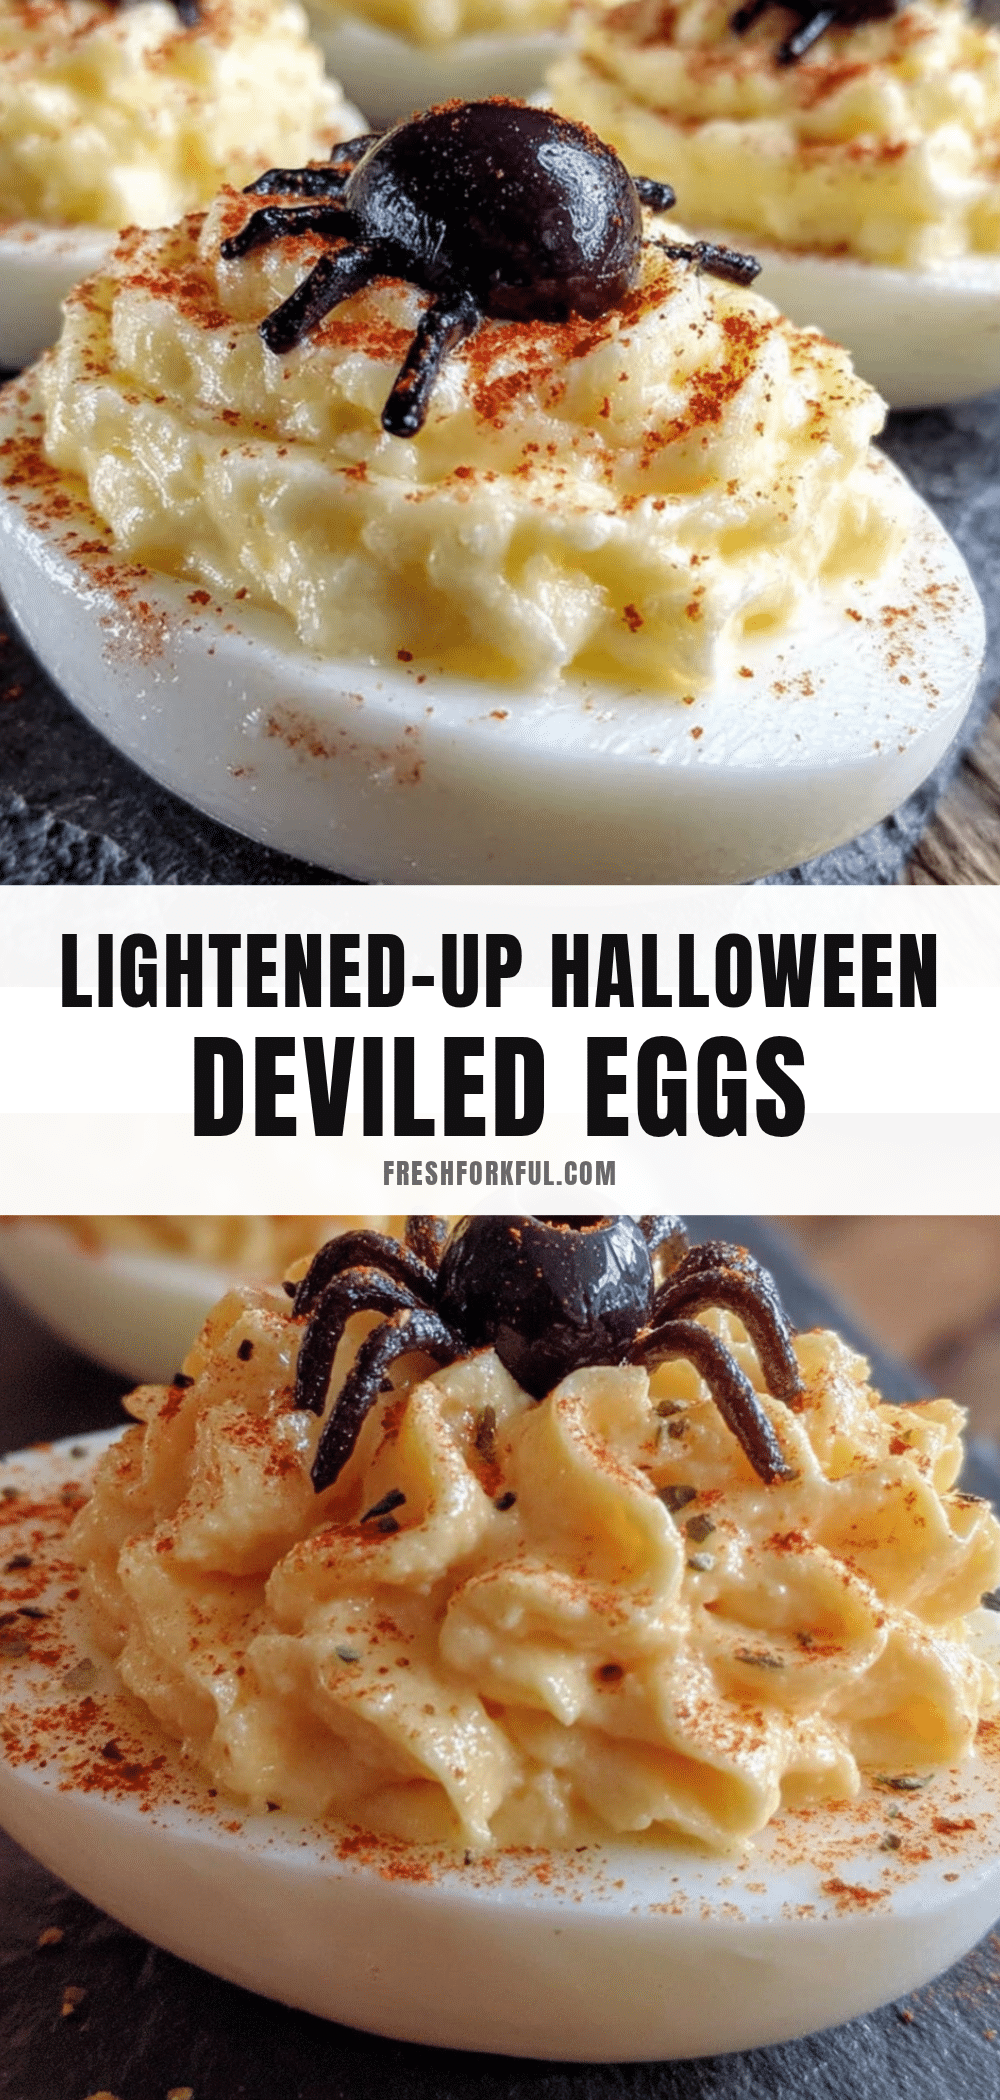
- Prepare the olive spiders. This is the fun part. Take the 12 large pitted black olives. For each spider, you’ll need two olives. Slice one olive in half lengthwise—these halves will be the spider’s body. For the legs, take the second olive and slice it into thin rounds (about 4-5 slices per olive). Then, cut each round in half to create little leg shapes. You should get about 8-10 tiny half-circles per olive. Arrange 4-5 leg pieces on each side of the olive body half, pressing them gently into the filling so they stay in place.
- Garnish and serve. Lightly sprinkle the filled eggs with paprika. If using chives or fresh dill, arrange a few pieces around the spiders to look like grass or webs. Serve immediately, or refrigerate until ready to serve. These are best enjoyed within a few hours of making them.
Sensory Cues: When you mash the yolks, you’re looking for a smooth, spreadable consistency—not too stiff, not too runny. The filling should hold its shape when piped but still feel creamy on the tongue. The olive spiders should look like they’re crawling across the yellow filling—creepy but cute!
Personal Tip: I always make an extra egg or two just in case one doesn’t peel perfectly. It’s a small insurance policy that saves stress. Also, if your filling seems too thick, add another teaspoon of Greek yogurt. Too thin? A tiny bit more mayo will thicken it up.
Cooking Tips & Techniques
Here are some things I’ve learned the hard way so you don’t have to.
- The egg-peeling struggle is real. If you’ve ever peeled a hard-boiled egg and ended up with a mangled mess, you’re not alone. The trick is using older eggs (a week or two old) and shocking them in an ice bath immediately after boiling. I also find that peeling under running water helps the shell slip off more easily.
- Don’t overmix the filling. It’s tempting to keep mashing until it’s perfectly smooth, but overmixing can make the filling gummy. Stop as soon as it comes together. A few tiny lumps are fine—they add texture.
- Make the spiders ahead of time. You can slice the olives and store them in an airtight container in the fridge for up to 2 days. This saves time on party day. Just assemble the spiders right before serving so they stay fresh and look their best.
- Watch your piping pressure. When piping the filling, squeeze gently and consistently. If you squeeze too hard, the filling can burst out the top. I learned this the messy way at my first Halloween party—let’s just say there was filling everywhere.
- Keep the eggs cold. Deviled eggs are best served chilled. If you’re bringing them to a party, transport them on a tray with an ice pack underneath. Nobody wants warm deviled eggs—trust me on this one.
Variations & Adaptations
This recipe is incredibly flexible. Here are some ways to make it your own:
- Spicy Southwest Version: Add 1/4 teaspoon smoked paprika and a pinch of cayenne pepper to the filling. Top each spider with a tiny slice of jalapeño for extra heat. This is my personal favorite variation—the smoky heat pairs beautifully with the creamy filling.
- Herb & Lemon Twist: Swap the Dijon mustard for whole-grain mustard and add 1 teaspoon of fresh lemon zest and 1 tablespoon of chopped fresh dill to the filling. The lemon brightens everything up, and the dill gives it a garden-fresh feel. I made this version for a spring brunch, and it was a hit.
- Everything Bagel Deviled Eggs: Sprinkle the filled eggs with everything bagel seasoning before adding the spiders. The sesame, poppy seed, garlic, and onion flavors add a savory crunch that’s surprisingly addictive. This is great if you’re serving them at a more casual gathering.
- Vegan Adaptation: Use silken tofu (firm, not soft) in place of the egg yolks, and vegan mayo and yogurt for the filling. The texture won’t be exactly the same, but it’s still creamy and delicious. I’ve tested this with a vegan friend, and she gave it two thumbs up.
- Gluten-Free Note: This recipe is naturally gluten-free, so no adaptations needed. Just double-check that your mustard and vinegar are certified gluten-free if you’re serving someone with celiac disease.
Serving & Storage Suggestions
These lightened-up Halloween deviled eggs are best served chilled, straight from the fridge. The cold filling contrasts beautifully with the briny olives, and the texture is at its peak when cold. Arrange them on a platter or deviled egg plate, and garnish with a light dusting of paprika and a few fresh chives for color.
What to Serve With Them: These eggs pair wonderfully with other Halloween party snacks. I love serving them alongside a platter of fresh veggies with ranch dip, some crispy spicy roasted pumpkin seeds, or a bowl of creamy roasted butternut squash soup for a more substantial spread. For drinks, a crisp apple cider or a dark beer complements the savory flavors nicely.
Storage Instructions: Store any leftover deviled eggs in an airtight container in the refrigerator for up to 2 days. The filling may soften slightly over time, but they’ll still taste great. I don’t recommend freezing them—the texture of the egg whites becomes rubbery when thawed.
Reheating: These are served cold, so no reheating needed. Just take them out of the fridge about 10 minutes before serving to take the chill off slightly. The flavors actually develop a bit more after a few hours in the fridge, so making them a few hours ahead is a great strategy.
Flavor Development: The filling gets even better after sitting for a few hours. The yogurt and mayo meld together, and the mustard and vinegar mellow into the background. If you can, make the filling a day ahead and pipe it into the eggs just before serving for the best texture.
Nutritional Information & Benefits
Here are the approximate nutritional values per serving (2 deviled egg halves):
- Calories: 140
- Protein: 10g
- Fat: 9g
- Carbohydrates: 3g
- Fiber: 0g
- Sugar: 1g
Health Benefits: By using Greek yogurt instead of all mayonnaise, you’re cutting the fat and calories significantly while adding protein and probiotics. Eggs are a fantastic source of high-quality protein, choline (great for brain health), and several B vitamins. The olives provide healthy monounsaturated fats and antioxidants. This recipe is naturally low-carb and keto-friendly, and it’s gluten-free as written.
Dietary Considerations: This recipe contains eggs and dairy (from the yogurt). For a dairy-free version, use a plant-based yogurt alternative. It’s also suitable for low-carb, keto, and gluten-free diets. If you’re watching your sodium, you can use low-sodium olives or reduce the added salt.
Personal Wellness Perspective: I love that this recipe lets me enjoy a classic party food without the heavy, greasy feeling that sometimes comes with traditional deviled eggs. The yogurt swap makes them feel lighter and fresher, which is perfect for a Halloween party where you might be eating other indulgent treats. It’s a small change that makes a big difference.
Conclusion
These lightened-up Halloween deviled eggs with olive spiders are more than just a cute party trick—they’re a genuinely delicious, crowd-pleasing appetizer that happens to be a little healthier than the original. Whether you’re hosting a spooky soiree, bringing a dish to a potluck, or just looking for a fun way to celebrate the season with your family, these eggs deliver on flavor, presentation, and ease. I love how they bring a smile to everyone’s face—from the kids who think the spiders are hilarious to the adults who appreciate the lighter twist. They’ve become a staple in my Halloween rotation, and I have a feeling they’ll become one in yours too.
I’d love to hear how yours turn out! Leave a comment below and let me know if you tried any fun variations—or if your olive spiders looked more like alien creatures than spiders (it happens to the best of us). Don’t forget to share this recipe with a friend who loves Halloween as much as you do. Happy cooking, and happy Halloween!
Frequently Asked Questions
Can I make these deviled eggs a day ahead?
Absolutely! You can hard-boil and peel the eggs, then prepare the filling and store it separately in the fridge. Pipe the filling into the egg whites and add the olive spiders just before serving for the freshest presentation. The filling actually tastes better after sitting overnight.
How do I keep the olive spiders from falling off?
The key is to press the olive legs gently but firmly into the piped filling. The filling acts like a natural adhesive. If your filling is too stiff, the legs might not stick well—just add a tiny bit more yogurt to soften it. You can also use a small dab of cream cheese to help secure them if needed.
Can I use a different type of olive?
You can, but large black olives work best for the spider effect because of their dark color and size. Kalamata olives are too small and soft to hold their shape. Green olives can work in a pinch, but they won’t have the same creepy spider look—they look more like little green bugs. Stick with large black olives for the best visual impact.
My egg yolks turned greenish. What went wrong?
That green ring around the yolk happens when eggs are overcooked or not cooled quickly enough. The green color is harmless—it’s just a reaction between iron and sulfur in the egg. To avoid it, make sure you’re not boiling the eggs for more than 10 minutes, and always transfer them to an ice bath immediately after cooking. If it happens, just scrape off the green part before mashing the yolks.
Can I freeze these deviled eggs?
I don’t recommend freezing deviled eggs. The egg whites become watery and rubbery when thawed, and the creamy filling can separate. These are best enjoyed fresh or within a day of making them. If you have leftovers, store them in the fridge for up to 2 days.
Pin This Recipe!
Lightened-Up Halloween Deviled Eggs with Spooky Olive Spiders
These lightened-up Halloween deviled eggs with olive spiders are a fun, creamy, and healthier twist on a classic appetizer. Perfect for spooky gatherings, they’re quick to make and sure to be a crowd-pleaser.
- Prep Time: 15 minutes
- Cook Time: 10 minutes
- Total Time: 25 minutes
- Yield: 6 servings (2 deviled egg halves per serving) 1x
- Category: Appetizer
- Cuisine: American
Ingredients
- 6 large eggs
- 3 tablespoons plain Greek yogurt
- 2 tablespoons mayonnaise
- 1 teaspoon Dijon mustard
- 1/2 teaspoon white vinegar
- 1/4 teaspoon salt
- 1/8 teaspoon black pepper
- 1/2 teaspoon paprika (for garnish)
- 12 large pitted black olives
- Chives or fresh dill (optional, for garnish)
Instructions
- Hard-boil the eggs: Place 6 eggs in a medium saucepan and cover with cold water by about an inch. Bring to a rolling boil over high heat. Cover, remove from heat, and let sit for exactly 10 minutes. Prepare an ice bath in a large bowl.
- Ice bath and peel: Transfer eggs to ice bath using a slotted spoon. Cool for at least 5 minutes. Tap each egg on the counter to crack the shell, then peel under cool running water. Pat dry.
- Halve the eggs: Slice each egg in half lengthwise. Pop yolks into a small mixing bowl. Arrange egg white halves on serving plate, cut-side up.
- Mash the yolks: Add Greek yogurt, mayonnaise, Dijon mustard, white vinegar, salt, and black pepper to the yolks. Mash with a fork until smooth and creamy. Adjust seasoning to taste.
- Pipe the filling: Spoon yolk mixture into a piping bag fitted with a star tip, or into a zip-top bag with a corner snipped off. Pipe filling into egg white halves, dividing evenly.
- Prepare the olive spiders: For each spider, slice one olive in half lengthwise for the body. Slice a second olive into thin rounds (4-5 slices), then cut each round in half to create legs. Arrange 4-5 leg pieces on each side of the olive body half, pressing gently into the filling.
- Garnish and serve: Sprinkle filled eggs with paprika. Add chives or dill if desired. Serve immediately or refrigerate until ready to serve.
Notes
Use older eggs (a week or two old) for easier peeling. For dairy-free, use a plant-based yogurt alternative. For Whole30 or paleo, swap Greek yogurt for additional avocado oil mayo and lemon juice. Make olive spiders ahead and store in fridge for up to 2 days. Filling can be made a day ahead; pipe just before serving.
Nutrition
- Serving Size: 2 deviled egg halves
- Calories: 140
- Sugar: 1
- Sodium: 320
- Fat: 9
- Saturated Fat: 2.5
- Carbohydrates: 3
- Protein: 10
Keywords: Halloween deviled eggs, lightened-up deviled eggs, olive spiders, healthy deviled eggs, spooky appetizer


