Love this? Save it for later!
Share the inspiration with your friends
I was standing in the craft store aisle last October, staring at a display of glittery spider webs and plastic cauldrons, when the smell hit me. It wasn’t from the store at all—it was the faint, sweet scent of black cocoa powder drifting from somewhere, and suddenly I was twelve years old in my neighbor Mrs. Kowalski’s kitchen. She wasn’t a grandmother type, not really—she was this sharp, retired chemist who wore cat-eye glasses and grew the most ridiculous orange pumpkins in her backyard every fall. Every Halloween, she’d show up at my parents’ door with a cardboard box full of the strangest cupcakes I’d ever seen. They were black. Like, properly, unnaturally black. And on top? The most electric purple frosting, swirled so high it looked like a tiny storm cloud.
I never got her recipe, you know. She moved to Arizona a few years later, and I didn’t think to ask. But every October, I’d find myself trying to remember that first bite—the way the cake was so tender it practically dissolved, the way the frosting tasted like vanilla and something else I couldn’t name. I tried recreating them maybe a dozen times over the years. The first batch came out gray. The second was so dry it crumbled into dust. The third… well, let’s just say I learned that black food coloring tastes absolutely terrible if you use too much.
It took me a while, honestly, but I finally cracked it. These Easy Black Velvet Halloween Cupcakes with Purple Frosting are the result of trial and error, a few late-night baking sessions, and maybe one very memorable mess involving a hand mixer and a cloud of powdered sugar. They’re the closest I’ve ever gotten to that memory. Maybe you’ve been there—chasing a taste from your past that you can’t quite pin down. This is that recipe.
Why You’ll Love This Recipe
Let me tell you why these Easy Black Velvet Halloween Cupcakes with Purple Frosting are about to become your new go-to for spooky season. I’ve tested this recipe more times than I care to admit, and every single batch has confirmed what I suspected from the start—this is the one.
- Quick & Easy: From start to finish, you’re looking at about 45 minutes. That’s mixing, baking, cooling, and frosting. Perfect for when you realize the school Halloween party is tomorrow and you’ve got nothing.
- Simple Ingredients: No weird additives or hard-to-find items. You probably have most of this in your pantry right now. The secret is black cocoa powder, which you can find at most grocery stores or online.
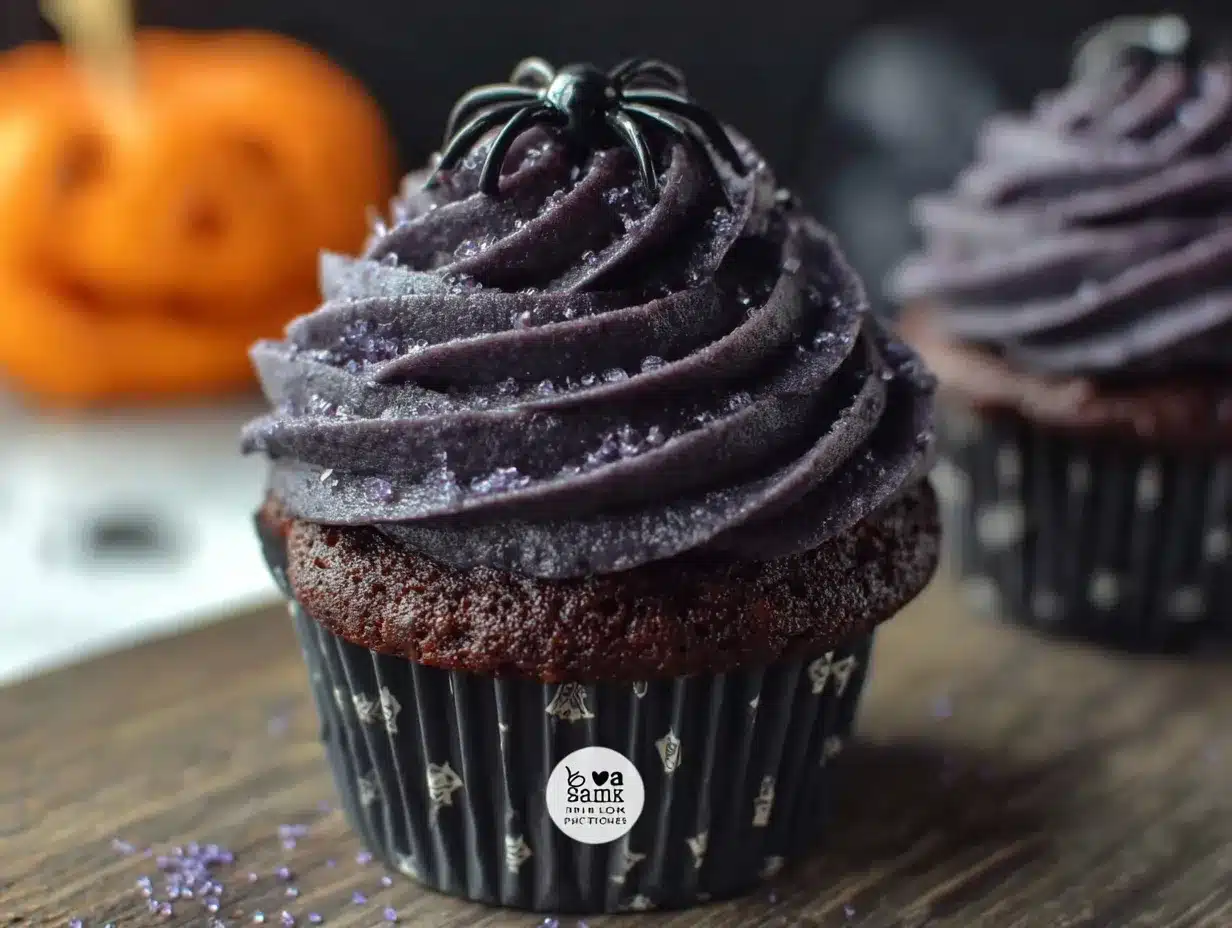
- Perfect for Halloween: These aren’t just cute—they’re showstoppers. The black cake against that purple frosting is genuinely striking. People will ask if you bought them from a bakery.
- Crowd-Pleaser: I brought a batch to my nephew’s Halloween party last year, and they disappeared before the pizza. Kids love the color, adults love the flavor.
- Unbelievably Delicious: The black cocoa gives these a deep, almost Oreo-like flavor. It’s not just food coloring—it actually tastes good. The purple frosting is light and fluffy, with just the right amount of sweetness to balance the dark cake.
What makes these different from every other Halloween cupcake recipe out there? It’s the texture. Black velvet is essentially red velvet’s moody cousin—same tender crumb, same subtle tang from buttermilk, but with that rich, dark cocoa flavor. I spent weeks perfecting the ratio of cocoa to flour to get that signature velvet softness without losing the color. And the frosting? I use a combination of butter and cream cheese that gives you the stability of buttercream with the tanginess of cream cheese frosting. It’s the best of both worlds.
These are the kind of cupcakes that make you close your eyes after the first bite. They’re nostalgic without being cliché, impressive without being complicated, and honestly? They’re just fun. Halloween should be fun. These cupcakes get that.
What Ingredients You Will Need
This recipe uses simple, everyday ingredients to create something that looks and tastes anything but ordinary. The magic really comes from the black cocoa powder and the way all these components work together.
For the Black Velvet Cupcakes
- All-purpose flour, 1 ½ cups (180g) — regular white flour works perfectly here; no need for cake flour
- Black cocoa powder, ½ cup (50g) — this is the star of the show (I prefer the brand Rodelle for its deep color and smooth flavor)
- Granulated sugar, 1 cup (200g) — adds sweetness and helps with that tender crumb
- Baking soda, 1 teaspoon — helps the cupcakes rise properly
- Salt, ½ teaspoon — balances the sweetness and enhances the cocoa flavor
- Buttermilk, 1 cup (240ml) — this is crucial for the velvet texture; the acidity tenderizes the gluten
- Vegetable oil, ½ cup (120ml) — keeps the cupcakes moist for days
- Large eggs, 2, room temperature — room temp eggs mix more evenly into the batter
- Vanilla extract, 2 teaspoons — use pure vanilla if you have it, the flavor difference is noticeable
- White vinegar, 1 teaspoon — sounds weird, I know, but it reacts with the baking soda for extra lift
- Gel black food coloring, 1-2 teaspoons — optional but recommended if you want that truly black color (liquid coloring won’t work as well)
For the Purple Cream Cheese Buttercream
- Unsalted butter, 1 cup (226g), softened — let it sit out for at least an hour
- Cream cheese, 4 oz (113g), softened — full fat is best for texture and stability
- Powdered sugar, 4 cups (480g), sifted — sifting prevents lumps in your frosting
- Vanilla extract, 1 teaspoon
- Heavy cream, 2-3 tablespoons — helps achieve the perfect piping consistency
- Purple gel food coloring, ½ to 1 teaspoon — gel is more concentrated and won’t thin out the frosting
- Pinch of salt — cuts the sweetness just a touch
For Decoration (Optional)
- Halloween sprinkles — orange, green, and purple mixes look amazing against the black cake
- Edible glitter — because why not?
- Mini candy eyeballs — these always get a laugh
One thing I learned the hard way—don’t skip the buttermilk. I tried making these with regular milk and lemon juice once, and while it worked okay, the texture wasn’t quite as tender. Real buttermilk makes a difference. And if you can’t find black cocoa powder, you can substitute Dutch-process cocoa, but the color won’t be as dramatic and the flavor will be more like a standard chocolate cupcake. Still good, just not the same.
Equipment Needed
- Standard 12-cup muffin tin — non-stick is nice but not required
- Paper cupcake liners — I like using black or purple liners for extra Halloween flair
- Two large mixing bowls — one for dry ingredients, one for wet
- Whisk — for combining dry ingredients
- Hand mixer or stand mixer — a hand mixer works perfectly fine; I’ve used both
- Rubber spatula — for scraping down the bowl and folding
- Cooling rack — wire rack is best for even cooling
- Piping bag with star tip — I use a Wilton 1M tip for that classic swirl look
- Measuring cups and spoons — accurate measurements matter in baking
- Kitchen scale — optional but helpful, especially for the flour and cocoa powder
If you don’t have a piping bag, you can absolutely use a zip-top bag with the corner snipped off. I’ve done it plenty of times when I couldn’t find my piping tips. It won’t look quite as polished, but it’ll still taste amazing. And if you don’t have a cooling rack, you can cool the cupcakes on a clean kitchen towel—just make sure they’re completely cool before frosting.
Preparation Method
- Preheat and prepare. Preheat your oven to 350°F (175°C). Line your muffin tin with 12 paper liners. I like to give them a quick spray of non-stick spray too, just to be safe—nothing worse than a cupcake that sticks to the liner.
- Mix the dry ingredients. In a large bowl, whisk together the flour, black cocoa powder, sugar, baking soda, and salt. Make sure there are no lumps in the cocoa powder—I’ve had batches where I got lazy and ended up with little cocoa clumps in the baked cupcakes. Not the end of the world, but annoying.
- Combine the wet ingredients. In a separate bowl, whisk together the buttermilk, vegetable oil, eggs, vanilla extract, and white vinegar. Whisk until everything is well combined and slightly frothy. If you’re using the gel food coloring, add it now and whisk until the mixture is a uniform dark gray.
- Make the batter. Pour the wet ingredients into the dry ingredients. Gently fold together with a rubber spatula until just combined—do not overmix! Overmixing activates the gluten and makes the cupcakes tough. A few small lumps are perfectly fine. The batter will look very dark and slightly thin, which is exactly what you want.
- Fill the liners. Divide the batter evenly among the 12 liners. I use a cookie scoop or a ¼ cup measure to keep them uniform. Each liner should be about ⅔ full. Don’t overfill, or you’ll get mushroom tops that are hard to frost neatly.
- Bake. Bake for 18-22 minutes, or until a toothpick inserted into the center comes out clean or with just a few moist crumbs. The tops should spring back when lightly touched. My oven runs hot, so I start checking at 18 minutes. Rotate the pan halfway through for even baking.
- Cool completely. Let the cupcakes cool in the pan for 5 minutes, then transfer them to a wire rack to cool completely. This is important—if you try to frost them while they’re still warm, the frosting will melt into a sad, soupy mess. Ask me how I know.
- Make the frosting. While the cupcakes cool, make the frosting. In a large bowl, beat the softened butter and cream cheese together until smooth and creamy—about 2-3 minutes. Scrape down the sides of the bowl. Add the sifted powdered sugar one cup at a time, beating on low speed after each addition. Add the vanilla extract and a pinch of salt. Beat in 2 tablespoons of heavy cream. If the frosting seems too thick, add the remaining tablespoon of cream. Beat on medium-high speed for 2-3 minutes until light and fluffy. Add the purple gel food coloring and beat until the color is evenly distributed. You can make it as pale or as vibrant as you like.
- Frost the cupcakes. Once the cupcakes are completely cool, fill your piping bag with the purple frosting. Pipe a generous swirl on each cupcake, starting from the outside and working inward. If you don’t have a piping bag, you can simply spread the frosting with an offset spatula—it’ll look rustic and charming.
- Decorate. Add sprinkles, edible glitter, or candy eyeballs while the frosting is still soft. The sprinkles will stick better this way. Let the frosting set for about 15 minutes before serving or storing.
Cooking Tips & Techniques
Here’s the thing about black cocoa powder—it’s more alkaline than regular cocoa, which means it can sometimes make baked goods dry if you’re not careful. That’s why this recipe uses oil instead of butter in the batter. Oil stays liquid at room temperature, so your cupcakes will stay moist for days. I learned this the hard way after my first attempt came out dry as a desert. The oil trick was a game-changer.
Another mistake I’ve made? Using liquid food coloring. It’s fine for most things, but for achieving a true black color, you need gel. Liquid coloring will just give you a muddy gray, and you’ll have to use so much that it affects the taste. Gel is concentrated, so a little goes a long way. Start with 1 teaspoon and add more if needed.
For the frosting, the key is making sure both the butter and cream cheese are properly softened. If they’re too cold, you’ll end up with lumps. If they’re too warm, the frosting will be too soft to pipe. I usually take them out of the fridge about an hour before I start baking. And don’t overbeat the cream cheese—it can get runny if you beat it too long on high speed.
Timing-wise, I like to bake the cupcakes the day before I need them and store them in an airtight container at room temperature. Then I make the frosting and decorate the morning of the event. The cupcakes actually taste better the next day—the flavors have time to meld together. Plus, it takes the stress out of doing everything at once.
Variations & Adaptations
One of the best things about this recipe is how flexible it is. Here are some variations I’ve tried and loved:
- Gluten-Free Version: Substitute the all-purpose flour with a 1:1 gluten-free baking flour blend. I’ve used King Arthur’s Measure for Measure blend with great results. The texture is slightly more delicate, but the flavor is spot on.
- Dairy-Free Version: Use a dairy-free buttermilk alternative (mix 1 cup of unsweetened almond milk with 1 tablespoon of lemon juice) and substitute the butter and cream cheese in the frosting with vegan alternatives. Miyoko’s makes an excellent vegan butter that behaves almost exactly like the real thing.
- Different Frosting Colors: The purple frosting is iconic, but you can easily change it up. Try neon green for a monster vibe, orange for a pumpkin theme, or even a deep blood red. Just swap the food coloring.
- Filled Cupcakes: For an extra surprise, core the center of each cooled cupcake and fill it with a dollop of raspberry jam or chocolate ganache before frosting. The red jam against the black cake is stunning.
- Cupcake Cake: You can bake this batter in two 8-inch round cake pans for a layer cake. Just adjust the baking time to 25-30 minutes. Double the frosting recipe for a layered cake.
My personal favorite variation? I once made these with a hint of peppermint extract in the frosting for a holiday party. The black and purple with a touch of mint was unexpectedly perfect. Sometimes the best discoveries come from happy accidents.
Serving & Storage Suggestions
These cupcakes are best served at room temperature. The cake is tender and moist, and the frosting is perfectly soft but stable. If you’ve refrigerated them, let them sit out for about 30 minutes before serving to take the chill off.
For a Halloween party, arrange them on a black cake stand or a platter lined with orange and purple napkins. They look amazing next to a bowl of candy corn or pumpkin-shaped cookies. I’ve also served them with a side of vanilla ice cream, and honestly, the combination is divine—the cold creaminess against the dark, rich cake is something special.
Storage-wise, these cupcakes will keep in an airtight container in the refrigerator for up to 5 days. The frosting will firm up in the fridge, but that’s fine—just let them come to room temperature before serving. You can also freeze the unfrosted cupcakes for up to 3 months. Wrap each one tightly in plastic wrap, then place them in a freezer bag. When you’re ready to use them, thaw at room temperature and frost as usual. The frosting itself can also be frozen for up to 2 months in an airtight container. Thaw it in the refrigerator overnight, then re-whip it briefly before using.
One thing I’ve noticed—the flavor actually improves after a day or two. The black cocoa flavor deepens and becomes even more pronounced. So don’t worry if you’re making these ahead of time. They’ll only get better.
Nutritional Information & Benefits
Let’s be real—these are cupcakes, not health food. But that doesn’t mean they can’t fit into a balanced lifestyle. Each cupcake (with frosting) contains approximately 380 calories, 18g of fat, 52g of carbohydrates, and 4g of protein. The exact numbers will vary depending on your specific ingredients and how much frosting you use.
On the plus side, black cocoa powder is rich in antioxidants called flavonoids, which are known to support heart health. It also contains less fat than regular cocoa powder, believe it or not. The buttermilk adds a small amount of calcium and probiotics, and the cream cheese in the frosting provides a bit of protein.
For those with dietary restrictions, this recipe can be made gluten-free and dairy-free with the substitutions I mentioned earlier. It’s also naturally nut-free, though you should always check your ingredient labels if you’re serving someone with allergies. These cupcakes are not suitable for vegans in their original form, but the dairy-free adaptations work beautifully.
My personal philosophy? Enjoy the treat, savor every bite, and don’t stress about the numbers. Halloween comes once a year. Life is too short to skip the purple frosting.
Conclusion
These Easy Black Velvet Halloween Cupcakes with Purple Frosting are more than just a recipe—they’re a memory maker. Every time I make them, I think of Mrs. Kowalski and her cat-eye glasses and that cardboard box full of magic. And every time I take a bite, I’m twelve years old again, standing in her kitchen, learning that food can be fun and beautiful and absolutely delicious all at once.
I hope you make these for your Halloween party, your classroom celebration, or just because it’s October and you feel like baking something that makes people smile. Don’t be afraid to make them your own—add sprinkles, change the color, fill them with jam. The best recipes are the ones that evolve with you.
When you make them, I’d love to hear how they turned out. Drop a comment below and let me know your favorite Halloween memory, or tag me in your photos on social media. There’s nothing better than seeing these spooky beauties come to life in your kitchen. Happy baking, and Happy Halloween!
Frequently Asked Questions
Can I use regular cocoa powder instead of black cocoa powder?
You can, but the color will be more of a dark brown than true black. The flavor will also be different—more like a standard chocolate cupcake. If you can find black cocoa powder, it’s worth the search for that dramatic color and Oreo-like flavor.
Why did my cupcakes turn out gray instead of black?
This usually happens when you don’t use enough black cocoa powder or when you use liquid food coloring instead of gel. Black cocoa powder is naturally very dark, but if you want that truly intense black color, adding a teaspoon of gel food coloring to the wet ingredients will help.
Can I make these cupcakes ahead of time?
Absolutely! Bake the cupcakes up to two days in advance and store them in an airtight container at room temperature. Make the frosting and decorate them the day you plan to serve them for the freshest look. You can also freeze unfrosted cupcakes for up to three months.
My frosting turned out too runny. What went wrong?
This usually happens when the cream cheese or butter is too warm, or when you’ve overbeaten the mixture. Make sure both are softened but still cool to the touch, and beat just until smooth and fluffy. If your frosting is already runny, try refrigerating it for 15-20 minutes to firm it up before piping.
Can I make these into a cake instead of cupcakes?
Yes! This batter works beautifully as a two-layer 8-inch cake. Bake at 350°F for 25-30 minutes, or until a toothpick comes out clean. You’ll want to double the frosting recipe to have enough for filling and covering the cake. The presentation is stunning—a black cake with purple frosting is a showstopper.
PrintEasy Black Velvet Halloween Cupcakes: Purple Frosting Recipe
These Easy Black Velvet Halloween Cupcakes with Purple Frosting are tender, moist, and deeply flavorful thanks to black cocoa powder. Topped with a vibrant purple cream cheese buttercream, they’re the perfect spooky treat for any Halloween celebration.
- Prep Time: 15 minutes
- Cook Time: 20 minutes
- Total Time: 45 minutes
- Yield: 12 cupcakes 1x
- Category: Dessert
- Cuisine: American
Ingredients
- 1 ½ cups (180g) all-purpose flour
- ½ cup (50g) black cocoa powder
- 1 cup (200g) granulated sugar
- 1 teaspoon baking soda
- ½ teaspoon salt
- 1 cup (240ml) buttermilk
- ½ cup (120ml) vegetable oil
- 2 large eggs, room temperature
- 2 teaspoons vanilla extract
- 1 teaspoon white vinegar
- 1–2 teaspoons gel black food coloring (optional)
- 1 cup (226g) unsalted butter, softened
- 4 oz (113g) cream cheese, softened
- 4 cups (480g) powdered sugar, sifted
- 1 teaspoon vanilla extract
- 2–3 tablespoons heavy cream
- ½ to 1 teaspoon purple gel food coloring
- Pinch of salt
- Halloween sprinkles (optional)
- Edible glitter (optional)
- Mini candy eyeballs (optional)
Instructions
- Preheat oven to 350°F (175°C). Line a 12-cup muffin tin with paper liners.
- In a large bowl, whisk together flour, black cocoa powder, sugar, baking soda, and salt until no lumps remain.
- In a separate bowl, whisk together buttermilk, vegetable oil, eggs, vanilla extract, white vinegar, and gel black food coloring (if using) until well combined and slightly frothy.
- Pour wet ingredients into dry ingredients. Gently fold with a rubber spatula until just combined; do not overmix. Batter will be dark and slightly thin.
- Divide batter evenly among the 12 liners, filling each about ⅔ full.
- Bake for 18-22 minutes, or until a toothpick inserted into the center comes out clean or with a few moist crumbs. Rotate pan halfway through baking.
- Let cupcakes cool in the pan for 5 minutes, then transfer to a wire rack to cool completely.
- While cupcakes cool, make the frosting: In a large bowl, beat softened butter and cream cheese together until smooth and creamy, about 2-3 minutes. Scrape down sides.
- Add sifted powdered sugar one cup at a time, beating on low after each addition. Add vanilla extract, salt, and 2 tablespoons heavy cream. Beat on medium-high for 2-3 minutes until light and fluffy. Add purple gel food coloring and beat until evenly distributed. If too thick, add remaining tablespoon of cream.
- Once cupcakes are completely cool, fill a piping bag fitted with a star tip (e.g., Wilton 1M) with purple frosting. Pipe a generous swirl on each cupcake, starting from the outside and working inward.
- Decorate with sprinkles, edible glitter, or candy eyeballs while frosting is still soft. Let frosting set for about 15 minutes before serving or storing.
Notes
For best results, use gel food coloring instead of liquid for true black and vibrant purple. Ensure butter and cream cheese are properly softened for smooth frosting. Cupcakes can be baked a day ahead and stored in an airtight container at room temperature; frost the day of serving. For a dairy-free version, use dairy-free buttermilk (almond milk + lemon juice) and vegan butter/cream cheese alternatives.
Nutrition
- Serving Size: 1 cupcake
- Calories: 380
- Sugar: 38
- Sodium: 220
- Fat: 18
- Saturated Fat: 10
- Carbohydrates: 52
- Fiber: 2
- Protein: 4
Keywords: Halloween cupcakes, black velvet cupcakes, purple frosting, easy Halloween dessert, black cocoa cupcakes


