Love this? Save it for later!
Share the inspiration with your friends
I was standing in line at the hardware store—of all places—when the woman ahead of me started telling the cashier about her Christmas Eve tradition. She was probably in her seventies, wearing a coat with a missing button, and she had this no-nonsense way of talking that made you listen. “Every year,” she said, “I put out a big board of little bowls. Marshmallows, crushed candy canes, those little chocolate chips. The kids go crazy for it. And I don’t have to cook a thing.” I wasn’t trying to eavesdrop, but honestly, I was frozen in place. A hot cocoa bar. Why had that never occurred to me? She paid for her lightbulbs and walked out, and I stood there with my bag of garden stakes, mentally rewriting my entire holiday menu. That chance encounter at the hardware store gave me the idea for this Quick Build-Your-Own Hot Cocoa Bar with Toppings Board, and I haven’t hosted a cold-weather gathering without one since.
The first time I tried it, I made every mistake you can imagine. I used a too-small board, so everything slid off when someone bumped the table. I forgot to include spoons for the toppings, so people were double-dipping with their mugs. And I used those giant marshmallows that looked cute but wouldn’t fit in anyone’s cup. But you know what? Nobody cared. Everyone was too busy grinning at the sheer joy of building their own perfect cup of hot chocolate. That’s the magic of a cocoa bar—it’s not about perfection. It’s about letting people play with their food in the most comforting way possible.
Maybe you’ve been there, staring at a party spread and wishing you had something that felt special but didn’t require hours in the kitchen. This hot cocoa bar is that answer. It takes about ten minutes to set up, uses ingredients you can find at any grocery store, and somehow makes everyone feel like a kid again. I keep coming back to this setup because it works for everything—holiday parties, snow days, birthday sleepovers, or just a Tuesday night when the family needs a little warmth. The woman from the hardware store probably has no idea she changed my winter hosting game forever, but I think about her every time I set out that board of little bowls.
Why You’ll Love This Recipe
Let me be straight with you—this isn’t a complicated recipe. That’s the whole point. I’ve tested this setup at least a dozen times over three winters, and every single time, it delivers more joy than anything I’ve spent hours slaving over in the kitchen. Here’s what makes this Quick Build-Your-Own Hot Cocoa Bar with Toppings Board stand out from every other party idea you’ve pinned:
- Quick & Easy : This whole setup comes together in under 10 minutes. No baking, no stirring, no stress. You literally open packages and pour things into bowls. That’s it.
- Simple Ingredients : Every topping on this board is something you can grab at a regular grocery store. No fancy baking supply runs or specialty shops required.
- Perfect for Any Occasion : Holiday parties, snow days, birthday mornings, movie nights, or even a cozy date at home. This bar adapts to whatever you’re celebrating.
- Crowd-Pleaser : Kids love the freedom to build their own cup. Adults love the nostalgia. I’ve never seen anyone walk past a cocoa bar without a smile.
- Unbelievably Delicious : The combination of rich hot chocolate with crunchy, creamy, and minty toppings creates a texture party in every sip.
What makes this different from every other hot cocoa bar out there is the board setup itself. Instead of scattering bowls across your counter, everything lives on one large cutting board or serving platter. This means less cleanup, a prettier presentation, and guests can grab a little bit of everything without hunting for toppings. I learned this the hard way after my first scattered setup left marshmallows rolling under the couch for weeks.
This recipe isn’t just good—it’s the kind of thing that makes people close their eyes after their first sip and go, “Oh, that’s perfect.” It’s comfort in a mug, with zero kitchen stress. For busy weeknights or last-minute gatherings, this is your secret weapon.
What Ingredients You Will Need
This recipe uses simple, store-bought ingredients to create a stunning presentation without any fuss. You’ll find everything at your local grocery store, and most of these are probably already in your pantry.
For the Hot Cocoa Base:
- 1 gallon whole milk (or any milk you prefer—oat milk works beautifully here)
- 1 cup hot cocoa mix (I recommend Ghirardelli or Swiss Miss Dark Chocolate for the richest flavor)
- 1 teaspoon vanilla extract (adds warmth and depth)
- 1/4 teaspoon salt (trust me on this—it balances the sweetness)
For the Toppings Board (7 Easy Options):
- 1 cup mini marshmallows (the tiny ones fit better in mugs than the giant ones)
- 1 cup crushed candy canes (about 6-8 candy canes, crushed in a bag with a rolling pin)
- 1 cup chocolate chips (semi-sweet or milk chocolate—both work great)
- 1 cup whipped cream (store-bought in a can is fine, or make your own if you’re feeling fancy)
- 1/2 cup caramel sauce (warmed slightly so it drizzles easily)
- 1/2 cup sprinkles (holiday mix or classic rainbow—let your personality shine)
- 1/2 cup toasted coconut flakes (adds a tropical twist that surprises everyone)
Optional Extras for the Adventurous:
- 1/4 cup cinnamon sticks (for stirring)
- 1/4 cup chocolate shavings (use a vegetable peeler on a chocolate bar)
- 1/4 cup peanut butter chips (for a salty-sweet combo)
I personally recommend using the Ghirardelli hot cocoa mix because it has that deep, almost fudge-like flavor that doesn’t get lost under all the toppings. But honestly, any brand works. If you’re dairy-free, swap the whole milk for oat milk or almond milk—just know that oat milk gives the creamiest texture. The candy canes are non-negotiable in my house. There’s something about that minty crunch against warm chocolate that feels like winter in a cup. For the caramel sauce, I use the one from the ice cream aisle—no need to make it from scratch unless you really want to impress someone.
One tip I learned the hard way: don’t crush the candy canes too fine. You want little chunks, not powder. Powder just dissolves into the cocoa and you lose that satisfying crunch. Put them in a ziplock bag and give them a few firm whacks with a rolling pin. It’s also a great way to let off some steam after a long day.
Equipment Needed
You don’t need much for this setup, which is part of the beauty. Here’s what I use every time:
- Large cutting board or serving platter (at least 12×16 inches—a wooden board looks gorgeous but any large platter works)
- Small bowls or ramekins (6 to 8 of them, roughly 4 ounces each—I use the ones from the dollar store)
- Small spoons or tongs (one for each topping bowl to prevent cross-contamination)
- Large pot or slow cooker (for heating the milk and cocoa mix—a slow cooker keeps it warm for hours)
- Mugs (6 to 8 mugs, depending on your crowd)
- Ziplock bag and rolling pin (for crushing candy canes)
- Whisk (for mixing the cocoa base)
If you don’t have a large cutting board, a baking sheet works perfectly fine. I’ve used a clean cookie sheet in a pinch, and nobody noticed. For the small bowls, I’ve used everything from teacups to mason jars to leftover yogurt containers. The key is making sure each topping has its own home so people can grab what they want without digging through a pile. If you’re setting this up for a party, consider using a slow cooker for the hot cocoa base—it keeps everything warm for hours without you having to babysit the stove.
Preparation Method
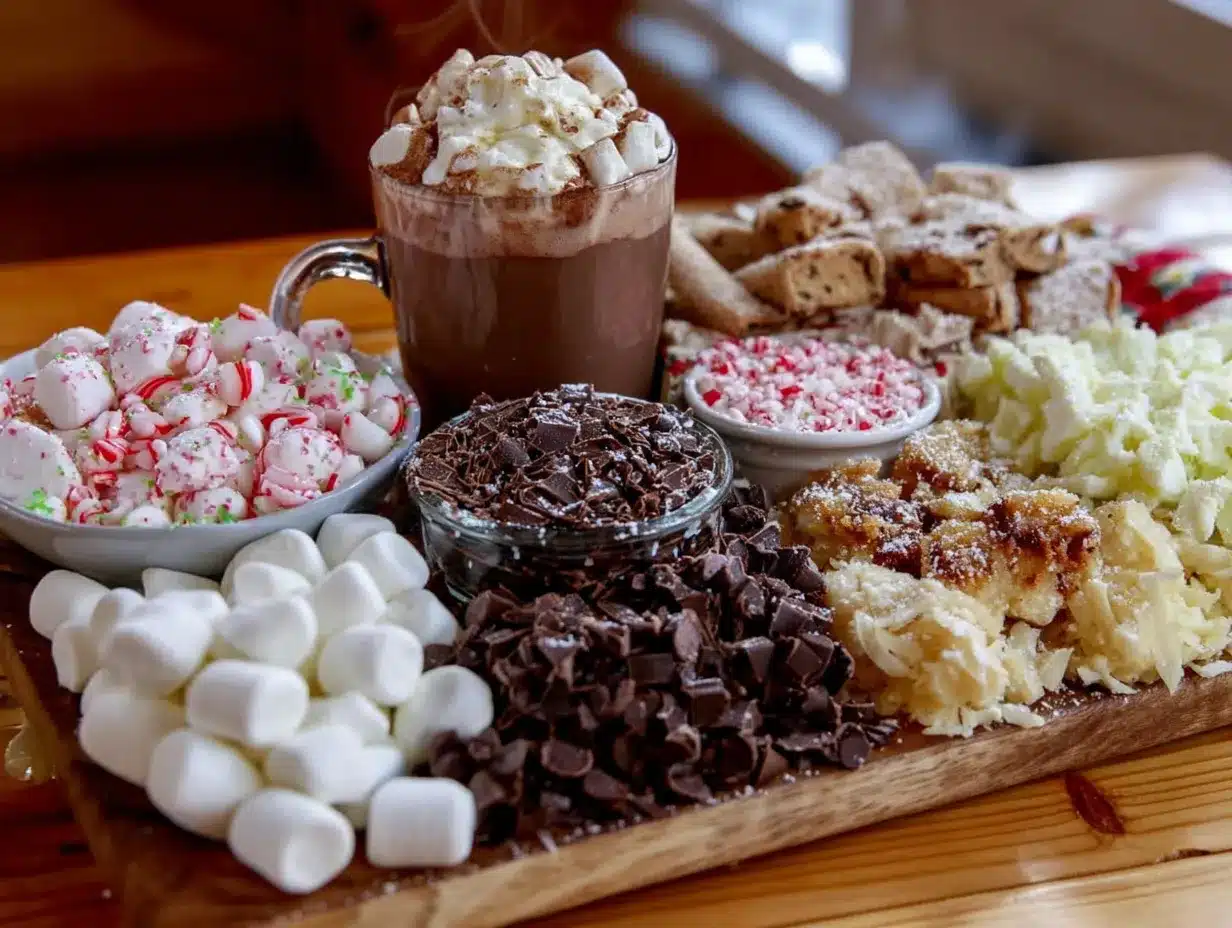
This setup is so simple, you’ll wonder why you haven’t been doing it for years. Here’s exactly how to put together your Quick Build-Your-Own Hot Cocoa Bar with Toppings Board.
Step 1: Prepare the Hot Cocoa Base (5 minutes)
Pour the gallon of milk into a large pot over medium heat. Whisk occasionally until it’s warm but not boiling—about 3 to 4 minutes. You want it steaming, not bubbling. Once it’s warm, whisk in the hot cocoa mix, vanilla extract, and salt. Keep whisking until everything is fully dissolved and the mixture is smooth. If you’re using a slow cooker, transfer the mixture now and set it to warm. This will keep your cocoa ready for hours without scorching.
Step 2: Crush the Candy Canes (2 minutes)
Place the unwrapped candy canes in a ziplock bag. Seal it, then go to town with a rolling pin. You want a mix of small pieces and a little bit of powder. Don’t overdo it—chunks are the goal. Set aside in a small bowl.
Step 3: Arrange the Toppings Board (5 minutes)
Take your large cutting board or platter and start placing your small bowls. Put the bigger items like marshmallows and chocolate chips at the corners, then fill in the middle with the smaller bowls of crushed candy canes, sprinkles, and coconut flakes. Leave space for the caramel sauce and whipped cream—these usually go in slightly larger bowls because people tend to take more. Place a small spoon or tongs in each bowl so guests can serve themselves without using their hands.
Step 4: Warm the Caramel Sauce (1 minute)
If you’re using caramel sauce, pop the jar in a bowl of hot water for a minute or two. This makes it pourable instead of gloppy. Don’t microwave it in the plastic jar—learn from my mistake. Transfer it to a small bowl if you can.
Step 5: Set Up the Serving Station (2 minutes)
Place the pot or slow cooker of hot cocoa next to the board. Stack your mugs nearby. Arrange everything so people can grab a mug, fill it with cocoa, then move down the line adding toppings. I like to put the marshmallows and whipped cream at the end of the line so they stay fluffy on top.
Step 6: Let People Build Their Own (0 minutes)
That’s it. Seriously. Step back and watch the magic happen. Kids will load their mugs with sprinkles and candy cane chunks. Adults will go for the caramel and coconut. Someone will inevitably make a second cup. That’s how you know it’s working.
One thing I always do: make a small sign that says “Build Your Own Cocoa” and prop it up behind the board. It adds a little charm and tells people exactly what to do. I once forgot the sign, and my uncle stood there staring at the board for a full minute before asking, “Is this for display?” Don’t be like my uncle. Make a sign.
Cooking Tips & Techniques
After setting up this cocoa bar more times than I can count, I’ve collected a few tricks that make everything run smoother. Here’s what I wish someone had told me the first time.
Keep the Cocoa Warm Without Burning It
If you’re using a pot on the stove, keep the heat on low and stir every 10 minutes or so. Milk scorches fast, and burnt cocoa is a tragedy. A slow cooker on warm setting is honestly the best option—it holds the perfect temperature for hours without any attention. I learned this after scorching a batch right before a party and having to start over in a panic.
Don’t Overload the Board
Seven toppings is the sweet spot. Any more than that and the board looks cluttered, people get overwhelmed, and half the toppings go unused. Stick with the seven I’ve listed, and you’ll have a beautiful, functional board. If you want to swap something out, go ahead—but keep the total number around seven.
Prep Everything Before Guests Arrive
This is not a recipe you want to assemble while people are standing in your kitchen. Crush the candy canes, arrange the bowls, and warm the milk ahead of time. When guests show up, all you have to do is pour the cocoa into the slow cooker and point them toward the board. I once tried to set this up while my sister-in-law was asking me about work, and I ended up putting sprinkles in the caramel bowl. It was a mess.
Use a Liner for Easy Cleanup
If you’re using a wooden cutting board, line it with parchment paper before arranging the bowls. This catches any spills or stray sprinkles, and when the party’s over, you just lift the paper and toss it. No scrubbing sticky residue off your board at 11 PM.
Label the Toppings
I use little tent cards or small tags propped in each bowl. It sounds fussy, but it saves people from guessing what’s in that white bowl (is it shredded coconut or parmesan cheese? The horror). Plus, it looks cute in photos.
Variations & Adaptations
This hot cocoa bar is endlessly customizable, which is exactly why I love it. Here are a few ways to switch things up depending on the season, your crowd, or your dietary needs.
Dairy-Free Version
Swap the whole milk for oat milk or coconut milk—both get creamy when heated. Use a dairy-free hot cocoa mix (most are naturally dairy-free, but check the label). For toppings, skip the whipped cream or use a coconut-based version. The chocolate chips should be dark chocolate to avoid milk solids. I’ve served this to a dairy-free friend and she said it was the first hot cocoa she’d had in years that actually felt indulgent.
Summer S’mores Cocoa Bar
Swap the candy canes for crushed graham crackers and add mini marshmallows for toasting (if you have a kitchen torch, this is a game-changer). Use milk chocolate chips and a drizzle of chocolate syrup. It tastes like a campfire in a mug, minus the mosquito bites.
Spiced Holiday Version
Add a cinnamon stick and a star anise to the milk while it heats. Remove them before serving. Swap the vanilla extract for peppermint extract (use 1/2 teaspoon—it’s strong). Top with crushed gingerbread cookies instead of candy canes. This version smells like Christmas morning and tastes even better.
Kid-Friendly Build-Your-Own Bar
Set up the board at kid height and include fun toppings like colorful marshmallows, gummy bears, and chocolate drizzle. Skip the hot cocoa base and use warm milk with a little chocolate syrup mixed in—less caffeine, more control. My niece once loaded her cup with so many gummy bears she couldn’t actually drink the cocoa, but she was thrilled about it.
Low-Sugar Option
Use unsweetened almond milk and a sugar-free hot cocoa mix. For toppings, offer unsweetened coconut flakes, dark chocolate chips (70% or higher), and a sprinkle of cinnamon. It’s lighter but still feels like a treat. I made this version for myself during a January health kick, and honestly, it hit the spot.
Serving & Storage Suggestions
This hot cocoa bar is best served immediately while the milk is warm and the toppings are fresh. But there are a few tricks to make it stretch further or work for different occasions.
Serving Temperature
Serve the cocoa base hot but not scalding—around 140°F is perfect. If it’s too hot, the whipped cream melts instantly and the marshmallows disappear. Warm enough to be cozy, cool enough to sip right away. I use a kitchen thermometer the first time, then go by feel after that.
Presentation Tips
Arrange the board on a cleared counter or side table where people can gather around it. Place the mugs to one side and the cocoa pot on the other. Add a small vase with a sprig of evergreen or a cinnamon stick for a festive touch. I always put out a few extra napkins because someone will inevitably drip caramel on the counter.
What to Serve Alongside
This cocoa bar pairs beautifully with cookies, biscotti, or a simple pound cake. For a full winter spread, add a plate of gingerbread cookies or a bowl of popcorn for a salty contrast. If you’re serving this as a dessert at a dinner party, keep the rest of the meal light—this is the star.
Storage Instructions
The hot cocoa base can be stored in the fridge for up to 3 days. Reheat it gently on the stove or in the microwave, whisking to recombine. The toppings are best stored separately in airtight containers at room temperature. The crushed candy canes will get sticky if left out too long, so store them in a sealed bag. The toasted coconut should be kept in a cool, dry place.
How Flavors Develop
The cocoa base actually tastes even better the next day—the flavors meld together and get richer. I sometimes make a double batch on purpose so I can have leftovers for a cozy morning. Just don’t add the toppings until you’re ready to serve, or they’ll get soggy.
Nutritional Information & Benefits
Let’s be honest—this is a treat, not a health food. But that doesn’t mean it can’t fit into a balanced lifestyle. Here’s a rough breakdown per 8-ounce serving of cocoa with a moderate amount of toppings.
| Nutrient | Amount Per Serving |
|---|---|
| Calories | 280-350 (depends on toppings) |
| Total Fat | 10-15g |
| Saturated Fat | 6-8g |
| Carbohydrates | 40-50g |
| Sugar | 30-40g |
| Protein | 8-10g |
| Calcium | 25% of daily value |
The milk provides a solid dose of calcium and protein, which helps balance the sugar rush. Dark chocolate chips offer antioxidants, and if you use dark cocoa mix, you’re getting a little magnesium boost. The crushed candy canes? Pure joy, no nutritional value, and I’m totally okay with that.
If you’re watching your sugar intake, use unsweetened milk and a sugar-free mix. Skip the caramel and sprinkles, and load up on the coconut and dark chocolate. It’s still delicious, just a little more grown-up. For anyone with allergies, note that most candy canes are gluten-free, but always check the label. The coconut is a common allergen, so I always set it apart from the other toppings with a small sign.
Conclusion
This Quick Build-Your-Own Hot Cocoa Bar with Toppings Board is the kind of recipe that makes you wonder why you ever stressed about hosting. It’s simple, it’s beautiful, and it makes everyone feel like they’re getting something special. The woman at the hardware store probably never knew she’d inspire dozens of cozy gatherings, but her offhand comment changed the way I approach winter entertaining forever.
I love this setup because it’s forgiving. You can use whatever toppings you have on hand, swap things out based on what your family loves, and it always looks impressive. There’s no wrong way to build your cocoa bar, and that’s the beauty of it. Whether you’re hosting a holiday party or just trying to make a snowy Tuesday feel magical, this board delivers every single time.
So go ahead—grab a cutting board, raid your pantry, and set up your own cocoa bar. And when your guests take that first sip and their faces light up, think of me (and the hardware store lady). I’d love to hear what toppings you used and how it turned out. Drop a comment below or tag me in your photos—I’m always looking for new ideas to try. Now go make some cocoa and enjoy the warmth.
Frequently Asked Questions
Can I make the hot cocoa base in a slow cooker?
Absolutely. In fact, I prefer it. Just whisk the milk, cocoa mix, vanilla, and salt together in the slow cooker, then set it to low for 2 hours or warm for up to 4 hours. Stir occasionally to prevent a skin from forming on top.
How many people does this cocoa bar serve?
This setup comfortably serves 8 to 10 people, assuming each person has one mug of cocoa. If you have a crowd that loves seconds (and they will), double the milk and cocoa mix.
Can I use water instead of milk?
You can, but it won’t be nearly as creamy. Milk gives the cocoa body and richness that water just can’t replicate. If you’re dairy-free, use oat milk or coconut milk for the best texture.
How do I keep the cocoa warm during a party?
A slow cooker on the warm setting is your best friend here. If you don’t have one, keep the pot on the stove over the lowest heat and stir every 10 minutes. You can also pour the cocoa into a thermal carafe—it stays hot for about 2 hours.
Can I prep the toppings the night before?
Yes, most toppings can be prepped a day in advance. Crush the candy canes, portion out the chocolate chips and sprinkles, and store everything in separate airtight containers. Set up the board right before guests arrive so the coconut stays crunchy and the marshmallows don’t get stale.
PrintQuick Build-Your-Own Hot Cocoa Bar with 7 Easy Toppings

A simple, crowd-pleasing hot cocoa bar that comes together in under 10 minutes with seven easy toppings. Perfect for holiday parties, snow days, or any cozy gathering.
- Prep Time: 10 minutes
- Cook Time: 5 minutes
- Total Time: 15 minutes
- Yield: 8-10 servings 1x
- Category: Beverage
- Cuisine: American
Ingredients
- 1 gallon whole milk (or oat milk for dairy-free)
- 1 cup hot cocoa mix (recommended: Ghirardelli or Swiss Miss Dark Chocolate)
- 1 teaspoon vanilla extract
- 1/4 teaspoon salt
- 1 cup mini marshmallows
- 1 cup crushed candy canes (about 6–8 candy canes)
- 1 cup chocolate chips (semi-sweet or milk chocolate)
- 1 cup whipped cream (store-bought or homemade)
- 1/2 cup caramel sauce (warmed)
- 1/2 cup sprinkles (holiday mix or rainbow)
- 1/2 cup toasted coconut flakes
- Optional: 1/4 cup cinnamon sticks, 1/4 cup chocolate shavings, 1/4 cup peanut butter chips
Instructions
- Prepare the hot cocoa base: Pour the gallon of milk into a large pot over medium heat. Whisk occasionally until warm but not boiling (about 3-4 minutes). Whisk in hot cocoa mix, vanilla extract, and salt until fully dissolved and smooth. If using a slow cooker, transfer and set to warm.
- Crush the candy canes: Place unwrapped candy canes in a ziplock bag and crush with a rolling pin until you have a mix of small pieces and some powder. Set aside in a small bowl.
- Arrange the toppings board: Place small bowls on a large cutting board or platter. Put larger items (marshmallows, chocolate chips) at corners, fill in with smaller bowls of crushed candy canes, sprinkles, and coconut flakes. Leave space for caramel sauce and whipped cream. Add a small spoon or tongs to each bowl.
- Warm the caramel sauce: Place the jar in a bowl of hot water for 1-2 minutes to make it pourable. Transfer to a small bowl if desired.
- Set up the serving station: Place the pot or slow cooker of hot cocoa next to the board. Stack mugs nearby. Arrange so guests can grab a mug, fill with cocoa, then add toppings. Put marshmallows and whipped cream at the end of the line.
- Let people build their own: Step back and let guests create their perfect cup. Optionally, make a small sign that says ‘Build Your Own Cocoa’.
Notes
Use a slow cooker to keep cocoa warm for hours. Don’t crush candy canes too fine—aim for chunks. Line the board with parchment paper for easy cleanup. Label toppings with small tent cards. Prep everything before guests arrive.
Nutrition
- Serving Size: 1 mug (8 ounces)
- Calories: 280350
- Sugar: 3040
- Sodium: 200300
- Fat: 1015
- Saturated Fat: 68
- Carbohydrates: 4050
- Fiber: 12
- Protein: 810
Keywords: hot cocoa bar, hot chocolate bar, build your own cocoa, winter party, holiday dessert, easy entertaining, toppings board


