Love this? Save it for later!
Share the inspiration with your friends
My neighbor Sarah asked why I couldn’t just use a boxed cookie mix for the Halloween party. I started to explain why that wouldn’t work — then stopped. Honestly, I had never considered it. I was so caught up in my “from-scratch-only” baking philosophy that I forgot the whole point: having fun with the kids. So on a Tuesday afternoon, with a box of mix in one hand and a tube of neon orange icing in the other, I let her take the lead. And let me tell you, watching her confidently squiggle spider legs onto those cookies was a moment. What came out of that kitchen wasn’t just cookies — it was a full-on, no-stress, crowd-pleasing Halloween tradition in the making. Maybe you’ve been there, holding onto a technique like it’s sacred, only to realize the shortcut is actually the secret. That’s exactly how these Easy Halloween Sugar Cookies were born. They’re soft, buttery, and absolutely perfect for decorating with friends, family, or a room full of little goblins. I mean, who knew a boxed mix could lead to such a delicious victory? The best part? I learned more from Sarah’s beginner instinct than I did from all my years of fussing over dough. So if you’re looking to impress your guests without sweating over a rolling pin, you’re in the right place.
Why You’ll Love This Recipe
These Easy Halloween Sugar Cookies are a game-changer for anyone hosting a Halloween gathering. After testing this recipe with my own kids and a dozen neighbors, I can confidently say it delivers every single time. No stress, no fancy techniques, just pure, buttery cookie joy that steals the show at any party.
- Quick & Easy: Comes together in under 30 minutes, perfect for last-minute Halloween parties or a fun afternoon activity with the kids.
- Simple Ingredients: No need for a specialty baking run. You likely have everything in your pantry, and a boxed mix makes it even easier.
- Perfect for Halloween Gatherings: Great for potlucks, dinner parties, or handing out to trick-or-treaters. They’re always the first thing to disappear from the dessert table.
- Crowd-Pleaser: Kids and adults alike rave about the soft, tender crumb. I’ve had grown-ups sneak three before dinner.
- Unbelievably Delicious: The texture is next-level comfort food — soft in the center with slightly crisp edges. The vanilla and almond extract combo is pure magic.
What makes this recipe different from the rest is the technique. Instead of fussing with chilled dough and rolling pins, we use a drop cookie method that keeps the cookies pillowy soft. It’s not just another sugar cookie — it’s your best version for a crowd. This recipe is the kind that makes you close your eyes after the first bite. It’s comfort food reimagined for the spooky season — faster, easier, but with the same soul-soothing satisfaction. Perfect for impressing guests without stress, or turning a simple Halloween snack into something memorable.
What Ingredients You Will Need
This recipe uses simple, pantry-friendly ingredients to deliver bold flavor and a satisfying texture. Most of these are staples you already have, making it easy to whip up a batch whenever the Halloween spirit strikes.
- Unsalted butter, softened (1 cup / 2 sticks) — Adds richness and that tender crumb. I prefer Land O’Lakes for consistent results.
- Granulated sugar (1 cup / 200g) — Provides sweetness and helps create those slightly crisp edges.
- Large egg (1, room temperature) — Binds everything together and adds structure.
- Vanilla extract (1 teaspoon) — The classic flavor base. Pure extract makes a difference here.
- Almond extract (½ teaspoon) — My secret weapon. It gives the cookies a subtle, nutty warmth that makes them taste bakery-style.
- All-purpose flour (2 cups / 240g) — The backbone of the dough. Spoon and level for accuracy.
- Baking soda (½ teaspoon) — Helps the cookies spread just enough for that perfect shape.
- Salt (¼ teaspoon) — Balances the sweetness and enhances the other flavors.
- Boxed sugar cookie mix (1 box, 17.5 oz) — The shortcut that started it all. I use Betty Crocker, but any brand works. This is optional if you want to go fully from scratch.
- Halloween sprinkles and decorations — Orange, black, and purple jimmies, candy eyeballs, and edible glitter. Let your imagination run wild.
- Royal icing or store-bought decorating icing (1-2 tubes) — For hand-decorating. Wilton or Pillsbury work great for beginners.
Ingredient Selection Tips: For the best texture, use butter that’s softened but not melted. If you’re using the boxed mix, follow the package instructions for the base, then add the almond extract yourself. For a gluten-free option, swap the all-purpose flour with a 1:1 gluten-free baking blend.
Equipment Needed
You don’t need a professional bakery setup to make these cookies shine. Here’s what you’ll want on hand:
- Large mixing bowl — A sturdy glass or ceramic bowl works best for creaming butter and sugar.
- Electric hand mixer or stand mixer — Makes creaming the butter and sugar a breeze. A wooden spoon works too, but your arm will thank you for the mixer.
- Baking sheets (2-3) — Light-colored aluminum sheets prevent over-browning. I’ve had great results with Nordic Ware.
- Parchment paper or silicone baking mats — Non-stick and easy cleanup. Silpat mats are my go-to for even baking.
- Cookie scoop (1.5 tablespoon size) — Ensures uniform cookies. A regular spoon works in a pinch.
- Cooling rack — Essential for letting cookies cool completely before decorating.
- Small piping bags or squeeze bottles — For precise icing application. Ziploc bags with a snipped corner are a budget-friendly alternative.
- Toothpicks — Perfect for fixing small icing mistakes or creating spider web designs.
Preparation Method
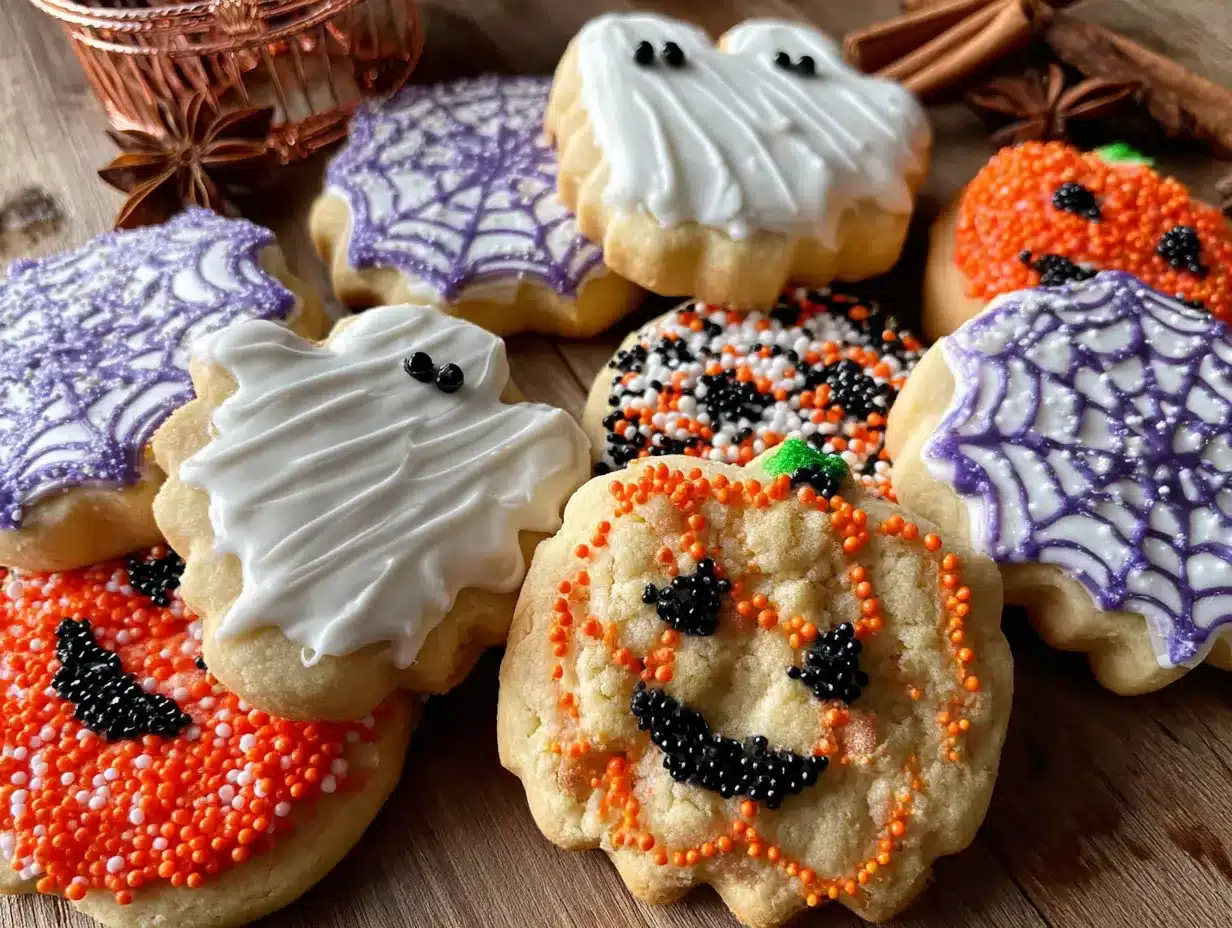
Follow these steps carefully, and you’ll have a batch of perfectly soft, crowd-pleasing Halloween sugar cookies ready to decorate.
- Preheat your oven to 350°F (175°C). Line two baking sheets with parchment paper or silicone mats. This ensures the cookies don’t stick and bake evenly.
- Cream the butter and sugar. In a large mixing bowl, beat the softened butter and granulated sugar together on medium speed for 2-3 minutes until light and fluffy. Scrape down the sides of the bowl once. The mixture should look pale and airy — that’s your cue it’s ready.
- Add the egg and extracts. Crack in the room-temperature egg, then add the vanilla and almond extracts. Beat on low until just combined. Don’t overmix here, or your cookies might turn out dense.
- Combine the dry ingredients. In a separate bowl, whisk together the flour, baking soda, and salt. If using the boxed mix, skip this step and just add the mix to the wet ingredients.
- Mix the dough. Gradually add the dry ingredients to the wet mixture, mixing on low speed until a soft dough forms. The dough should be slightly sticky but hold together when pressed. If it feels too sticky, add a tablespoon of flour at a time.
- Scoop the cookies. Use a cookie scoop to portion out rounded tablespoons of dough. Place them 2 inches apart on the prepared baking sheets. These cookies spread a little, so give them room to breathe.
- Bake. Pop the baking sheets into the preheated oven and bake for 8-10 minutes. The edges should be lightly golden, but the centers will look slightly underdone. That’s exactly what you want for soft cookies.
- Cool completely. Let the cookies rest on the baking sheet for 2 minutes, then transfer them to a cooling rack. Wait until they are completely cool before decorating — warm icing is a recipe for a sticky mess.
- Decorate. This is where the fun begins. Use your royal icing or store-bought decorating icing to create spider webs, ghosts, pumpkins, or simple polka dots. Let the kids go wild with sprinkles and candy eyeballs. I like to pipe a thin outline first, then flood the center with a slightly thinner icing.
Troubleshooting Tip: If your dough feels too soft to scoop, pop it in the fridge for 15 minutes. This firms it up without making it hard to work with.
Cooking Tips & Techniques
Over the years, I’ve made plenty of mistakes with sugar cookies. I once forgot the sugar entirely — talk about a sad batch of flour discs. But those failures taught me a few things that make these cookies bulletproof.
Don’t overbake. The number one mistake is leaving cookies in the oven too long. They continue to cook on the hot baking sheet after you pull them out, so take them out when the centers look just set. Trust me, your guests will thank you for the soft texture.
Room temperature ingredients matter. Cold eggs or butter can cause the dough to seize up. Let your butter sit out for an hour before starting, and place the egg in a bowl of warm water for 5 minutes if you forgot to take it out.
Use the back of a spoon for flat tops. If you want a smoother surface for decorating, gently press each dough ball down with the back of a spoon before baking. This creates a perfect canvas for your icing designs.
Multitask like a pro. While one batch bakes, scoop the next batch onto a second baking sheet. This keeps the workflow smooth and prevents the dough from warming up too much.
Test your icing consistency. Before decorating, pipe a small test line on a plate. If it spreads into a puddle, it’s too thin. Add a pinch of powdered sugar to thicken it. If it holds a stiff peak, it’s too thick — add a drop of water.
Variations & Adaptations
These cookies are incredibly versatile, so don’t be afraid to make them your own. Here are a few variations I’ve personally tested and loved.
Dietary Variations: For a dairy-free version, swap the butter with vegan butter sticks (I like Earth Balance). Use a flax egg (1 tablespoon ground flaxseed mixed with 3 tablespoons water) for an egg-free option. The texture will be slightly more cakey, but still delicious.
Flavor Twists: Add ½ teaspoon of pumpkin pie spice to the dough for a fall-inspired twist. Or fold in ¼ cup of mini chocolate chips for a chocolate-studded surprise. I once added orange zest to the dough, and it paired beautifully with the almond extract.
Different Cooking Methods: If you’re short on time, use an air fryer. Preheat to 320°F (160°C) and bake for 5-6 minutes. The cookies come out just as soft, but you’ll need to work in smaller batches.
Customize for Taste: Love a crispier cookie? Bake for an extra 2 minutes and flatten the dough balls more before baking. Prefer a thicker cookie? Chill the dough for 30 minutes before scooping.
Allergen Substitutions: For nut-free baking, simply omit the almond extract and use an additional ½ teaspoon of vanilla. For gluten-free, use a 1:1 gluten-free flour blend and add ¼ teaspoon of xanthan gum if your blend doesn’t include it.
Serving & Storage Suggestions
These cookies are best served at room temperature, fresh off the cooling rack. Arrange them on a decorative platter or tiered stand for that wow factor at your Halloween party. I like to place them next to a bowl of apple cider or a pitcher of spooky punch for a complete spread.
Complementary Dishes: Pair these cookies with a warm mug of hot chocolate, a scoop of vanilla ice cream, or a side of caramel dip. For a savory balance, serve alongside a cheese board with sharp cheddar and apple slices.
Storage: Store undecorated cookies in an airtight container at room temperature for up to 5 days. Decorated cookies should be stored in a single layer, separated by wax paper, to prevent smudging. They’ll stay fresh for up to a week.
Freezing: Freeze undecorated cookies in a freezer-safe bag for up to 3 months. Thaw at room temperature for 30 minutes before decorating. You can also freeze the dough balls — just scoop them, freeze on a baking sheet, then transfer to a bag. Bake straight from frozen, adding 2 minutes to the bake time.
Reheating: Pop a cookie in the microwave for 10 seconds for that just-baked warmth. For a larger batch, warm them in a 300°F (150°C) oven for 5 minutes.
Flavor Development: Honestly, these cookies taste even better the next day. The flavors meld together, and the texture softens slightly. So don’t stress about baking them the morning of your party — they’re actually better made a day ahead.
Nutritional Information & Benefits
Per serving (1 cookie, based on 24 cookies): Approximately 140 calories, 7g fat, 18g carbohydrates, 1g protein, 10g sugar. These are estimates and will vary based on decorations and substitutions.
Health Benefits of Key Ingredients: Butter provides vitamin A for healthy vision and skin. Eggs offer high-quality protein and choline, which supports brain health. Almond extract adds a touch of flavor without extra sugar.
Dietary Considerations: This recipe can easily be adapted for gluten-free, dairy-free, or nut-free diets. It is not suitable for vegan diets without substitutions, but the options above work beautifully.
Potential Allergens: Contains wheat, dairy, eggs, and tree nuts (almond). Always check your decorating ingredients for hidden allergens.
Personal Wellness Perspective: Look, these are cookies. They’re meant to be a treat, not a health food. But I love that by making them at home, I control exactly what goes in. No preservatives, no artificial flavors — just real ingredients and a whole lot of love. That’s a win in my book.
Conclusion
These Easy Halloween Sugar Cookies are proof that sometimes the best recipes come from letting go of perfection. They’re soft, buttery, and absolutely perfect for a crowd — whether you’re hosting a costume party or just want something fun to do with the kids. I love how customizable they are, and honestly, the decorating is half the fun. So grab your sprinkles, put on your favorite spooky playlist, and get ready to impress your guests. I can’t wait to hear how yours turn out! Drop a comment below and share your best decorating idea — I’m always looking for new inspiration. Happy Halloween, and happy baking!
Frequently Asked Questions
Can I make the dough ahead of time?
Absolutely. You can refrigerate the dough for up to 3 days or freeze it for up to 3 months. Just let it sit at room temperature for 10 minutes before scooping if it’s too firm.
Why did my cookies spread too much?
This usually happens if the butter was too soft or the dough was overmixed. Chill the dough for 15-20 minutes before baking to prevent excessive spreading.
Can I use a different type of icing?
Yes! Buttercream frosting works well for a thicker, creamier decoration. Just be aware it won’t harden completely, so stack cookies carefully. Royal icing is best for detailed designs.
How do I get my kids involved without making a huge mess?
Set up a decorating station with pre-portioned icing bags and bowls of sprinkles. Use a plastic tablecloth for easy cleanup. Let them focus on one cookie at a time, and embrace the chaos — that’s part of the fun!
Can I make these cookies vegan?
Yes, with a few swaps. Use vegan butter, a flax egg, and a plant-based milk in place of the egg. The texture will be slightly different, but they’ll still be delicious. Just keep an eye on bake time, as vegan doughs can brown faster.
PrintEasy Halloween Sugar Cookies: Hand Decorated & Crowd-Pleasing

These Easy Halloween Sugar Cookies are soft, buttery, and perfect for decorating with friends and family. Made with a simple boxed mix shortcut, they come together in under 30 minutes and are a crowd-pleasing hit at any Halloween gathering.
- Prep Time: 15 minutes
- Cook Time: 10 minutes
- Total Time: 25 minutes
- Yield: 24 servings 1x
- Category: Dessert
- Cuisine: American
Ingredients
- 1 cup (2 sticks) unsalted butter, softened
- 1 cup (200g) granulated sugar
- 1 large egg, room temperature
- 1 teaspoon vanilla extract
- ½ teaspoon almond extract
- 2 cups (240g) all-purpose flour
- ½ teaspoon baking soda
- ¼ teaspoon salt
- 1 box (17.5 oz) boxed sugar cookie mix (optional)
- Halloween sprinkles and decorations (orange, black, purple jimmies, candy eyeballs, edible glitter)
- Royal icing or store-bought decorating icing (1-2 tubes)
Instructions
- Preheat your oven to 350°F (175°C). Line two baking sheets with parchment paper or silicone mats.
- In a large mixing bowl, beat the softened butter and granulated sugar together on medium speed for 2-3 minutes until light and fluffy. Scrape down the sides of the bowl once.
- Add the room-temperature egg, vanilla extract, and almond extract. Beat on low until just combined.
- In a separate bowl, whisk together the flour, baking soda, and salt. If using the boxed mix, skip this step and just add the mix to the wet ingredients.
- Gradually add the dry ingredients to the wet mixture, mixing on low speed until a soft dough forms. The dough should be slightly sticky but hold together when pressed.
- Use a cookie scoop to portion out rounded tablespoons of dough. Place them 2 inches apart on the prepared baking sheets.
- Bake for 8-10 minutes. The edges should be lightly golden, but the centers will look slightly underdone.
- Let the cookies rest on the baking sheet for 2 minutes, then transfer them to a cooling rack. Wait until they are completely cool before decorating.
- Decorate using royal icing or store-bought decorating icing to create spider webs, ghosts, pumpkins, or simple polka dots. Add sprinkles and candy eyeballs as desired.
Notes
For the best texture, use butter that’s softened but not melted. If using the boxed mix, follow the package instructions for the base, then add the almond extract yourself. For a gluten-free option, swap the all-purpose flour with a 1:1 gluten-free baking blend. If the dough feels too soft to scoop, chill it in the fridge for 15 minutes. Don’t overbake; cookies continue to cook on the hot baking sheet after removal.
Nutrition
- Serving Size: 1 cookie
- Calories: 140
- Sugar: 10
- Sodium: 95
- Fat: 7
- Saturated Fat: 4
- Carbohydrates: 18
- Protein: 1
Keywords: Halloween sugar cookies, easy sugar cookies, decorated cookies, Halloween dessert, drop cookies, boxed mix cookies


