Love this? Save it for later!
Share the inspiration with your friends
The church bake sale was in six hours and I’d completely forgotten. Not just forgotten—I’d signed up to bring “something special” three weeks ago and then promptly erased it from my brain. Everyone else would be bringing their grandmother’s famous pecan pies or those perfect little lemon tarts that look like they belong in a bakery window. I had a can of pumpkin puree, a block of cream cheese, and about forty-five minutes before I needed to leave. Let me tell you, the panic was real.
I stood there staring into my pantry like it might magically produce a solution. And then I remembered this classic pumpkin roll with cream cheese filling my aunt used to make. Not that I’d ever actually made one myself. I mean, how hard could it be? Famous last words, right? I grabbed the ingredients, cleared off my counter, and started measuring things with the kind of frantic energy you only get when you’re racing against a deadline.
The first one cracked. Of course it did. I think I actually said some words my grandmother wouldn’t approve of. But I rolled it up anyway, let it cool, and tried again. The second one came out looking almost presentable. By the time I was spreading that cream cheese filling and rolling it up tight, I had flour on my forehead and a weird sense of confidence. Honestly, I didn’t think much of it when I dropped it off at the bake sale table.
Turns out, that classic pumpkin roll with cream cheese filling was the first thing to sell out. People were literally asking me for the recipe. Maybe you’ve been there—throwing something together under pressure and accidentally creating a hit. That’s this recipe for you. It’s the one that made me realize simple doesn’t mean boring, and rushed doesn’t mean bad.
Why You’ll Love This Recipe
Let me be straight with you—I’ve tested this classic pumpkin roll with cream cheese filling more times than I care to count. I’ve cracked it, overbaked it, underfilled it, and rolled it the wrong direction. But through all those kitchen disasters, I figured out exactly what makes this version work every single time. Here’s why you’re going to love it:
- Quick & Easy: From start to finish, you’re looking at about an hour, plus chilling time. Perfect for when you need a showstopper without spending all day in the kitchen.
- Simple Ingredients: No exotic extracts or hard-to-find spices. You probably have most of these in your pantry right now.
- Perfect for Fall Gatherings: Thanksgiving, Friendsgiving, potlucks, bake sales—this roll fits right in and always stands out.
- Crowd-Pleaser: I’ve watched kids go back for thirds and adults sneak slices when they thought no one was looking.
- Unbelievably Delicious: That combo of spiced pumpkin cake and tangy cream cheese filling? It’s the kind of thing that makes you close your eyes after the first bite.
What makes this recipe different from all the others? It’s the texture. I’ve nailed the balance between a cake that’s tender enough to roll without cracking but sturdy enough to hold that beautiful swirl. Plus, I’m sharing my secret for getting that cream cheese filling perfectly smooth every time—no lumps, no fuss.
This isn’t just another pumpkin dessert. It’s the one that’ll have people asking you to bring it to every holiday gathering from now on. And honestly? You’ll be happy to oblige.
What Ingredients You Will Need
This classic pumpkin roll with cream cheese filling uses simple, everyday ingredients to create something truly special. I’ve tested this with different brands and variations, so I’m sharing what works best based on my own kitchen trials.
For the Pumpkin Cake
- 3 large eggs, at room temperature (this matters for the texture)
- 1 cup granulated sugar (225g)
- 2/3 cup pumpkin puree (160g) — I prefer Libby’s for consistent moisture content
- 1 teaspoon lemon juice (helps activate the baking soda)
- 3/4 cup all-purpose flour (95g)
- 1 teaspoon baking powder
- 1/2 teaspoon baking soda
- 1/2 teaspoon salt
- 2 teaspoons pumpkin pie spice (or make your own with cinnamon, nutmeg, ginger, and cloves)
- 1 teaspoon ground cinnamon (because you can never have too much)
- Powdered sugar, for dusting the kitchen towel (you’ll use a generous amount)
For the Cream Cheese Filling
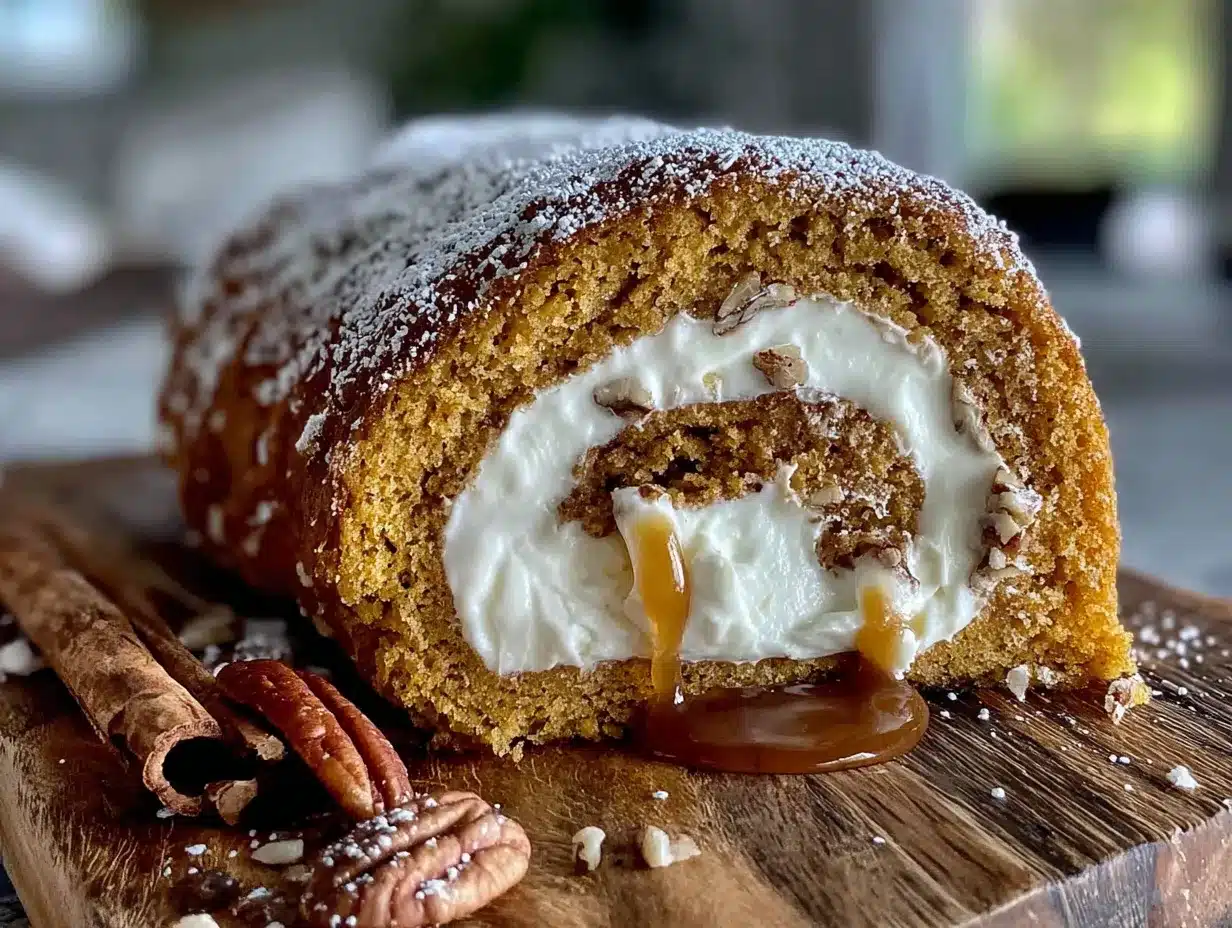
- 8 oz cream cheese (226g), softened to room temperature — use full-fat for best results
- 1/4 cup unsalted butter (57g), softened
- 1 cup powdered sugar (120g), sifted if you want it extra smooth
- 1 teaspoon vanilla extract (pure, not imitation if you can swing it)
A quick note on the pumpkin puree: don’t grab pumpkin pie filling by accident. I’ve done that before and trust me, the extra sugar and spices throw everything off. You want 100% pure pumpkin puree. Also, I’ve found that generic cream cheese brands sometimes make the filling a bit runny. Philadelphia is my go-to for consistent results, but any full-fat block cream cheese should work fine.
Equipment Needed
You don’t need a fancy kitchen to pull off this classic pumpkin roll with cream cheese filling. Here’s what you’ll actually use:
- 15×10 inch jelly roll pan (also called a half-sheet pan) — this is non-negotiable for the right thickness
- Parchment paper — don’t skip this, it’s your best friend for easy removal
- Clean kitchen towel (a thin cotton one works best, not terry cloth)
- Electric mixer — hand mixer or stand mixer both work great
- Large mixing bowls (you’ll need at least two)
- Rubber spatula for folding and spreading
- Fine-mesh sieve for sifting powdered sugar (optional but helpful)
- Cooling rack
- Plastic wrap for chilling
If you don’t have a jelly roll pan, you can try using a similar-sized baking sheet, but the cake might be thinner or thicker depending on the dimensions. I picked up my pan at a thrift store for three bucks, so keep an eye out. And that kitchen towel? Make sure it’s one you don’t mind getting powdered sugar all over. I have a dedicated “baking towel” that’s seen better days but works perfectly.
Preparation Method
Alright, let’s get rolling—literally. I’ve broken this down step by step so you don’t end up with a cracked mess like my first attempt.
Step 1: Preheat and Prep
Preheat your oven to 375°F (190°C). Line your jelly roll pan with parchment paper, leaving a little overhang on the long sides. Spray the parchment lightly with non-stick spray. This extra step means your cake will release without any drama.
Step 2: Make the Cake Batter
In a large bowl, beat the eggs and granulated sugar together on high speed for about 2-3 minutes. You want it thick and pale, like a milkshake. Add the pumpkin puree and lemon juice, then mix until combined. In a separate bowl, whisk together the flour, baking powder, baking soda, salt, pumpkin pie spice, and cinnamon. Gradually add the dry ingredients to the wet mixture, mixing on low speed just until incorporated. Don’t overmix—I learned this the hard way when my cake turned out tough.
Step 3: Bake
Pour the batter into your prepared pan and spread it evenly with a spatula. It’ll be a thin layer, and that’s exactly what you want. Bake for 13-15 minutes. The cake should spring back when you touch it lightly in the center. My oven runs hot, so I start checking at 12 minutes. You know that feeling when you’re nervous about overcooking something? Set a timer and actually use it.
Step 4: The Rolling Trick
While the cake is baking, lay out your clean kitchen towel on a flat surface and dust it generously with powdered sugar. Like, really generous—this is what prevents sticking. As soon as the cake comes out of the oven, flip it onto the sugared towel. Carefully peel off the parchment paper. Starting at one of the short ends, roll the cake up in the towel. Roll it tightly but gently. Let it cool completely on a wire rack, seam-side down. This usually takes about 30-40 minutes. Don’t rush this step. I once tried to unroll a warm cake and ended up with pumpkin crumble instead of a roll.
Step 5: Make the Filling
While the cake cools, beat the softened cream cheese and butter together until smooth and fluffy. About 2 minutes on medium speed. Add the powdered sugar and vanilla extract, then beat until everything is combined. Scrape down the sides of the bowl at least once. The filling should be thick and spreadable, not runny. If it seems too soft, pop it in the fridge for 10 minutes.
Step 6: Assemble
Once the cake is completely cool, carefully unroll it. It might try to curl back up, and that’s normal. Spread the cream cheese filling evenly over the cake, leaving about a 1-inch border on all sides. Now, reroll the cake—this time without the towel. Roll it as tightly as you can without squeezing the filling out the sides. I find it helps to use the parchment paper that was under the towel to guide the roll.
Step 7: Chill and Serve
Wrap the rolled cake tightly in plastic wrap and refrigerate for at least 2 hours. Overnight is even better. This sets the filling and makes slicing much cleaner. When you’re ready to serve, trim the ends for a neat look, dust with powdered sugar, and slice into 1-inch rounds.
Cooking Tips & Techniques
After more pumpkin rolls than I care to count, here’s what I’ve learned the hard way so you don’t have to.
The towel matters more than you think. Use a thin, lint-free cotton towel. Terry cloth will leave weird patterns on your cake, and microfiber doesn’t hold the powdered sugar well. I ruined a perfectly good cake with a fuzzy towel once. Never again.
Don’t skip the lemon juice. It sounds weird in a pumpkin recipe, I know. But that little bit of acid reacts with the baking soda and helps the cake stay tender. Plus, it brightens the pumpkin flavor without making it taste lemony.
Cool it completely. I cannot stress this enough. If the cake is even slightly warm when you add the filling, you’ll end up with a melty mess. I’ve been impatient before and ended up with cream cheese soup leaking out the sides. Not cute.
Roll it twice. The first roll in the towel trains the cake to hold that shape. The second roll with the filling is where the magic happens. If you skip the first roll, your cake will crack. Trust me on this one.
Use a serrated knife for slicing. A sharp chef’s knife can work, but serrated blades cut through the roll without squishing it. I use a gentle sawing motion and wipe the blade between slices for clean edges.
Variations & Adaptations
One of the best things about this classic pumpkin roll with cream cheese filling is how easy it is to switch things up. Here are some variations I’ve tried and loved:
Gluten-Free Version: Substitute the all-purpose flour with a 1:1 gluten-free baking flour blend. I’ve used Bob’s Red Mill with great results. Just don’t overmix the batter, and you’ll barely notice the difference.
Spiced-Up Filling: Add a pinch of cinnamon and nutmeg to the cream cheese filling for extra warmth. I also like folding in a tablespoon of maple syrup for a deeper flavor. My neighbor tried this version and now refuses to make it any other way.
Chocolate Pumpkin Roll: Swap 2 tablespoons of flour for unsweetened cocoa powder. The chocolate-pumpkin combo is surprisingly good—kind of like a healthier take on a chocolate cream roll. I made this for a Halloween party and it disappeared fast.
Dairy-Free Adaptation: Use dairy-free cream cheese and butter alternatives. I’ve tested this with Kite Hill cream cheese and Earth Balance butter, and while the texture is slightly different, it still rolls and tastes wonderful.
Mini Pumpkin Rolls: Divide the batter between two smaller pans and make two thinner rolls. These are perfect for gifting or when you want smaller portions. Just reduce the baking time by a couple of minutes.
Serving & Storage Suggestions
This classic pumpkin roll with cream cheese filling is best served cold or at room temperature. I prefer it straight from the fridge—the filling stays firm and the flavors taste more pronounced. When you’re ready to serve, let it sit out for about 10 minutes to take the chill off, then slice and enjoy.
For presentation, I dust the top with powdered sugar right before serving. Sometimes I add a few candied pecans or a drizzle of caramel sauce for extra flair. It’s also gorgeous on a platter with fresh cranberries and rosemary sprigs around it—very holiday vibes.
Storage: Wrap the roll tightly in plastic wrap and keep it in the refrigerator for up to 5 days. The flavors actually get better on day two. I’ve also frozen these rolls successfully. Wrap the fully assembled and chilled roll in plastic wrap, then a layer of aluminum foil, and freeze for up to 3 months. Thaw overnight in the fridge before serving.
Reheating: Honestly, I don’t recommend reheating this one. It’s meant to be served cold or at room temperature. If you absolutely want it warm, try microwaving a single slice for about 10 seconds, but the filling will get soft.
One thing I’ve noticed—this roll slices much cleaner on day two. The filling sets up perfectly, and the cake softens just a bit. So if you can plan ahead, make it the day before you need it.
Nutritional Information & Benefits
Here’s the honest truth about this classic pumpkin roll with cream cheese filling—it’s a dessert, so it’s not health food. But it does have some redeeming qualities worth mentioning.
Pumpkin is packed with vitamin A, fiber, and antioxidants. It’s one of those ingredients that makes you feel slightly better about eating dessert. The cream cheese adds calcium and protein, though let’s be real, it’s mostly there for the deliciousness.
Per slice (based on 10 servings):
- Calories: approximately 280
- Fat: 12g
- Carbohydrates: 38g
- Protein: 5g
- Fiber: 1g
- Sugar: 28g
For dietary considerations: this recipe contains gluten, dairy, and eggs. I’ve included gluten-free and dairy-free variations above if you need them. It’s not suitable for vegan diets as written, but you could experiment with egg replacers and plant-based dairy alternatives.
Personally, I think this dessert fits perfectly into a balanced lifestyle. It’s a treat, sure, but one made with real ingredients that you can feel good about serving to your family. And honestly, the portion control is built in—one slice is plenty satisfying.
Conclusion
This classic pumpkin roll with cream cheese filling has become my go-to fall dessert for a reason. It’s impressive enough for Thanksgiving dinner but simple enough for a random Tuesday when you’re craving something cozy. The spiced pumpkin cake wrapped around that creamy, tangy filling is just pure comfort on a plate.
I love how forgiving this recipe is once you know the tricks. And I’ve shared every single one of them with you—from the towel rolling technique to the perfect cream cheese consistency. You’ve got everything you need to make this work on your first try.
So go ahead and give it a shot. Maybe you’ll crack your first one like I did, or maybe you’ll nail it on the first try. Either way, you’ll end up with something delicious that people will ask you to make again and again. And when they do, send them my way.
I’d love to hear how yours turns out! Drop a comment below and let me know if you tried any variations or if this was your first time making a rolled cake. Happy baking, friends!
Frequently Asked Questions
Why did my pumpkin roll crack when I tried to roll it?
Cracking usually happens when the cake is overbaked or cooled too much before the first roll. Make sure you roll it in the towel while it’s still warm—that initial roll trains the cake to hold that shape. Also, don’t skip the powdered sugar on the towel; it helps prevent sticking.
Can I make this pumpkin roll ahead of time?
Absolutely! In fact, I recommend it. This classic pumpkin roll with cream cheese filling tastes even better on day two. You can make it up to 2 days ahead and keep it wrapped in the fridge. Just dust with powdered sugar right before serving.
Can I freeze a pumpkin roll?
Yes, and it freezes beautifully. Wrap the fully assembled and chilled roll tightly in plastic wrap, then a layer of aluminum foil. Freeze for up to 3 months. Thaw overnight in the refrigerator before serving. Don’t dust with powdered sugar until after thawing.
My cream cheese filling turned out runny. What went wrong?
This usually happens when the cream cheese or butter isn’t fully softened, or if you overbeat the mixture. Make sure both are at room temperature before you start. If the filling seems too soft, pop it in the fridge for 15-20 minutes to firm up before spreading it on the cake.
Can I use homemade pumpkin puree instead of canned?
You can, but homemade pumpkin puree tends to be more watery than canned. If you’re using homemade, try straining it through a cheesecloth or paper towels for about 30 minutes to remove excess moisture. Otherwise, your cake might turn out too wet and difficult to roll.
Pin This Recipe!
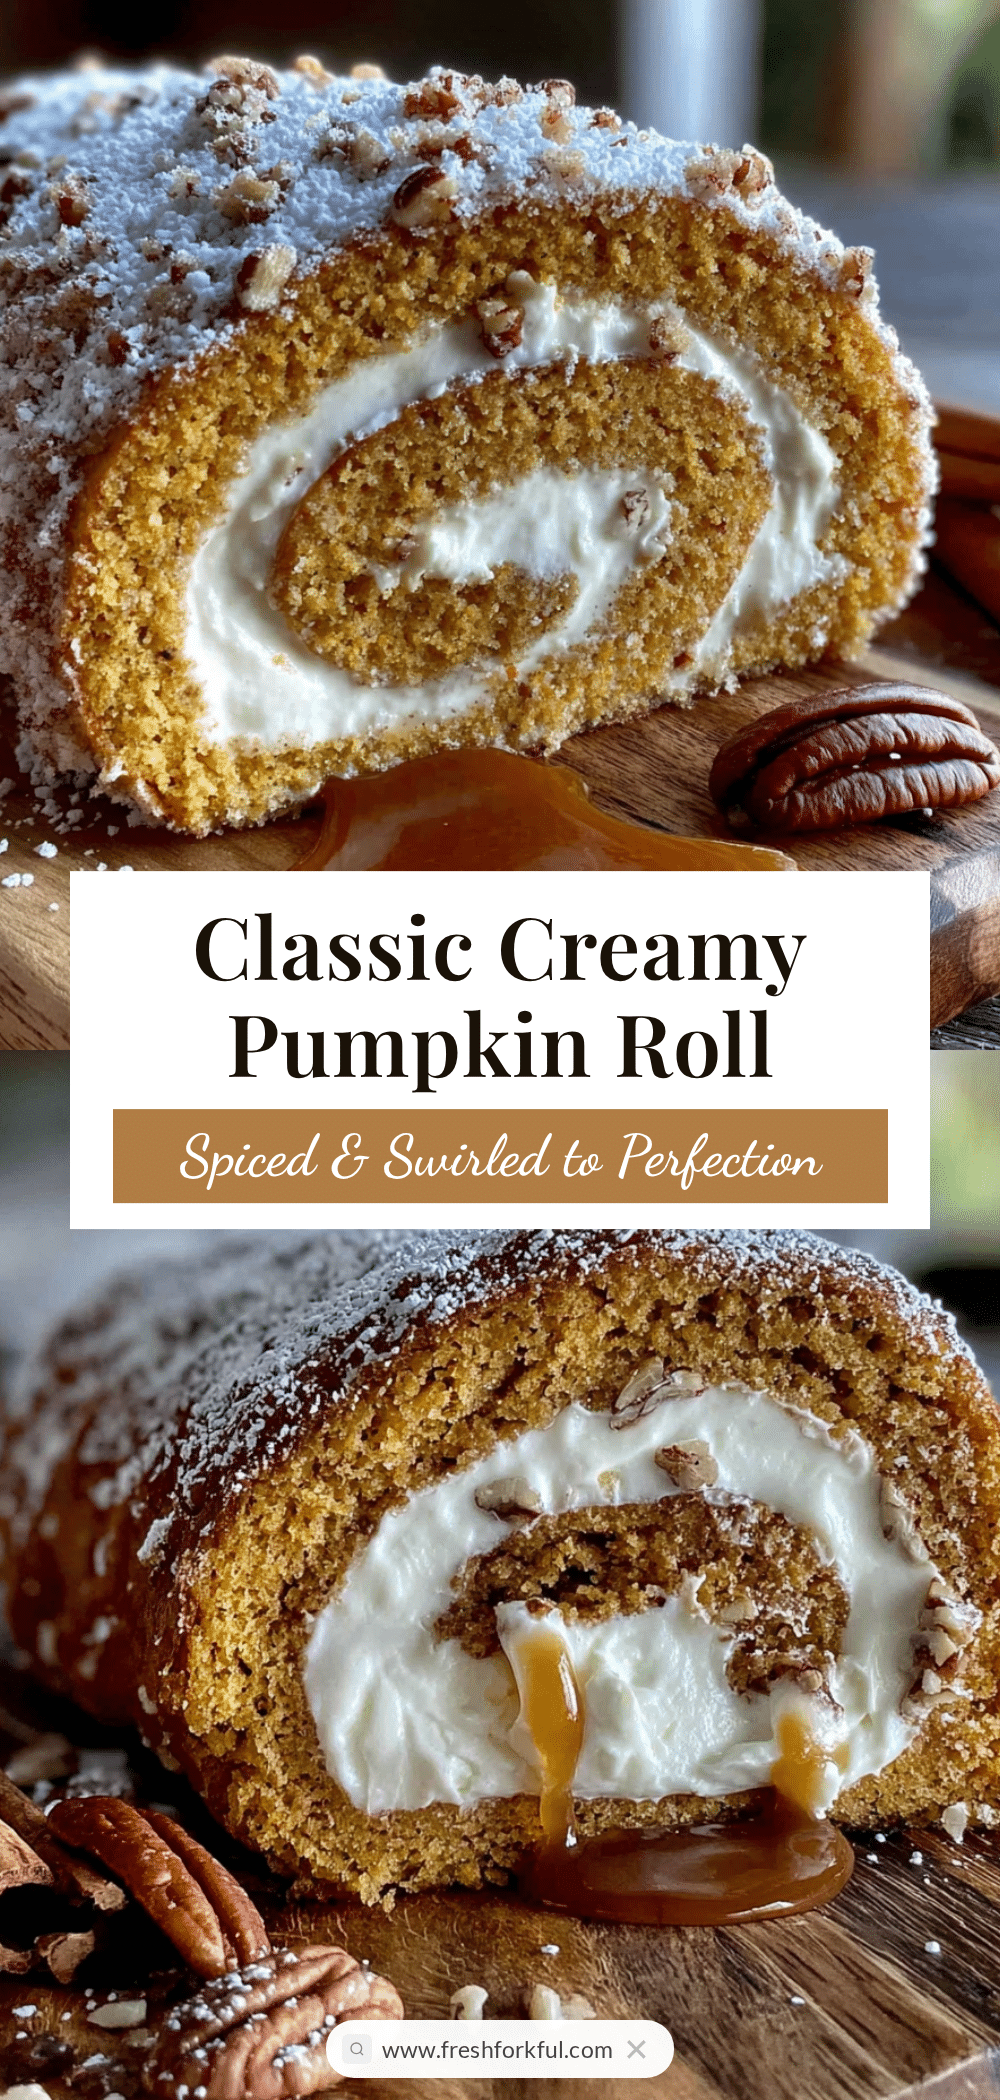
No-Bake Classic Pumpkin Roll with Cream Cheese Filling
A classic pumpkin roll with cream cheese filling that’s perfect for fall gatherings. This spiced pumpkin cake is rolled with a creamy, tangy filling for a showstopping dessert that’s surprisingly easy to make.
- Prep Time: 20 minutes
- Cook Time: 15 minutes
- Total Time: 35 minutes (plus 2 hours chilling)
- Yield: 10 servings 1x
- Category: Dessert
- Cuisine: American
Ingredients
- 3 large eggs, at room temperature
- 1 cup granulated sugar (225g)
- 2/3 cup pumpkin puree (160g), preferably Libby’s
- 1 teaspoon lemon juice
- 3/4 cup all-purpose flour (95g)
- 1 teaspoon baking powder
- 1/2 teaspoon baking soda
- 1/2 teaspoon salt
- 2 teaspoons pumpkin pie spice
- 1 teaspoon ground cinnamon
- Powdered sugar, for dusting
- 8 oz cream cheese (226g), softened to room temperature, full-fat
- 1/4 cup unsalted butter (57g), softened
- 1 cup powdered sugar (120g), sifted if desired
- 1 teaspoon vanilla extract, pure
Instructions
- Preheat oven to 375°F (190°C). Line a 15×10 inch jelly roll pan with parchment paper, leaving overhang on long sides. Lightly spray parchment with non-stick spray.
- In a large bowl, beat eggs and granulated sugar on high speed for 2-3 minutes until thick and pale. Add pumpkin puree and lemon juice; mix until combined.
- In a separate bowl, whisk together flour, baking powder, baking soda, salt, pumpkin pie spice, and cinnamon. Gradually add dry ingredients to wet mixture, mixing on low speed just until incorporated. Do not overmix.
- Pour batter into prepared pan and spread evenly. Bake for 13-15 minutes until cake springs back when lightly touched. Start checking at 12 minutes.
- While cake bakes, lay a clean kitchen towel on a flat surface and dust generously with powdered sugar. As soon as cake comes out of oven, flip it onto the sugared towel. Carefully peel off parchment paper.
- Starting at one short end, roll the cake up in the towel tightly but gently. Let cool completely on a wire rack, seam-side down, about 30-40 minutes.
- While cake cools, beat softened cream cheese and butter together until smooth and fluffy, about 2 minutes on medium speed. Add powdered sugar and vanilla extract; beat until combined. Scrape down sides of bowl. If filling seems too soft, refrigerate for 10 minutes.
- Once cake is completely cool, carefully unroll it. Spread cream cheese filling evenly over cake, leaving a 1-inch border on all sides. Reroll cake without the towel, rolling as tightly as possible without squeezing filling out.
- Wrap rolled cake tightly in plastic wrap and refrigerate for at least 2 hours, preferably overnight. When ready to serve, trim ends, dust with powdered sugar, and slice into 1-inch rounds.
Notes
Don’t skip the lemon juice; it reacts with baking soda to keep cake tender. Roll cake in towel while still warm to train it to hold shape. Cool completely before adding filling to prevent melting. Use a serrated knife for clean slices. For best results, make a day ahead.
Nutrition
- Serving Size: 1 slice (1-inch roun
- Calories: 280
- Sugar: 28
- Sodium: 280
- Fat: 12
- Saturated Fat: 7
- Carbohydrates: 38
- Fiber: 1
- Protein: 5
Keywords: pumpkin roll, pumpkin dessert, cream cheese filling, fall dessert, Thanksgiving dessert, no-bake dessert, pumpkin cake roll


