Love this? Save it for later!
Share the inspiration with your friends
My neighbor across the hall, a quiet retired baker named Mrs. Gable, watched me struggle with a wobbly apple pie crust through my open kitchen door one September afternoon. She didn’t say anything at first—just shook her head with this knowing little smile. Then she knocked, handed me a chilled stick of butter, and said, “You’re overworking it. Come down for coffee tomorrow. I’ll show you something easier.”
The next morning, I walked into her apartment and found a 9×13 pan of these salted caramel apple pie bars cooling on her counter. Honestly, I almost cried. The smell alone—brown butter, cinnamon, bubbling apples, that salty-sweet caramel—made me forget my own failed pie crust completely. She told me she’d been making them for forty years, ever since her daughter requested a “pie that didn’t fall apart in your lunchbox.” I mean, that’s genius right there.
I’ve tweaked her original recipe over the years—added a bit more salt to the caramel, swapped in Granny Smith apples for better structure, and tested the shortbread crust until it was absolutely foolproof. But the heart of it is still her: simple, forgiving, and somehow more special than a traditional pie. Maybe you’ve been there, staring at a pie recipe that feels more like a science experiment than comfort food. These bars are the answer. They give you all the cozy, nostalgic flavor of apple pie without the fuss, the rolling pin, or the fear of a soggy bottom.
I keep making them because they work every single time. And because every time I pull that pan out of the oven, I think of Mrs. Gable’s tiny kitchen, her chipped blue mug, and the way she said, “See? No tears.” That’s the kind of recipe worth sharing.
Why You’ll Love This Recipe
Let me tell you—these salted caramel apple pie bars have saved me more times than I can count. They’ve been my go-to for potlucks, holiday parties, lazy Sunday baking sessions, and even a last-minute “I need dessert in two hours” emergency. Here’s why they’ll become your favorite too:
- No Pie Crust Stress: Forget rolling, chilling, and praying your crust doesn’t crack. This shortbread base presses into the pan in under five minutes. It’s buttery, sturdy, and absolutely forgiving.
- Simple Pantry Ingredients: You probably have most of this in your kitchen right now. Apples, butter, flour, sugar, cinnamon, and a little cream. No fancy trips to specialty stores.
- Perfect for Fall Gatherings: Whether it’s Thanksgiving, a Friendsgiving potluck, or just a cozy Sunday with coffee, these bars feel special without being fussy. They travel beautifully too—no pie carrier required.
- Crowd-Pleaser Status: I’ve brought these to parties where people argued over the last piece. Kids love the caramel; adults appreciate the salt and the buttery crust. It’s a win-win.
- Unbelievably Delicious: The combination of soft, cinnamon-spiced apples, that crisp shortbread base, and the rich, salty caramel drizzle—honestly, it’s next-level comfort food. You’ll close your eyes after the first bite.
What makes this recipe different from every other apple bar out there? Two things. First, the crust—it’s a shortbread that bakes up golden and crisp, not soggy or doughy. Second, the caramel. We’re not using store-bought sauce here. Making your own salted caramel takes ten minutes and tastes like liquid gold. Trust me, it’s worth the extra step. This isn’t just another apple dessert—it’s the one you’ll come back to year after year.
What Ingredients You Will Need
This recipe uses straightforward, wholesome ingredients to build layers of flavor. The magic happens when simple things—butter, apples, sugar—come together just right. Here’s what you’ll need:
For the Shortbread Crust
- 2 cups all-purpose flour (spooned and leveled—don’t scoop straight from the bag or you’ll pack it too tight)
- 1/2 cup granulated sugar
- 3/4 cup unsalted butter, cold and cubed (I use Kerrygold—the higher fat content makes the crust extra tender)
- 1/4 teaspoon salt
For the Apple Filling
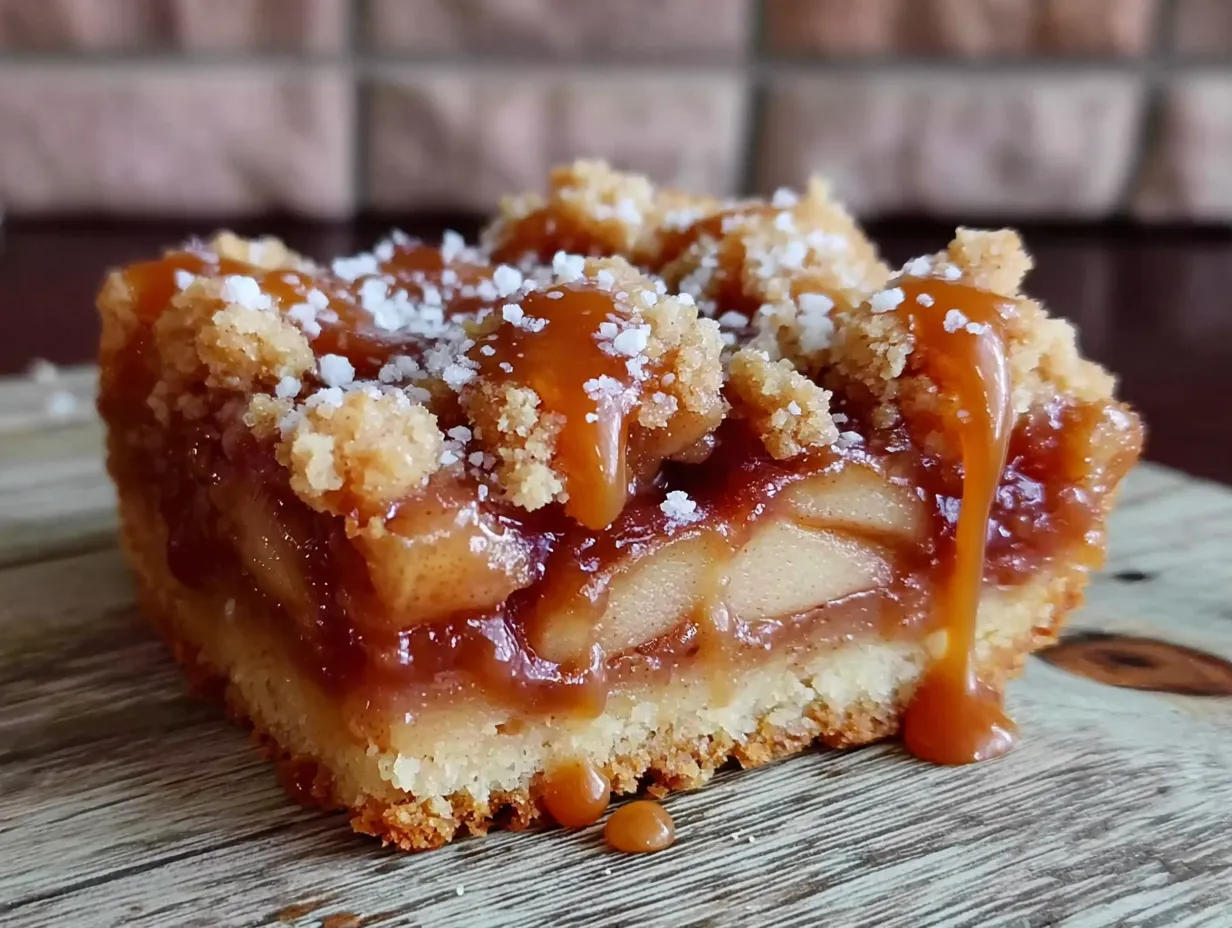
- 5 cups peeled and thinly sliced apples (about 5-6 medium apples—Granny Smith are my go-to for structure, but Honeycrisp work beautifully too)
- 1/4 cup granulated sugar
- 1/4 cup light brown sugar, packed
- 2 tablespoons all-purpose flour
- 1 teaspoon ground cinnamon
- 1/4 teaspoon ground nutmeg (freshly grated if you have it—the flavor is noticeably brighter)
- 1 tablespoon lemon juice (keeps the apples from browning and balances the sweetness)
- 1 teaspoon vanilla extract
For the Salted Caramel Sauce
- 1/2 cup unsalted butter
- 1 cup light brown sugar, packed
- 1/2 cup heavy cream (room temperature—cold cream can make the caramel seize)
- 1 teaspoon flaky sea salt (plus more for finishing—I love Maldon for this)
- 1 teaspoon vanilla extract
For the Streusel Topping
- 1 cup all-purpose flour
- 1/2 cup light brown sugar, packed
- 1/2 cup rolled oats (old-fashioned, not quick-cooking—they add better texture)
- 1/2 teaspoon ground cinnamon
- 1/2 cup unsalted butter, melted
Ingredient Notes: For the apples, I recommend a mix of tart and sweet varieties. Granny Smith holds its shape during baking, while Honeycrisp or Fuji add natural sweetness. If you only have one type, go with Granny Smith—they won’t turn into applesauce. For the caramel, use a heavy-bottomed saucepan and don’t walk away. Burnt caramel is a heartbreaker, and I’ve definitely been there.
Equipment Needed
You don’t need a fancy kitchen to make these bars, but a few tools make the process smoother. Here’s what I use:
- 9×13-inch baking pan (metal or glass both work—just note that glass may need a few extra minutes of baking time)
- Parchment paper (cut it long enough to hang over the edges—this creates “handles” for lifting the bars out cleanly)
- Large mixing bowls (one for the crust, one for the apples, one for the streusel)
- Pastry cutter or two forks (for cutting butter into the flour for the crust)
- Medium saucepan (for the caramel—heavy-bottomed is best to prevent scorching)
- Sharp knife and cutting board (for slicing apples evenly)
- Measuring cups and spoons
- Whisk
- Spatula
- Cooling rack
If you don’t have a pastry cutter, your hands work just fine. Use your fingertips to rub the cold butter into the flour—just work quickly so the butter doesn’t warm up. And if you don’t have a 9×13 pan, you can use a 9×9 pan for thicker bars, but you’ll need to increase the baking time by about 10 minutes. I learned that the hard way after pulling out a pan of raw dough once. Not my finest moment.
Preparation Method
Alright, let’s get to it. This recipe has a few components, but I promise it comes together without stress. Take it step by step, and you’ll have a pan of golden, caramel-drizzled bars before you know it.
Step 1: Make the Shortbread Crust
Preheat your oven to 350°F (175°C). Line your 9×13-inch baking pan with parchment paper, leaving a couple inches overhang on the long sides. In a large bowl, whisk together the flour, sugar, and salt. Add the cold, cubed butter and cut it in using a pastry cutter or your fingertips until the mixture looks like coarse meal with pea-sized butter pieces. Don’t overwork it—those little butter bits create a flaky texture. Press the mixture evenly into the bottom of the prepared pan. Bake for 18-20 minutes, until lightly golden around the edges. Set aside to cool slightly while you prepare the filling.
Step 2: Prepare the Apple Filling
In a large bowl, toss the sliced apples with granulated sugar, brown sugar, flour, cinnamon, nutmeg, lemon juice, and vanilla extract. Make sure every slice is coated. Let it sit for about 10 minutes—this draws out some liquid and helps the apples soften during baking. Don’t skip this resting time; I’ve tried rushing it, and the filling ends up watery.
Step 3: Make the Streusel Topping
In a medium bowl, combine the flour, brown sugar, rolled oats, and cinnamon. Pour in the melted butter and stir with a fork until the mixture forms clumps. Set aside. The streusel should look like wet sand with some larger crumbles. If it’s too dry, add a tablespoon more melted butter.
Step 4: Assemble the Bars
Spoon the apple filling evenly over the pre-baked crust—spread it out so you get apples in every bite. Sprinkle the streusel topping generously over the apples, covering them completely. Bake at 350°F (175°C) for 35-40 minutes, until the streusel is golden brown and the apples are tender when pierced with a fork. If the streusel is browning too quickly, tent loosely with foil halfway through.
Step 5: Make the Salted Caramel Sauce
While the bars bake, make your caramel. In a medium saucepan over medium heat, melt the butter. Add the brown sugar and whisk until combined. Slowly pour in the heavy cream while whisking constantly. Bring the mixture to a gentle boil, then reduce the heat to low and let it simmer for 5-7 minutes, whisking occasionally, until it thickens slightly. Remove from heat and stir in the flaky sea salt and vanilla extract. Let it cool for 10 minutes—it will thicken more as it cools.
Step 6: Finish and Cool
Once the bars come out of the oven, let them cool in the pan on a wire rack for 20 minutes. Then drizzle the salted caramel sauce generously over the top. Sprinkle with a little extra flaky sea salt if you like that sweet-salty contrast. Let the bars cool completely (about 1-2 hours) before lifting them out using the parchment handles and cutting into squares. I know it’s hard to wait, but warm bars will fall apart—patience pays off here.
Cooking Tips & Techniques
I’ve made these bars more times than I can count, and I’ve picked up a few tricks along the way. Here’s what I wish someone had told me the first time:
Don’t overmix the crust. The shortbread base should be barely held together when you press it into the pan. Overmixing develops gluten and makes it tough. You want tender, crumbly, melt-in-your-mouth texture—not a hockey puck. I learned this after my third batch came out dense and sad.
Slice your apples evenly. This isn’t just about looks—it’s about even cooking. If some slices are thick and others are paper-thin, you’ll end up with mushy spots and crunchy spots in the same pan. Aim for 1/4-inch thick slices. A mandoline helps, but a steady hand and a sharp knife work fine.
Watch your caramel like a hawk. Caramel goes from perfect to burnt in about thirty seconds. Keep the heat on medium-low once it starts bubbling, and whisk constantly. If you see dark specks forming, pull it off the heat immediately. Burnt caramel has a bitter, acrid taste that ruins the whole dessert. Ask me how I know.
Let the bars cool completely. I know, I know—you want to dig in while they’re warm. But the caramel needs time to set, and the bars need structure to hold their shape. If you cut too soon, you’ll get a delicious but messy pile of crumbles. For clean, bakery-style squares, wait the full two hours. Trust me, they’re still amazing at room temperature.
Use a hot knife for clean cuts. Run your knife under hot water, wipe it dry, then slice. Repeat between cuts. This gives you those gorgeous, Instagram-worthy squares without dragging caramel through the filling.
Variations & Adaptations
One of the best things about this recipe is how flexible it is. Here are some ways to make it your own:
Gluten-Free Version: Swap the all-purpose flour in the crust and streusel with a 1:1 gluten-free baking flour blend. I’ve used Bob’s Red Mill with great results. The texture is slightly more delicate, so let the bars cool completely before cutting.
Dairy-Free Adaptation: Use a high-quality vegan butter substitute (I like Miyoko’s) in the crust, streusel, and caramel. For the caramel, replace heavy cream with full-fat coconut cream. The flavor is slightly different—more coconut-y—but still delicious. Just know the caramel won’t get quite as thick.
Spice It Up: Add 1/4 teaspoon of cardamom or ginger to the apple filling for a warm, aromatic twist. I tried this last fall on a whim, and it was a hit at my book club meeting. The cardamom pairs beautifully with the salted caramel.
Nutty Streusel: Toss 1/2 cup of chopped pecans or walnuts into the streusel topping. Toast them lightly first for extra crunch and flavor. My husband insists this is the only way to make them.
Pear and Apple Combo: Swap half the apples for firm, ripe pears. Bosc or Anjou work well. The pears add a subtle sweetness and a slightly different texture. It’s a lovely variation for late fall when pears are at their peak.
Serving & Storage Suggestions
These bars are wonderful at room temperature, but they’re also incredible warm with a scoop of vanilla ice cream. For a truly indulgent dessert, reheat a bar in the microwave for 15 seconds, then top with ice cream and an extra drizzle of caramel. The contrast between warm apple filling and cold ice cream—honestly, it’s unbeatable.
For presentation, I like to cut the bars into 12-16 squares and arrange them on a wooden board or a white platter. A light dusting of powdered sugar and a sprinkle of flaky sea salt makes them look bakery-fancy with zero effort.
Storage: Keep leftover bars in an airtight container at room temperature for up to 3 days. After that, move them to the refrigerator for up to a week. The crust will soften slightly in the fridge, but the flavor stays wonderful.
Freezer Instructions: These bars freeze beautifully. Let them cool completely, then wrap individual squares in plastic wrap and place them in a freezer-safe bag. They’ll keep for up to 3 months. To thaw, leave them at room temperature for about an hour, then reheat in a 300°F oven for 10 minutes. I always keep a stash in my freezer for unexpected guests or late-night cravings.
Flavor Development: Here’s a little secret—these bars actually taste better the next day. The flavors meld together overnight, and the caramel soaks into the apples and crust just enough. So if you can, make them a day ahead. Your future self will thank you.
Nutritional Information & Benefits
Let’s be honest—these are a treat, not a health food. But knowing what’s in them helps you enjoy them mindfully. Here’s the approximate breakdown per bar (based on 16 servings):
- Calories: 380
- Fat: 18g
- Carbohydrates: 52g
- Fiber: 3g
- Sugar: 34g
- Protein: 4g
On the bright side, apples are a great source of fiber and vitamin C. Oats in the streusel add soluble fiber, which is good for heart health. And cinnamon has anti-inflammatory properties—so there’s that. I like to think of these bars as a dessert that also happens to include some wholesome ingredients. Everything in moderation, right?
Dietary Considerations: This recipe contains gluten, dairy, and eggs (if you use them). For a gluten-free or dairy-free version, see the variations section above. The caramel sauce can be made dairy-free with coconut cream and vegan butter. Always check your ingredient labels if you’re cooking for someone with allergies.
Conclusion
These salted caramel apple pie bars have become my signature fall dessert, and I’m honestly a little proud of that. They’re everything I want in a recipe—impressive enough for company, simple enough for a Tuesday night, and so delicious that people ask for the recipe every single time. The buttery shortbread crust, the tender cinnamon apples, the crunchy streusel, and that glorious salted caramel drizzle—it’s hard to beat.
I hope you make these bars and make them your own. Maybe you’ll add extra salt, or swap in pears, or double the streusel like I sometimes do. That’s the beauty of a good recipe—it’s a starting point, not a rulebook. Mrs. Gable would agree.
If you try these, I’d love to hear how they turned out. Leave a comment below, tag me in your photos, or tell me about your own kitchen mishaps and triumphs. Happy baking, friend—you’ve got this.
Frequently Asked Questions
Can I use store-bought caramel sauce instead of making my own?
You can, but honestly, homemade caramel makes a huge difference. Store-bought sauces are often thinner and sweeter, without that rich, buttery depth. Homemade salted caramel takes just 10 minutes and tastes infinitely better. If you’re short on time, look for a high-quality jarred caramel—just know it won’t be quite the same.
What’s the best apple for these bars?
Granny Smith apples are my top choice because they hold their shape during baking and provide a nice tart contrast to the sweet caramel and streusel. Honeycrisp or Fuji work well too, but they’re sweeter and slightly softer. A mix of Granny Smith and Honeycrisp gives you the best of both worlds—structure and natural sweetness.
Can I make these bars ahead of time?
Absolutely. In fact, they taste even better the next day. Bake and cool the bars completely, then store them in an airtight container at room temperature. Add the caramel drizzle just before serving to keep the streusel crisp. You can also freeze the unbaked bars (without caramel) and bake them straight from frozen—just add 10-15 minutes to the baking time.
Why did my caramel turn out grainy?
Grainy caramel usually happens when sugar crystals form during cooking. To prevent this, make sure your whisk and saucepan are completely clean (no leftover residue), and don’t stir the caramel once it starts boiling—just swirl the pan gently. If your caramel does turn grainy, you can save it by adding a tablespoon of warm water and whisking over low heat until smooth.
How do I get clean, neat cuts?
Patience is key—let the bars cool completely before cutting. Use a sharp chef’s knife and run it under hot water between each cut, wiping it dry before slicing. This prevents the caramel from dragging through the bars and gives you those beautiful, bakery-style squares. For the cleanest cuts, chill the bars in the refrigerator for 30 minutes before slicing.
Pin This Recipe!
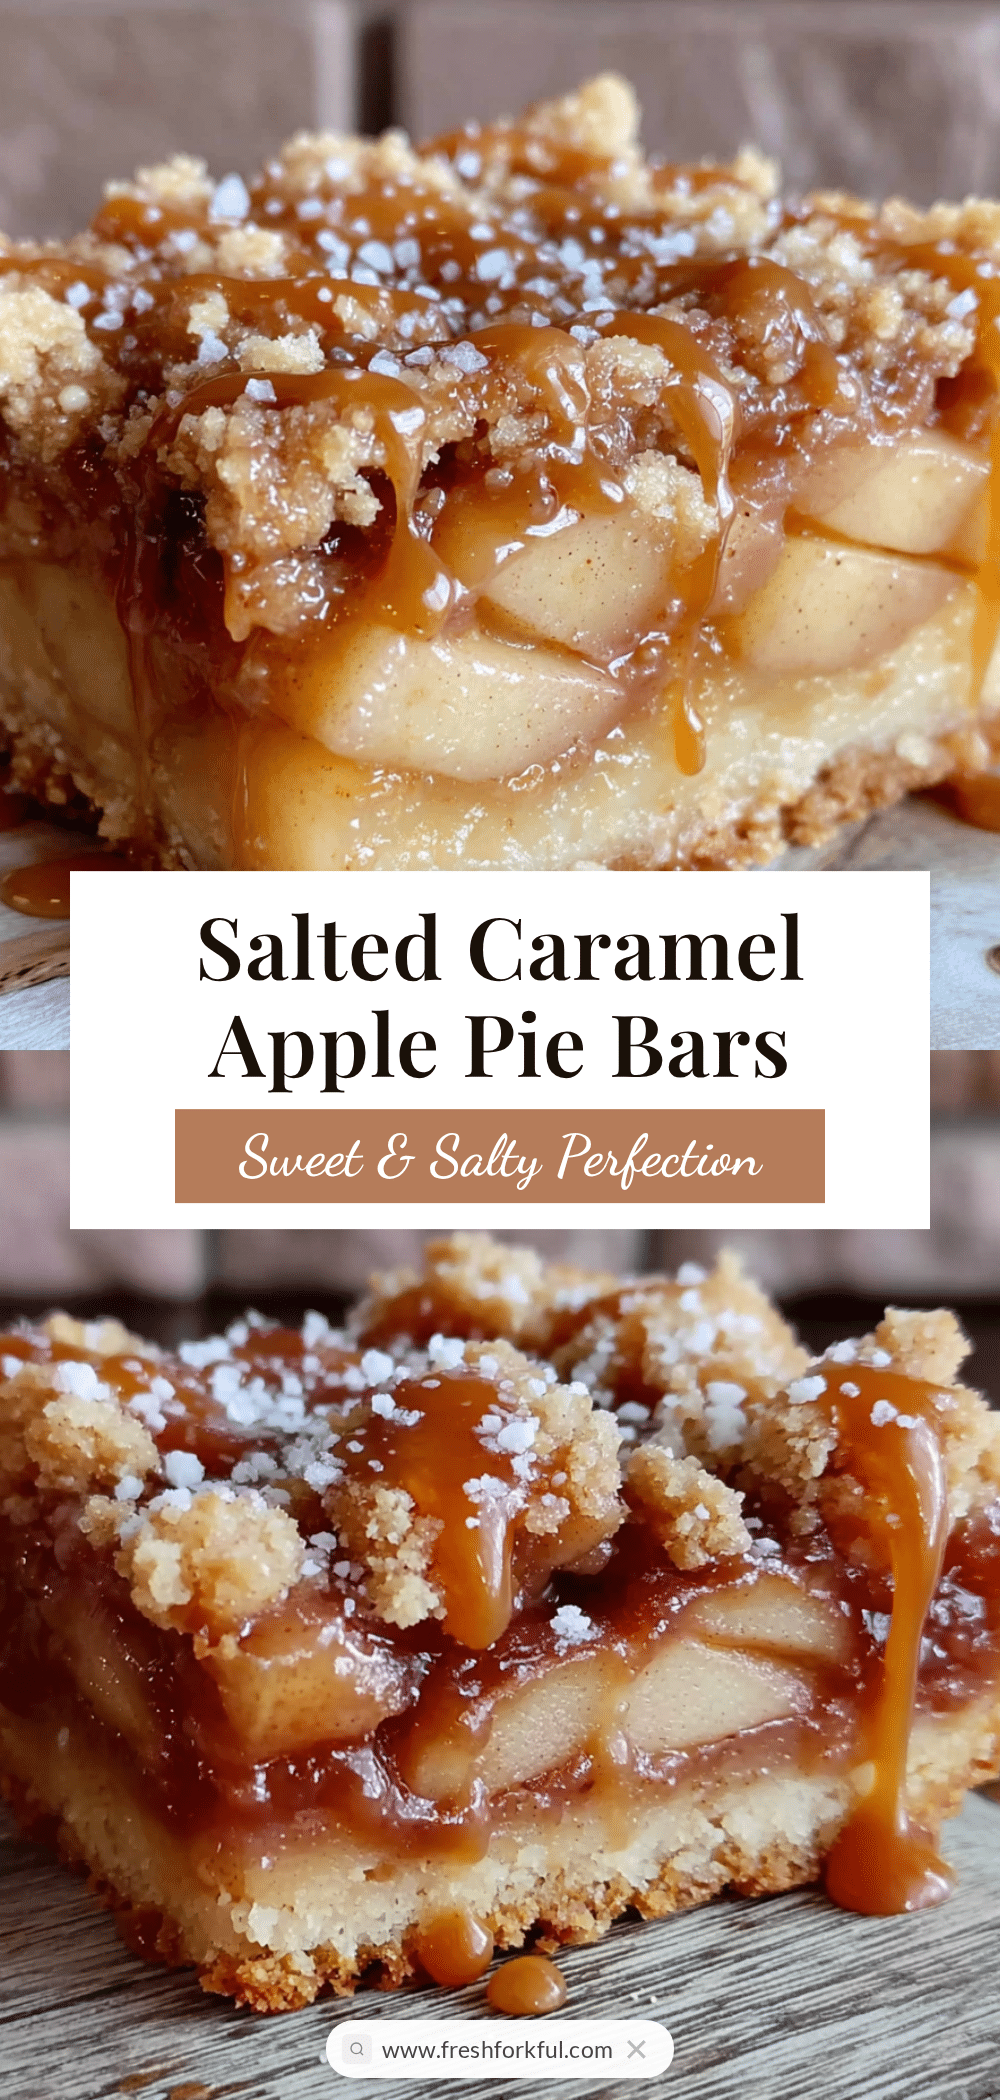
Best Salted Caramel Apple Pie Bars: Easy Fall Dessert
These salted caramel apple pie bars feature a buttery shortbread crust, tender cinnamon-spiced apples, a crunchy oat streusel topping, and a rich homemade salted caramel drizzle. They’re an easier, fuss-free alternative to traditional apple pie that’s perfect for fall gatherings.
- Prep Time: 30 minutes
- Cook Time: 55 minutes
- Total Time: 1 hour 25 minutes
- Yield: 16 servings 1x
- Category: Dessert
- Cuisine: American
Ingredients
- 2 cups all-purpose flour (spooned and leveled)
- 1/2 cup granulated sugar
- 3/4 cup unsalted butter, cold and cubed
- 1/4 teaspoon salt
- 5 cups peeled and thinly sliced apples (about 5–6 medium apples, Granny Smith recommended)
- 1/4 cup granulated sugar
- 1/4 cup light brown sugar, packed
- 2 tablespoons all-purpose flour
- 1 teaspoon ground cinnamon
- 1/4 teaspoon ground nutmeg (freshly grated preferred)
- 1 tablespoon lemon juice
- 1 teaspoon vanilla extract
- 1/2 cup unsalted butter
- 1 cup light brown sugar, packed
- 1/2 cup heavy cream (room temperature)
- 1 teaspoon flaky sea salt (plus more for finishing)
- 1 teaspoon vanilla extract
- 1 cup all-purpose flour
- 1/2 cup light brown sugar, packed
- 1/2 cup rolled oats (old-fashioned)
- 1/2 teaspoon ground cinnamon
- 1/2 cup unsalted butter, melted
Instructions
- Preheat oven to 350°F (175°C). Line a 9×13-inch baking pan with parchment paper, leaving overhang on the long sides.
- Make the shortbread crust: In a large bowl, whisk together 2 cups flour, 1/2 cup granulated sugar, and 1/4 teaspoon salt. Cut in 3/4 cup cold cubed butter using a pastry cutter or fingertips until mixture resembles coarse meal with pea-sized butter pieces. Press evenly into prepared pan. Bake 18-20 minutes until lightly golden. Set aside to cool slightly.
- Prepare the apple filling: In a large bowl, toss sliced apples with 1/4 cup granulated sugar, 1/4 cup packed brown sugar, 2 tablespoons flour, 1 teaspoon cinnamon, 1/4 teaspoon nutmeg, 1 tablespoon lemon juice, and 1 teaspoon vanilla extract. Let sit for 10 minutes.
- Make the streusel topping: In a medium bowl, combine 1 cup flour, 1/2 cup packed brown sugar, 1/2 cup rolled oats, and 1/2 teaspoon cinnamon. Pour in 1/2 cup melted butter and stir with a fork until clumps form.
- Assemble the bars: Spoon apple filling evenly over pre-baked crust. Sprinkle streusel topping over apples. Bake at 350°F (175°C) for 35-40 minutes until streusel is golden brown and apples are tender. Tent with foil if browning too quickly.
- Make the salted caramel sauce: In a medium saucepan over medium heat, melt 1/2 cup butter. Add 1 cup packed brown sugar and whisk until combined. Slowly pour in 1/2 cup heavy cream while whisking constantly. Bring to a gentle boil, then reduce heat to low and simmer 5-7 minutes, whisking occasionally, until slightly thickened. Remove from heat and stir in 1 teaspoon flaky sea salt and 1 teaspoon vanilla extract. Let cool 10 minutes.
- Finish and cool: Let bars cool in pan on a wire rack for 20 minutes. Drizzle salted caramel sauce generously over top. Sprinkle with extra flaky sea salt if desired. Let cool completely (1-2 hours) before lifting out using parchment handles and cutting into squares.
Notes
For best results, use Granny Smith apples for structure. Let bars cool completely before cutting to prevent crumbling. For clean cuts, run knife under hot water between slices. Bars taste even better the next day as flavors meld. Store in airtight container at room temperature up to 3 days, or refrigerate up to 1 week. Freeze individual wrapped bars for up to 3 months.
Nutrition
- Serving Size: 1 bar
- Calories: 380
- Sugar: 34
- Fat: 18
- Carbohydrates: 52
- Fiber: 3
- Protein: 4
Keywords: salted caramel apple pie bars, apple pie bars, fall dessert, apple dessert, shortbread crust, streusel topping, easy apple bars


