Love this? Save it for later!
Share the inspiration with your friends
I was standing in the frozen foods aisle last Tuesday, staring at a bag of pre-breaded chicken wings, when the smell hit me—not from the freezer, but from somewhere deep in my memory. It was that sharp, almost nutty aroma of garlic hitting hot butter, mixed with the dusty, familiar scent of grated Parmesan cheese. Suddenly I was eight years old, perched on a wobbly stool in my aunt Rosa’s tiny apartment kitchen, watching her pull a baking sheet from the oven. The wings on that pan were a perfect, speckled golden brown, and the sound they made—that faint, crackling hiss as they hit the air—was pure magic.
Aunt Rosa wasn’t really my aunt; she was our next-door neighbor, a retired lunch lady who believed that the secret to any good dish was a little bit of patience and a whole lot of garlic. She’d let me “help” by shaking the wings in a brown paper bag with the seasoning mix, something I took very seriously until I got overzealous and tore the bag, sending flour and paprika all over her linoleum floor. Honestly, I thought she’d be mad, but she just laughed, handed me a damp cloth, and said, “Now you’ve seasoned the floor too—double the flavor.” I never forgot that moment, or the way those wings tasted. They were impossibly crispy, without a drop of oil for deep frying, and coated in a salty, savory crust that made you close your eyes and chew slowly.
Maybe you’ve been there—trying to recreate a taste from your past that feels just out of reach. I’ve spent years chasing that specific crunch and that bold, cheesy-garlic punch. This recipe for Crispy Garlic Parmesan Baked Chicken Wings is the closest I’ve ever gotten. It’s the one I make when I need a guaranteed win for game day, or when I just want to feel like I’m eight years old again, standing on that stool, watching a master at work. It’s simple, it’s fast, and it brings that exact feeling back every single time.
Why You’ll Love This Recipe
Look, I’ve tested a lot of wing recipes over the years. I’ve tried the complicated brines, the double-baking methods, and even the ones that call for weird ingredients like baking powder that can leave a metallic taste if you’re not careful. This Crispy Garlic Parmesan Baked Chicken Wings recipe is the one I keep coming back to because it just works. It’s not fancy, and it doesn’t try to be. It’s the result of a dozen or so trials in my own kitchen, and a few happy accidents that taught me what not to do.
- 30 Minutes, Start to Finish: No marinating overnight, no complicated steps. From fridge to table in half an hour, which is perfect for a weeknight craving or a last-minute party snack.
- Simple Pantry Ingredients: You probably have everything you need right now. Chicken wings, garlic, Parmesan, butter, and a few basic spices. No trip to a specialty store required.
- Perfect for Game Day or Dinner: These wings are sturdy enough to hold their own as a main course with some celery and dip, but they’re also the first thing to disappear at a party. They’re versatile like that.
- Seriously Crispy, No Deep Frying: This is the part that gets people. The texture is that perfect, shatteringly crisp exterior with juicy meat inside, all achieved in the oven. It feels like a cheat code.
- Bold, Savory Flavor: The garlic is roasted just enough to mellow its bite, and the Parmesan creates a salty, umami crust that’s just addictive. It’s comfort food that feels a little bit special.
This isn’t just another wing recipe you’ll try once and forget. It’s the kind of dish that makes you look forward to the leftovers—if there are any. It’s reliable, forgiving, and genuinely delicious. I’ve brought these to potlucks and watched people hover around the platter, and I’ve made them on a quiet Tuesday just because. They deliver every single time.
What Ingredients You Will Need
This recipe uses a short list of ingredients that work together to create something bigger than the sum of their parts. The magic is in the technique, not in a long grocery list.
- Chicken Wings (2 lbs / about 900g): You can use whole wings, but I prefer to buy them already separated into drumettes and flats. It saves a step and a mess. Pat them very dry with paper towels before you start—this is the single most important step for getting them crispy. If they’re wet, they’ll steam instead of roast.
- Unsalted Butter (4 tbsp / 57g), melted: I use unsalted so I can control the salt level, especially since the Parmesan is already quite salty. Melt it gently in the microwave or on the stove. Don’t let it brown; you just want it liquid.
- Fresh Garlic (4-5 cloves), minced: This is non-negotiable for me. The pre-minced stuff in a jar has a different, slightly sharper flavor that doesn’t mellow the same way. Take the extra 30 seconds to mince fresh garlic. It makes a real difference in the final taste.
- Grated Parmesan Cheese (1/2 cup / 50g): Please, please use the real stuff from a block that you grate yourself. The powdery, shelf-stable kind in the green can has added anti-caking agents that prevent it from melting and sticking properly. A microplane or the small holes of a box grater work perfectly. I recommend a block of Parmigiano-Reggiano if you can find it, but a good domestic Parmesan works well too.
- Panko Breadcrumbs (1/2 cup / 30g): These are lighter and flakier than regular breadcrumbs, and they create a much crunchier crust. You can find them in the Asian foods aisle or near the regular breadcrumbs at most grocery stores. They’re a game changer for oven-baked coatings.
- Dried Oregano (1 tsp): It adds a subtle, earthy herbiness that complements the garlic and cheese without overpowering them. Italian seasoning works as a substitute in a pinch.
- Garlic Powder (1/2 tsp): This is different from the fresh garlic. The powder adds a deeper, roasted garlic note that rounds out the flavor. Don’t skip it.
- Salt and Black Pepper: Go easy on the salt at first because the Parmesan is salty. A generous pinch of black pepper is a must—it cuts through the richness.
- Fresh Parsley (2 tbsp), chopped: This is for garnish, and it’s not just for looks. The fresh, clean flavor of parsley balances the richness of the butter and cheese. A little green on top makes the dish look finished and professional.
Equipment Needed
You don’t need a professional kitchen to make these wings, but a few key tools make the process smoother and the results more reliable.
- Baking Sheet (13×18 inch / half-sheet pan): A good, heavy-duty baking sheet distributes heat evenly and prevents warping at high temperatures. Avoid non-stick pans with a dark coating, as they can cause the bottoms of the wings to burn before the tops are done.
- Wire Rack: This is the secret weapon for crispy wings. Placing the wings on a wire rack set inside the baking sheet allows hot air to circulate all around them, so the bottom gets just as crispy as the top. It’s a small investment that pays off big time.
- Mixing Bowls: You’ll need one large bowl for tossing the wings in the butter mixture, and a shallow dish or pie plate for the breadcrumb coating.
- Tongs: For turning the wings in the coating and transferring them to the baking sheet. They keep your hands clean and the process efficient.
- Microplane or Box Grater: For grating the Parmesan cheese. A microplane gives you a very fine, fluffy grate that adheres perfectly to the wings.
- Garlic Press (optional): I use a press for the garlic because I’m lazy, but mincing it with a knife works just as well. A press just saves a little time and cleanup.
Preparation Method
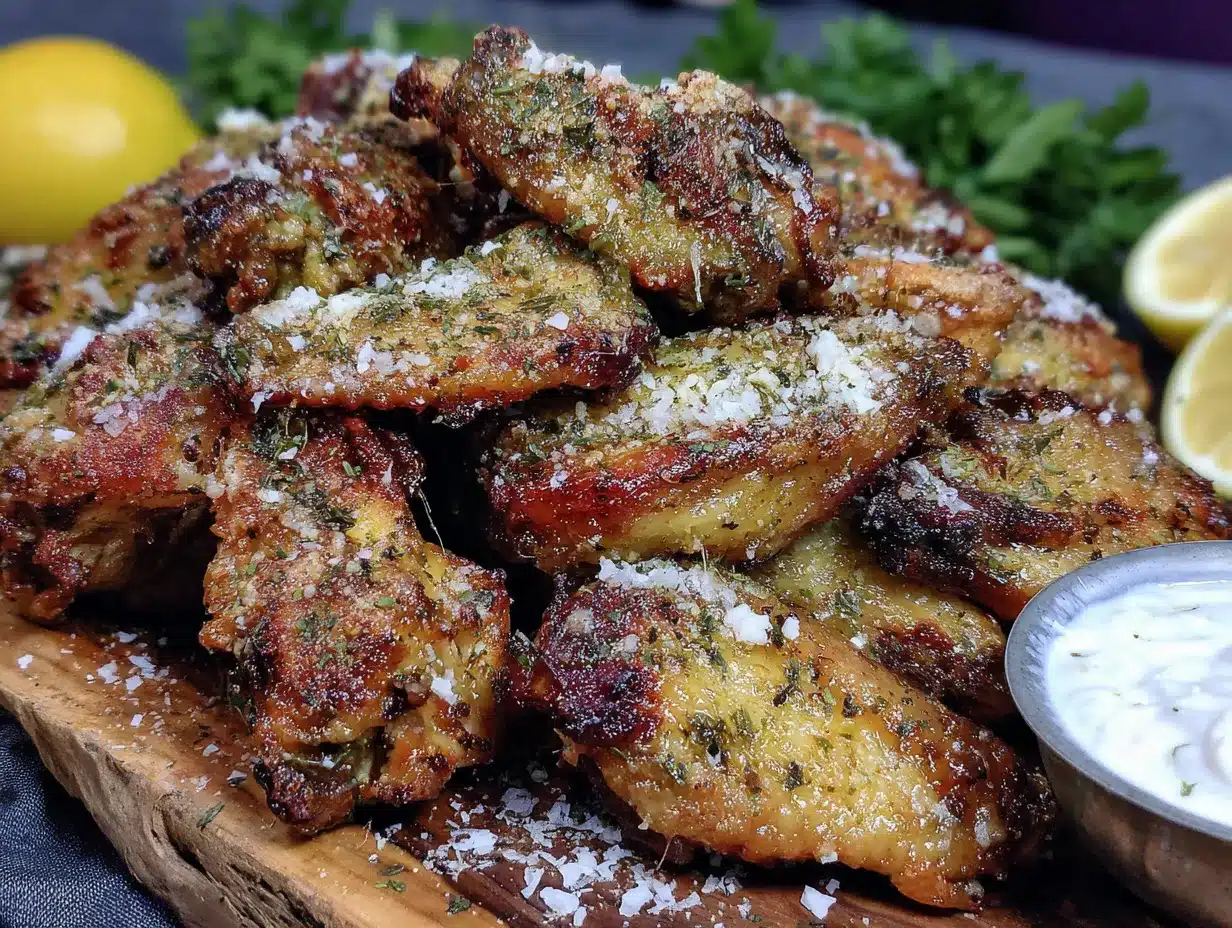
This is where the magic happens. Follow these steps closely, and you’ll have the crispiest, most flavorful baked wings of your life.
- Preheat and Prep (5 minutes): Preheat your oven to 425°F (220°C). Place a wire rack inside a large baking sheet and set it aside. While the oven heats, take your chicken wings out of the fridge and pat them completely dry with paper towels. This is crucial—any moisture will create steam and prevent the coating from getting crispy. Let them sit on a plate while you prepare the coating mixture.
- Make the Garlic Butter Base (5 minutes): In a large mixing bowl, combine the 4 tablespoons of melted unsalted butter and the 4-5 minced garlic cloves. Stir it together and let it sit for a minute. The heat from the butter will slightly cook the garlic, mellowing its raw bite. This step mellows the garlic just enough so it’s fragrant but not harsh.
- Prepare the Parmesan-Panko Coating (3 minutes): In a separate shallow dish (a pie plate works great), whisk together the 1/2 cup of grated Parmesan cheese, 1/2 cup of panko breadcrumbs, 1 teaspoon of dried oregano, 1/2 teaspoon of garlic powder, and a generous pinch of black pepper. Go easy on the salt here—the Parmesan is already salty. Mix until everything is evenly distributed.
- Coat the Wings (10 minutes): Add the dry chicken wings to the bowl with the garlic butter. Use your hands or tongs to toss them until every wing is evenly coated in the buttery mixture. Don’t be shy—make sure they’re all slick and shiny. Then, working one at a time, take a wing and place it in the dish with the Parmesan-panko mixture. Turn it over and press gently so the coating sticks to all sides. Place the coated wing on the prepared wire rack. Repeat with all the wings. Don’t overcrowd them; leave a little space between each one so the hot air can circulate.
- Bake to Crispy Perfection (22-25 minutes): Place the baking sheet on the center rack of your preheated oven. Bake for 22-25 minutes, or until the wings are golden brown and cooked through. The internal temperature should reach 165°F (74°C) when checked with an instant-read thermometer. For extra crispy wings, you can turn on the broiler for the last 1-2 minutes, but watch them closely—they can burn quickly. I usually skip the broiler and just let them bake the full time; they come out perfectly crunchy.
- Rest and Garnish (3 minutes): Remove the baking sheet from the oven. Let the wings rest on the wire rack for 2-3 minutes. This allows the coating to set and become even crispier. Transfer them to a serving platter, sprinkle with the fresh chopped parsley, and serve immediately. The texture is best when they’re hot from the oven.
Cooking Tips & Techniques
I’ve made plenty of mistakes with wings over the years, so you don’t have to. Here are the things I’ve learned the hard way.
- Dryness is Your Best Friend: I cannot stress this enough. If your wings are wet, even a little bit, the coating will turn into a soggy paste. Pat them dry with paper towels, let them sit uncovered in the fridge for 15 minutes if you have the time, and make sure your butter isn’t too hot. Moisture is the enemy of crispiness.
- Don’t Skip the Wire Rack: I tried making these without a wire rack once because I was lazy and didn’t want to wash an extra thing. The bottoms of the wings were soggy and pale. The rack allows air to flow underneath, cooking the bottom as evenly as the top. It’s a small piece of equipment that makes a huge difference.
- Watch the Garlic: Fresh garlic can burn easily at high temperatures. That’s why we mix it with the melted butter first—it starts cooking gently before it even hits the oven. If you see the garlic pieces starting to turn dark brown during baking, your oven might be running hot. Check the wings a few minutes early.
- Panko vs. Regular Breadcrumbs: Panko is the way to go here. Regular breadcrumbs are too fine and dense; they create a more bready, less crunchy crust. Panko’s flaky texture gives you that light, shattering crispiness that makes these wings so addictive.
- Scrape, Don’t Wash: After you’re done coating the wings, you’ll have a dish with leftover breadcrumb mixture. Don’t throw it away! I often sprinkle the leftover crumbs over the wings on the baking sheet before they go in the oven. They toast up and create little crunchy bits that are delicious.
Variations & Adaptations
Once you’ve mastered the basic recipe, it’s fun to play around. Here are a few ways I’ve adapted these wings for different moods and diets.
- Spicy Buffalo-Parmesan: Add 1-2 tablespoons of your favorite hot sauce (Frank’s RedHot is my go-to) to the melted butter and garlic mixture. The heat cuts through the richness of the cheese beautifully. You get the best of both worlds—tangy heat and savory, nutty Parmesan.
- Gluten-Free Version: Swap the panko breadcrumbs for gluten-free panko or crushed pork rinds. Crushed pork rinds create an incredibly crispy, low-carb coating that’s surprisingly close to the original. Just make sure your other ingredients (like the Parmesan) are certified gluten-free if that’s a concern.
- Herb & Lemon Twist: Add the zest of one lemon and 2 tablespoons of fresh chopped rosemary or thyme to the breadcrumb mixture. The lemon brightens everything up, and the herbs add an earthy, almost floral note. This is my favorite version for a spring or summer dinner.
- Dairy-Free Adaptation: Use a high-quality dairy-free butter substitute (like Miyoko’s) and a dairy-free Parmesan alternative. The texture will be slightly different, but the flavor can still be excellent. I’ve made this for a friend with a dairy allergy and she couldn’t stop eating them.
- Air Fryer Method: If you have an air fryer, preheat it to 400°F (200°C). Cook the coated wings in a single layer for 12-15 minutes, shaking the basket halfway through. The air fryer circulates heat even more efficiently than an oven, resulting in an incredibly crispy exterior in less time.
Serving & Storage Suggestions
These wings are best enjoyed fresh from the oven, but they can be prepped ahead or stored for later if you know what you’re doing.
Serving: Serve the wings hot, piled on a large platter. I like to line the platter with a few paper towels to catch any excess butter. A sprinkle of fresh parsley and a light dusting of extra grated Parmesan right before serving makes them look restaurant-worthy. They’re fantastic on their own, but they also pair beautifully with classic dipping sauces like ranch dressing, blue cheese dressing, or a simple lemon-herb aioli. For a complete meal, serve them with crunchy celery and carrot sticks, or a simple side salad with a tangy vinaigrette to cut through the richness.
Storage: Leftover wings can be stored in an airtight container in the refrigerator for up to 3 days. The texture will soften as they sit, but they’re still delicious. I don’t recommend freezing these wings after they’re baked—the coating becomes soggy upon thawing and reheating.
Reheating: To bring back the crispiness, reheat the wings in a single layer on a wire rack set over a baking sheet in a 400°F (200°C) oven for 5-7 minutes. The microwave will make them rubbery and sad, so avoid it at all costs. If you’re in a hurry, an air fryer at 375°F (190°C) for 3-4 minutes works like a charm. The flavors actually meld together a bit more overnight, so leftover wings can taste even more garlicky and savory the next day.
Nutritional Information & Benefits
While these wings are an indulgence, they do offer some nutritional perks. Here’s an estimate per serving (about 5-6 wings, based on the full recipe serving 4 people).
- Calories: Approximately 420-480 kcal
- Protein: 28-32g (chicken wings are a great source of lean protein)
- Fat: 30-35g (mostly from the butter and chicken skin)
- Carbohydrates: 8-10g (mostly from the panko breadcrumbs)
- Fiber: 1g
- Sugar: 1g
Health Benefits: Chicken wings provide a solid amount of protein, which is essential for muscle repair and keeping you full. Garlic is a powerhouse ingredient—it’s known for its anti-inflammatory properties and its ability to support immune health. Parmesan cheese is a good source of calcium and phosphorus, which are important for bone health. Compared to deep-fried wings, this baked version significantly reduces the amount of unhealthy fats and calories. It’s a smarter way to enjoy a classic comfort food.
Dietary Considerations: This recipe is naturally low-carb and can be made gluten-free and dairy-free with the substitutions mentioned in the variations section. It is not suitable for a vegan diet due to the chicken, butter, and cheese.
Conclusion
This Crispy Garlic Parmesan Baked Chicken Wings recipe is more than just a quick dinner or a party snack—it’s a little piece of my own history, perfected in my kitchen so you can make it yours. It’s the kind of recipe that proves you don’t need a deep fryer or a long list of exotic ingredients to get that incredibly satisfying crunch. You just need a hot oven, a little patience, and a willingness to get your hands a bit buttery.
I really hope you give these wings a try. Don’t be afraid to tweak the garlic level or add your own favorite herbs—that’s the fun part of cooking. If you make them, I’d love to hear how they turned out. Leave a comment below and let me know if they disappeared as fast as they do at my house! And if you’re looking for another crowd-pleasing appetizer, you might also enjoy my Crispy Garlic Chicken recipe, which uses a similar technique. Happy cooking!
Frequently Asked Questions
Can I use frozen chicken wings for this recipe?
Yes, you can use frozen wings, but you must thaw them completely in the refrigerator first. Once thawed, pat them very dry with paper towels. Frozen wings straight into the oven will release too much moisture and will not get crispy.
Why did my coating fall off in the oven?
This usually happens for two reasons: the wings were too wet when you coated them, or you didn’t press the coating firmly enough onto the wings. Make sure the wings are patted completely dry, and press the breadcrumb mixture gently but firmly onto all sides.
Can I prepare these wings ahead of time for a party?
Absolutely! You can coat the wings and arrange them on the wire rack up to 4 hours before baking. Keep them uncovered in the refrigerator. The dry air in the fridge will actually help the coating dry out slightly, which can lead to even crispier results. Just add 2-3 minutes to the baking time since they’ll be starting cold.
How do I make these wings extra spicy?
For a serious heat kick, add 1/2 teaspoon of cayenne pepper to the breadcrumb mixture, and add 1-2 tablespoons of your favorite hot sauce to the melted butter. You can also sprinkle some red pepper flakes over the finished wings before serving.
Can I use chicken thighs or drumsticks instead of wings?
Yes, you can use this same coating and method for chicken drumsticks or boneless, skinless chicken thighs. The cooking time will be longer—about 30-35 minutes for drumsticks and 20-25 minutes for boneless thighs. Always check the internal temperature, which should reach 165°F (74°C).
Pin This Recipe!
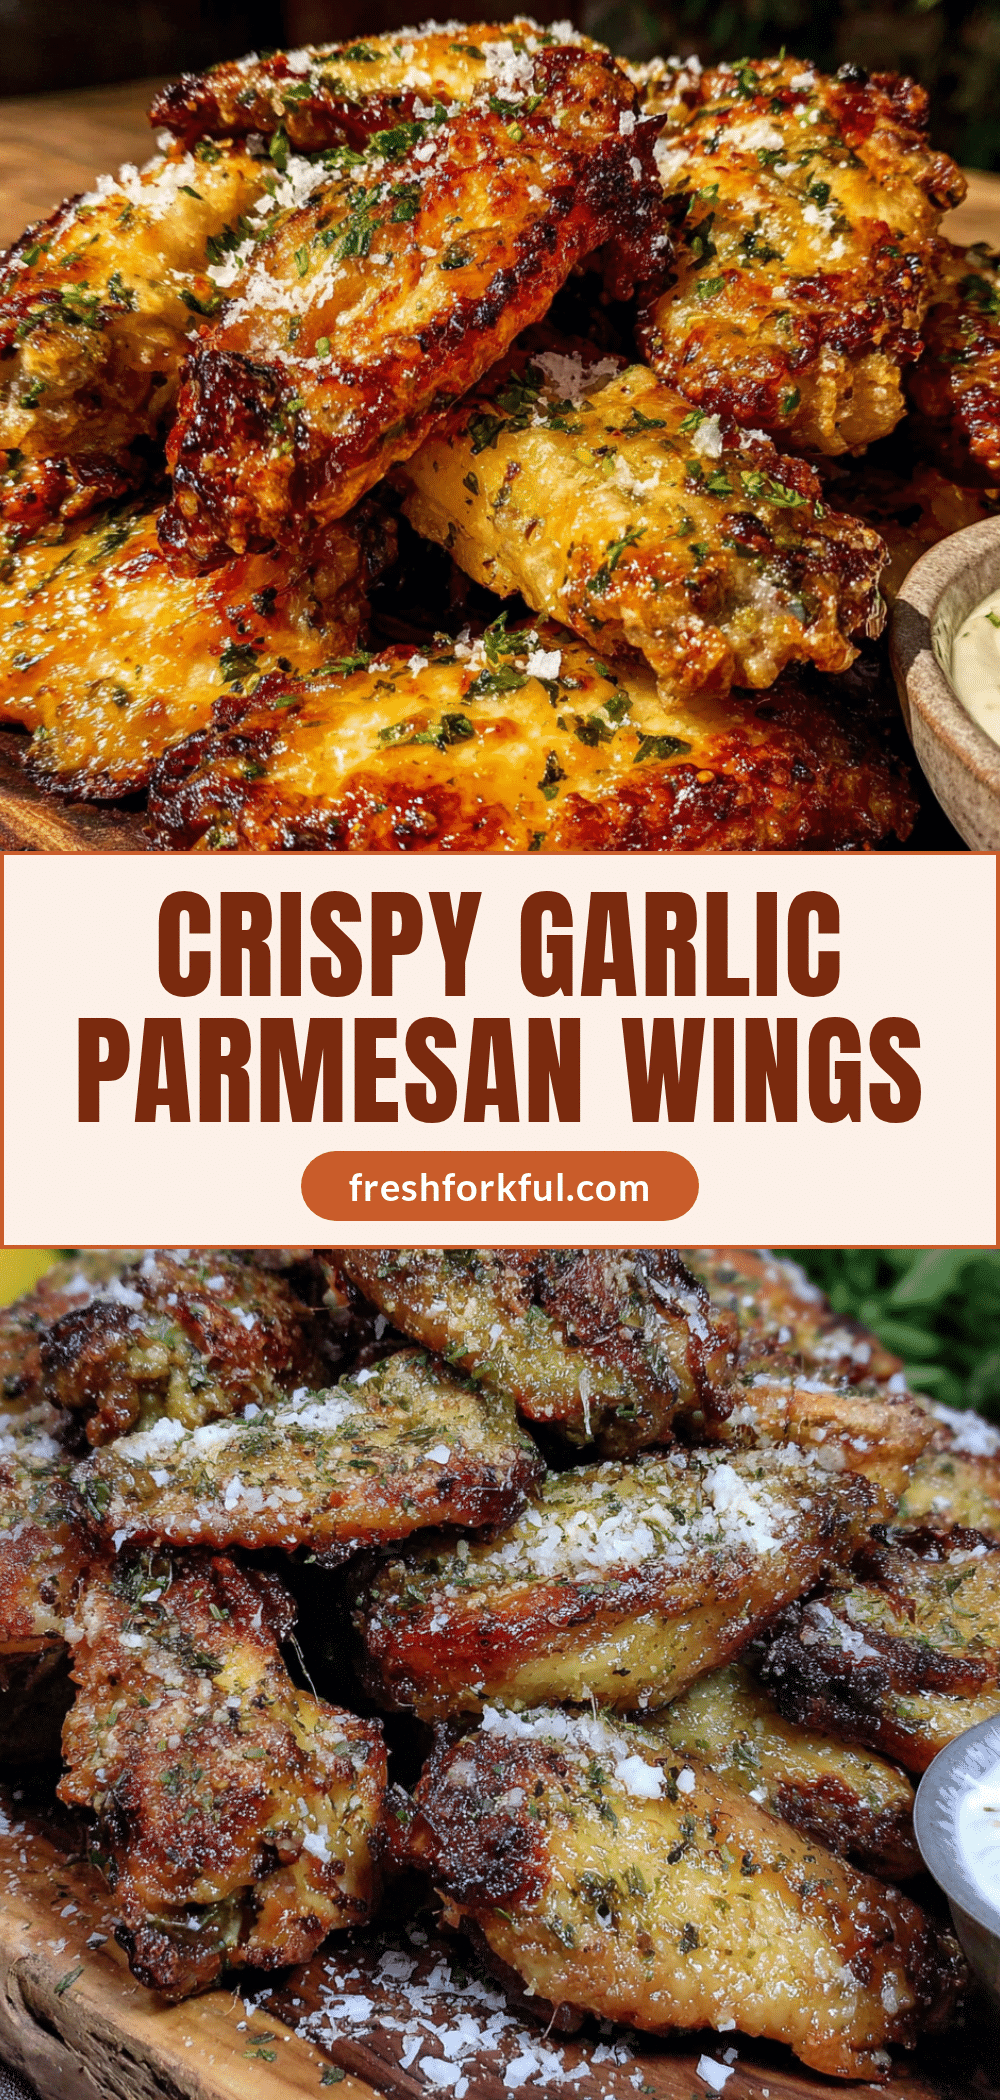
Crispy Garlic Parmesan Baked Chicken Wings – Easy 30-Min Recipe
These baked chicken wings are impossibly crispy without deep frying, coated in a salty, savory garlic-Parmesan crust. Ready in just 30 minutes, they’re perfect for game day or a quick weeknight dinner.
- Prep Time: 10 minutes
- Cook Time: 25 minutes
- Total Time: 35 minutes
- Yield: 4 servings 1x
- Category: Appetizer
- Cuisine: American
Ingredients
- 2 lbs (about 900g) chicken wings, separated into drumettes and flats
- 4 tbsp (57g) unsalted butter, melted
- 4–5 cloves fresh garlic, minced
- 1/2 cup (50g) grated Parmesan cheese (from a block)
- 1/2 cup (30g) panko breadcrumbs
- 1 tsp dried oregano
- 1/2 tsp garlic powder
- Salt and black pepper to taste
- 2 tbsp fresh parsley, chopped (for garnish)
Instructions
- Preheat oven to 425°F (220°C). Place a wire rack inside a large baking sheet.
- Pat chicken wings completely dry with paper towels.
- In a large bowl, combine melted butter and minced garlic. Let sit for 1 minute.
- In a shallow dish, whisk together Parmesan, panko, oregano, garlic powder, and a pinch of black pepper. Go easy on salt.
- Add dry wings to the butter-garlic mixture and toss until evenly coated.
- One at a time, place each wing in the Parmesan-panko mixture, turning and pressing gently to coat. Place on the prepared wire rack, leaving space between wings.
- Bake for 22-25 minutes, until golden brown and cooked through (internal temperature 165°F / 74°C). For extra crispiness, broil for 1-2 minutes at the end, watching closely.
- Let wings rest on the rack for 2-3 minutes. Transfer to a platter, sprinkle with fresh parsley, and serve immediately.
Notes
Pat wings very dry for maximum crispiness. Use a wire rack to allow air circulation. Fresh garlic is essential; pre-minced jarred garlic has a different flavor. Real Parmesan from a block is best; pre-grated contains anti-caking agents that prevent sticking. Panko breadcrumbs create a lighter, crunchier crust than regular breadcrumbs. Leftover wings can be stored in an airtight container in the refrigerator for up to 3 days. Reheat in a 400°F (200°C) oven for 5-7 minutes or in an air fryer at 375°F (190°C) for 3-4 minutes to restore crispiness.
Nutrition
- Serving Size: 5-6 wings
- Calories: 420480
- Sugar: 1
- Sodium: 500600
- Fat: 3035
- Saturated Fat: 1215
- Carbohydrates: 810
- Fiber: 1
- Protein: 2832
Keywords: baked chicken wings, garlic parmesan wings, crispy wings, 30-minute recipe, game day appetizer


