Love this? Save it for later!
Share the inspiration with your friends
I was standing in the checkout line at the hardware store—of all places—when the woman behind me started talking about lunchboxes. Not in a complaining way, more like she’d cracked some kind of code. She was maybe sixty-five, wearing a gardening apron with actual dirt on it, and she had this no-nonsense way of explaining things that made you want to listen. “My grandson won’t eat sandwiches,” she said, shaking her head. “Says the bread gets soggy by noon. So I started making these little roll-ups instead. Turkey, cheese, maybe a smear of cream cheese. He calls them ‘snail sandwiches.'”
I laughed, but honestly, I was already mentally taking notes. I’d been in a lunch-packing rut myself—the same sad rotation of sandwiches, crackers, and whatever fruit wasn’t mushy yet. My kids were getting bored, and let’s face it, when kids get bored with lunch, they either trade it away or toss it in the trash. Neither option feels great when you’re the one packing the lunchbox at 6:30 AM. So I went home, grabbed a tortilla, some turkey slices, and a block of cheddar, and gave those snail sandwiches a try.
The first batch was a little lopsided—I’ll admit that. I rolled them too loose, and they came out looking more like collapsed slugs than tidy pinwheels. But the taste? My kids devoured them. My youngest actually asked for them again the next day, which basically never happens. That’s when I knew this wasn’t just a cute idea. It was a legit lunchbox solution. These easy turkey and cheddar pinwheel wraps are now a staple in my kitchen, and I’m pretty sure they’ll become one in yours too. Maybe you’ve been in that same lunch-packing slump, staring at a fridge full of ingredients and thinking, what else is there? Well, here you go.
Why You’ll Love This Recipe
Let me tell you why these easy turkey and cheddar pinwheel wraps have earned a permanent spot in my weekly meal prep rotation. I’ve tested this recipe more times than I care to count—some with too much filling that squished out the sides, others with not enough that just tasted like plain tortilla. This version? It’s the Goldilocks of pinwheel wraps. Just right.
- Quick & Easy: These come together in about 5 minutes flat. Seriously. If you can spread cream cheese and roll a tortilla, you can make these. Perfect for those mornings when you’re running on coffee and sheer willpower.
- Simple Ingredients: You probably already have everything in your fridge. Turkey, cheddar, tortillas, and a spread. No fancy grocery trips required. That’s the kind of recipe I can get behind.
- Perfect for Lunchboxes: These hold up beautifully in a lunchbox. No soggy bread, no sad, flattened sandwiches. They stay neat and appetizing even hours later. Great for school, work, picnics, or road trips.
- Crowd-Pleaser: Kids love the fun spiral shape, and adults appreciate the flavor. I’ve brought these to potlucks and watched them disappear before the main dishes even hit the table.
- Unbelievably Delicious: The combination of creamy spread, savory turkey, and sharp cheddar wrapped in a soft tortilla is simple but satisfying. It’s comfort food you can eat with one hand while packing a lunchbox with the other.
What makes these pinwheels different from every other wrap recipe out there? It’s the technique. I learned through trial and error that the spread layer matters more than you’d think. Too thin, and the roll falls apart. Too thick, and everything squishes out. I also figured out that letting the rolled tortilla rest for just two minutes before slicing makes a world of difference. That little pause lets everything settle, giving you those clean, photogenic spirals instead of messy ovals. This isn’t just another lunch idea—it’s the lunch idea that’ll make you feel like you’ve got your act together, even on chaotic mornings.
What Ingredients You Will Need
This recipe uses simple, everyday ingredients to deliver big flavor without any fuss. Most of these are probably already living in your refrigerator or pantry right now. Here’s what you’ll need to make these easy turkey and cheddar pinwheel wraps:
- Large flour tortillas (10-inch size works best; burrito-sized tortillas give you more surface area for rolling)
- 8 ounces cream cheese, softened to room temperature (this is key—cold cream cheese tears the tortilla)
- 1/4 cup mayonnaise (adds creaminess and a little tang; you can use Greek yogurt as a lighter swap)
- 1 teaspoon Dijon mustard (optional but recommended—it cuts through the richness nicely)
- 8 slices deli turkey breast (I prefer oven-roasted turkey from the deli counter; pre-packaged works fine too)
- 4 slices sharp cheddar cheese (medium or mild cheddar also works, but sharp gives you more flavor per bite)
- 1/4 cup shredded lettuce (optional for crunch; add it just before serving to keep it from getting soggy)
- Salt and black pepper to taste
- Fresh spinach leaves (optional; a handful adds color and nutrients without altering the flavor much)
A few notes on ingredient selection: I recommend using full-fat cream cheese for the best texture. Low-fat versions tend to be a bit watery and can make the tortilla soggy. If you’re using block cream cheese, let it sit on the counter for about 20 minutes before you start. For the tortillas, look for ones that are pliable and not cracked at the edges. I’ve had good luck with the Mission brand, but any large flour tortilla will do the job.
For the turkey, ask for thicker slices at the deli counter if you can. Thin shaved turkey tends to tear when you roll it, and you want nice, even layers. The cheddar should be sliced thin enough to bend without breaking. Pre-shredded cheese won’t work here—it doesn’t melt or stick the same way sliced cheese does.
If you need substitutions, here are some that work well: swap the cream cheese for hummus or pesto for a different flavor profile. Use provolone or Swiss instead of cheddar. For a lower-carb option, try using large lettuce leaves or collard greens instead of tortillas—just blanch the collards briefly to make them pliable.
Equipment Needed
You don’t need much fancy equipment for these easy turkey and cheddar pinwheel wraps. That’s part of the beauty of this recipe. Here’s what you’ll want to have on hand:
- A sharp knife—a serrated bread knife works surprisingly well for slicing pinwheels without squishing them
- A cutting board with some grip so it doesn’t slide around
- A small mixing bowl for combining the cream cheese spread
- A rubber spatula for spreading the mixture evenly
- Plastic wrap or parchment paper for wrapping the rolled tortillas (helps them hold their shape)
- A plate or baking sheet to hold the rolled tortillas while they rest
If you don’t have a serrated knife, a regular chef’s knife works fine—just use a gentle sawing motion rather than pressing straight down. I’ve also used dental floss (unflavored!) to slice pinwheels in a pinch, and it actually gives you incredibly clean cuts. Slide a piece of floss under the roll, cross the ends over the top, and pull. Works like magic.
For storage, I recommend using airtight containers with lids that snap shut. The pinwheels stay fresh longer when they’re not exposed to air. If you’re packing these for lunch, those reusable silicone bags work great too.
Preparation Method
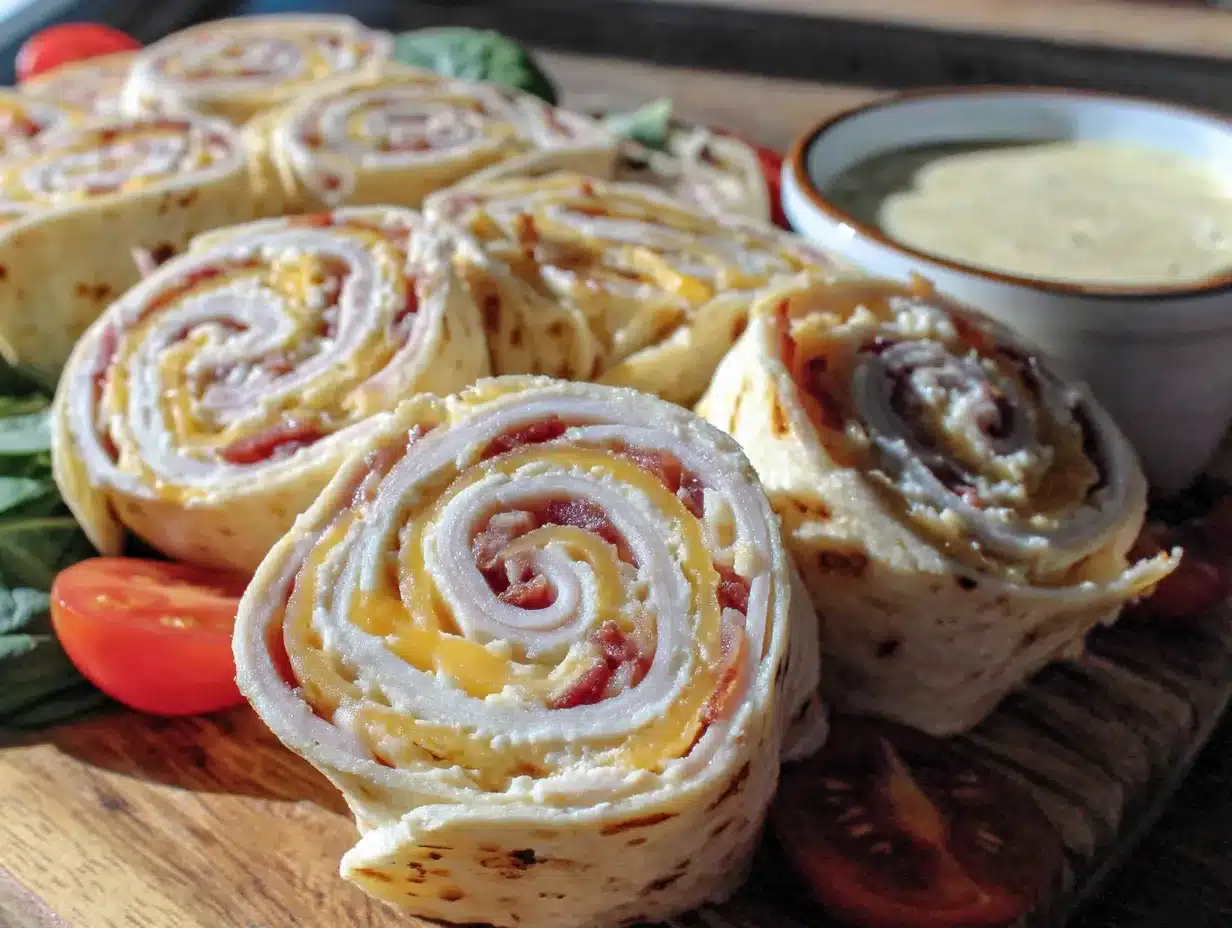
Making these easy turkey and cheddar pinwheel wraps is almost embarrassingly simple. But there are a few small tricks that make the difference between a pinwheel that looks like it came from a deli and one that looks like it fought a losing battle with a rolling pin. Follow these steps, and you’ll be golden.
- Make the spread: In your small mixing bowl, combine the softened cream cheese, mayonnaise, and Dijon mustard. Stir until smooth and completely combined. Add a pinch of salt and a few grinds of black pepper. Taste it—yes, taste it. You want the spread to be flavorful on its own because it’s carrying a lot of the seasoning in this recipe. Set aside.
- Prep your tortillas: Lay one tortilla flat on your cutting board. If your tortillas are cold from the fridge, microwave them for about 10 seconds to make them more pliable. This prevents cracking when you roll them. I learned this the hard way after my first tortilla split right down the middle like a bad zipper.
- Spread the mixture: Using your rubber spatula, spread about 2 tablespoons of the cream cheese mixture evenly over the entire surface of the tortilla. Go all the way to the edges—this acts as glue to hold everything together. If you leave bare spots, your pinwheels will unravel. Don’t ask me how I know this.
- Layer the turkey: Place 2 slices of turkey flat on the bottom third of the tortilla, overlapping them slightly. Don’t pile them all in one spot. You want an even layer across the whole tortilla. If your turkey slices are small, use more pieces to cover the surface. Think of it like making a blanket, not a mountain.
- Add the cheese: Place 1 slice of cheddar on top of the turkey. Again, keep it flat and even. If the cheese is too thick, it’ll create a bulge when you roll. I like to fold the cheese slice in half lengthwise to make two thinner layers. It distributes better that way.
- Add optional fillings: If you’re using spinach or shredded lettuce, scatter a thin layer over the cheese now. Don’t go overboard—too many greens will make the roll bulky and hard to slice.
- Roll it up: Starting at the edge closest to you, begin rolling the tortilla away from you, keeping it tight but not so tight that you squeeze the filling out the ends. Use your fingers to tuck the filling in as you go. Think of it like rolling a sleeping bag—firm and even. Once it’s fully rolled, place it seam-side down on the cutting board.
- Wrap and rest: Tightly wrap the rolled tortilla in plastic wrap or parchment paper. Twist the ends like a candy wrapper to secure it. Let it rest at room temperature for 5-10 minutes. This step is non-negotiable. The rest time allows the spread to firm up slightly and the tortilla to relax, which makes slicing much cleaner. If you skip this, you’ll get squished, messy pinwheels. Trust me on this one.
- Slice: Unwrap the roll and place it on your cutting board. Using your sharp knife (or dental floss!), slice the roll into 1-inch thick pieces. A gentle sawing motion works best—don’t press straight down. You should get about 6-8 pinwheels per tortilla, depending on how tightly you rolled and how thick you slice them.
- Arrange and serve: Place the pinwheels cut-side up on a plate or in your lunchbox. They’re ready to eat immediately, but they also hold up beautifully for several hours in the fridge.
Cooking Tips & Techniques
After making these easy turkey and cheddar pinwheel wraps roughly forty-seven times (I stopped counting after thirty), I’ve picked up a few tricks that make the process smoother and the results more consistent. Let me share the ones that matter most.
Don’t overfill. I know it’s tempting to pile on the turkey and cheese, especially if you’re hungry while you’re making these. But overfilling leads to bulging rolls that burst at the seams. The filling should be thin and even—think of it as a layer, not a mountain. If you can’t close the tortilla without squeezing, you’ve used too much.
Temperature matters. Cold cream cheese is the enemy of smooth spreading. It tears tortillas and leaves lumpy patches. Let your cream cheese sit out for 20-30 minutes before you start. If you forgot to plan ahead, microwave it for 10 seconds at 50% power. Not longer—you want it soft, not melted. I made that mistake once and ended up with a warm, soupy mess that refused to stay inside the tortilla.
Roll tight, but not too tight. This is the Goldilocks principle of pinwheel making. Roll too loose, and you get gaping holes in the center of your pinwheels. Roll too tight, and the filling squishes out the ends. The sweet spot is firm but gentle—imagine you’re rolling a yoga mat, not wringing out a wet towel.
Let it rest. I cannot stress this enough. That 5-10 minute rest wrapped in plastic is what gives you those beautiful, Instagram-worthy spirals. During this time, the cream cheese firms up slightly, the tortilla relaxes, and everything kind of settles into place. If you slice immediately, you’ll be disappointed. Patience pays off here.
Use a serrated knife. A serrated bread knife cuts through the tortilla without squishing the layers. If you use a straight-edged knife, you have to press harder, which compresses the pinwheels and makes them oval instead of round. If you don’t have a serrated knife, try the dental floss trick I mentioned earlier. It works surprisingly well.
Variations & Adaptations
One of the best things about these easy turkey and cheddar pinwheel wraps is how customizable they are. I’ve tried quite a few variations over the years, and here are the ones that stood out as winners.
Mediterranean Twist: Swap the turkey for roasted red peppers and the cheddar for feta cheese. Use a hummus spread instead of cream cheese, and add a handful of chopped kalamata olives. This version is vegetarian-friendly and has a totally different flavor profile—bright, tangy, and satisfying. My friend Sarah, who’s not a big meat eater, requests this version every time we have a picnic.
Spicy Southwest: Use pepper jack cheese instead of cheddar, and add a thin layer of refried beans or guacamole under the cream cheese. Throw in some sliced jalapeños if you like heat. The turkey stays, but you could also use shredded chicken. This version has a nice kick without being overwhelming. My husband, who puts hot sauce on everything, declared this his favorite.
Breakfast Pinwheels: This is a fun twist I tried on a lazy Sunday morning. Use scrambled eggs instead of turkey, add some crumbled bacon or sausage, and use a mild cheddar or American cheese. The cream cheese spread works beautifully with eggs. These are great for brunch or a grab-and-go breakfast during the week. My kids thought they were eating something special, which is always a win.
Low-Carb Version: Use large lettuce leaves or collard greens instead of tortillas. For collards, blanch them in boiling water for 30 seconds, then plunge them into ice water to stop the cooking. Pat them dry, then use them exactly like you would a tortilla. The filling stays the same—turkey, cheddar, cream cheese. You lose a little structural integrity, but the flavor is still there, and the carb count drops significantly.
Veggie-Packed: Add thinly sliced cucumber, bell pepper strips, or shredded carrots to the filling. These add crunch and color without changing the basic formula. I sometimes add a layer of roasted red pepper spread for extra flavor. This is a sneaky way to get more vegetables into a lunchbox without anyone complaining.
Serving & Storage Suggestions
These easy turkey and cheddar pinwheel wraps are versatile in how you serve them and surprisingly good at hanging out in the fridge for a day or two. Here’s what I’ve learned about serving and storing them.
Serving Temperature: These pinwheels are best served cold or at room temperature. If you’re packing them for lunch, they’ll be perfect by the time lunch rolls around. If you’re serving them as an appetizer, arrange them on a platter cut-side up so the spirals are visible. They look beautiful that way—colorful and inviting.
What to Serve With Them: These pair well with a simple side salad, some fresh fruit, or a handful of baby carrots. For a more substantial meal, serve them alongside a cup of soup or a small bowl of pasta salad. They’re also great on their own as a snack or light lunch. If you’re serving them at a party, set out a few dipping sauces—ranch dressing, honey mustard, or a spicy sriracha mayo all work well.
Storage Instructions: Store leftover pinwheels in an airtight container in the refrigerator. They’ll stay fresh for up to 3 days, though they’re best within the first 24 hours. The tortillas can start to dry out after that, especially if they’re not sealed properly. I like to place a slightly damp paper towel in the container to help maintain moisture—just make sure it doesn’t touch the pinwheels directly.
Freezer Tips: You can freeze these pinwheels, though the texture changes slightly. To freeze, roll and slice the pinwheels, then place them on a baking sheet in a single layer. Freeze until solid, then transfer to a freezer bag. They’ll keep for up to 2 months. To thaw, transfer them to the refrigerator overnight. The cream cheese may lose a bit of its creamy texture, but the flavor remains good.
Reheating: I don’t recommend reheating these in the microwave—the tortilla gets rubbery and the cream cheese can separate. If you want them warm, let them sit at room temperature for about 15 minutes before serving. That takes the chill off without compromising the texture. For a warm version, consider making a different recipe altogether, like a grilled wrap.
Nutritional Information & Benefits
Here’s the approximate nutritional breakdown for one serving of these easy turkey and cheddar pinwheel wraps (about 4-5 pinwheels, depending on size). Keep in mind that these values will vary based on the specific brands and ingredients you use.
| Nutrient | Amount Per Serving |
|---|---|
| Calories | 280-320 |
| Protein | 18-22g |
| Carbohydrates | 22-26g |
| Fat | 14-18g |
| Saturated Fat | 7-9g |
| Fiber | 1-2g |
| Sodium | 680-750mg |
These pinwheels offer a decent balance of protein, carbs, and fat, making them a satisfying lunch option. The turkey provides lean protein that helps keep you full and focused. Cheddar cheese adds calcium and vitamin D, which are important for bone health. Cream cheese, while higher in fat, contributes to the creamy texture that makes these pinwheels so satisfying—a little goes a long way.
If you’re watching your sodium intake, look for low-sodium turkey and reduced-sodium cheese. You can also use a whole wheat tortilla for added fiber. For a lower-calorie version, use a light cream cheese and skip the mayonnaise in the spread. For a higher-protein version, add an extra slice of turkey.
These pinwheels are not suitable for anyone with a dairy allergy, but they can easily be made dairy-free by using dairy-free cream cheese and cheese alternatives. They’re also not gluten-free unless you use gluten-free tortillas. For a nut-free version, simply avoid any nut-based spreads or additions.
FAQs
Can I make these pinwheels ahead of time?
Absolutely. You can make them up to 24 hours in advance. Just keep them wrapped tightly in plastic wrap in the refrigerator until you’re ready to slice and serve. In fact, letting them rest overnight often improves the texture and makes slicing even easier.
Why are my pinwheels falling apart?
This usually happens for one of three reasons: your spread layer was too thin (not enough glue), you didn’t let the roll rest before slicing, or you overfilled the tortilla. Make sure your cream cheese spread goes all the way to the edges, let the roll rest for at least 5 minutes, and keep your filling layers thin and even.
Can I use a different type of cheese?
Yes, you can use almost any cheese that slices well. Provolone, Swiss, mozzarella, and pepper jack all work beautifully. Just avoid crumbly cheeses like feta or blue cheese for the main layer—they don’t hold together well. You can sprinkle them on top if you want extra flavor.
How do I keep the pinwheels from getting soggy in a lunchbox?
The key is to avoid watery ingredients. Pat any lettuce or spinach dry before adding it. If you’re using vegetables like cucumber or bell pepper, remove the seeds and pat them dry as well. The cream cheese spread also acts as a barrier that helps keep the tortilla from absorbing moisture from the fillings.
Can I make these with gluten-free tortillas?
Yes, but gluten-free tortillas can be more fragile and prone to cracking. Warm them slightly before rolling to improve pliability. You may also want to roll them a bit less tightly than you would with regular tortillas. The flavor will still be great, even if the appearance is slightly different.
Conclusion
These easy turkey and cheddar pinwheel wraps have become one of those recipes I genuinely look forward to making, even on busy mornings. They’re quick enough for a weekday lunchbox but pretty enough to serve at a party. The combination of creamy spread, savory turkey, and sharp cheddar wrapped in a soft tortilla is simple, but sometimes simple is exactly what you need.
I love that this recipe is a starting point, not a rigid set of rules. You can swap the turkey for ham or roast beef, use different cheeses, add vegetables, or change up the spread. Every version I’ve tried has been good in its own way. That’s the beauty of a recipe that’s built on a solid technique rather than a specific set of ingredients.
If you give these pinwheels a try, I’d love to hear how they turned out. Did you stick with the classic turkey and cheddar version, or did you try one of the variations? Maybe you came up with your own twist. Drop a comment below and let me know—I’m always looking for new ideas to try in my own kitchen. And if you’re packing these in a lunchbox, I hope they make lunchtime a little brighter for whoever’s opening that bag.
Happy rolling, friends. You’ve got this.
Pin This Recipe!
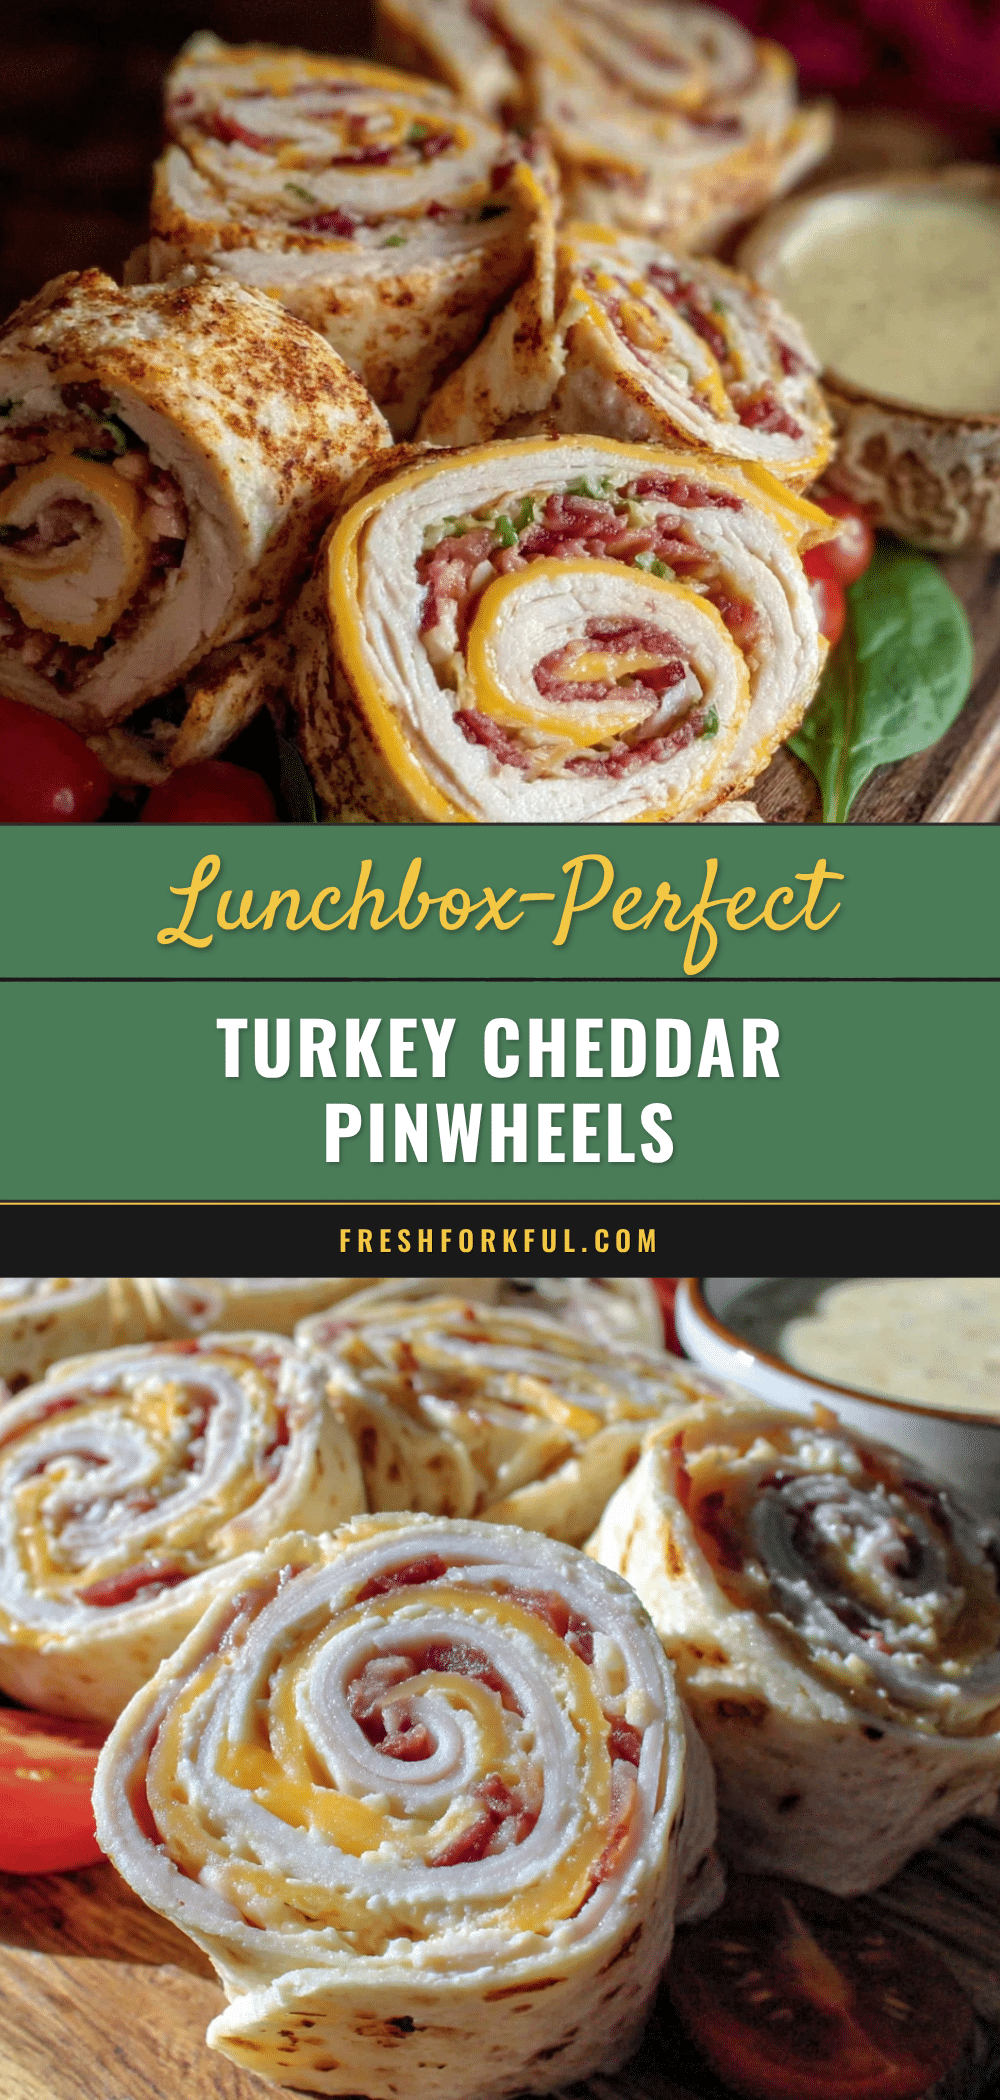
Easy Turkey and Cheddar Pinwheel Wraps (5-Minute Lunchbox Idea)

These easy turkey and cheddar pinwheel wraps are a quick, 5-minute lunchbox solution that kids and adults love. Creamy spread, savory turkey, and sharp cheddar rolled in a soft tortilla create a fun, no-soggy-bread alternative to sandwiches.
- Prep Time: 5 minutes
- Cook Time: 0 minutes
- Total Time: 5 minutes
- Yield: 4 servings 1x
- Category: Lunch
- Cuisine: American
Ingredients
- 4 large flour tortillas (10-inch)
- 8 ounces cream cheese, softened
- 1/4 cup mayonnaise
- 1 teaspoon Dijon mustard (optional)
- 8 slices deli turkey breast
- 4 slices sharp cheddar cheese
- 1/4 cup shredded lettuce (optional)
- Salt and black pepper to taste
- Fresh spinach leaves (optional)
Instructions
- Make the spread: In a small mixing bowl, combine softened cream cheese, mayonnaise, and Dijon mustard. Stir until smooth. Add a pinch of salt and black pepper. Taste and adjust seasoning.
- Prep your tortillas: Lay one tortilla flat on a cutting board. If cold, microwave for 10 seconds to make pliable.
- Spread the mixture: Using a rubber spatula, spread about 2 tablespoons of the cream cheese mixture evenly over the entire surface of the tortilla, all the way to the edges.
- Layer the turkey: Place 2 slices of turkey flat on the bottom third of the tortilla, overlapping slightly. Cover the entire tortilla evenly.
- Add the cheese: Place 1 slice of cheddar on top of the turkey. Fold the cheese slice in half lengthwise for thinner layers if needed.
- Add optional fillings: If using spinach or shredded lettuce, scatter a thin layer over the cheese.
- Roll it up: Starting at the edge closest to you, roll the tortilla away from you, keeping it tight but not squeezing filling out the ends. Place seam-side down.
- Wrap and rest: Tightly wrap the rolled tortilla in plastic wrap or parchment paper. Twist the ends like a candy wrapper. Let rest at room temperature for 5-10 minutes.
- Slice: Unwrap the roll and slice into 1-inch thick pieces using a sharp knife or dental floss. Use a gentle sawing motion.
- Arrange and serve: Place pinwheels cut-side up on a plate or in a lunchbox. Serve immediately or refrigerate.
Notes
Let cream cheese soften to room temperature for easy spreading. Resting the rolled tortilla for 5-10 minutes before slicing ensures clean spirals. For best results, use full-fat cream cheese and thick-sliced deli turkey. Avoid overfilling to prevent bulging.
Nutrition
- Serving Size: 4-5 pinwheels
- Calories: 300
- Sugar: 3
- Sodium: 715
- Fat: 16
- Saturated Fat: 8
- Carbohydrates: 24
- Fiber: 1.5
- Protein: 20
Keywords: turkey pinwheels, cheddar pinwheels, lunchbox ideas, easy lunch, no-cook lunch, kid-friendly lunch, 5-minute recipe


