Love this? Save it for later!
Share the inspiration with your friends
The neighborhood Halloween block party was in six hours and I’d completely forgotten I signed up for the dessert table. Everyone else would be bringing those elaborate, bakery-grade creations—you know, the ones that look like they took three days and a pastry degree. I had a box of vanilla cake mix, a tub of cream cheese frosting, and a sudden, slightly panicked idea. It was a Tuesday, my kitchen was a disaster, and I was pretty sure I had purple food coloring somewhere in the back of a cabinet. This wasn’t planned. It was pure, sugar-fueled survival mode.
Honestly, I was just hoping for something that didn’t look like a sad, beige blob next to the pumpkin-shaped cheesecakes. I started mixing, not really thinking, just moving. I divided the dough, added a few drops of color to each portion, and layered them. I didn’t have a plan, just a feeling. When it came out of the oven, this gorgeous, gradient swirl of purple staring back at me, I almost dropped the spatula. It was beautiful. And then, at the party, it was gone in fifteen minutes. People asked for the recipe. I had to make it three more times that month. So, this Perfect Purple Ombre Halloween Cookie Cake? It’s not a complicated story. It’s a story about a Tuesday, a forgotten commitment, and a happy accident that turned into a yearly tradition. Maybe you’ve been there—staring into your pantry, hoping for a miracle. This is that miracle.
Why You’ll Love This Recipe
Let’s be real for a second. Halloween treats are often more about the look than the taste. You get those dry, crumbly cookies that taste like cardboard with food coloring. Not this one. This cookie cake is soft, chewy, and actually delicious. It’s the kind of dessert that makes you close your eyes after the first bite, even if you’re wearing a silly costume. I’ve tested this recipe at three different parties and one very skeptical family dinner, and it passed the “can I have another piece?” test every single time.
- Quick & Easy: From start to finish, you’re looking at about 45 minutes. No chilling, no complicated folding. Just mix, layer, and bake.
- Simple Ingredients: You probably have 90% of this in your kitchen right now. No weird extracts or hard-to-find specialty items.
- Perfect for Halloween: It’s the star of any spooky spread. It looks impressive, but it’s secretly the easiest thing on the table.
- Crowd-Pleaser: Kids love the color, adults love the flavor. It’s a guaranteed win.
- Unbelievably Delicious: The texture is what gets you. It’s that perfect balance between a soft cookie and a dense cake. The edges are slightly crisp, the center is gooey, and the purple ombre effect is just a bonus.
What makes this different from the other Halloween desserts out there? It’s not about the gimmick. It’s about a technique that actually works. By layering the dough in a specific way, you get that beautiful gradient without any weird streaks or muddy colors. It’s a foolproof method that looks like you spent hours on it. And honestly, that’s the best kind of recipe to have in your back pocket.
What Ingredients You Will Need
This recipe uses simple, wholesome-ish ingredients to deliver a big, bold flavor without the fuss. Most of these are pantry staples, so you’re probably already halfway there. The magic is in how you combine them.
- For the Cookie Cake Base:
- 1 cup (2 sticks) unsalted butter, softened (I like using Land O’Lakes for consistent results)
- 1 cup granulated sugar
- 1/2 cup packed light brown sugar (adds moisture and a hint of molasses)
- 2 large eggs, room temperature
- 2 teaspoons vanilla extract (use pure, not imitation, for the best flavor)
- 2 1/2 cups all-purpose flour
- 1 teaspoon baking soda
- 1/2 teaspoon salt
- 1 cup white chocolate chips (or semi-sweet, if you prefer a darker contrast)
- For the Purple Ombre Effect:
- Gel food coloring in purple and violet (I recommend Wilton or AmeriColor—liquid drops are too watery and mess with the dough texture)
- For the Cream Cheese Frosting (optional, but recommended):
- 4 oz cream cheese, softened
- 1/4 cup unsalted butter, softened
- 2 cups powdered sugar
- 1 teaspoon vanilla extract
- A splash of milk (to thin, if needed)
Ingredient Tips: For the best texture, make sure your butter and eggs are truly at room temperature. Cold butter won’t cream properly, and cold eggs can make the batter seize up. If you’re in a rush, you can microwave the butter for 10 seconds, but keep an eye on it—you want it soft, not melted. For the food coloring, gel is non-negotiable here. Liquid food coloring will make your dough sticky and mess up the beautiful gradient. Trust me on this one. I learned the hard way.
For a gluten-free option, you can swap the all-purpose flour with a 1:1 gluten-free baking blend. I’ve used Bob’s Red Mill with good results. Just note the texture will be slightly more crumbly.
Equipment Needed
You don’t need a professional bakery setup for this. A few basic tools will do the job perfectly. Here’s what you’ll need:
- 9-inch round cake pan or a cast iron skillet (I prefer the skillet for even heat distribution)
- Parchment paper (for easy removal)
- Large mixing bowl
- Hand mixer or stand mixer (a whisk and some elbow grease works too, but your arm will thank you for the mixer)
- Rubber spatula
- Measuring cups and spoons
- Small bowls (for dividing the dough)
- Toothpicks (for testing doneness)
If you don’t have a 9-inch pan, you can use an 8-inch pan, but you’ll need to increase the baking time by about 5 minutes. A springform pan works great too, and it makes for a pretty presentation. For the frosting, a piping bag is nice but not necessary—a simple offset spatula will give you that rustic, homemade look.
Preparation Method
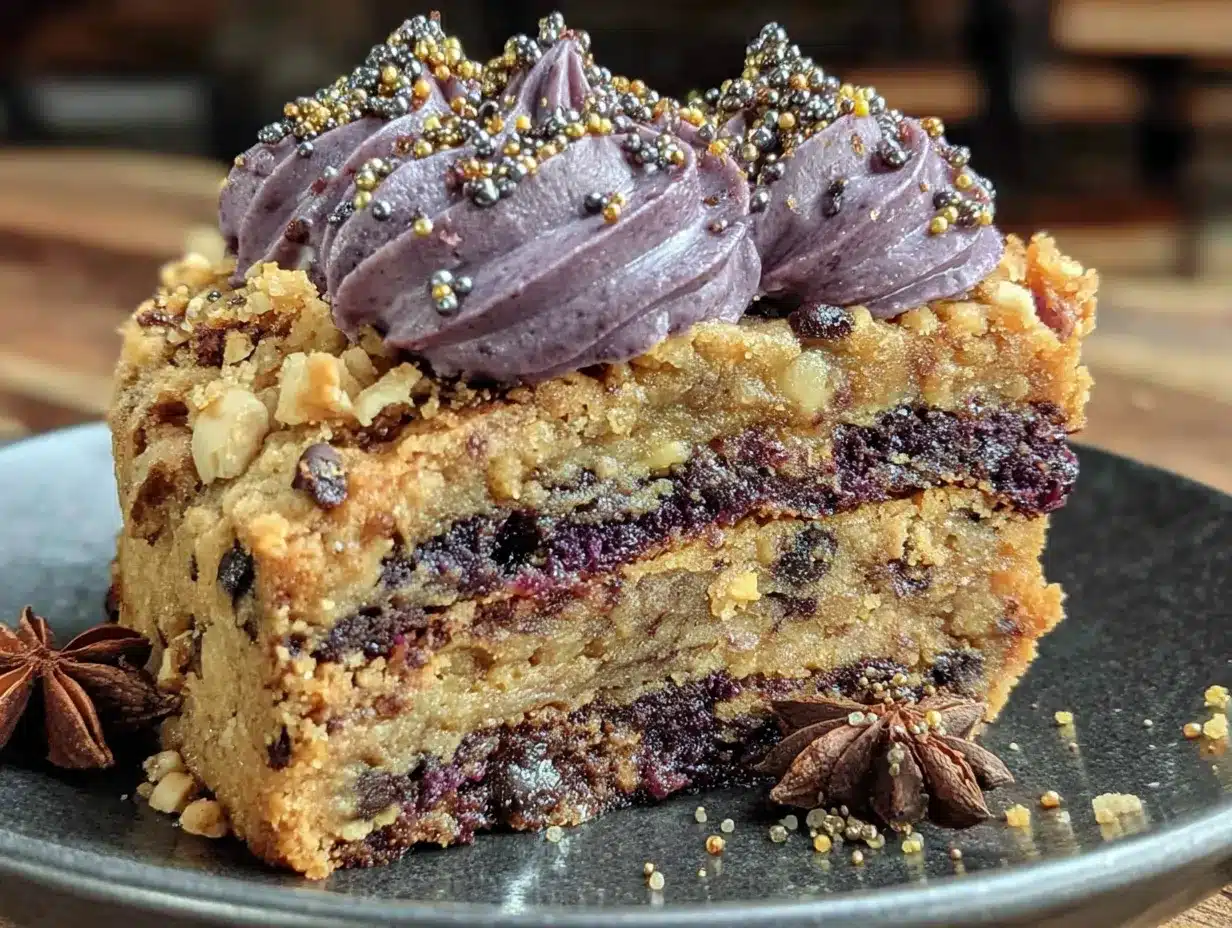
Alright, let’s get to the fun part. This is where the magic happens. Follow these steps, and you’ll have a showstopper on your hands.
- Preheat and Prep: Preheat your oven to 350°F (175°C). Line your 9-inch cake pan with parchment paper, leaving some overhang on the sides. This makes lifting the cookie cake out a breeze later. Lightly grease the parchment with non-stick spray.
- Cream the Butter and Sugars: In your large mixing bowl, beat the softened butter, granulated sugar, and brown sugar together until light and fluffy. This should take about 3-4 minutes with a hand mixer. You want it to look pale and airy. Scrape down the sides of the bowl with your spatula.
- Add the Wet Ingredients: Beat in the eggs one at a time, making sure each is fully incorporated before adding the next. Then, add the vanilla extract. Mix until just combined. The batter might look a little curdled at this point—don’t panic, that’s normal.
- Combine the Dry Ingredients: In a separate bowl, whisk together the flour, baking soda, and salt. Gradually add this to the wet mixture, mixing on low speed. Stop as soon as the flour disappears. Overmixing will make your cookie cake tough. Fold in the white chocolate chips with your spatula.
- Divide and Color: This is the crucial step. Divide the dough into three equal portions in small bowls. Leave one portion plain (it will be your lightest layer). To the second portion, add 2-3 drops of violet gel food coloring. To the third portion, add 3-4 drops of purple gel food coloring. Mix each until the color is evenly distributed. You should have a light, medium, and dark purple dough.
- Layer the Dough: Take your darkest purple dough and press it evenly into the bottom of the prepared pan. Use your fingers or the back of a spoon to make an even layer. Next, take the medium purple dough and carefully press it on top, spreading it to the edges. Finally, add the lightest dough on top. Don’t worry if the layers aren’t perfectly smooth—the slight imperfections add to the homemade charm.
- Bake: Bake for 20-25 minutes, or until the edges are golden brown and the center is set. A toothpick inserted into the center should come out with a few moist crumbs, not raw batter. The top might look a little puffy—that’s okay. It will settle as it cools.
- Cool: Let the cookie cake cool in the pan for 10 minutes. Then, using the parchment overhang, lift it out onto a wire rack to cool completely. Do not frost it while it’s warm, or the frosting will turn into a melty mess.
Sensory Cue: When it’s done, your kitchen will smell like a warm vanilla hug. The edges should be a deep golden brown, and the center should spring back slightly when you touch it.
Cooking Tips & Techniques
I’ve made this cookie cake about a dozen times now, and I’ve learned a few things the hard way. Here are my best tips to make sure yours turns out perfect.
- Don’t Overmix: I cannot stress this enough. Once you add the flour, mix only until it’s incorporated. Overmixing develops the gluten, which leads to a tough, cakey texture. We want soft and chewy.
- Gel vs. Liquid Coloring: I already mentioned this, but it’s worth repeating. Gel food coloring is your friend. It’s concentrated, so you need less, and it won’t mess with the dough’s moisture balance. Liquid coloring will make the dough sticky and harder to layer.
- Layer Evenly: When pressing the dough into the pan, try to make each layer as even as possible. This ensures a clean, distinct ombre effect. If one layer is thicker than the others, the gradient will look lopsided. Use the back of a spoon to smooth it out.
- Check for Doneness Early: All ovens are different. Start checking your cookie cake at the 18-minute mark. If the edges are browning too quickly, tent the pan loosely with foil for the last 5 minutes.
- Cool Completely: This is the hardest part, I know. But if you frost the cookie cake while it’s still warm, the frosting will slide right off. Patience, my friend. Let it cool completely on the wire rack.
One time, I was in a rush and skipped the cooling step. I ended up with a purple puddle of frosting on my counter. It was a sad, delicious mess. Learn from my mistakes.
Variations & Adaptations
This recipe is incredibly forgiving. You can tweak it to fit any occasion or dietary need. Here are a few ways I’ve played around with it.
- Spooky Spider Web: After frosting, drizzle melted dark chocolate in a spiral pattern on top. Use a toothpick to drag lines from the center outwards to create a web effect. It looks terrifyingly cool.
- Vegan Version: Swap the butter for a vegan butter stick (I like Miyoko’s), use flax eggs (1 tablespoon ground flaxseed + 3 tablespoons water per egg), and use dairy-free chocolate chips. The texture will be slightly less tender, but it’s still delicious.
- Different Colors: Who says it has to be purple? For a non-Halloween version, try pink, blue, and green for a mermaid cake. Or red, orange, and yellow for a sunset effect. The technique works with any color gradient.
- Gluten-Free Option: As mentioned, use a 1:1 gluten-free flour blend. I’ve also had success with almond flour, but the texture is more crumbly and less chewy. Add an extra egg if using almond flour to help bind it.
- Add-Ins: Feel free to swap the white chocolate chips for dark chocolate, butterscotch chips, or even chopped nuts. I once added a teaspoon of cinnamon to the dough, and it was a game-changer.
Serving & Storage Suggestions
This cookie cake is best served at room temperature. If you’ve frosted it, let it sit out for about 20 minutes before slicing so the frosting softens slightly. I like to serve it on a simple cake stand with a few spooky sprinkles on top. It pairs beautifully with a cold glass of milk or a hot cup of coffee.
For storage, keep the unfrosted cookie cake in an airtight container at room temperature for up to 3 days. If you’ve already frosted it, store it in the fridge. The frosting will firm up, but the cookie cake will stay soft. To reheat, pop a slice in the microwave for 10 seconds—it’s like a fresh-baked cookie all over again.
You can also freeze the unfrosted cookie cake. Wrap it tightly in plastic wrap and then foil, and freeze for up to 3 months. Thaw overnight in the fridge, then bring to room temperature before frosting and serving. The flavors actually get a little deeper after freezing. It’s weird, but true.
Nutritional Information & Benefits
Let’s be honest—this is a treat. It’s not health food. But that doesn’t mean you can’t feel good about eating it. Here’s a rough estimate per slice (assuming 12 slices):
- Calories: 380
- Fat: 18g
- Carbohydrates: 52g
- Protein: 4g
- Sugar: 34g
The butter and eggs provide some protein and healthy fats, and the white chocolate chips offer a little calcium. Mostly, it’s about joy. And honestly, a little joy is good for you. If you’re watching your sugar, you can reduce the granulated sugar by a quarter cup without affecting the texture too much. For a lower-fat option, you can substitute half the butter with unsweetened applesauce. The texture will be more cake-like, but it’s still tasty.
This recipe is not gluten-free, dairy-free, or vegan as written, but see the variations section for adaptations. It contains gluten, dairy, and eggs.
Conclusion
So there you have it. A Perfect Purple Ombre Halloween Cookie Cake that started as a frantic, last-minute idea and turned into a yearly tradition. It’s proof that you don’t need a lot of time or fancy ingredients to create something beautiful. You just need a little bit of creativity and a willingness to try.
I love this recipe because it reminds me that sometimes the best things in life are the ones you don’t overthink. It’s forgiving, it’s fun, and it always makes people smile. I hope you give it a try and make it your own. Maybe add some green food coloring for a witchy vibe, or top it with candy eyes for a monster mash. The possibilities are endless.
If you make this, I’d love to hear about it. Drop a comment below and let me know how it turned out. Did you try a different color? Did your kids help you layer the dough? Share your stories, your photos, and your happy accidents. Happy Halloween, and happy baking!
Frequently Asked Questions
Can I use liquid food coloring instead of gel?
I strongly recommend against it. Liquid food coloring will make your dough sticky and wet, which makes it harder to layer and can affect the texture of the baked cookie cake. Gel coloring gives you vibrant colors without adding extra moisture.
Can I make this cookie cake ahead of time?
Absolutely. You can bake the cookie cake up to two days in advance and store it unfrosted at room temperature. Frost it on the day you plan to serve it for the best presentation.
Why did my ombre layers look muddy?
This usually happens if the layers aren’t pressed firmly enough, or if the dough is too warm. Make sure each layer is evenly pressed into the pan before adding the next. If your dough feels too soft, pop it in the fridge for 10 minutes to firm up.
Can I use a different pan size?
Yes, but you’ll need to adjust the baking time. An 8-inch pan will give you a thicker cookie cake and will need about 5 more minutes in the oven. A 10-inch pan will give you a thinner cake and will need about 5 fewer minutes.
How do I get clean slices?
Use a sharp, serrated knife and wipe it clean between cuts. For the cleanest slices, chill the frosted cookie cake in the fridge for 30 minutes before cutting. This firms up the frosting and the cookie, giving you those Instagram-worthy slices.
Pin This Recipe!
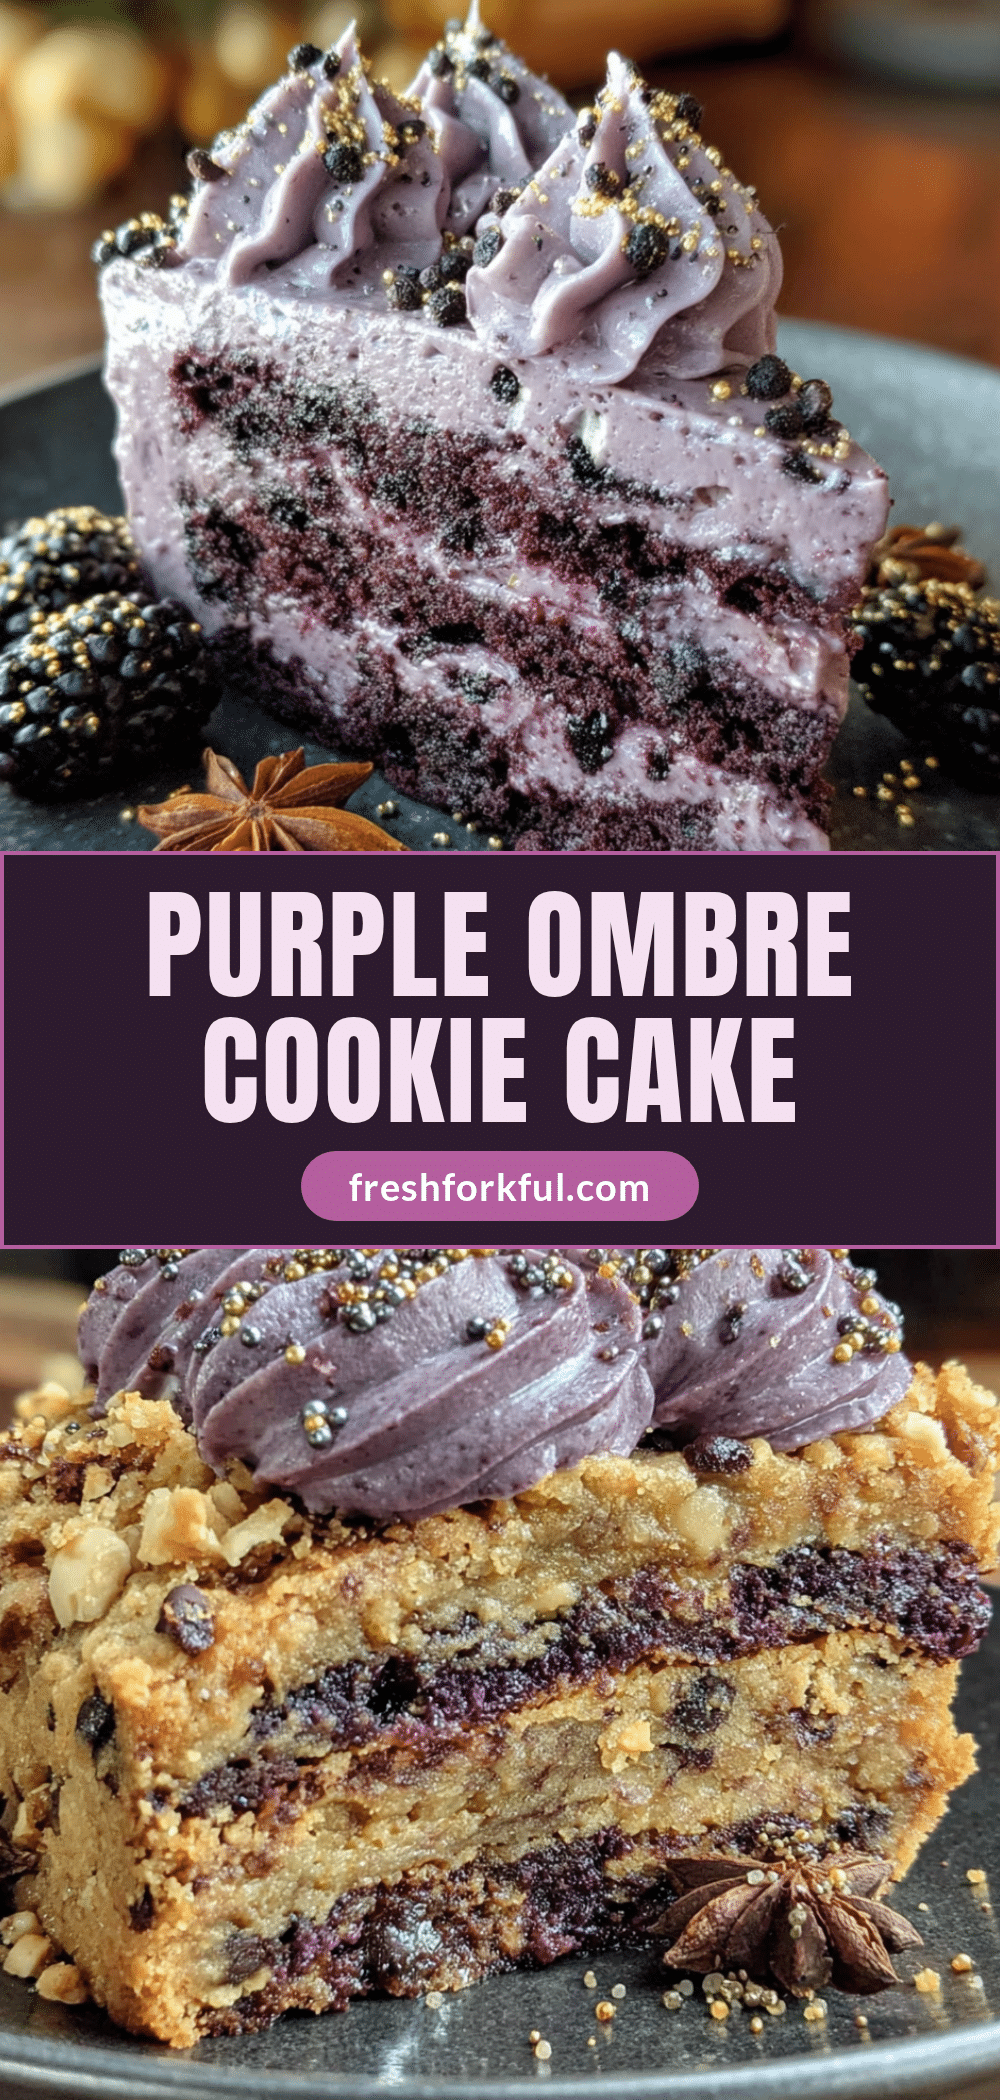
Perfect Purple Ombre Halloween Cookie Cake
A soft, chewy cookie cake with a stunning purple ombre effect, perfect for Halloween. This easy recipe uses simple ingredients and comes together in about 45 minutes, making it a last-minute dessert hero.
- Prep Time: 20 minutes
- Cook Time: 25 minutes
- Total Time: 45 minutes
- Yield: 12 servings 1x
- Category: Dessert
- Cuisine: American
Ingredients
- 1 cup (2 sticks) unsalted butter, softened
- 1 cup granulated sugar
- 1/2 cup packed light brown sugar
- 2 large eggs, room temperature
- 2 teaspoons vanilla extract (pure)
- 2 1/2 cups all-purpose flour
- 1 teaspoon baking soda
- 1/2 teaspoon salt
- 1 cup white chocolate chips (or semi-sweet)
- Gel food coloring in purple and violet (e.g., Wilton or AmeriColor)
- 4 oz cream cheese, softened (for frosting)
- 1/4 cup unsalted butter, softened (for frosting)
- 2 cups powdered sugar (for frosting)
- 1 teaspoon vanilla extract (for frosting)
- A splash of milk (for frosting, if needed)
Instructions
- Preheat oven to 350°F (175°C). Line a 9-inch round cake pan with parchment paper, leaving overhang, and lightly grease.
- In a large bowl, beat softened butter, granulated sugar, and brown sugar until light and fluffy (3-4 minutes).
- Beat in eggs one at a time, then add vanilla extract; mix until just combined.
- In a separate bowl, whisk together flour, baking soda, and salt. Gradually add to wet mixture on low speed until just incorporated. Fold in white chocolate chips.
- Divide dough into three equal portions. Leave one plain. Color the second with 2-3 drops violet gel, and the third with 3-4 drops purple gel. Mix each until evenly colored.
- Press the darkest purple dough evenly into the bottom of the prepared pan. Layer the medium purple dough on top, then the lightest dough. Smooth each layer.
- Bake for 20-25 minutes, until edges are golden and center is set (toothpick with moist crumbs). Cool in pan for 10 minutes, then lift onto a wire rack to cool completely.
- For frosting: Beat cream cheese and butter until smooth. Gradually add powdered sugar and vanilla; beat until fluffy. Add milk if needed. Frost cooled cookie cake.
Notes
Use gel food coloring for best results; liquid coloring makes dough sticky. Ensure butter and eggs are room temperature. Do not overmix after adding flour. Cool completely before frosting. For gluten-free, use a 1:1 gluten-free flour blend.
Nutrition
- Serving Size: 1 slice
- Calories: 380
- Sugar: 34
- Sodium: 220
- Fat: 18
- Saturated Fat: 11
- Carbohydrates: 52
- Fiber: 1
- Protein: 4
Keywords: Halloween cookie cake, purple ombre, cookie cake, easy dessert, Halloween dessert, purple cookie cake


