Love this? Save it for later!
Share the inspiration with your friends
I was elbow-deep in flour last Tuesday when my neighbor knocked on the door holding a bag of sourdough starter. “I’m going out of town,” she said, pushing it into my hands. “Feed him. He’s named Gerald.” And just like that, I had a responsibility I wasn’t ready for. I mean, I’d read about sourdough. I’d scrolled through those gorgeous Instagram loaves with their ear flaps and blistered crusts. But me? Making sourdough? That felt like something other people did — people with fancy Dutch ovens and patience I clearly didn’t have.
But here’s the thing about Gerald. He was hungry. And after a week of feeding him and watching him bubble away on my counter, I felt guilty throwing him out. So I did what any reasonable person would do when faced with a living, breathing starter: I looked up the easiest possible thing to make. And that’s when I found this easy same-day sourdough sandwich bread recipe.
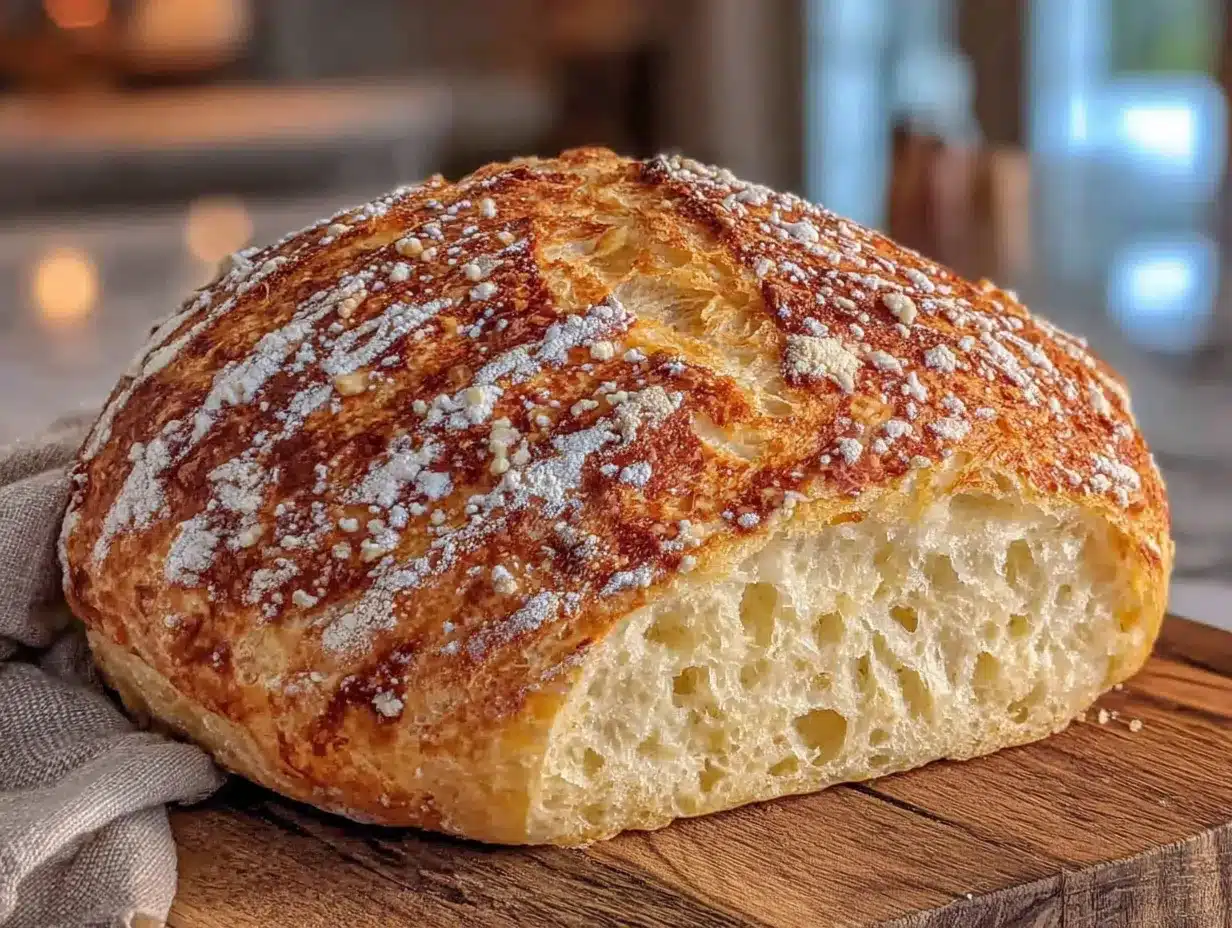
Honestly, I was skeptical. Same-day sourdough? Isn’t the whole point of sourdough that it takes forever? But let me tell you — this recipe proved me wrong. The first loaf came out of the oven looking like a golden pillow of happiness. The crust had that perfect chew, the inside was soft enough for a proper sandwich, and the tang was there — subtle, not overwhelming. I may have texted my neighbor a photo with the caption “Gerald and I are in love.” She hasn’t asked for him back yet.
And that’s why I keep making this bread. Not because I’m some artisan baker with years of experience, but because this recipe actually works for someone like me — someone who wants real sourdough flavor without the two-day commitment. Maybe you’ve been there too, staring at your starter wondering if you’re cut out for this whole sourdough thing. Trust me, you are. And this bread is proof.
Why You’ll Love This Recipe
Let me be real with you — I’ve tested a lot of sourdough recipes. Some were too complicated, some took too long, and some just didn’t taste like anything special. This one? It’s the Goldilocks of sourdough bread. And here’s why I think you’ll love it as much as I do:
- Quick & Easy: From start to finish, this bread is ready in about 6-8 hours. That’s same-day sourdough, folks. You can start it in the morning and have fresh bread for dinner.
- Simple Ingredients: You need four ingredients — flour, water, salt, and your active sourdough starter. That’s it. No special flours, no commercial yeast, no trips to a specialty store.
- Perfect for Sandwiches: This loaf has a soft, tender crumb that holds up to fillings without falling apart. It toasts beautifully, too. I’ve made everything from turkey clubs to grilled cheese with this bread, and it never disappoints.
- Crowd-Pleaser: Even people who say they don’t like sourdough love this bread. The tang is mild and balanced — it’s more about that depth of flavor than punch-you-in-the-face sourness.
- Beginner-Friendly: If you’re new to sourdough, this is the recipe to start with. No complicated folds, no scoring, no steam injection. Just straightforward, forgiving dough that behaves itself.
What makes this recipe different from all the other sourdough sandwich bread recipes out there? It’s the timing. Most same-day sourdough recipes rush the fermentation, which means you end up with bread that tastes like regular bread with a splash of vinegar. This recipe uses a warm fermentation method that develops real sourdough flavor in a fraction of the time. It’s not just fast — it’s genuinely delicious.
I remember the first time I made this for a friend who claimed she “didn’t have time for sourdough.” She took one bite of this bread and asked for the recipe. Now she makes it every week. That’s the kind of recipe this is — it changes minds and makes believers out of skeptics.
What Ingredients You Will Need
This recipe uses simple, everyday ingredients to create something truly special. The beauty of sourdough is that it doesn’t need much — just quality ingredients and a little patience. Here’s what you’ll need:
For the Bread
- 400 grams bread flour — I prefer King Arthur Bread Flour for its higher protein content, which gives the bread structure and a nice chew. All-purpose flour works too, but the bread won’t be quite as tall or airy.
- 100 grams whole wheat flour — This adds depth of flavor and helps with browning. You can substitute with all-purpose flour if you want a lighter loaf, but I really love the subtle nuttiness the whole wheat brings.
- 375 grams water, lukewarm — About 80°F (27°C) is ideal. Too hot and you’ll kill the good bacteria in your starter; too cold and fermentation will drag on forever.
- 100 grams active sourdough starter, bubbly and doubled — This is crucial. Your starter should be at its peak — fed 4-8 hours before you start, depending on your kitchen temperature. It should float in water and smell pleasantly sour, not like nail polish remover.
- 10 grams fine sea salt — Don’t skip this! Salt is essential for flavor and for controlling fermentation. I use Redmond Real Salt, but any fine sea salt will do.
Ingredient Tips & Substitutions
- Flour variations: You can swap the whole wheat flour for rye, spelt, or einkorn for different flavor profiles. Just keep the total flour weight at 500 grams. If using rye, reduce the water slightly as rye absorbs more liquid.
- Hydration adjustments: Different flours absorb water differently. If your dough feels too stiff, add a tablespoon of water. If it’s too slack, add a tablespoon of flour. Trust your hands more than the numbers.
- Starter readiness: If your starter isn’t quite doubled but is still bubbly, you can use it — just expect a longer fermentation time. The bread might not rise as much, but it’ll still taste great.
- Salt options: Kosher salt works fine, but use slightly more since it’s less dense than fine sea salt. I’d start with 12 grams and adjust from there.
One thing I’ve learned from making this bread dozens of times: the quality of your starter matters more than anything. A happy, well-fed starter makes for happy, well-risen bread. If your starter has been sitting in the fridge for weeks, give it a few days of regular feedings before attempting this recipe. Trust me, your bread will thank you.
Equipment Needed
You don’t need a lot of fancy equipment to make this bread, which is part of why I love it. Here’s what you’ll need:
- Digital kitchen scale — This is non-negotiable for sourdough. Measuring by volume is too inconsistent. A $15 scale from Amazon works perfectly.
- Large mixing bowl — Any bowl big enough to hold the dough as it rises. I use a stainless steel bowl because it doesn’t hold onto odors.
- 9×5-inch loaf pan — Standard size works great. If you have a Pullman pan, even better for perfectly square slices.
- Bench scraper or dough scraper — Makes handling sticky dough so much easier. I use a metal one, but plastic works too.
- Plastic bowl scraper — Optional but helpful for getting every last bit of dough out of the bowl.
- Plastic wrap or a reusable bowl cover — For covering the dough during bulk fermentation.
- Kitchen towel — For covering the loaf during the final proof.
- Oven thermometer — Ovens lie about their temperature. An inexpensive oven thermometer ensures you’re baking at the right temp.
If you don’t have a loaf pan, you can shape this dough into a free-form boule or batard and bake it on a baking sheet. The bake time will be shorter — start checking at 30 minutes. I’ve done this in a pinch and it works fine, though the slices won’t be as uniform for sandwiches.
Preparation Method
Alright, let’s make some bread! I’ve broken this down into clear steps with all the little details I wish someone had told me when I first started.
- Mix the dough (8:00 AM): In your large mixing bowl, combine 400 grams bread flour and 100 grams whole wheat flour. Add 375 grams lukewarm water and 100 grams active sourdough starter. Mix with your hand or a dough whisk until no dry flour remains. The dough will look shaggy and rough — that’s normal. Cover the bowl with plastic wrap and let it rest for 30 minutes. This is called autolyse, and it gives the flour time to absorb the water and start developing gluten naturally.
- Add the salt (8:30 AM): Sprinkle 10 grams fine sea salt over the rested dough. Add 15 grams of water (about a tablespoon) to help the salt dissolve. Pinch and squeeze the dough with your fingers to incorporate the salt evenly. It’ll feel weird and messy at first, but after about 2-3 minutes, the dough will start to smooth out. Cover again and let it rest for 30 minutes.
- Stretch and folds (9:00 AM – 11:00 AM): Over the next 2 hours, you’ll perform 4 sets of stretch and folds, spaced 30 minutes apart. Here’s how: wet your hand slightly, grab one side of the dough, stretch it up as far as it will go without tearing, and fold it over the top. Rotate the bowl a quarter turn and repeat. Do this all the way around — that’s one set. The dough will feel loose and sticky at first, but by the fourth set, it should feel smoother and more elastic. After each set, cover the bowl and let it rest.
- Bulk fermentation (11:00 AM – 1:00 PM): After the last set of folds, let the dough rise undisturbed. Cover the bowl and place it in a warm spot — about 75-80°F (24-27°C) is ideal. If your kitchen is cooler, it’ll take longer. The dough is ready when it has increased in volume by about 50-75%, looks domed on top, and has bubbles visible on the surface. This usually takes 2-3 hours, but go by how the dough looks and feels, not the clock.
- Shape the dough (1:00 PM): Lightly flour your work surface. Turn the dough out gently — try not to deflate it too much. Stretch it into a rough rectangle about 8×10 inches. Fold the top third down to the center, then the bottom third up over that (like folding a letter). Starting from the top, roll the dough toward you, tucking it tightly as you go. Pinch the seam closed. Place the shaped dough seam-side down into your greased loaf pan.
- Final proof (1:00 PM – 3:30 PM): Cover the loaf pan with a kitchen towel or lightly greased plastic wrap. Let it rise in a warm spot until the dough has risen about 1 inch above the rim of the pan. This usually takes 2-3 hours. The dough should feel puffy and spring back slowly when gently poked. If it springs back immediately, it needs more time. If it doesn’t spring back at all, you’ve over-proofed it — bake it anyway, it’ll still taste good.
- Preheat and bake (3:30 PM): About 30 minutes before your dough is ready, preheat your oven to 375°F (190°C). Place a rack in the middle position. When the dough is proofed, place the loaf pan in the oven. Bake for 40-45 minutes, until the top is deep golden brown and the internal temperature reaches 200°F (93°C). If the top is browning too quickly, tent loosely with foil after 25 minutes.
- Cool completely (4:15 PM): Remove the bread from the pan immediately and let it cool on a wire rack. I know it’s tempting to slice into it right away, but resist! The bread continues to cook internally as it cools, and slicing too early will give you a gummy texture. Let it cool for at least 2 hours before cutting. I usually make this bread in the morning so it’s ready for dinner.
Cooking Tips & Techniques
After making this bread more times than I can count, I’ve picked up a few tricks that make the process smoother and the results more consistent. Here are my best tips:
Temperature management is everything. Sourdough is alive, and like all living things, it’s sensitive to temperature. If your kitchen is cold (below 70°F/21°C), your dough will take forever to rise. I’ve had loaves take 10 hours in a chilly kitchen. Use the oven with the light on as a proofing box — just make sure the oven is off. If your kitchen is hot (above 85°F/29°C), fermentation will speed up dramatically. Check your dough earlier than you think you need to.
Don’t skip the stretch and folds. I know it seems fussy, but this step builds the gluten structure that gives your bread its height and texture. Without it, you’ll end up with a dense, flat loaf. Set a timer on your phone so you don’t forget. I usually do mine while I’m drinking my morning coffee — it becomes a nice little rhythm.
Learn to read your dough. The times I’ve given are guidelines, not rules. Your dough will tell you when it’s ready if you know what to look for. During bulk fermentation, look for a domed surface, visible bubbles, and a slight jiggle when you shake the bowl. The dough should feel aerated and alive, not dense and heavy.
My biggest failure: The first time I made this bread, I got distracted and let the dough over-proof. It rose beautifully in the pan, but when I baked it, the top collapsed and the crumb was dense and gummy. It still tasted good as toast, but it wasn’t pretty. Now I set a timer for every step and check my dough 30 minutes before I think it’ll be ready.
For consistent results: Keep a bread journal. Write down the temperature of your kitchen, how long each step took, and how the bread turned out. After a few bakes, you’ll start to see patterns and know exactly what works in your kitchen.
Variations & Adaptations
One of the best things about this recipe is how adaptable it is. Here are some variations I’ve tried and loved:
Seeded Sandwich Bread: Add 3 tablespoons of mixed seeds (sesame, sunflower, flax, poppy) to the flour before mixing. Toast the seeds lightly first for more flavor. This is my go-to variation for making turkey sandwiches — the seeds add a nice crunch and nuttiness.
Herb and Garlic Bread: Add 2 tablespoons of dried herbs (rosemary, thyme, oregano) and 3 cloves of minced garlic to the dough during the stretch and fold stage. This bread is incredible for making garlic bread or serving alongside soup. I made this for a potluck once and someone asked if I’d bought it from a bakery.
Whole Wheat Version: Replace all the bread flour with whole wheat flour for a 100% whole wheat loaf. You’ll need to add about 25-50 grams more water since whole wheat absorbs more liquid. The bread will be denser but packed with flavor and fiber. It’s perfect for hearty sandwiches with roast beef and sharp cheddar.
Dairy-Free Adaptation: This recipe is already dairy-free, so no changes needed. But if you want a richer flavor, you can replace 50 grams of water with olive oil or melted coconut oil. Add it during the stretch and fold stage.
Gluten-Free Option: I won’t lie — this is tricky. Gluten-free sourdough is a whole different beast. But if you’re determined, use a gluten-free flour blend with xanthan gum and increase the water by about 20%. The texture won’t be the same, but you’ll still get that sourdough tang.
My personal favorite variation is the cheddar jalapeño version. I add 100 grams of sharp cheddar cheese (cubed small) and 2 tablespoons of pickled jalapeños (drained and chopped) during the last stretch and fold. The cheese melts into pockets throughout the bread, and the jalapeños add just enough heat. It’s dangerous — I can’t stop eating it.
Serving & Storage Suggestions
This bread is at its absolute best on the day it’s baked, when the crust is still slightly crisp and the inside is tender. But let’s be real — a whole loaf is a lot for one person. Here’s how to make the most of it:
Serving: Let the bread cool completely before slicing. Use a serrated knife and gentle sawing motion — don’t press down or you’ll squish the crumb. For the perfect toast, slice about 3/4 inch thick and toast until golden. The bread develops a wonderful crunch on the outside while staying soft inside.
Storage: Store the bread cut-side down on a cutting board at room temperature, covered with a clean kitchen towel. This keeps the crust from getting too hard. If you live in a humid climate, store it in a paper bag instead. The bread will stay fresh for 3-4 days at room temperature.
Freezing: This bread freezes beautifully. Slice the entire loaf, place the slices in a single layer on a baking sheet, and freeze for 1 hour. Then transfer the frozen slices to a zip-top bag. This way, you can pull out individual slices as needed. They thaw in about 10 minutes at room temperature or pop right into the toaster.
Reheating: For the best texture, reheat slices in a toaster or toaster oven. For a whole loaf, wrap it in foil and warm it in a 350°F (175°C) oven for 10 minutes. Don’t use the microwave — it’ll make the bread rubbery.
Flavor development: Here’s something interesting — the sourdough flavor actually intensifies after the first day. Day-old bread has a more pronounced tang. I actually prefer it for toast on day two or three. The texture firms up slightly, which makes it perfect for avocado toast or bruschetta.
Nutritional Information & Benefits
This easy same-day sourdough sandwich bread isn’t just delicious — it also has some nutritional advantages over store-bought bread. Here’s a breakdown:
Per slice (1/12 of loaf): Approximately 160 calories, 32g carbohydrates, 5g protein, 1g fat, 2g fiber. These are estimates and will vary based on your exact ingredients.
Health benefits: Sourdough fermentation breaks down phytic acid in the flour, which makes the minerals in the bread more bioavailable. This means your body can actually absorb more of the nutrients. The fermentation also pre-digests some of the gluten, which makes sourdough easier to digest for some people with mild gluten sensitivities.
Dietary considerations: This bread is dairy-free, egg-free, and contains no added sugars. It’s naturally vegan. It does contain gluten, so it’s not suitable for celiac disease or severe gluten intolerance.
Better than store-bought: Most commercial sandwich breads contain preservatives, dough conditioners, and added sugars. This bread has four ingredients — that’s it. You control what goes into it, and you get the added benefit of probiotics from the fermentation process (though most of the beneficial bacteria are killed during baking).
I love knowing exactly what’s in my food, and this bread gives me that peace of mind. Plus, the act of making bread — the rhythm of mixing, folding, and waiting — is genuinely good for my mental health. There’s something grounding about creating food from just flour, water, salt, and a living culture.
Conclusion
Look, I’m not going to pretend this is the only sourdough recipe you’ll ever need. But for those days when you want real sourdough flavor without committing your entire weekend? This is it. This easy same-day sourdough sandwich bread has become a staple in my kitchen, and I think it deserves a spot in yours too.
What I love most about this recipe is how forgiving it is. You don’t need to be a professional baker. You don’t need a perfect starter or a temperature-controlled proofing box. You just need a little time, a little patience, and the willingness to get flour under your fingernails. The bread will reward you — I promise.
So go ahead. Feed your starter, mix up some dough, and give this recipe a try. And when you pull that golden loaf out of the oven and the smell fills your kitchen, take a moment to appreciate what you’ve made. You did that. With your own hands. And it’s beautiful.
I’d love to hear how it goes! Drop a comment below and let me know — did you try any variations? Did your family love it? Did you have any disasters that turned into happy accidents? Share your bread journey with me. And if you loved this recipe, pass it along to a friend who needs a little sourdough confidence. Happy baking!
Frequently Asked Questions
Can I use all-purpose flour instead of bread flour?
Yes, you can! The bread will be slightly less tall and have a softer crumb, but it’ll still taste great. Bread flour has more protein, which gives the bread more structure and a chewier texture. If using all-purpose, you might want to reduce the water by about 10-15 grams since it absorbs less liquid.
My starter isn’t very active. Will this recipe still work?
It might, but the bread won’t rise as well and the flavor will be milder. I’d recommend feeding your starter twice a day for 2-3 days before attempting this recipe. Look for a starter that doubles in size within 4-6 hours of feeding and has lots of bubbles. A healthy starter is the secret to good sourdough.
Can I make this bread in a bread machine?
I wouldn’t recommend it for this recipe. The stretch and folds and bulk fermentation are crucial for developing the gluten structure. A bread machine’s mixing cycle is too short and aggressive for sourdough. If you want to use a bread machine, look for a recipe specifically designed for it.
Why is my bread dense and heavy?
This usually happens for one of three reasons: your starter wasn’t active enough, you didn’t let the dough ferment long enough, or you deflated the dough too much during shaping. Next time, make sure your starter is bubbly and doubled, let the bulk fermentation go until the dough is visibly aerated, and handle the dough gently when shaping.
Can I double this recipe?
Absolutely! Just double all the ingredients. Keep in mind that the fermentation times might change slightly since a larger mass of dough will take longer to warm up and ferment. You’ll need two loaf pans, and you might need to bake them one at a time if your oven isn’t big enough for both. I do this all the time when I’m making bread for a crowd.
Pin This Recipe!

Easy Same-Day Sourdough Sandwich Bread: Best Homemade Recipe

This easy same-day sourdough sandwich bread recipe delivers real sourdough flavor in just 6-8 hours, with a soft, tender crumb perfect for sandwiches. Made with simple ingredients and beginner-friendly techniques, it’s the perfect loaf for anyone who wants homemade sourdough without the two-day commitment.
- Prep Time: 30 minutes
- Cook Time: 40-45 minutes
- Total Time: 6-8 hours
- Yield: 12 servings 1x
- Category: Bread
- Cuisine: American
Ingredients
- 400 grams bread flour
- 100 grams whole wheat flour
- 375 grams water, lukewarm (about 80°F / 27°C)
- 100 grams active sourdough starter, bubbly and doubled
- 10 grams fine sea salt
Instructions
- Mix the dough (8:00 AM): In a large mixing bowl, combine 400 grams bread flour and 100 grams whole wheat flour. Add 375 grams lukewarm water and 100 grams active sourdough starter. Mix with your hand or a dough whisk until no dry flour remains. The dough will look shaggy and rough. Cover the bowl with plastic wrap and let it rest for 30 minutes (autolyse).
- Add the salt (8:30 AM): Sprinkle 10 grams fine sea salt over the rested dough. Add 15 grams of water (about a tablespoon) to help the salt dissolve. Pinch and squeeze the dough with your fingers to incorporate the salt evenly for 2-3 minutes until the dough starts to smooth out. Cover and let rest for 30 minutes.
- Stretch and folds (9:00 AM – 11:00 AM): Over the next 2 hours, perform 4 sets of stretch and folds, spaced 30 minutes apart. Wet your hand slightly, grab one side of the dough, stretch it up as far as it will go without tearing, and fold it over the top. Rotate the bowl a quarter turn and repeat all the way around. After each set, cover the bowl and let it rest.
- Bulk fermentation (11:00 AM – 1:00 PM): After the last set of folds, let the dough rise undisturbed in a warm spot (75-80°F / 24-27°C) until it has increased in volume by about 50-75%, looks domed on top, and has bubbles visible on the surface. This usually takes 2-3 hours.
- Shape the dough (1:00 PM): Lightly flour your work surface. Turn the dough out gently. Stretch it into a rough rectangle about 8×10 inches. Fold the top third down to the center, then the bottom third up over that (like folding a letter). Starting from the top, roll the dough toward you, tucking it tightly as you go. Pinch the seam closed. Place the shaped dough seam-side down into a greased 9×5-inch loaf pan.
- Final proof (1:00 PM – 3:30 PM): Cover the loaf pan with a kitchen towel or lightly greased plastic wrap. Let it rise in a warm spot until the dough has risen about 1 inch above the rim of the pan, usually 2-3 hours. The dough should feel puffy and spring back slowly when gently poked.
- Preheat and bake (3:30 PM): About 30 minutes before the dough is ready, preheat the oven to 375°F (190°C) with a rack in the middle position. Place the loaf pan in the oven and bake for 40-45 minutes, until the top is deep golden brown and the internal temperature reaches 200°F (93°C). If the top is browning too quickly, tent loosely with foil after 25 minutes.
- Cool completely (4:15 PM): Remove the bread from the pan immediately and let it cool on a wire rack for at least 2 hours before slicing.
Notes
Temperature management is crucial: keep dough at 75-80°F (24-27°C) for best results. Don’t skip the stretch and folds—they build gluten structure. Learn to read your dough rather than relying solely on times. For consistent results, keep a bread journal. Let the bread cool completely before slicing to avoid a gummy texture.
Nutrition
- Serving Size: 1 slice (1/12 of loa
- Calories: 160
- Sodium: 195
- Fat: 1
- Carbohydrates: 32
- Fiber: 2
- Protein: 5
Keywords: sourdough, sandwich bread, same-day sourdough, homemade bread, easy sourdough recipe, beginner sourdough, sourdough sandwich bread


