Love this? Save it for later!
Share the inspiration with your friends
There used to be a tiny bakery tucked behind a bookstore in my old neighborhood that made the most incredible focaccia. When they closed suddenly during that weird stretch of 2020, I honestly felt a little lost. That bread had become my Friday ritual—crispy on the bottom, airy on top, with those perfect dimples catching pools of olive oil and flaky salt. After maybe twelve attempts—some that came out like hockey pucks, others that were just sad, dense bricks—I finally cracked the code. And the secret? It was sitting in my fridge the whole time: sourdough discard.
I mean, let me tell you, the first time I pulled this crispy no-knead sourdough discard focaccia out of the oven, I actually teared up a little. That familiar crackle when you tap the bottom, the way the olive oil pools in those signature dimples, the chewy interior with just the right amount of tang—it was all there. My neighbor Karen even knocked on my door asking what smelled so good. She left with half the pan, and honestly, I didn’t even mind.
What makes this recipe special is that it turns what most people throw away into something genuinely spectacular. You know that jar of sourdough discard sitting in your fridge, the one you keep meaning to do something with? This is that something. And the best part? There’s no kneading, no stand mixer required, and almost zero active work. The dough does all the heavy lifting while you go about your day. This crispy no-knead sourdough discard focaccia has become my most-requested recipe, and I think it’s about to become yours too.
Why You’ll Love This Recipe
This isn’t just another focaccia recipe—it’s the one that finally solves the sourdough discard problem in the most delicious way possible. After testing this recipe for months, I can tell you with confidence that this is the version worth making again and again.
- No Kneading Required : The dough does all the work while you relax. A few stretches and folds build the gluten structure without any arm workout.
- Uses Up Sourdough Discard : Finally, a way to use that discard that actually tastes amazing. No more guilt over throwing it away.
- Incredibly Crispy Bottom : The generous olive oil in the pan creates that signature crackly crust that shatters when you bite into it.
- Perfectly Airy Interior : Those big, irregular bubbles you see in bakery focaccia? You’ll get them here, I promise.
- Minimal Active Time : About 15 minutes of hands-on work, then the refrigerator does the rest. Perfect for busy schedules.
- Endlessly Customizable : Top it with rosemary and flaky salt, or go wild with cherry tomatoes and garlic confit.
What sets this recipe apart is the cold fermentation method. By letting the dough rest in the fridge for 12-24 hours, you develop that complex sourdough flavor and open crumb structure without any complicated techniques. The long, slow rise also makes the dough incredibly forgiving—even if you forget about it for an extra day, it only gets better. This isn’t just another recipe; it’s the kind that makes you close your eyes after the first bite, remembering exactly why homemade bread is worth every minute of waiting.
What Ingredients You Will Need
This crispy no-knead sourdough discard focaccia uses simple, pantry-friendly ingredients to create something truly special. The magic happens when these humble components work together during that long cold fermentation.
- Bread flour, 4 cups (500g) – I prefer King Arthur Baking Company for its higher protein content, which gives the best structure. All-purpose flour works too, but the crumb won’t be quite as airy.
- Water, 1 ½ cups (360g), lukewarm – Use filtered water if your tap water is heavily chlorinated, as it can affect fermentation. The water should feel like warm bathwater, not hot.
- Sourdough discard, 1 cup (250g), unfed and straight from the fridge – This is the star of the show. Don’t worry if it’s been sitting for a week or two; older discard actually adds more tangy flavor.
- Olive oil, ½ cup (120ml), plus more for drizzling – Use a good quality extra virgin olive oil here. This isn’t the time for the cheap stuff, since the oil contributes so much to the flavor and texture. I like California Olive Ranch for a reliable everyday option.
- Fine sea salt, 2 teaspoons (10g) – Regular table salt works, but sea salt dissolves more evenly into the dough. Save the flaky salt for topping.
- Instant yeast, 1 teaspoon (3g) – Yes, even with sourdough discard, we add a tiny bit of yeast for reliable rise. The discard contributes flavor, while the yeast guarantees that beautiful lift.
- Flaky sea salt, for finishing – Maldon is my go-to. Those delicate crystals create little bursts of saltiness that make every bite exciting.
- Fresh rosemary, 2 tablespoons, chopped (optional but recommended) – The classic topping. Rub the leaves between your fingers before sprinkling to release the oils.
Ingredient Selection Tips: For the best results, use bread flour with at least 12% protein content. If your sourdough discard has been sitting for more than two weeks and smells strongly of acetone, feed it once and let it sit at room temperature for a few hours before using. The discard should smell pleasantly sour, not harsh or chemical.
Substitution Guidance: You can replace up to half the bread flour with whole wheat flour for a nuttier flavor, but the texture will be slightly denser. For a gluten-free version, this recipe isn’t ideal due to the long fermentation, but you can try a 1:1 gluten-free flour blend with added xanthan gum. Dairy-free? This recipe is naturally dairy-free already.
Equipment Needed
One of the best things about this recipe is how little equipment it requires. You don’t need a stand mixer, bread machine, or any fancy gadgets.
- Large mixing bowl – A 4-quart bowl works perfectly. I use a glass bowl so I can see the bubbles forming during fermentation.
- 9×13 inch baking pan – Metal is best for that crispy bottom. Glass or ceramic pans won’t conduct heat as well and may result in a softer crust.
- Digital kitchen scale – Honestly, this is the one tool I’d insist on. Measuring flour by volume can vary by up to 25%, which makes a huge difference in bread baking. A $15 scale will transform your baking.
- Bench scraper or flexible spatula – For stretching and folding the dough without deflating it. A plastic dough scraper is ideal.
- Plastic wrap or a reusable bowl cover – To keep the dough from drying out during its long rest.
- Cooling rack – Essential for that crispy bottom. If you let the focaccia cool in the pan, the steam will soften the crust.
Budget-Friendly Options: Don’t have a kitchen scale? Use the spoon-and-level method for measuring flour: spoon it into your measuring cup, then level it off with a knife. No 9×13 pan? A 10-inch cast iron skillet works beautifully and gives you a round focaccia with an extra-crispy edge.
Preparation Method

This recipe works on your schedule, not the other way around. The active work takes about 15 minutes total, then the refrigerator does everything else.
- Mix the dough (5 minutes): In your large mixing bowl, combine the lukewarm water and sourdough discard. Stir until the discard is mostly dissolved—a few small lumps are fine. Add the bread flour, fine sea salt, and instant yeast. Using a flexible spatula or your hand, mix until no dry flour remains. The dough will be shaggy and sticky—that’s exactly what we want. Cover the bowl with plastic wrap and let it rest for 30 minutes. This autolyse step lets the flour absorb the water and starts developing gluten without any effort from you.
- Stretch and fold (2 minutes per round): After the rest, wet your hands slightly to prevent sticking. Grab one side of the dough, stretch it up, and fold it over the center. Rotate the bowl a quarter turn and repeat. Do this four times total, working your way around the dough. Cover and let rest 30 minutes. Repeat this stretch-and-fold process three more times, with 30-minute rests in between. You’ll notice the dough becoming smoother and more elastic with each round. After the fourth round, the dough should feel pillowy and alive, with small bubbles visible on the surface.
- Cold ferment (12-24 hours): Cover the bowl tightly with plastic wrap and place it in the refrigerator. This is where the magic happens. The cold fermentation develops deep, complex flavors and creates that open, airy crumb structure. You can leave it for up to 48 hours, but 12-24 hours hits the sweet spot. The dough will almost double in size and smell wonderfully sour and yeasty.
- Prepare the pan and shape (5 minutes): When you’re ready to bake, pour ¼ cup of olive oil into your 9×13 inch baking pan. Tilt the pan to coat the bottom evenly. Remove the cold dough from the fridge—it will be firm and easier to handle. Turn it out into the oiled pan. Don’t punch it down! Just let it fall gently. Let it rest at room temperature for 30 minutes to take the chill off.
- Dimple and proof (2-3 hours): After 30 minutes, start gently stretching the dough to fit the pan. Use your fingertips to press it outward, being careful not to tear it. If the dough resists, let it rest another 15 minutes and try again. Once it fills the pan, cover with plastic wrap and let it proof at room temperature for 2-3 hours, until the dough is puffy and jiggly. About 30 minutes before baking, preheat your oven to 450°F (230°C) with a rack in the middle position.
- Dimple and top (5 minutes): Just before baking, drizzle another 2 tablespoons of olive oil over the surface. Now for the fun part: use your fingertips to press deep dimples all across the dough, pushing all the way to the bottom of the pan. The oil will pool in these dimples, creating those signature crispy, oily pockets. Sprinkle generously with flaky sea salt and chopped rosemary if using.
- Bake (25-30 minutes): Place the pan on the middle rack and bake for 25-30 minutes, rotating halfway through. The focaccia is done when the top is deep golden brown and the bottom sounds hollow when tapped. If the top is browning too quickly, tent loosely with foil for the last 10 minutes. Let it cool in the pan for 5 minutes, then transfer to a cooling rack. Don’t skip this step—cooling on a rack keeps the bottom crispy.
Cooking Tips & Techniques
After making this crispy no-knead sourdough discard focaccia more times than I can count, I’ve learned a few things the hard way. Let me save you some trouble.
The dough is supposed to be sticky. I cannot emphasize this enough. One of my early attempts ended in frustration because I kept adding flour trying to make it manageable. Don’t do that. Wet hands are your best friend when handling this dough. Keep a small bowl of water nearby and dip your fingers before each stretch and fold. The stickiness is what creates that open, airy crumb.
Don’t rush the cold ferment. I know it’s tempting to skip the refrigerator step and just let it rise at room temperature, but you’ll lose so much flavor. The first time I tried this, I was impatient and baked it after just 4 hours at room temperature. The result was edible but bland—like focaccia without a personality. That 12-24 hour cold ferment is non-negotiable for the best flavor.
The dimpling matters more than you think. I used to be too gentle with my dimples, barely pressing into the dough. The result was a flat, uniform surface without those glorious oil pools. Press firmly and all the way to the bottom of the pan. You want the oil to flood those indentations. The contrast between the crispy edges of the dimples and the soft, oil-soaked centers is what makes focaccia so addictive.
Watch for the jiggle test. Before baking, give the pan a gentle shake. The dough should wobble like Jell-O. If it’s stiff and doesn’t move, it needs more proofing time. If it’s collapsing or looking deflated, you’ve over-proofed it. That jiggly, alive feeling is the sweet spot.
Let it cool completely. I know the smell is intoxicating and you want to tear into it immediately. But cutting into hot focaccia compresses the crumb and makes it gummy. Give it at least 20 minutes on a cooling rack. The crust will stay crispy, and the interior will set properly. Trust me on this one—I’ve ruined too many pans to hot, impatient slices.
Variations & Adaptations
Once you’ve mastered the basic crispy no-knead sourdough discard focaccia, the possibilities are endless. Here are some of my favorite variations.
Everything Bagel Focaccia: Before baking, brush the top with a beaten egg white and sprinkle generously with everything bagel seasoning. The sesame seeds and poppy seeds toast beautifully in the oven. I made this for a brunch gathering and it disappeared before the main course even came out.
Roasted Garlic and Cherry Tomato: While the dough does its final proof, roast a head of garlic wrapped in foil at 400°F until soft and golden. Press the roasted cloves into the dimpled dough along with halved cherry tomatoes. The tomatoes burst during baking, creating little pockets of sweetness that contrast perfectly with the salty, oily bread.
Cheese and Herb Focaccia: Sprinkle ½ cup of grated Parmesan or pecorino over the dough after dimpling, then add your herbs. The cheese creates a crispy, almost lacy crust on the bottom. I like to use a mix of fresh thyme, oregano, and rosemary for an Italian-inspired version.
Sweet Focaccia: Yes, this works for dessert too! Skip the salt and rosemary, and instead top the dimpled dough with a mixture of brown sugar, cinnamon, and thinly sliced apples or pears. Drizzle with honey before baking. The result is a sweet, pull-apart bread that’s incredible with coffee. My kids request this more than the savory version.
Gluten-Free Adaptation: While I haven’t perfected a completely gluten-free version of this exact recipe, I’ve had good results using a high-quality 1:1 gluten-free flour blend that contains xanthan gum. Reduce the water slightly and expect a denser, more cake-like texture. The flavor will still be fantastic thanks to that sourdough discard.
Serving & Storage Suggestions
This crispy no-knead sourdough discard focaccia is incredibly versatile. Serve it warm or at room temperature—both are excellent, just in different ways.
Serving Temperature: Warm from the oven is hard to beat, with the olive oil still glistening and the salt crystals crackling. But honestly, I love it even more at room temperature the next day. The flavors meld together, and the texture becomes somehow both chewier and more tender. For sandwiches, room temperature is ideal because the bread doesn’t compress as much.
Perfect Pairings: This focaccia is amazing alongside a bowl of tomato soup or minestrone for dipping. It also makes incredible sandwich bread—try it with prosciutto, fresh mozzarella, and arugula drizzled with balsamic glaze. For breakfast, toast a slice and top with a fried egg and avocado. I’ve even used it as the base for a quick panzanella salad by cubing day-old focaccia and tossing it with tomatoes, cucumbers, and a red wine vinaigrette.
Storage Instructions: Store leftover focaccia in an airtight container at room temperature for up to 3 days. Do not refrigerate—the cold will dry it out and make the crumb stale. If you need to keep it longer, freeze it. Wrap the cooled focaccia tightly in plastic wrap, then in foil, and freeze for up to 3 months. To reheat, place frozen slices directly on an oven rack at 350°F for 8-10 minutes. The crust comes back to life, and the interior stays soft.
Reheating Tips: The microwave will ruin this bread—it turns the crispy bottom into a soggy mess. Always reheat in the oven or a toaster oven. For a single slice, a hot cast iron skillet works beautifully. Place the slice in a dry skillet over medium heat for 2 minutes per side. The bottom gets crispy again, and the top stays tender.
Flavor Development: Interestingly, the sourdough flavor continues to develop after baking. Day-old focaccia often tastes more complex and tangy than fresh-baked. If you’re serving it as part of a meal, consider making it a day ahead. Your taste buds will thank you.
Nutritional Information & Benefits
While focaccia isn’t exactly health food, this version has some surprising benefits thanks to the sourdough fermentation process.
| Nutrient | Per Serving (1/12 of recipe) |
|---|---|
| Calories | 245 |
| Total Fat | 12g |
| Saturated Fat | 2g |
| Carbohydrates | 30g |
| Fiber | 2g |
| Protein | 5g |
| Sodium | 380mg |
Health Benefits: The long fermentation process in sourdough breaks down phytic acid, making the minerals in the flour more bioavailable. This means your body can actually absorb more of the iron, zinc, and magnesium present in the wheat. The fermentation also produces beneficial organic acids that may help with blood sugar regulation—sourdough bread has a lower glycemic index compared to bread made with commercial yeast alone.
Dietary Considerations: This recipe is naturally dairy-free and vegan, as written. It contains gluten, so it’s not suitable for those with celiac disease. The olive oil provides heart-healthy monounsaturated fats, and using whole wheat flour for part of the bread flour adds extra fiber and nutrients. For a lower-sodium option, reduce the flaky salt topping or use a salt substitute.
Personal Wellness Perspective: I love that this recipe turns a byproduct of sourdough baking into something nourishing. Instead of feeling guilty about discarding starter, I now look forward to having discard on hand. There’s something satisfying about creating beautiful, delicious food from what would otherwise be waste.
Conclusion
This crispy no-knead sourdough discard focaccia has become a staple in my kitchen for good reason. It transforms something most bakers throw away into a showstopping bread that rivals anything from a professional bakery. The contrast between the shatteringly crisp bottom and the airy, tangy interior is something you have to experience to believe.
I hope you’ll give this recipe a try, even if you’re new to working with sourdough. The process is forgiving, the ingredients are simple, and the results are genuinely impressive. Feel free to make it your own—experiment with toppings, try different herbs, or use it as the base for the best sandwich bread you’ve ever had. That’s the beauty of focaccia; it welcomes creativity.
If you make this crispy no-knead sourdough discard focaccia, I’d love to hear about it. Drop a comment below and let me know what toppings you used, how it turned out, or any questions you have. And if you’re looking for more ways to use up sourdough discard, check out my sourdough discard crackers or this easy no-knead sourdough bread recipe. Happy baking, friends!
Frequently Asked Questions
Can I use all-purpose flour instead of bread flour?
Yes, you can, but the texture will be slightly less airy and the crust won’t be quite as crispy. Bread flour has more protein, which creates stronger gluten structure and better rise. If using all-purpose, reduce the water by about 2 tablespoons to account for lower absorption.
How do I know when my sourdough discard is ready to use?
Your discard can be straight from the fridge, even if it’s been sitting for a week or two. The main thing is that it shouldn’t have any mold or an off-putting smell. If it smells like nail polish remover or has orange or pink spots, it’s time to start fresh. A pleasantly sour, yeasty smell is perfect.
Can I skip the cold fermentation step?
Technically yes, but I wouldn’t recommend it. The cold fermentation is what develops that complex sourdough flavor and creates the open, airy crumb. Without it, you’ll get a flatter, less flavorful bread. If you’re short on time, try at least 8 hours in the fridge.
Why did my focaccia come out dense and heavy?
This usually happens for one of three reasons: the dough wasn’t proofed long enough, you used too much flour when handling it, or your sourdough discard was too young and weak. Make sure you’re following the dimple and jiggle test, and resist the urge to add extra flour. A dense focaccia can also result from over-kneading, but since this is a no-knead recipe, that’s unlikely.
Can I freeze the baked focaccia?
Absolutely! Let it cool completely, then wrap tightly in plastic wrap followed by foil. Freeze for up to 3 months. To serve, thaw at room temperature, then reheat in a 350°F oven for 8-10 minutes. The crust comes back beautifully crispy. I often bake two at once and freeze one for later.
Pin This Recipe!
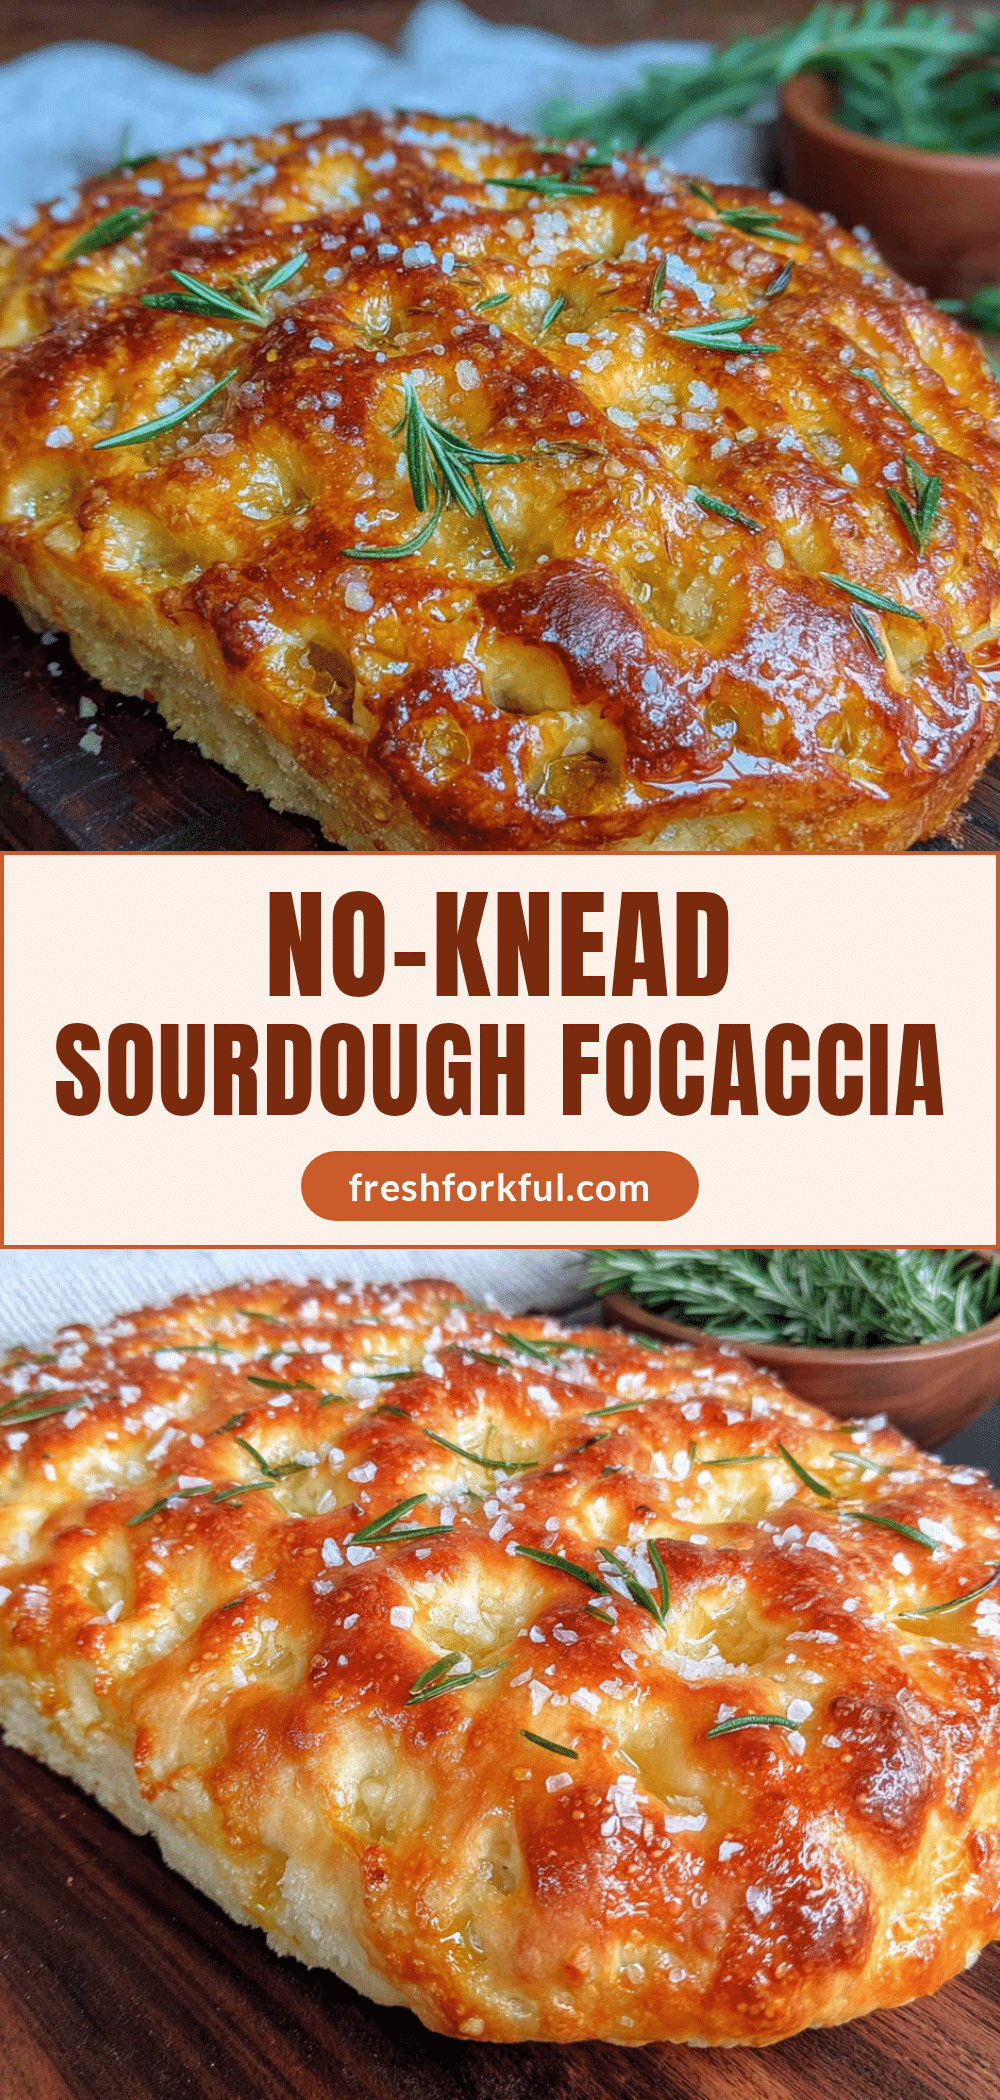
Crispy No-Knead Sourdough Discard Focaccia: Easy Best Recipe

This crispy no-knead sourdough discard focaccia turns what most people throw away into something genuinely spectacular. With a shatteringly crisp bottom, airy interior, and minimal active time, it’s the perfect way to use up sourdough discard.
- Prep Time: 15 minutes
- Cook Time: 25-30 minutes
- Total Time: 13-24 hours 40 minutes (includes cold ferment and proofing)
- Yield: 12 servings 1x
- Category: Bread
- Cuisine: Italian
Ingredients
- 4 cups (500g) bread flour
- 1 ½ cups (360g) lukewarm water
- 1 cup (250g) sourdough discard, unfed and straight from the fridge
- ½ cup (120ml) olive oil, plus more for drizzling
- 2 teaspoons (10g) fine sea salt
- 1 teaspoon (3g) instant yeast
- Flaky sea salt, for finishing
- 2 tablespoons fresh rosemary, chopped (optional but recommended)
Instructions
- Mix the dough (5 minutes): In your large mixing bowl, combine the lukewarm water and sourdough discard. Stir until the discard is mostly dissolved—a few small lumps are fine. Add the bread flour, fine sea salt, and instant yeast. Using a flexible spatula or your hand, mix until no dry flour remains. The dough will be shaggy and sticky—that’s exactly what we want. Cover the bowl with plastic wrap and let it rest for 30 minutes. This autolyse step lets the flour absorb the water and starts develop…
- Stretch and fold (2 minutes per round): After the rest, wet your hands slightly to prevent sticking. Grab one side of the dough, stretch it up, and fold it over the center. Rotate the bowl a quarter turn and repeat. Do this four times total, working your way around the dough. Cover and let rest 30 minutes. Repeat this stretch-and-fold process three more times, with 30-minute rests in between. You’ll notice the dough becoming smoother and more elastic with each round. After the fourth round, the …
- Cold ferment (12-24 hours): Cover the bowl tightly with plastic wrap and place it in the refrigerator. This is where the magic happens. The cold fermentation develops deep, complex flavors and creates that open, airy crumb structure. You can leave it for up to 48 hours, but 12-24 hours hits the sweet spot. The dough will almost double in size and smell wonderfully sour and yeasty.
- Prepare the pan and shape (5 minutes): When you’re ready to bake, pour ¼ cup of olive oil into your 9×13 inch baking pan. Tilt the pan to coat the bottom evenly. Remove the cold dough from the fridge—it will be firm and easier to handle. Turn it out into the oiled pan. Don’t punch it down! Just let it fall gently. Let it rest at room temperature for 30 minutes to take the chill off.
- Dimple and proof (2-3 hours): After 30 minutes, start gently stretching the dough to fit the pan. Use your fingertips to press it outward, being careful not to tear it. If the dough resists, let it rest another 15 minutes and try again. Once it fills the pan, cover with plastic wrap and let it proof at room temperature for 2-3 hours, until the dough is puffy and jiggly. About 30 minutes before baking, preheat your oven to 450°F (230°C) with a rack in the middle position.
- Dimple and top (5 minutes): Just before baking, drizzle another 2 tablespoons of olive oil over the surface. Now for the fun part: use your fingertips to press deep dimples all across the dough, pushing all the way to the bottom of the pan. The oil will pool in these dimples, creating those signature crispy, oily pockets. Sprinkle generously with flaky sea salt and chopped rosemary if using.
- Bake (25-30 minutes): Place the pan on the middle rack and bake for 25-30 minutes, rotating halfway through. The focaccia is done when the top is deep golden brown and the bottom sounds hollow when tapped. If the top is browning too quickly, tent loosely with foil for the last 10 minutes. Let it cool in the pan for 5 minutes, then transfer to a cooling rack. Don’t skip this step—cooling on a rack keeps the bottom crispy.
Notes
The dough is supposed to be sticky. Don’t add extra flour; use wet hands to handle it. The cold ferment is non-negotiable for best flavor. Press dimples firmly all the way to the bottom of the pan. Let the focaccia cool completely on a rack to keep the bottom crispy. For best results, use bread flour with at least 12% protein content.
Nutrition
- Serving Size: 1/12 of recipe
- Calories: 245
- Sodium: 380
- Fat: 12
- Saturated Fat: 2
- Carbohydrates: 30
- Fiber: 2
- Protein: 5
Keywords: sourdough discard, focaccia, no-knead bread, crispy focaccia, sourdough bread, easy bread recipe, discard recipe


