Love this? Save it for later!
Share the inspiration with your friends
My sister-in-law, Claire, wasn’t trying to impress me. I’d stopped by her place on a random Tuesday to drop off a book I’d borrowed, and the sight of her kitchen counter stopped me cold. There, on a simple wooden board, sat the most beautiful little arrangement of food I’d ever seen—neat rows of rolled ham, cubes of cheese, a pile of crackers, and a tiny handful of grapes. It wasn’t a fancy charcuterie spread. It was lunch. For her kids. And honestly, I felt a little jealous.
She looked up, saw me staring, and just shrugged. “Oh, it’s just a fancy Lunchable. The kids go crazy for them, and they’re cheaper than the boxed ones.” She said it like it was nothing—like she hadn’t just created the perfect, most satisfying little meal I’d seen in weeks. I mean, I’d bought those plastic trays before. We all have. But this? This was different. This was something you’d actually want to eat.
I stood there, maybe a little too long, watching her assemble another one for her youngest. She was so casual about it—slicing cheese without measuring, rolling ham without fussing over perfection. It was the most effortless thing I’d ever witnessed in a kitchen. And let me tell you, that moment changed my lunch game forever. Maybe you’ve been there—standing in someone else’s kitchen, realizing you’ve been overcomplicating something that could be this simple. That’s exactly how these Easy Ham and Cheese Lunchable Boxes were born into my life. Not from a cookbook or a class, but from a Tuesday afternoon and a sister-in-law who didn’t know she was a genius.
Why You’ll Love This Recipe
Let’s be real for a second. Store-bought lunch kits are convenient, but they’re also expensive, full of preservatives, and honestly? The portions are a little sad. These homemade Ham and Cheese Lunchable Boxes solve all of that. I’ve tested this concept dozens of times—with my own kids, for my own work lunches, even for road trips—and it never fails. Here’s why this version wins every time:
- Quick & Easy: You can assemble a full box in under 10 minutes. No cooking, no fuss. It’s faster than waiting in line at the deli counter.
- Simple Ingredients: You probably already have ham, cheese, and crackers in your fridge right now. No fancy grocery trips required.
- Perfect for Meal Prep: Make five boxes on Sunday, and your lunches are sorted for the whole work week. It’s a game-changer for busy mornings.
- Crowd-Pleaser: Kids love the fun, DIY feel of it. Adults love the nostalgia and the fresh, clean taste. Everyone wins.
- Unbelievably Customizable: The base recipe is just a starting point. You can swap in different meats, cheeses, fruits, or treats based on what you have or what you’re craving.
What makes this recipe different from just throwing food in a container? It’s the thoughtfulness. The little details—like rolling the ham instead of laying it flat, or adding a small sweet element to balance the salty. It’s not just another lunch; it’s your best version of a lunch box. And honestly, the first time you open one of these at your desk or pull it out for your kid at school, you’ll feel a little proud. It’s comfort food reimagined—faster, fresher, and made with the kind of care that makes you close your eyes after that first bite.
What Ingredients You Will Need
This recipe uses the simplest ingredients to create something that feels way more special than the sum of its parts. Everything is a pantry staple or a quick fridge grab, and substitutions are incredibly easy to make.
- Ham – 6-8 slices of deli ham (I prefer honey ham or black forest ham for that slight sweetness; look for thick-cut slices if you want a heartier bite)
- Cheese – 4-6 ounces of cheddar cheese, cut into cubes (you can also use Colby Jack, Swiss, or provolone; I personally use sharp cheddar for the best flavor contrast)
- Crackers – 12-16 whole-grain or buttery crackers (Ritz or wheat crackers work beautifully; choose something sturdy enough to hold the ham and cheese)
- Fruit – ¼ cup of red grapes or apple slices (adds a sweet, juicy pop that balances the saltiness; wash and dry them well before packing)
- Vegetable – ¼ cup of baby carrots or cucumber slices (optional, but great for adding crunch and color)
- Spread (optional) – 1-2 tablespoons of honey mustard or Dijon mustard (for dipping or spreading on crackers; this is my personal favorite addition)
- Small Treat (optional) – 1-2 squares of dark chocolate or a few mini pretzels (adds a little something sweet or salty for a complete lunch experience)
For the best texture, I recommend using ham that’s sliced fresh from the deli counter rather than pre-packaged. It rolls better and tastes noticeably fresher. If you’re avoiding dairy, you can swap the cheese with a plant-based alternative—just make sure it’s firm enough to cube without crumbling. And honestly, don’t stress about exact amounts. The beauty of these boxes is that you can adjust everything based on hunger levels and what you have on hand.
Equipment Needed
You don’t need much to make these boxes, which is part of the appeal. Here’s what you’ll want to have ready:
- Lunch Box or Bento-Style Container – A container with divided sections works best to keep ingredients separate and prevent sogginess. I love using stainless steel bento boxes for durability, but any plastic container with compartments will do.
- Small Cutting Board – For cubing the cheese and slicing any fruit or vegetables. A wooden board is nice, but plastic works just fine.
- Sharp Knife – A good chef’s knife or paring knife makes clean work of cubing cheese and slicing ham rolls.
- Small Bowls – For holding dips or spreads if you’re including them. Silicone muffin cups also work great as little dividers inside a larger container.
- Parchment Paper or Silicone Baking Cups – Optional, but useful for separating moist ingredients like grapes from crackers to keep everything crisp.
If you don’t have a bento box, don’t worry. I’ve used regular meal prep containers and even cleaned-out takeout containers in a pinch. The key is just keeping wet and dry ingredients separate until you’re ready to eat. And honestly, a little cross-contamination never hurt anyone—it’s all going to the same place anyway.
Preparation Method
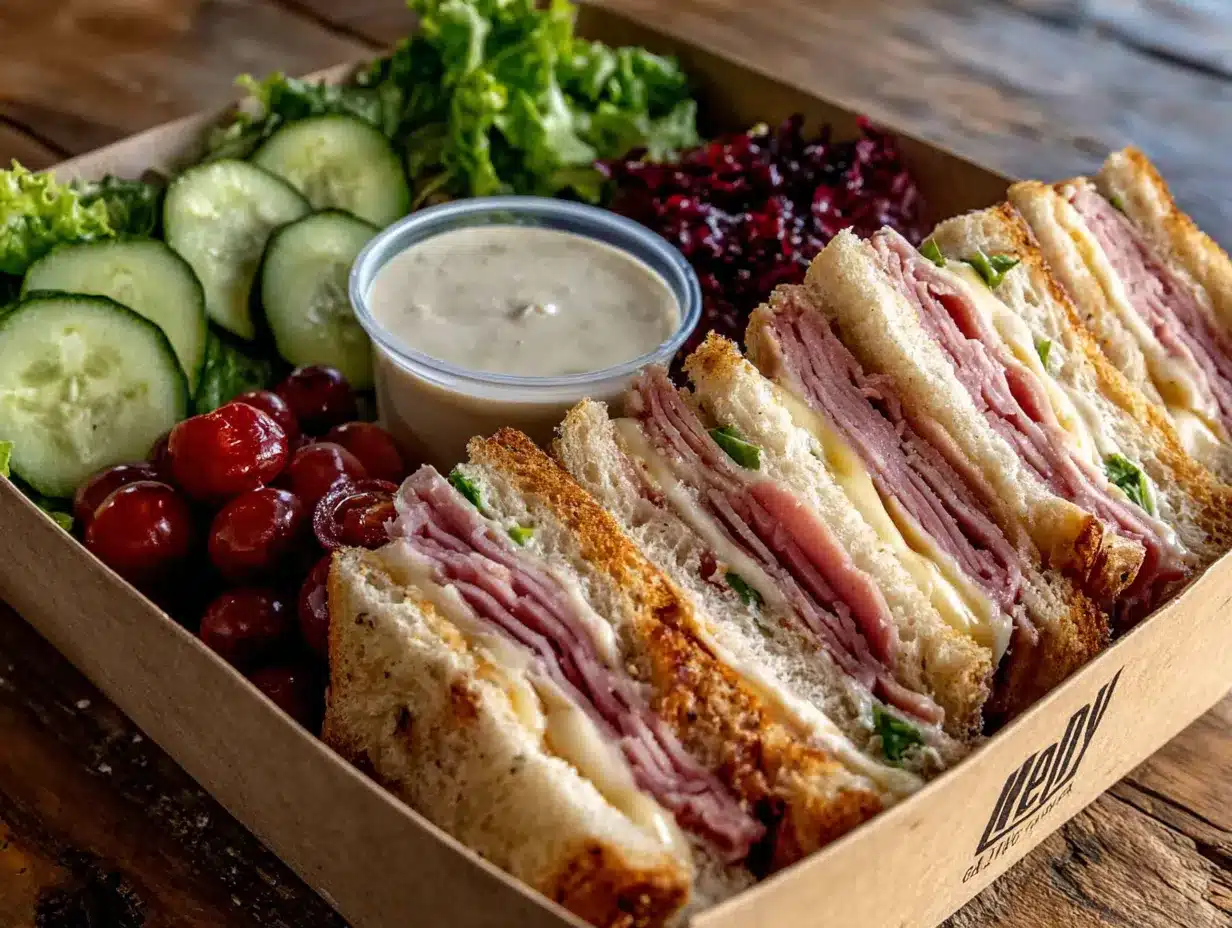
Making these Easy Ham and Cheese Lunchable Boxes is almost too simple, but follow these steps for the best results every time. The order matters a little—start with the cheese, then the ham, then everything else.
- Prepare the cheese (2 minutes): Take your block of cheddar and cut it into ½-inch cubes. You want them small enough to pop in your mouth in one bite but large enough to feel satisfying. Aim for about 10-12 cubes per box. If you’re using pre-sliced cheese, you can stack the slices and cut them into small squares instead.
- Roll the ham (3 minutes): Lay each slice of ham flat on your cutting board. Starting from one short end, roll it up tightly into a little log. For thicker slices, you might only get one roll per slice. For thinner slices, feel free to roll two together. Once rolled, slice each log into 1-inch pinwheels. They should look like little spirals of ham—cute and easy to grab.
- Wash and prep the fruit (2 minutes): Rinse your grapes under cold water and pat them completely dry with a paper towel. Wet grapes can make crackers soggy, so this step matters. If you’re using apple slices, toss them in a little lemon juice to prevent browning.
- Prepare the vegetables (2 minutes): If you’re including baby carrots, just wash them. For cucumber slices, cut them into rounds about ¼-inch thick. Pat everything dry as well.
- Assemble the boxes (3 minutes): Start arranging your ingredients in your container. Place the ham rolls in one section, the cheese cubes in another, and the crackers in a third. Add the grapes or fruit in a separate spot. If you’re including a dip, spoon it into a small container or silicone cup and nestle it into the box. Try to keep crackers away from anything moist.
- Add the finishing touches (1 minute): If you’re including a small treat like chocolate or pretzels, tuck them into any remaining space. Close the lid and refrigerate until you’re ready to eat.
One thing I learned the hard way—don’t overfill the boxes. It’s tempting to pack as much as possible, but if the lid presses down on the crackers, they’ll break. Leave a little breathing room. The goal is a beautiful, organized box that looks as good as it tastes.
Cooking Tips & Techniques
After making these boxes more times than I can count, I’ve picked up a few tricks that make a real difference. Let me share them so you don’t have to learn the hard way.
The biggest mistake I made early on? Not drying the fruit properly. I once packed a box with freshly washed grapes and closed it up for the day. By lunchtime, the crackers were soft and the ham was sitting in a little puddle of water. Not a great look. Now I always pat fruit and vegetables completely dry with a paper towel before packing. It takes an extra 30 seconds and saves the whole box.
Here’s a pro tip for keeping crackers crisp: If you’re packing these boxes the night before, put the crackers in a small separate baggie and add them to the box right before serving. Or, use a container with a tight seal and pack the crackers in a dry compartment away from any moisture. I’ve also started using those little silicone baking cups as separators—they’re perfect for keeping grapes and crackers from touching.
For the best ham rolls: If your deli ham is sticking together or tearing when you try to roll it, let it sit at room temperature for about 5 minutes first. Cold ham is less pliable. And if you want extra flavor, spread a thin layer of cream cheese or honey mustard on the ham before rolling. It adds a creamy tang that takes these boxes to another level.
Timing strategy: I usually make 4-5 boxes at once on Sunday evening. It takes about 15 minutes total, and then I have lunches sorted for the whole week. Just keep the crackers separate until the morning of, and you’re golden.
Variations & Adaptations
One of the best things about this recipe is how endlessly adaptable it is. Here are some of my favorite variations that I’ve tried and loved:
The Italian Twist: Swap the ham for salami or prosciutto, use mozzarella pearls instead of cheddar, and add a few cherry tomatoes and basil leaves. Include a small container of balsamic glaze for dipping. It’s like a mini antipasto platter in a box.
The Turkey & Apple Combo: Use oven-roasted turkey breast instead of ham, swap cheddar for brie or gouda, and add thin apple slices (tossed in lemon juice to prevent browning). A little honey mustard on the side ties it all together. This one is my personal go-to for fall lunches.
The Vegetarian Version: Skip the meat entirely and double up on cheese. Add hummus or guacamole as a protein-rich dip, and include extra vegetables like bell pepper strips, snap peas, or cherry tomatoes. For a heartier box, add some hard-boiled egg slices or roasted chickpeas.
The Keto/Low-Carb Adaptation: Replace crackers with cucumber rounds or cheese crisps. Use full-fat cheese and ham, and add avocado slices or olives for healthy fats. Skip the fruit and add more vegetables instead. It’s filling, satisfying, and keeps you in ketosis.
The Sweet & Savory Version: Use honey ham, add cubes of sharp white cheddar, include a handful of dried cranberries or dried apricots, and add a few dark chocolate squares. The combination of salty, sweet, and tangy is absolutely addictive. I made this for a road trip once, and it was the highlight of the drive.
Serving & Storage Suggestions
These boxes are best enjoyed cold or at room temperature. If you’re packing them for later, here’s how to keep everything fresh and delicious.
Serving temperature: I prefer these boxes straight from the fridge on a warm day, but if you’re eating indoors, letting them sit at room temperature for about 10 minutes allows the cheese to soften slightly and the flavors to come together. It makes a noticeable difference.
Presentation: If you’re serving these for a party or playdate, arrange everything on a small wooden board or in a shallow bowl instead of a closed container. The visual appeal is half the fun—those neat rows of ham rolls and cheese cubes are genuinely beautiful.
Complementary pairings: These boxes pair beautifully with a small cup of soup or a simple salad. For kids, add a juice box or a small yogurt tube on the side. For adults, a sparkling water or iced tea rounds out the meal perfectly.
Storage instructions: Assembled boxes (with crackers included) will keep in the refrigerator for up to 2 days. If you’re keeping them longer, store the crackers separately and add them just before serving. The ham and cheese will stay fresh for up to 4 days if stored in an airtight container.
Reheating: Honestly, these are meant to be eaten cold. But if you want warm ham, you can microwave the ham rolls for about 15 seconds—just don’t heat the cheese or crackers. I’ve done this on chilly days, and it’s a nice change of pace.
Flavor development: The flavors actually meld together a bit after a day in the fridge. The ham takes on a slight tang from the cheese, and the crackers absorb just a hint of everything around them. It’s a subtle shift, but a pleasant one.
Nutritional Information & Benefits
These boxes are naturally balanced, offering protein, healthy fats, carbohydrates, and a little bit of sweetness. Here’s an approximate breakdown for one box (using the base recipe with ham, cheddar, whole-grain crackers, and grapes):
| Nutrient | Amount per Box |
|---|---|
| Calories | 380-420 |
| Protein | 22-26g |
| Fat | 18-22g |
| Carbohydrates | 28-34g |
| Fiber | 3-5g |
| Sugar | 10-14g (mostly from fruit) |
| Sodium | 800-1000mg |
Health benefits: Ham is an excellent source of high-quality protein and B vitamins, particularly B12, which supports energy metabolism. Cheese provides calcium for bone health and casein protein, which digests slowly to keep you full longer. Grapes are packed with antioxidants like resveratrol, and whole-grain crackers add fiber for digestive health.
Dietary considerations: This recipe can easily be made gluten-free by using gluten-free crackers. For a lower-sodium option, choose low-sodium deli ham and reduced-sodium cheese. The base recipe is naturally nut-free, but always check labels if allergies are a concern. For a dairy-free version, use plant-based cheese and skip the optional cream cheese spread.
I personally love that these boxes keep me satisfied without that heavy, sluggish feeling after lunch. The protein and fat provide steady energy, while the fruit and crackers give a little carb boost without going overboard. It’s balanced eating that actually tastes good—and that’s a win in my book.
Conclusion
These Easy Ham and Cheese Lunchable Boxes are proof that the best recipes don’t have to be complicated. They came from a random Tuesday at my sister-in-law’s house, and they’ve become a staple in my kitchen ever since. There’s something deeply satisfying about opening a lunch box that looks this good and knowing you made it yourself in under ten minutes.
I hope you’ll try making these boxes your own. Swap in your favorite meats and cheeses, add whatever fruit or vegetables you have on hand, and don’t be afraid to experiment with different dips and spreads. The beauty of this recipe is that it’s more of a framework than a rigid set of rules—it adapts to whatever you need it to be.
Honestly, I still think about that day at Claire’s kitchen counter. She didn’t know she was sharing a recipe with me. She was just making lunch for her kids, the way she always did. But that casual, unassuming moment changed the way I think about meal prep forever. Sometimes the best ideas come from the most ordinary places.
I’d love to hear how your boxes turn out! Leave a comment below and let me know what combinations you tried. Did you add something unexpected? Did your kids love them? Share your creations and tag me—I can’t wait to see what you come up with. Happy packing, friends!
Frequently Asked Questions
Can I make these boxes ahead of time for the whole week?
Absolutely! You can assemble the boxes up to 4 days in advance. Just keep the crackers stored separately in a sealed bag or container, and add them to the box on the morning you plan to eat them. This keeps everything crisp and fresh.
What’s the best way to keep crackers from getting soggy?
The key is moisture control. Make sure all fruit and vegetables are completely dry before packing. Use a container with divided sections to keep crackers separate from wet ingredients. You can also place a small piece of parchment paper between the crackers and other items for extra protection.
Can I use pre-sliced cheese instead of a block?
Yes, you can! Pre-sliced cheese works fine in a pinch. Stack 2-3 slices on top of each other and cut them into small squares. Just keep in mind that pre-sliced cheese often has a slightly different texture and may not cube as neatly as block cheese. It’ll still taste great, though.
What are some good nut-free options for school lunches?
This recipe is naturally nut-free if you stick with the base ingredients. For extra variety without nuts, try adding sunflower seeds, pumpkin seeds, or roasted chickpeas for crunch. You can also include cheese sticks, yogurt tubes, or fruit leather for a fun addition.
How can I make these boxes more filling for an adult lunch?
For a heartier adult version, double the protein by adding extra ham rolls or including a hard-boiled egg. Add more vegetables like bell pepper strips, snap peas, or cherry tomatoes. You can also include a small container of hummus or guacamole for dipping, or add a handful of almonds for healthy fats and extra crunch.
Pin This Recipe!
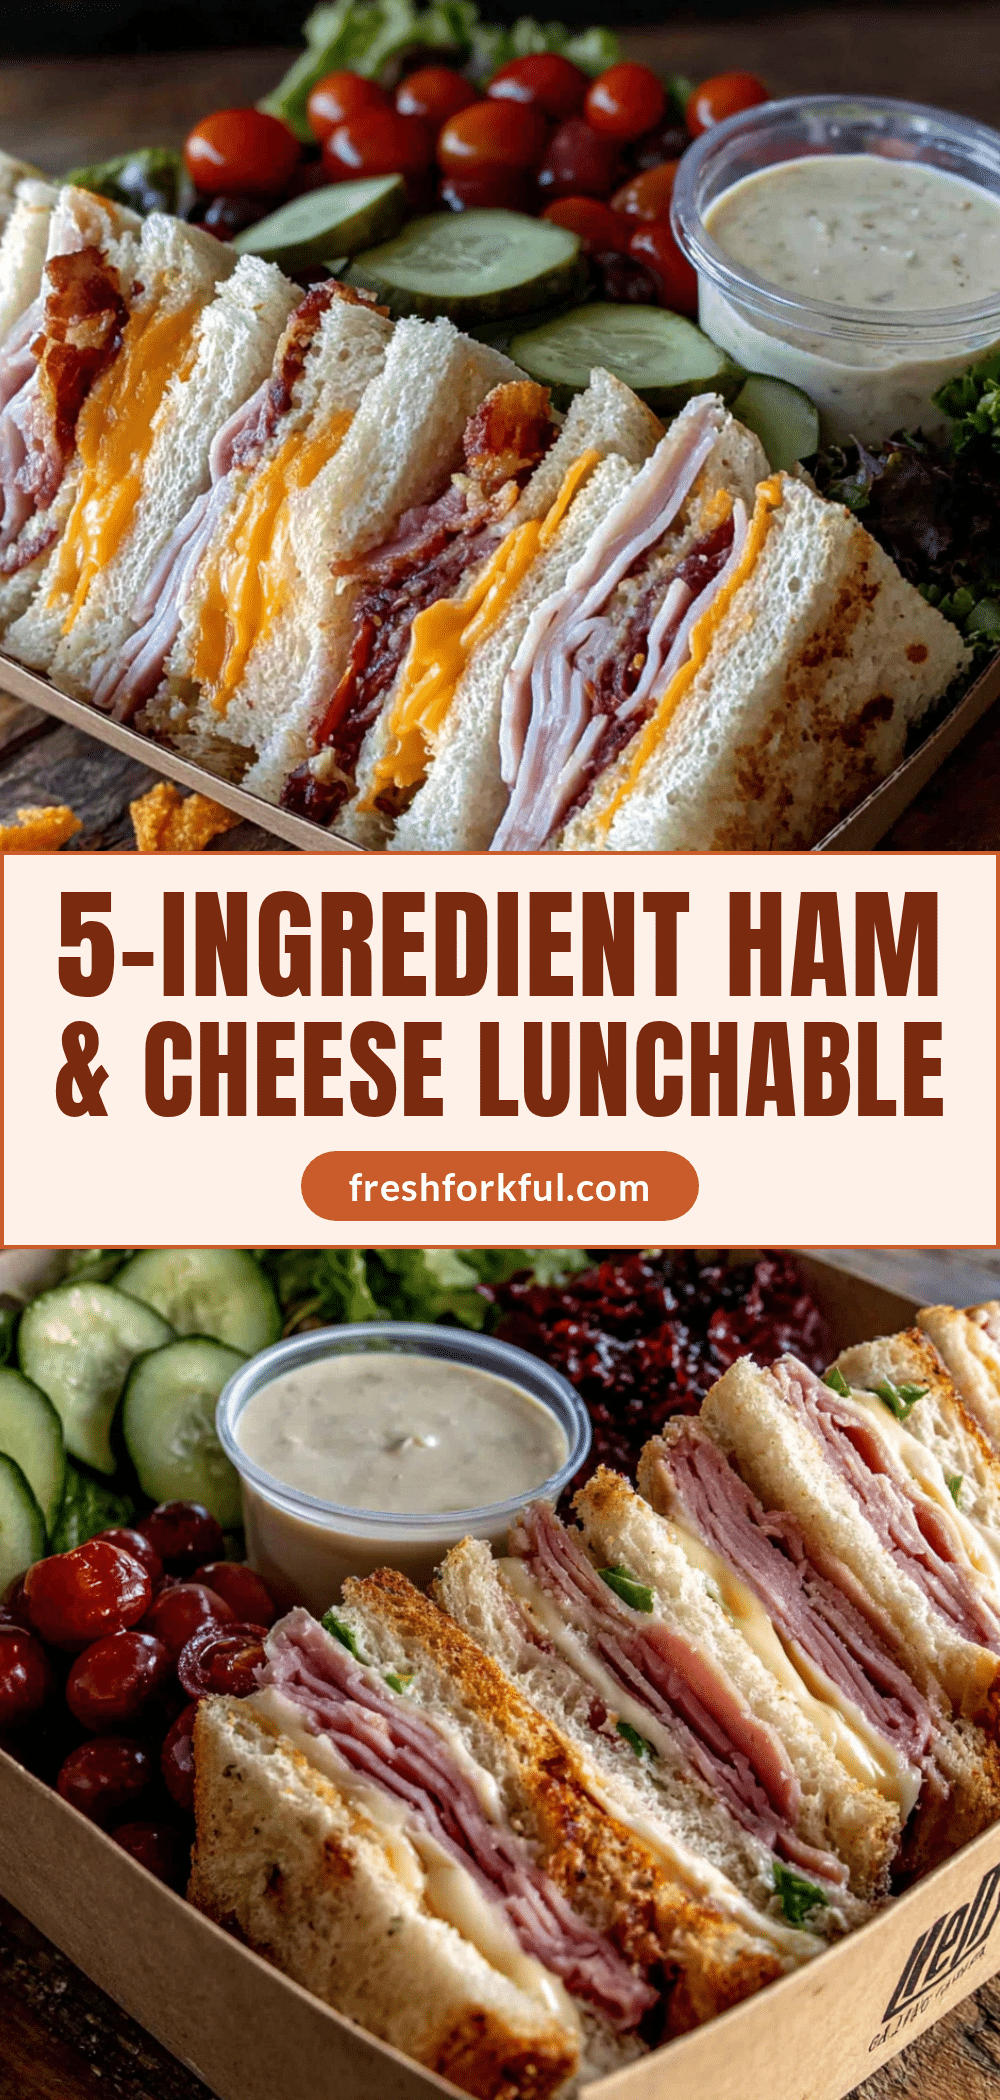
Easy Ham and Cheese Lunchable Boxes
These homemade Ham and Cheese Lunchable Boxes are quick, customizable, and perfect for meal prep. Assemble a delicious and satisfying lunch in under 10 minutes with simple ingredients like ham, cheese, crackers, and fruit.
- Prep Time: 10 minutes
- Cook Time: 0 minutes
- Total Time: 10 minutes
- Yield: 1 serving 1x
- Category: Lunch
- Cuisine: American
Ingredients
- 6–8 slices deli ham (honey ham or black forest ham)
- 4–6 ounces cheddar cheese, cut into cubes
- 12–16 whole-grain or buttery crackers
- 1/4 cup red grapes or apple slices
- 1/4 cup baby carrots or cucumber slices (optional)
- 1–2 tablespoons honey mustard or Dijon mustard (optional)
- 1–2 squares dark chocolate or a few mini pretzels (optional)
Instructions
- Prepare the cheese: Cut the block of cheddar into 1/2-inch cubes, aiming for about 10-12 cubes per box.
- Roll the ham: Lay each slice of ham flat and roll it tightly into a log. Slice each log into 1-inch pinwheels.
- Wash and prep the fruit: Rinse grapes under cold water and pat completely dry. If using apple slices, toss them in lemon juice to prevent browning.
- Prepare the vegetables: Wash baby carrots or slice cucumber into 1/4-inch rounds. Pat dry.
- Assemble the boxes: Arrange ham rolls, cheese cubes, crackers, fruit, and vegetables in separate sections of a bento-style container. Add dip in a small container if using.
- Add finishing touches: Tuck in any optional treats like chocolate or pretzels. Close the lid and refrigerate until ready to eat.
Notes
For best results, pat fruit and vegetables completely dry to prevent soggy crackers. Store crackers separately if making boxes more than 2 days in advance. Let ham sit at room temperature for 5 minutes before rolling for easier handling. For extra flavor, spread a thin layer of cream cheese or honey mustard on the ham before rolling.
Nutrition
- Serving Size: 1 box
- Calories: 400
- Sugar: 12
- Sodium: 900
- Fat: 20
- Saturated Fat: 10
- Carbohydrates: 31
- Fiber: 4
- Protein: 24
Keywords: ham and cheese lunchable, homemade lunchable, bento box lunch, easy lunch recipe, meal prep lunch, no-cook lunch, kid-friendly lunch


