Love this? Save it for later!
Share the inspiration with your friends
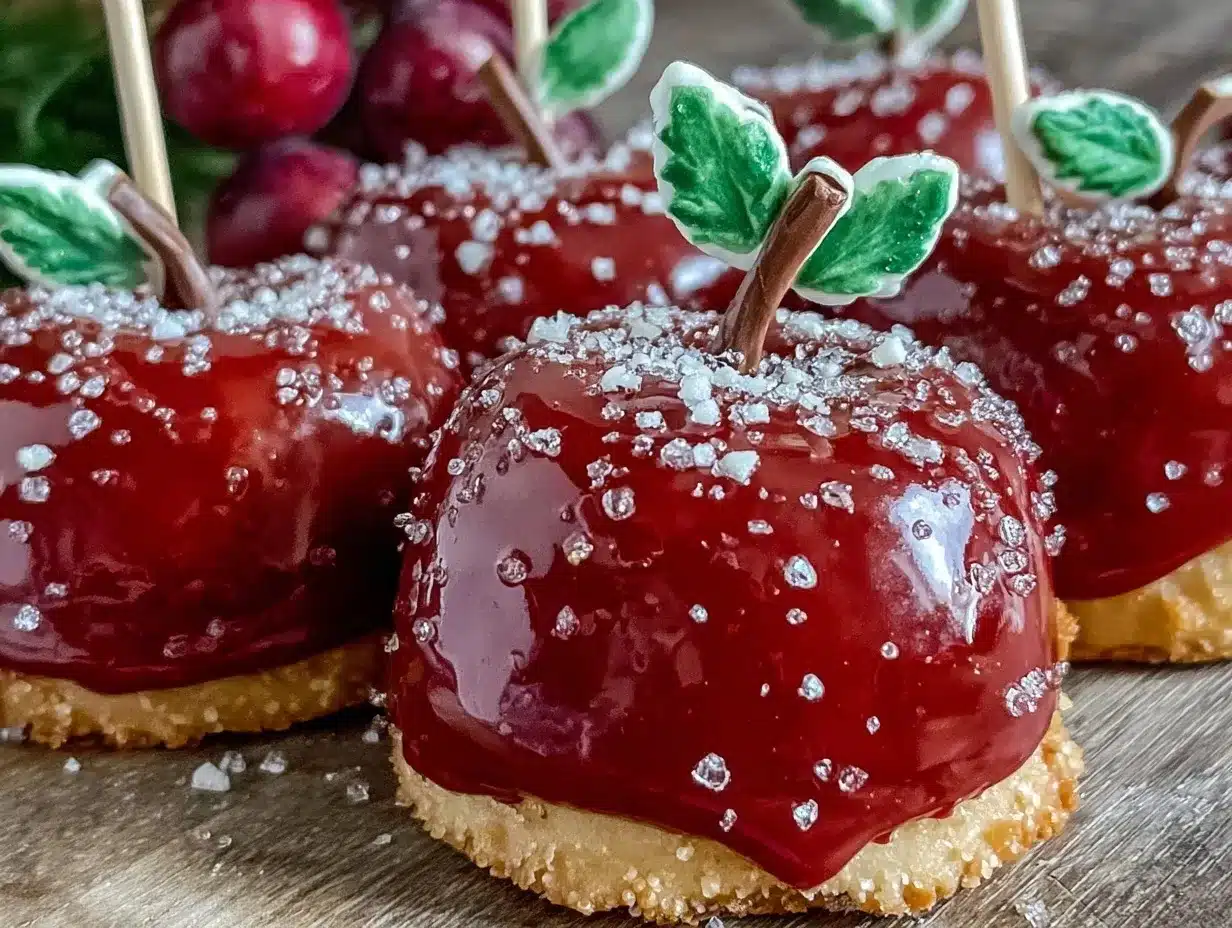
“You know that moment when a simple craving turns into a full-on kitchen adventure?” That’s exactly how these perfect apple-shaped vanilla sugar cookie pops came to be. It was a rainy Thursday afternoon, and honestly, I was just trying to keep my restless mind busy while waiting for a phone call. I started fiddling with dough, a bit of vanilla extract, and some sugar, but the real inspiration struck when I spotted a bright red apple on the counter. Something about its shiny, vibrant skin made me think: why not turn this into a cookie pop?
At first, I wasn’t even sure if the royal icing would cooperate — I mean, royal icing can be a tricky beast. But after a few attempts, some flour on the counter, and a bit of patience (and a small mess or two), these apple-shaped cookie pops turned out pretty darn close to what I imagined. The glossy red icing, the subtle vanilla aroma, and that satisfying crunch? It all just clicked. Maybe you’ve been there — that mix of frustration and delight when a recipe doesn’t go perfectly but somehow ends up better than expected.
These cookies have since become my go-to when I want a sweet treat that’s both nostalgic and a little playful. Whether you’re baking for a school event, a fall gathering, or just because you love a good vanilla sugar cookie with a twist, this recipe is worth holding onto. Let me tell you, once you try these apple-shaped vanilla sugar cookie pops with that gorgeous red royal icing, you’re going to keep coming back for more — just like I do.
Why You’ll Love This Recipe
After testing this recipe several times (and trust me, there were a few sticky fingers involved), I can confidently say these apple-shaped vanilla sugar cookie pops are a win for many reasons. Here’s why you might want to add them to your baking list:
- Quick & Easy: These come together in about 45 minutes, perfect for a last-minute dessert craving or a fun weekend project.
- Simple Ingredients: No need for fancy or hard-to-find items. Most of these you probably already have in your pantry — vanilla, sugar, flour, and eggs.
- Perfect for Celebrations: Whether it’s back-to-school, a fall party, or a teacher’s gift, these cookie pops fit the bill beautifully.
- Crowd-Pleaser: Kids and adults alike love the classic vanilla flavor with the fun apple shape and shiny red icing.
- Unbelievably Delicious: The vanilla sugar cookie base is tender but holds its shape well, while the red royal icing adds a sweet, slightly crisp finish.
What sets this recipe apart is the balance between the soft vanilla cookie and the perfectly smooth royal icing that’s colored a vibrant, glossy red — it’s like candy and cookie had a beautiful baby. I’ve tried other royal icing recipes before, but this one dries just right without cracking, making these pops perfect for stacking or gifting.
Honestly, this recipe isn’t just about the taste — it’s about the joy of creating something that looks as good as it tastes. I hope you find the same satisfaction in pulling these out of the oven and seeing those shiny apple shapes come to life!
What Ingredients You Will Need
This recipe focuses on simple, wholesome ingredients that come together to create a sweet, flavorful treat without any fuss. You’ll find most of these are pantry staples, making it easy to whip up a batch whenever the mood strikes.
- For the Vanilla Sugar Cookie Dough:
- 2 ¾ cups (345 g) all-purpose flour, sifted (I recommend King Arthur Flour for consistent texture)
- 1 teaspoon baking powder
- ½ teaspoon salt
- 1 cup (227 g) unsalted butter, softened (Room temp butter is key for smooth dough)
- 1 ½ cups (300 g) granulated sugar
- 1 large egg, room temperature
- 1 teaspoon pure vanilla extract (I like Nielsen-Massey for its rich flavor)
- Optional: 1 tablespoon sour cream or Greek yogurt (adds tenderness, but you can skip it if you want a slightly crisper cookie)
- For the Red Royal Icing:
- 3 cups (360 g) powdered sugar, sifted
- 2 large egg whites or 4 tablespoons meringue powder + 5 tablespoons water (meringue powder is a safer option if you’re worried about raw eggs)
- 1 teaspoon lemon juice (helps with consistency and brightness)
- Red gel food coloring (I prefer AmeriColor for vibrant, non-runny color)
- Optional: ½ teaspoon vanilla extract (for a subtle flavor twist)
- For Assembly:
- Wooden lollipop sticks or sturdy paper straws (avoid flimsy ones for better support)
- Optional: Edible green leaf decorations or green icing for apple leaves
Feel free to swap all-purpose flour with a gluten-free blend if needed, but the texture may be a bit different. Also, if you want to make the cookies dairy-free, use a plant-based butter alternative and omit the sour cream or yogurt.
Equipment Needed
- Mixing bowls (medium and large sizes)
- Electric mixer or stand mixer (hand mixing is possible but takes more effort)
- Rolling pin (a silicone one helps prevent sticking)
- Apple-shaped cookie cutter (about 3-4 inches wide; you can also improvise with a sharp knife if you’re feeling brave)
- Baking sheets lined with parchment paper or silicone mats
- Cooling rack for cookies
- Piping bags and small round piping tips (size #2 or #3 works well for outlining and flooding)
- Toothpicks or scribe tool (great for spreading icing and fixing small details)
- Timer (because royal icing waits for no one!)
For those on a budget, parchment paper can be swapped with aluminum foil lightly greased, though I find silicone mats provide the best non-stick surface. If you don’t have a piping bag, a resealable plastic bag with a tiny corner snipped off works in a pinch. Just be prepared for a bit less control.
Preparation Method
- Prepare the Dough (15 minutes + chilling): In a medium bowl, whisk together the sifted flour, baking powder, and salt. In a large bowl, cream the softened butter and granulated sugar with an electric mixer until light and fluffy — about 3-4 minutes. Beat in the egg and vanilla extract until combined. If you’re using sour cream or yogurt, mix it in now. Gradually add the dry ingredients, mixing until just combined. Avoid overmixing to keep the cookies tender.
- Chill the Dough (at least 1 hour): Divide the dough into two discs, wrap in plastic wrap, and refrigerate for a minimum of one hour. This step is crucial to prevent spreading and to make rolling easier. I once skipped chilling, and let me tell you, the cookies turned into weird blobs — lesson learned!
- Roll and Cut (15 minutes): Preheat your oven to 350°F (175°C). On a lightly floured surface, roll out one disc of dough to about ¼ inch (6 mm) thickness. Use your apple-shaped cookie cutter to cut out shapes. Insert a wooden stick into each cookie gently, making sure it’s secure but not poking through the other side. Place the cookie pops on your lined baking sheet, leaving about 1 inch (2.5 cm) between each.
- Bake the Cookies (10-12 minutes): Bake in the preheated oven until the edges just begin to turn golden — about 10 to 12 minutes. Keep an eye on them; overbaking will dry them out. Remove from oven and let cool completely on the baking sheet for 5 minutes before transferring to a wire rack. The cookies should be firm enough to hold the stick but still tender inside.
- Prepare the Royal Icing (10 minutes): While cookies cool, whisk together the powdered sugar and egg whites (or meringue powder and water) in a clean bowl. Add lemon juice and vanilla extract if using. Beat on medium speed until stiff peaks form, about 5-7 minutes. Add red gel food coloring a little at a time until you reach the vibrant apple red you want. The icing should be thick enough to hold shape but thin enough to flood the cookie surface.
- Decorate the Cookie Pops (30-40 minutes): Transfer royal icing to piping bags. Outline each apple cookie with a slightly thicker icing line to create a border. Then flood the center with thinner icing, using a toothpick to spread it evenly and pop any air bubbles. Add a small green leaf detail with green icing or edible decorations if desired. Let the icing dry completely, ideally overnight, so it sets with that perfect glossy finish.
- Store or Serve: Once dry, your apple cookie pops are ready to enjoy or package as gifts. Keep them in an airtight container at room temperature for up to 5 days.
Pro tip: If your royal icing feels too thick, add a few drops of water at a time to thin it out — but be patient; rushing this step can lead to runny icing and unhappy cookies. Also, I find letting the cookies rest a few minutes after baking before decorating helps prevent cracking.
Cooking Tips & Techniques
Making royal icing can be intimidating, but honestly, a few tricks make it so much easier. First, always sift your powdered sugar to avoid lumps. When beating egg whites or meringue powder, make sure your bowl and beaters are clean and free from any grease — even a tiny bit can prevent stiff peaks. I learned this the hard way after a few failed batches.
Temperature matters too. If your kitchen is too warm, the icing might stay too runny or take forever to dry. I usually decorate near an open window or in an air-conditioned room. Also, when flooding the cookies, work quickly and use a toothpick to gently push the icing to edges — this helps create a smooth, even surface.
Don’t forget to rotate your baking sheets halfway through baking for even cooking. And if you’re worried about the sticks falling out, gently press them again into the warm cookie as soon as they come out of the oven — just be careful not to burn yourself!
One of my favorite hacks: when you’re done decorating, place the cookie pops upright in a tall glass or styrofoam block to dry. This keeps the icing smooth and prevents smudges. Trust me, this step keeps your cookies looking professional, even if your piping skills are still a work in progress.
Variations & Adaptations
These apple-shaped vanilla sugar cookie pops are a great base for creativity. Here are a few ways I’ve played around with the recipe, and you can too:
- Flavor Variations: Swap vanilla extract for almond or cinnamon extract in the dough for a cozy twist. I once made a batch with a hint of ginger — perfect for fall!
- Colorful Icing: Instead of red, try green for Granny Smith apple vibes or even a speckled effect by flicking darker red food coloring over the flooded icing.
- Gluten-Free Option: Use a gluten-free all-purpose flour blend. Keep in mind the texture might be slightly crumbly but still delicious.
- Allergy-Friendly: Replace butter with coconut oil and use aquafaba instead of egg whites in the royal icing for a dairy- and egg-free version. I tried this once for a friend, and it was surprisingly good!
- Alternative Shapes: If you want to switch things up, the dough works beautifully with other shapes like pumpkins or leaves for seasonal variety.
Serving & Storage Suggestions
Serve these cookie pops at room temperature to fully enjoy the crisp royal icing and soft cookie inside. They’re a fun finger food for parties or a sweet treat to pack in lunchboxes. Pair them with a warm cup of apple cider or chai tea for cozy vibes.
To store, keep the cookie pops in a single layer in an airtight container at room temperature for up to 5 days. Avoid stacking to prevent the icing from sticking or cracking. If you want to keep them longer, wrapping each in plastic wrap and freezing works well — just thaw at room temperature before serving.
Reheating isn’t necessary, but if you do, a few seconds in the microwave can soften the cookie slightly (be careful not to melt the icing). Over time, the flavors meld and the cookie becomes even more tender, so leftovers are honestly a treat in their own right.
Nutritional Information & Benefits
Each apple-shaped vanilla sugar cookie pop roughly contains:
| Calories | 150-170 kcal |
|---|---|
| Carbohydrates | 25 g |
| Fat | 6 g |
| Protein | 1.5 g |
| Sugar | 15 g |
While these treats are definitely on the sweeter side, there’s some nutritional goodness in the use of real vanilla and fresh ingredients. The powdered sugar and butter provide energy, making these cookie pops a quick pick-me-up. If you’re mindful of allergens, be aware that this recipe contains eggs, dairy, and gluten unless substitutions are made.
I like to think of these cookie pops as a little celebration — a sweet moment in the day that’s worth savoring, especially when shared with friends or family.
Conclusion
So, why should you give these perfect apple-shaped vanilla sugar cookie pops with red royal icing a try? Because they’re fun, delicious, and come with a bit of kitchen magic that turns simple ingredients into something memorable. I love how easy they are to make, yet they look like you spent hours crafting each one — perfect for impressing without stress.
Feel free to make this recipe your own: swap flavors, colors, or shapes based on what you like or what’s in season. Baking is all about joy and experimentation, after all. I’d love to hear how your cookie pops turn out and any creative twists you come up with. Drop a comment below or share your photos!
Remember, cooking is meant to be fun — so grab that rolling pin, get your hands a little sticky, and enjoy every sweet bite!
FAQs
Can I make these cookie pops ahead of time?
Absolutely! You can bake and decorate the cookie pops up to 3 days in advance. Store them in an airtight container at room temperature to keep the icing crisp.
What if I don’t have a cookie cutter shaped like an apple?
No worries! You can carefully cut out apple shapes with a knife or use other seasonal cookie cutters like leaves or pumpkins.
Is it safe to use raw egg whites in royal icing?
If you’re concerned about raw eggs, use meringue powder as a substitute. It’s pasteurized and works just as well for royal icing.
How do I fix cracked or runny royal icing?
If your icing is too thick and cracking, add a few drops of water to thin it. If it’s too runny, add more powdered sugar. Make sure to mix well and test consistency before applying.
Can I store leftover cookie pops in the freezer?
Yes! Wrap each cookie pop individually in plastic wrap and place them in a freezer-safe container. Thaw at room temperature before serving.
Pin This Recipe!
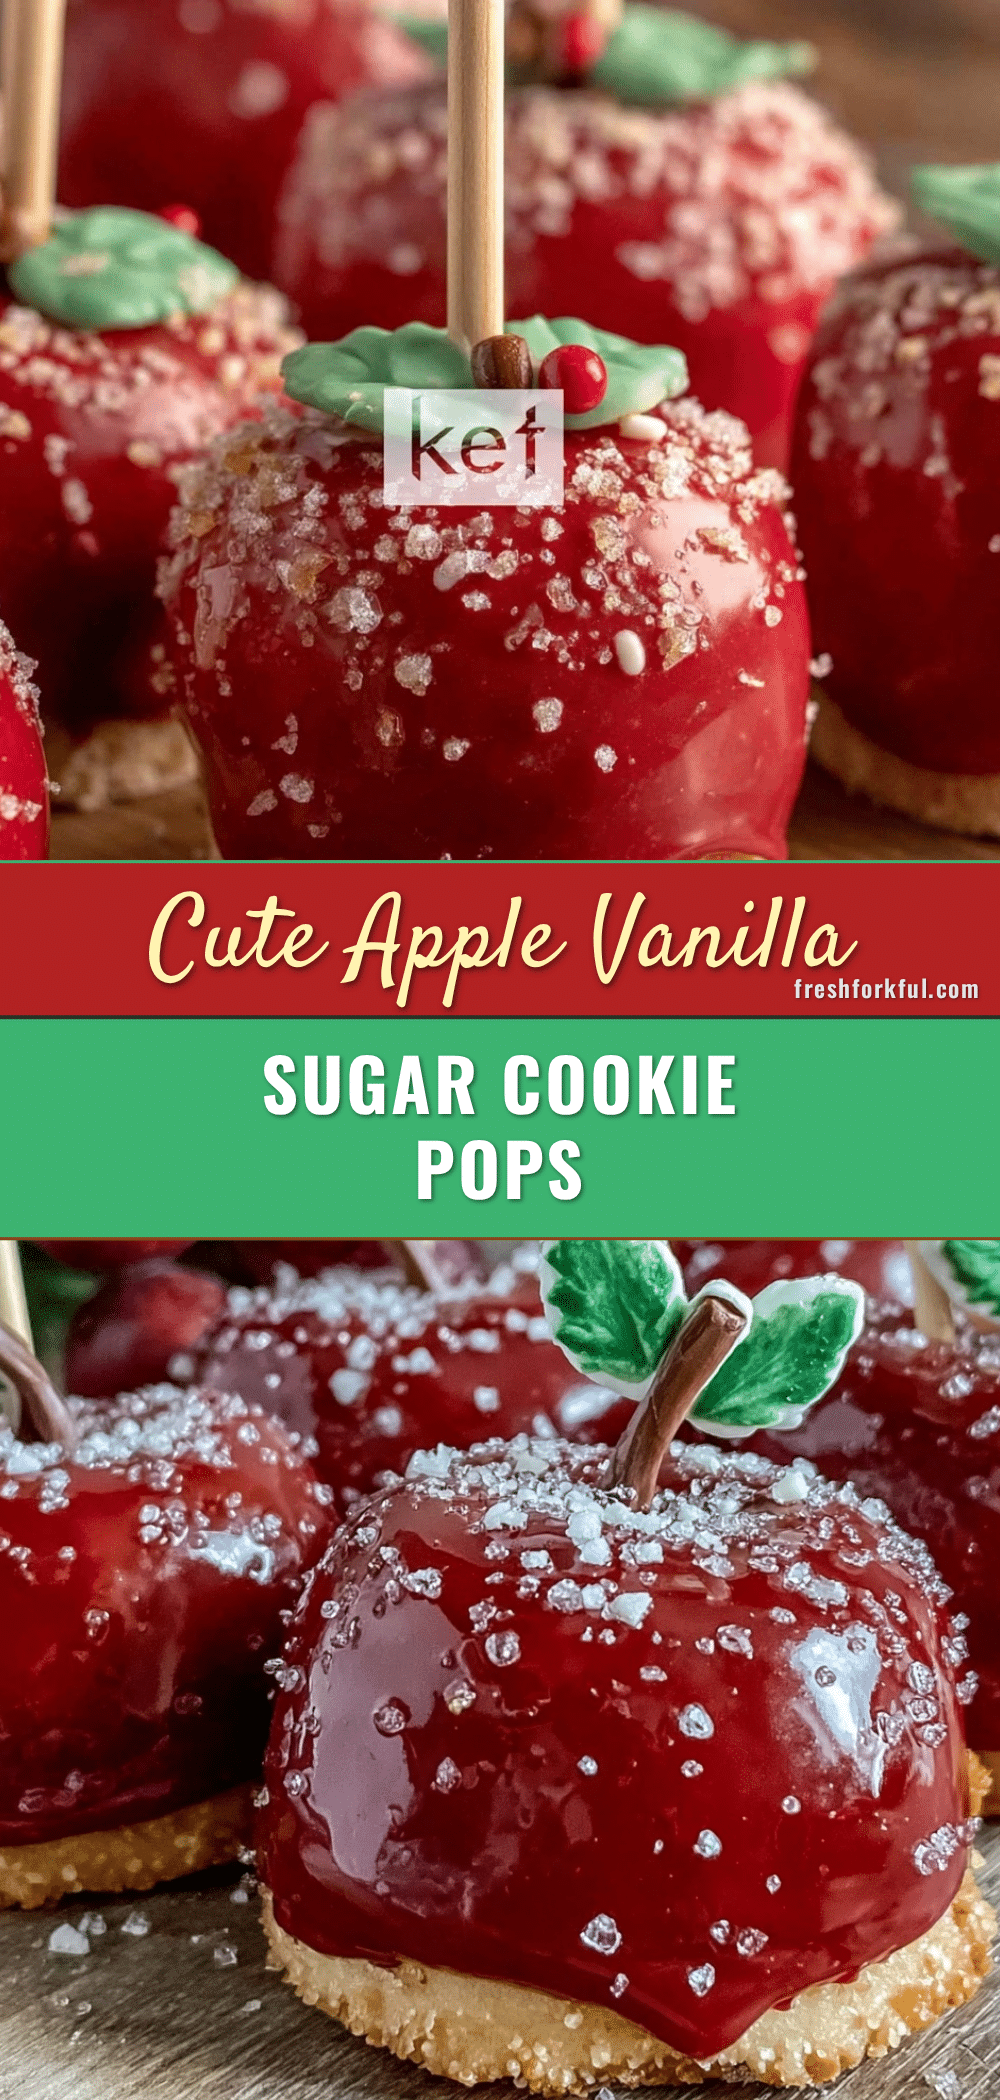
Perfect Apple-Shaped Vanilla Sugar Cookie Pops Easy Homemade Recipe with Red Royal Icing
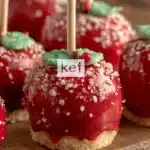
These apple-shaped vanilla sugar cookie pops feature a tender vanilla sugar cookie base topped with glossy red royal icing, perfect for celebrations or a fun treat.
- Prep Time: 15 minutes
- Cook Time: 10-12 minutes
- Total Time: 1 hour 55 minutes
- Yield: About 24 cookie pops 1x
- Category: Dessert
- Cuisine: American
Ingredients
- 2 ¾ cups (345 g) all-purpose flour, sifted
- 1 teaspoon baking powder
- ½ teaspoon salt
- 1 cup (227 g) unsalted butter, softened
- 1 ½ cups (300 g) granulated sugar
- 1 large egg, room temperature
- 1 teaspoon pure vanilla extract
- Optional: 1 tablespoon sour cream or Greek yogurt
- 3 cups (360 g) powdered sugar, sifted
- 2 large egg whites or 4 tablespoons meringue powder + 5 tablespoons water
- 1 teaspoon lemon juice
- Red gel food coloring
- Optional: ½ teaspoon vanilla extract
- Wooden lollipop sticks or sturdy paper straws
- Optional: Edible green leaf decorations or green icing
Instructions
- Prepare the Dough (15 minutes + chilling): In a medium bowl, whisk together the sifted flour, baking powder, and salt. In a large bowl, cream the softened butter and granulated sugar with an electric mixer until light and fluffy (3-4 minutes). Beat in the egg and vanilla extract until combined. If using sour cream or yogurt, mix it in now. Gradually add the dry ingredients, mixing until just combined. Avoid overmixing.
- Chill the Dough (at least 1 hour): Divide the dough into two discs, wrap in plastic wrap, and refrigerate for a minimum of one hour.
- Roll and Cut (15 minutes): Preheat oven to 350°F (175°C). On a lightly floured surface, roll out one disc of dough to about ¼ inch (6 mm) thickness. Use an apple-shaped cookie cutter to cut out shapes. Insert a wooden stick into each cookie gently. Place cookie pops on lined baking sheet, leaving about 1 inch between each.
- Bake the Cookies (10-12 minutes): Bake until edges just begin to turn golden, about 10-12 minutes. Remove and let cool on baking sheet for 5 minutes before transferring to a wire rack.
- Prepare the Royal Icing (10 minutes): Whisk together powdered sugar and egg whites (or meringue powder and water). Add lemon juice and vanilla extract if using. Beat until stiff peaks form (5-7 minutes). Add red gel food coloring until desired color is reached.
- Decorate the Cookie Pops (30-40 minutes): Transfer icing to piping bags. Outline each apple cookie with thicker icing line, then flood center with thinner icing using a toothpick to spread evenly. Add green leaf details if desired. Let icing dry completely, ideally overnight.
- Store or Serve: Once dry, enjoy or package as gifts. Store in airtight container at room temperature for up to 5 days.
Notes
Chill dough for at least 1 hour to prevent spreading. Use meringue powder instead of raw egg whites for safer royal icing. Let icing dry overnight for best glossy finish. If royal icing is too thick, add water a few drops at a time. Rotate baking sheets halfway through baking for even cooking. Press sticks gently into warm cookies after baking to secure.
Nutrition
- Serving Size: 1 cookie pop
- Calories: 160
- Sugar: 15
- Sodium: 100
- Fat: 6
- Saturated Fat: 4
- Carbohydrates: 25
- Fiber: 0.5
- Protein: 1.5
Keywords: apple shaped cookies, vanilla sugar cookies, royal icing, cookie pops, homemade cookies, easy dessert, fall treats