Love this? Save it for later!
Share the inspiration with your friends
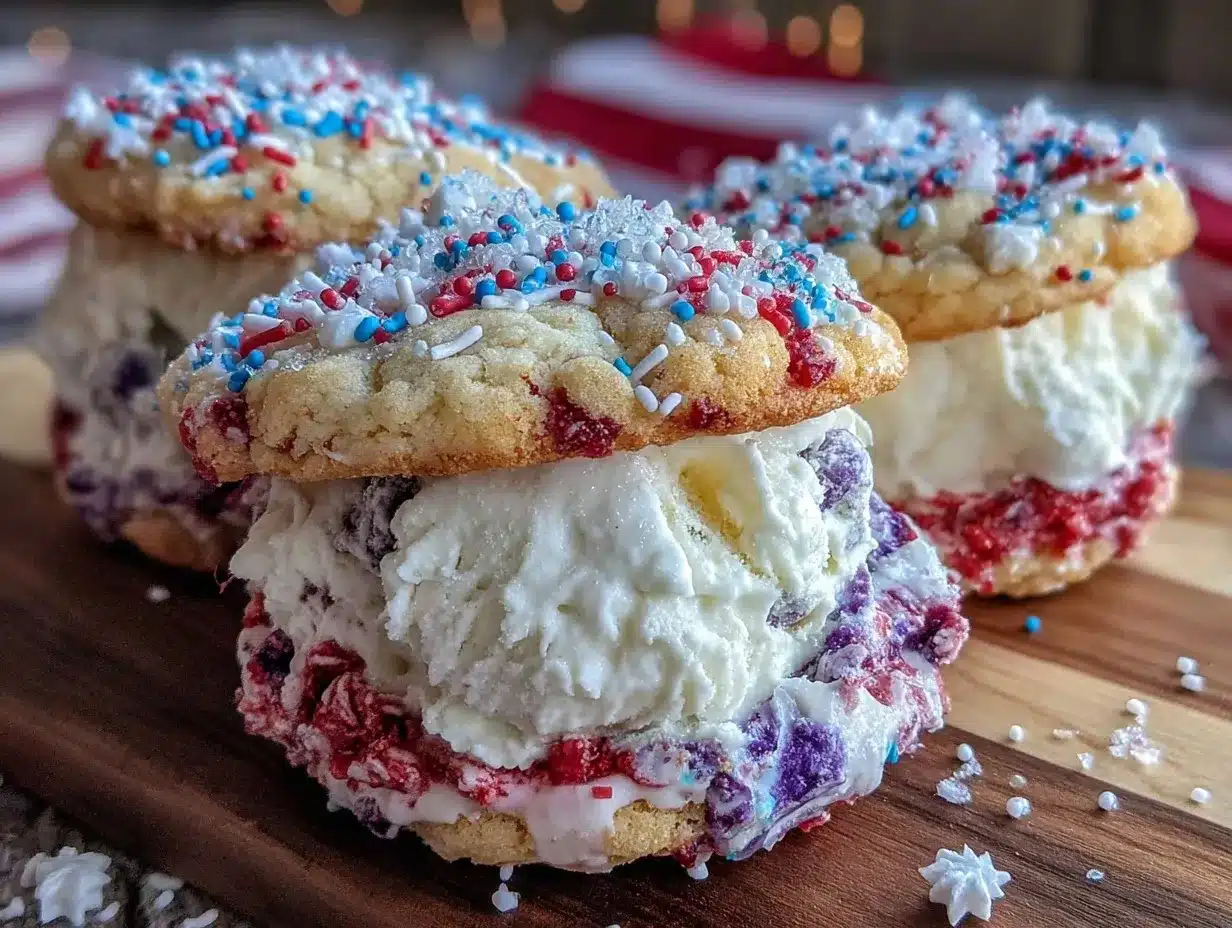
“You know that feeling when a simple idea turns into something unexpectedly magical?” That’s exactly what happened one hot July afternoon when I found myself rummaging through a dusty box of old baking tools in my grandmother’s attic. Among the clutter, there was a faded recipe card tucked inside a worn leather notebook, scribbled in elegant, looping handwriting: “Vanilla Bean Ice Cream Sandwiches with Patriotic Sugar Cookies.” Honestly, I wasn’t sure if I’d ever make the old-fashioned sugar cookies look quite right, let alone pair them with homemade ice cream. But the thought of biting into creamy vanilla bean ice cream hugged between soft, cheerful red, white, and blue cookies stuck with me.
It all started as a lazy weekend project — the kind where you’re half-distracted by the hum of the dishwasher and a playlist of classic summer tunes. I forgot to pre-chill my ice cream maker on the first try and had to improvise with a makeshift cooler (don’t ask, it was a mess). But the results? Let me tell you, the first sandwich I made was gone before I even finished wiping the counter. Something about the way the warm, buttery sugar cookie met the cold, rich vanilla bean ice cream took me right back to those carefree summer evenings when fireworks lit up the sky and everyone gathered on the porch.
Maybe you’ve been there, craving a nostalgic treat that feels both festive and comforting. This recipe isn’t just a dessert; it’s a little celebration in every bite, perfect for those sunny days when you want to impress with something homemade but without fuss. Plus, the touch of real vanilla bean makes it feel special, not like those store-bought versions that try but don’t quite hit the mark. I keep coming back to this recipe because it’s simple, fun, and honestly, it’s the kind of thing that turns an ordinary summer day into a memory worth savoring.
Why You’ll Love This Recipe
After countless summer afternoons and many happy taste testers, I can confidently say this recipe hits all the right notes. Here’s why you’ll want to make these Perfect Homemade Vanilla Bean Ice Cream Sandwiches with Patriotic Sugar Cookies your go-to summer treat:
- Quick & Easy: The cookies and ice cream come together in under two hours — perfect for last-minute backyard gatherings or a spontaneous family treat.
- Simple Ingredients: No need for fancy or hard-to-find items. Most are pantry staples, and the vanilla bean adds that unmistakable, authentic aroma.
- Perfect for Summer Celebrations: These sandwiches bring a festive vibe to 4th of July picnics, pool parties, or casual barbecues.
- Crowd-Pleaser: Kids love the colorful cookies, and adults appreciate the creamy, rich ice cream paired with a hint of fresh vanilla.
- Unbelievably Delicious: The buttery sugar cookies have just the right chew, balancing the smooth, dreamy texture of the ice cream. Honestly, this combo is pure comfort food with a patriotic twist.
What sets this recipe apart is the care put into the ice cream’s base — real vanilla bean seeds swirl through the creamy custard, making each bite feel indulgent yet fresh. And the patriotic sugar cookies? They’re not just pretty; they taste buttery and sweet with a slight crisp edge that holds up perfectly against the melting ice cream. No soggy sandwiches here!
Whether you’re looking to impress guests or simply treat yourself to something special on a warm summer evening, this recipe delivers the kind of nostalgic joy that keeps you coming back for more.
What Ingredients You Will Need
This recipe uses straightforward, wholesome ingredients to deliver a bold flavor and satisfying texture without any fuss. Most are pantry staples, with a few fresh touches that make a difference.
- For the Patriotic Sugar Cookies:
- All-purpose flour – 3 cups (360 g), sifted for lightness
- Baking powder – 1 teaspoon
- Salt – ½ teaspoon
- Unsalted butter – 1 cup (227 g), softened (I prefer Plugrá for a rich flavor)
- Granulated sugar – 1 ½ cups (300 g)
- Large eggs – 2, room temperature
- Pure vanilla extract – 2 teaspoons (or use vanilla bean paste for extra depth)
- Red and blue gel food coloring – just a few drops for vibrant colors
- For the Vanilla Bean Ice Cream:
- Heavy cream – 2 cups (480 ml)
- Whole milk – 1 cup (240 ml)
- Granulated sugar – ¾ cup (150 g)
- Vanilla bean – 1 large pod, split and seeds scraped (if unavailable, high-quality pure vanilla extract works)
- Large egg yolks – 5
- Salt – a pinch (balances sweetness)
For the best results, pick fresh eggs from a trusted source or organic options if possible. The vanilla bean is a bit of a showstopper here — it adds those tiny black specks and a real floral aroma that no extract can match. If you want to skip the gel colors, the cookies are delicious plain too, but the patriotic red and blue just make summer feel complete.
If you prefer a dairy-free alternative, swapping the cream and milk with full-fat coconut milk works surprisingly well, and you can use a vegan egg replacer for the cookies.
Equipment Needed
- Stand mixer or hand mixer – for creaming butter and mixing dough smoothly
- Mixing bowls – at least two medium-sized bowls
- Measuring cups and spoons – for accuracy (especially important for baking!)
- Baking sheets lined with parchment paper or silicone mats – prevents sticking and promotes even baking
- Rolling pin – to roll out cookie dough evenly; a textured rolling pin can add fun patterns
- Cookie cutters – star-shaped or round for that patriotic touch (I use a 3-inch star cutter for perfect sandwich size)
- Ice cream maker – this really makes a difference for creamy texture; if you don’t have one, no worries, I’ll share a no-churn tip below
- Fine mesh strainer – to ensure the custard is silky smooth (trust me, it’s worth it!)
- Cooling racks – to let cookies cool completely before assembly
If you’re on a budget, a good hand mixer works wonderfully instead of a stand mixer, and silicone mats can be replaced with parchment paper. For ice cream, a simple plastic freezer-safe container works if you follow the no-churn instructions carefully.
Preparation Method
- Prepare the Patriotic Sugar Cookies Dough: In a bowl, whisk together 3 cups (360 g) of sifted flour, 1 teaspoon baking powder, and ½ teaspoon salt. Set aside.
In your mixer, beat 1 cup (227 g) softened unsalted butter with 1 ½ cups (300 g) sugar until fluffy and pale, about 3-4 minutes. Add 2 large eggs and 2 teaspoons vanilla extract, mixing until fully combined.
Gradually add the dry flour mixture to the wet ingredients, mixing on low speed just until incorporated. Divide the dough into three equal portions. - Color the Dough: Add a few drops of red gel food coloring to one portion and blue to another; leave the third plain. Knead each gently by hand until the colors are evenly distributed. Wrap each dough portion in plastic wrap and chill in the fridge for at least one hour (this step is crucial for easy rolling and clean edges!).
- Roll and Cut the Cookies: Preheat oven to 350°F (175°C). On a lightly floured surface, roll each dough portion to about ¼ inch (6 mm) thickness. Use star-shaped cookie cutters or your preferred shapes to cut cookies, aiming for pairs of similar size for the sandwiches.
Place cookies on parchment-lined baking sheets about 1 inch apart. - Bake: Bake for 10-12 minutes until edges are just golden but centers remain soft. Remove from oven and let cool on baking sheets for 5 minutes before transferring to cooling racks to cool completely.
- Make the Vanilla Bean Ice Cream Base: In a saucepan, combine 2 cups (480 ml) heavy cream, 1 cup (240 ml) whole milk, ¾ cup (150 g) sugar, and the scraped seeds plus pod of 1 vanilla bean. Heat over medium until sugar dissolves and mixture is hot but not boiling.
In a separate bowl, whisk 5 large egg yolks until smooth. Gradually pour about 1 cup of the hot cream mixture into the yolks, whisking constantly (this tempers the eggs so they don’t scramble). - Cook the Custard: Pour the tempered egg mixture back into the saucepan. Cook over low heat, stirring constantly with a wooden spoon or spatula, until the custard thickens enough to coat the back of the spoon (about 170-175°F or 77-80°C). Do not boil! Remove from heat, strain through a fine mesh sieve to remove vanilla pod and any cooked egg bits, then let cool to room temperature.
- Chill and Churn: Cover and refrigerate the custard for at least 4 hours or overnight. Churn in your ice cream maker according to manufacturer instructions until it reaches soft-serve consistency.
If you don’t have an ice cream maker, transfer the custard to a freezer-safe container and freeze, stirring vigorously every 30 minutes for 2-3 hours to break up ice crystals. - Assemble the Sandwiches: Once the cookies and ice cream are fully chilled, scoop generous portions of ice cream onto the flat side of one cookie. Top with a matching cookie and gently press together. Wrap each sandwich in parchment or wax paper and freeze for at least 30 minutes to set.
Pro tip: If your ice cream softens too much while assembling, pop the sandwiches back in the freezer quickly to firm up. And don’t skip chilling the dough — it makes all the difference in handling and crisp edges!
Cooking Tips & Techniques
Making homemade ice cream sandwiches might sound fancy, but with a few tips, you can nail it every time. Here’s what I’ve learned:
- Chill Everything: From the dough to the ice cream base, cold temperatures help keep the texture on point. I once skipped chilling the dough and ended up with cookies that spread all over the pan — a total mess.
- Use Gel Food Coloring: It gives vibrant colors without thinning the dough, unlike liquid food coloring. A little goes a long way!
- Don’t Overmix: When combining wet and dry ingredients, mix just until combined to avoid tough cookies.
- Temper the Eggs: Slowly adding hot cream to egg yolks prevents curdling, which is key to a smooth custard base.
- Strain Your Custard: This removes any bits of cooked egg and vanilla pod pieces, leaving silky ice cream.
- Work Quickly When Assembling: Ice cream melts fast, especially in warm kitchens. Have your cookies ready and a cold surface to work on.
- Storage Matters: Wrap sandwiches individually to avoid ice crystals and freezer burn.
Honestly, the best advice is to enjoy the process — I’ve made plenty of messes and had to improvise, but that’s part of the fun! Every batch gets better, and you’ll develop your own rhythm.
Variations & Adaptations
If you want to switch things up, here are some ideas that work well with this base recipe:
- Flavor Swaps: Try swapping vanilla bean ice cream for chocolate or strawberry for a fruity twist. You can add crushed peppermint to the dough for a holiday version.
- Gluten-Free Option: Use a 1:1 gluten-free flour blend instead of all-purpose flour. The texture is slightly different but still delicious.
- Dairy-Free Version: Substitute coconut milk for cream and almond or oat milk for whole milk. Use dairy-free butter for the cookies.
- Shape and Size Variations: Instead of stars, try round cookies or even mini sandwiches for bite-sized treats at parties.
- Personal Favorite: I once added a sprinkle of sea salt to the cookie dough, which gave the sandwiches a lovely sweet-salty balance that surprised everyone.
Feel free to experiment with different colors or add edible glitter for extra sparkle — it’s your summer celebration after all!
Serving & Storage Suggestions
These ice cream sandwiches are best served straight from the freezer after a quick 5-minute thaw to soften slightly. The cookies should be chewy but not too hard to bite.
Pair them with a cold lemonade or iced tea to stay refreshed on a hot day. They also make a fantastic dessert after grilled meals like grilled citrus chicken or alongside lighter salads.
For storage, wrap each sandwich tightly in parchment or wax paper and place in an airtight container or freezer bag. They keep well for up to 2 weeks, but honestly, they rarely last that long in my house!
Reheat tips? Just let them sit for a few minutes at room temperature before eating to get that perfect balance of creamy and soft cookie. Over time, the flavors meld beautifully, making the vanilla bean even more pronounced.
Nutritional Information & Benefits
Each ice cream sandwich contains approximately 250-300 calories depending on size. The homemade ice cream uses real vanilla bean, which adds antioxidants and a natural rich flavor without artificial additives.
The cookies provide energy from wholesome butter and eggs, making these treats a better alternative to processed snacks. This recipe can be adapted to be gluten-free or dairy-free depending on your dietary needs.
From a wellness perspective, making your own desserts means you control the ingredients, avoiding preservatives and excess sugars common in store-bought versions. It’s a bit of indulgence with a conscience.
Conclusion
Perfect Homemade Vanilla Bean Ice Cream Sandwiches with Patriotic Sugar Cookies are more than just a dessert — they’re a little summer celebration captured between two soft, colorful cookies. Whether you’re hosting a backyard barbecue or craving an easy, fun treat, this recipe brings joy and nostalgia with every bite.
Feel free to tweak the colors, flavors, or shapes to suit your style. I love how this recipe brings people together, sparking smiles and happy memories. I hope it becomes a favorite in your kitchen too.
If you give this recipe a try, please leave a comment or share your tweaks — I’d love to hear how you made it your own. Here’s to sweet summer moments and delicious homemade treats!
Frequently Asked Questions
Can I make the ice cream without an ice cream maker?
Yes! You can use the no-churn method by freezing the custard in a container and stirring vigorously every 30 minutes to prevent ice crystals. It won’t be quite as smooth but still delicious.
How far ahead can I make these ice cream sandwiches?
They keep well for up to 2 weeks when wrapped tightly and stored in the freezer. Just thaw a few minutes before serving for the best texture.
Can I use vanilla extract instead of vanilla bean?
Absolutely. Use 2 teaspoons of high-quality pure vanilla extract if you can’t find vanilla beans. The flavor will be less intense but still lovely.
What type of cookies work best for ice cream sandwiches?
Soft but sturdy cookies like sugar cookies, chocolate chip, or snickerdoodles hold up well. The cookies should have a slight chew without being too crumbly.
Can I prepare the cookie dough in advance?
Yes, the dough can be made and refrigerated or frozen for up to 3 days before rolling out and baking. Just let it sit at room temperature a bit before rolling for easier handling.
Pin This Recipe!
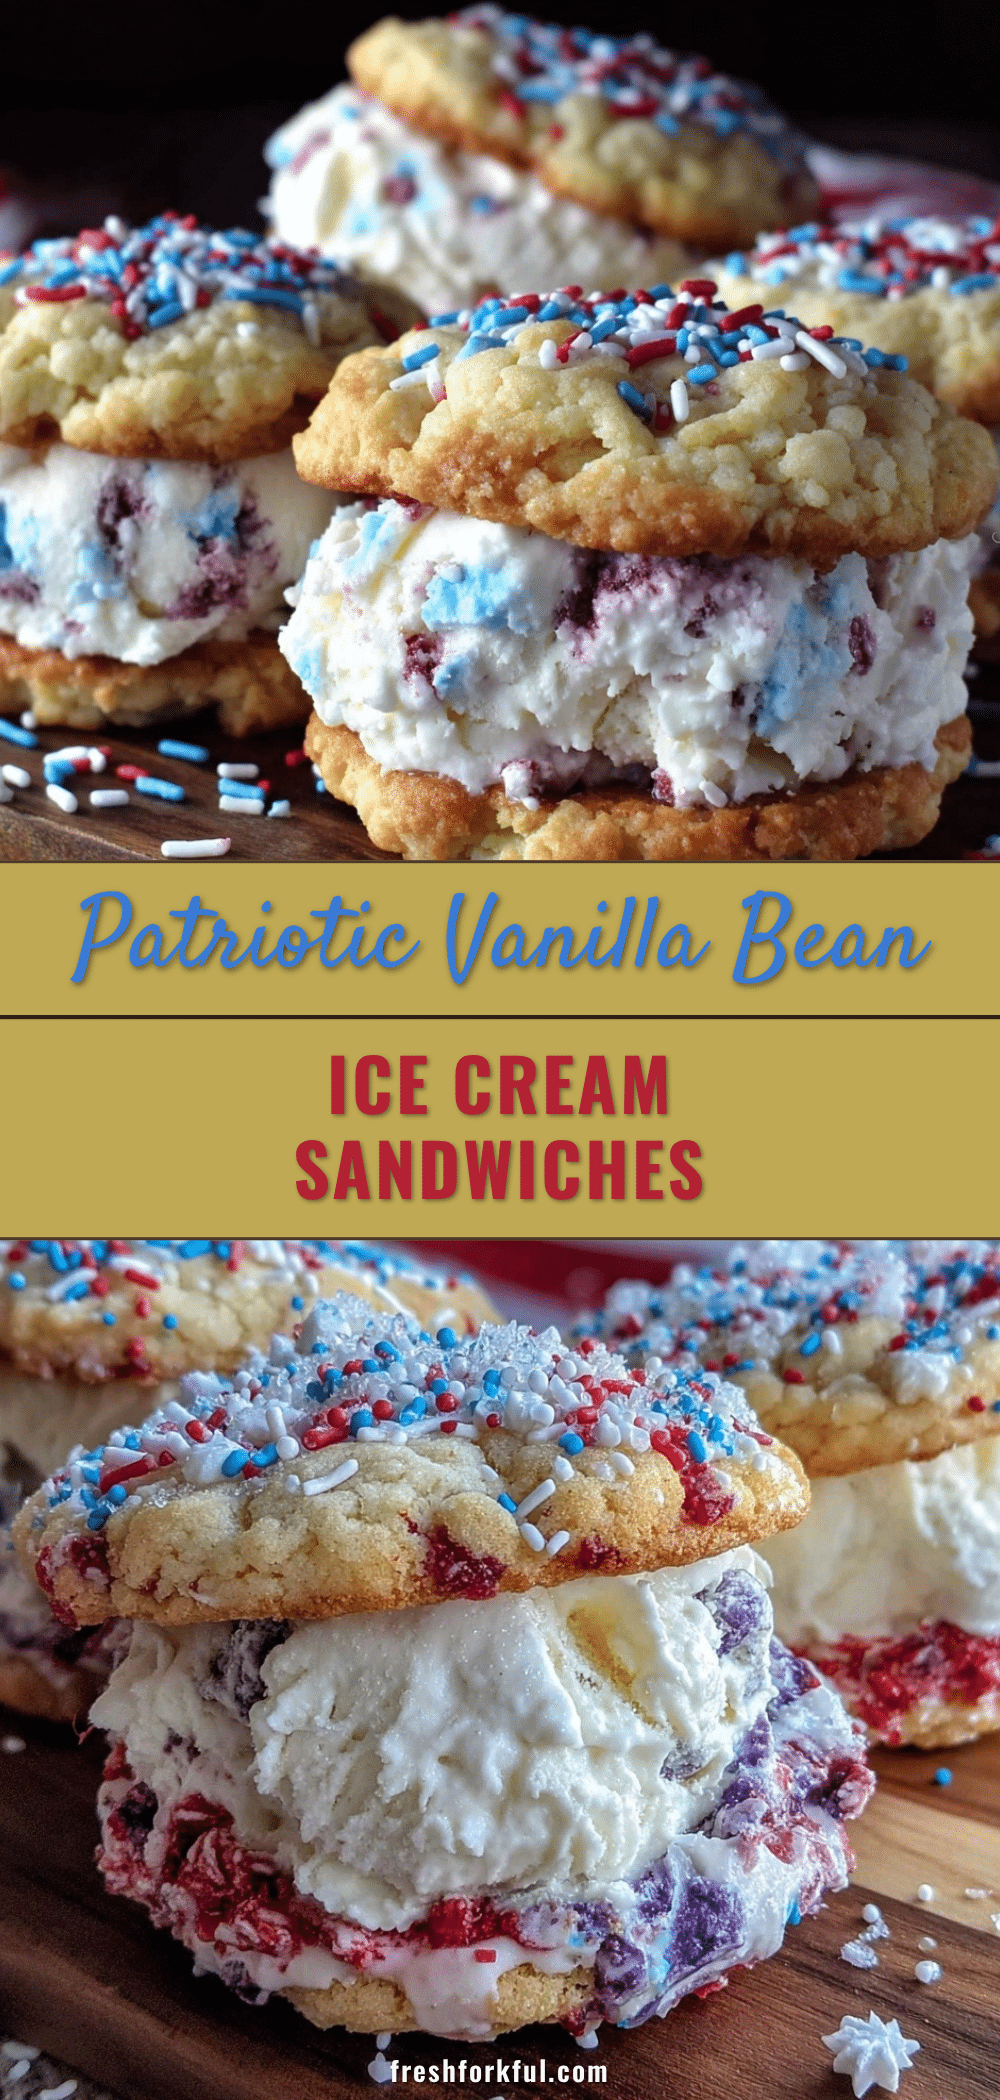
Perfect Homemade Vanilla Bean Ice Cream Sandwiches with Patriotic Sugar Cookies

A nostalgic summer treat featuring creamy vanilla bean ice cream sandwiched between soft, colorful patriotic sugar cookies. Perfect for backyard gatherings and festive celebrations.
- Prep Time: 1 hour 20 minutes
- Cook Time: 12 minutes
- Total Time: 2 hours 30 minutes
- Yield: 12 sandwiches 1x
- Category: Dessert
- Cuisine: American
Ingredients
- 3 cups (360 g) all-purpose flour, sifted
- 1 teaspoon baking powder
- ½ teaspoon salt
- 1 cup (227 g) unsalted butter, softened
- 1 ½ cups (300 g) granulated sugar
- 2 large eggs, room temperature
- 2 teaspoons pure vanilla extract or vanilla bean paste
- Red and blue gel food coloring, a few drops
- 2 cups (480 ml) heavy cream
- 1 cup (240 ml) whole milk
- ¾ cup (150 g) granulated sugar
- 1 large vanilla bean pod, split and seeds scraped (or 2 teaspoons vanilla extract)
- 5 large egg yolks
- Pinch of salt
Instructions
- Prepare the Patriotic Sugar Cookies Dough: In a bowl, whisk together flour, baking powder, and salt. In a mixer, beat softened butter with sugar until fluffy. Add eggs and vanilla extract, mix until combined. Gradually add dry ingredients and mix on low until incorporated. Divide dough into three equal portions.
- Color the Dough: Add red gel food coloring to one portion, blue to another, leave the third plain. Knead each gently until colors are even. Wrap in plastic and chill for at least 1 hour.
- Roll and Cut the Cookies: Preheat oven to 350°F (175°C). Roll each dough portion to ¼ inch thickness. Cut cookies with star-shaped or preferred cutters. Place on parchment-lined baking sheets 1 inch apart.
- Bake: Bake for 10-12 minutes until edges are golden but centers soft. Cool on baking sheets 5 minutes, then transfer to cooling racks to cool completely.
- Make the Vanilla Bean Ice Cream Base: In a saucepan, combine heavy cream, milk, sugar, vanilla bean seeds and pod. Heat until sugar dissolves and mixture is hot but not boiling. In a bowl, whisk egg yolks. Gradually temper yolks with hot cream mixture.
- Cook the Custard: Return tempered yolks to saucepan. Cook over low heat, stirring constantly until custard coats the back of a spoon (170-175°F). Remove from heat, strain custard, cool to room temperature.
- Chill and Churn: Refrigerate custard at least 4 hours or overnight. Churn in ice cream maker until soft-serve consistency. Alternatively, freeze in container, stirring every 30 minutes for 2-3 hours.
- Assemble the Sandwiches: Scoop ice cream onto flat side of one cookie, top with matching cookie, press gently. Wrap sandwiches in parchment or wax paper and freeze at least 30 minutes to set.
Notes
Chill the dough for at least one hour for easy rolling and clean edges. Use gel food coloring for vibrant colors without thinning dough. Temper eggs carefully to avoid curdling. Strain custard for silky smooth ice cream. Assemble sandwiches quickly to prevent melting. Wrap sandwiches individually to avoid freezer burn. No ice cream maker? Use no-churn method by stirring frozen custard every 30 minutes.
Nutrition
- Serving Size: 1 ice cream sandwich
- Calories: 275
- Sugar: 20
- Sodium: 120
- Fat: 15
- Saturated Fat: 9
- Carbohydrates: 30
- Fiber: 0.5
- Protein: 4
Keywords: vanilla bean ice cream sandwiches, patriotic sugar cookies, summer dessert, homemade ice cream, 4th of July treats, easy ice cream sandwiches