Love this? Save it for later!
Share the inspiration with your friends
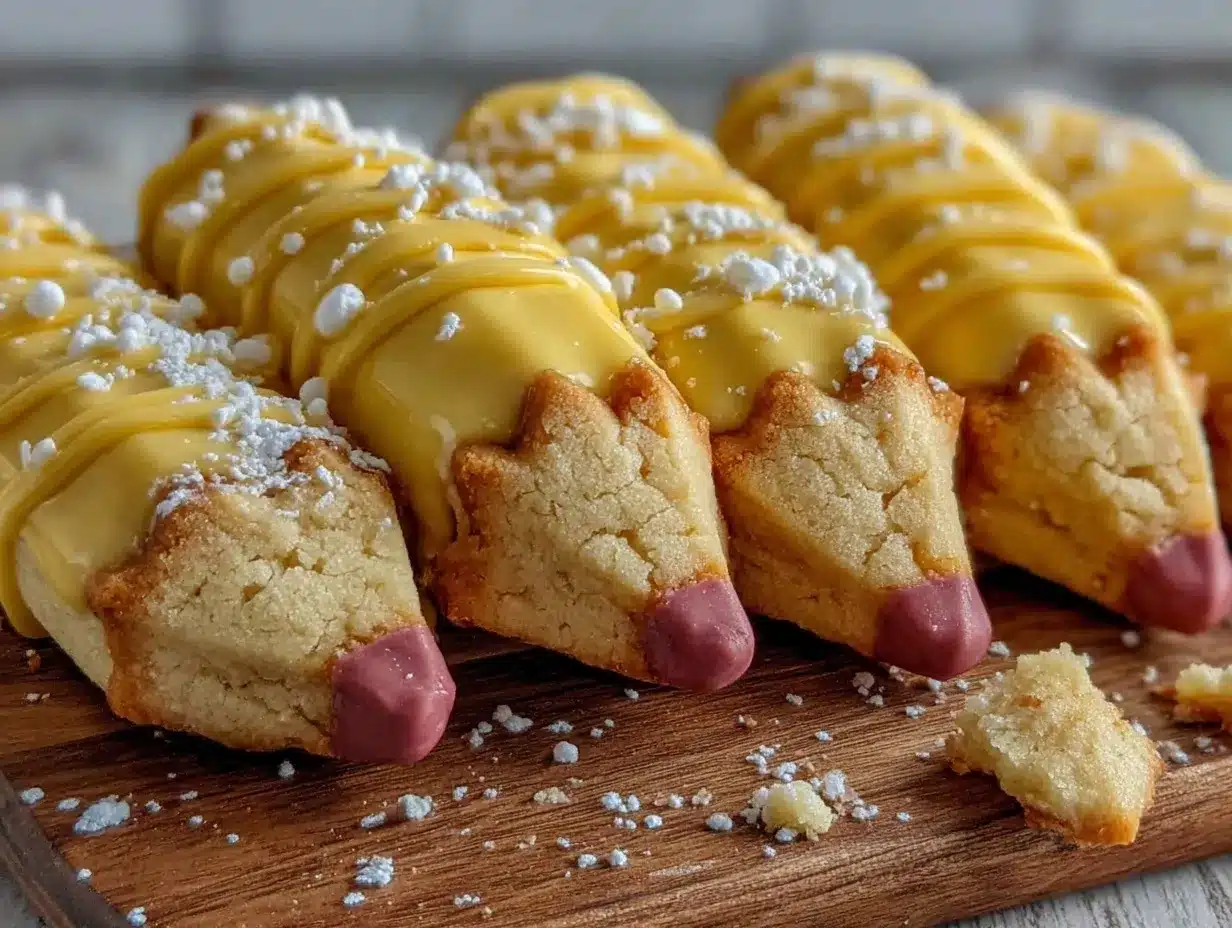
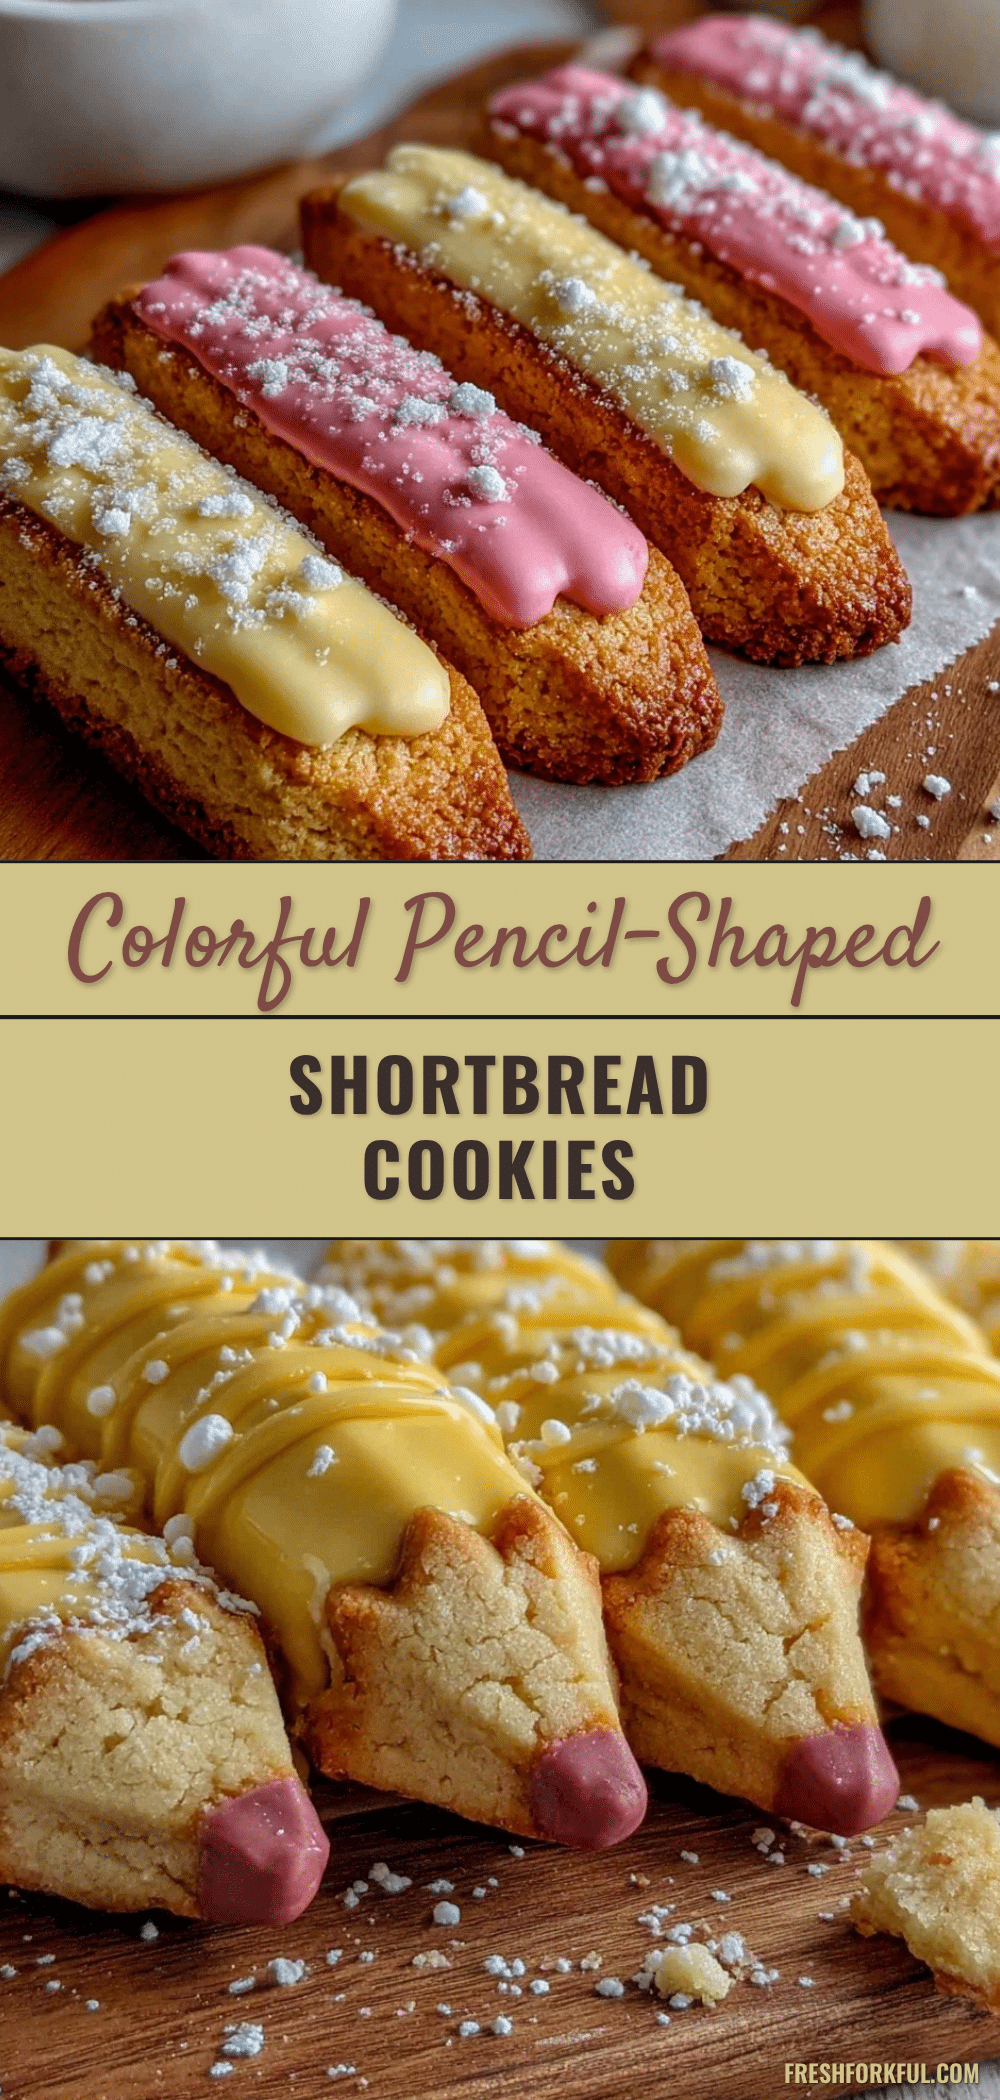
“You know, I never thought shortbread cookies could double as art,” my friend Lisa remarked one rainy Saturday afternoon. I had just pulled a tray of pencil-shaped shortbread cookies from the oven, their golden edges crisp and inviting. The kitchen smelled like buttery heaven, and the royal icing decorations gleamed with the precision of tiny, edible masterpieces. This recipe wasn’t something I set out to perfect on purpose. Honestly, it all began when a last-minute request for teacher appreciation gifts collided with my notoriously chaotic schedule.
Picture this: a cluttered kitchen table, a cracked mixing bowl that’s seen better days, and a recipe scribbled hastily in my notebook — half-covered with flour and a stray coffee ring. I was supposed to make classic shortbread, but then I thought, why not give them a fun twist? Shaping them like pencils seemed quirky enough to make the teachers smile, and the royal icing was just the right touch to bring them to life. I forgot to buy the food coloring at first, so there I was, mixing dyes with what I had on hand — a little too much yellow, a splash of red, and a stubborn blob of green that refused to blend smoothly. The result? A batch of cookies that looked charmingly imperfect but tasted absolutely heavenly.
Maybe you’ve been there — juggling deadlines, craving a sweet creative outlet, and ending up with something unexpectedly wonderful. These perfect pencil-shaped shortbread cookies with royal icing have since become my go-to for gifting and celebrations. They’re simple enough for a weekday project but detailed enough to impress without stress. Let me tell you, once you try this recipe, you’ll find yourself sneaking a bite or two before decorating even begins. And that buttery, crumbly texture? It’s like a nostalgic hug from the oven. So, shall we get baking?
Why You’ll Love This Recipe
After testing this recipe through many trials (and a few frosting mishaps), I can confidently say it’s one of my all-time favorites. There’s something so satisfying about making shortbread cookies that aren’t just tasty but also double as little works of art. Here’s why this recipe stands out in my collection:
- Quick & Easy: The dough comes together in under 15 minutes, making it perfect for last-minute gift ideas or spontaneous baking sessions.
- Simple Ingredients: You probably have all the pantry staples already—no need for fancy or hard-to-find items.
- Perfect for Gifting: Pencil-shaped cookies are ideal for teacher appreciation, back-to-school parties, or even office treats.
- Crowd-Pleaser: Kids and adults alike love the buttery, crumbly texture paired with the sweet, smooth royal icing.
- Unbelievably Delicious: The balance between tender shortbread and the slightly crisp icing creates a delightful contrast that keeps you coming back for more.
This isn’t just another shortbread recipe. The precise dough consistency makes shaping these pencils easy without losing that melt-in-your-mouth crumb. Plus, the royal icing recipe here is tested to dry hard enough to stack the cookies without smudging, which is a lifesaver for packaging. Honestly, it’s like combining simplicity with a playful flair. Whether you’re an experienced baker or just starting, these cookies feel both achievable and special—a little project that turns into a big hit.
What Ingredients You Will Need
This recipe uses simple, wholesome ingredients to deliver bold flavor and satisfying texture without the fuss. Most are pantry staples, and the royal icing calls for basic baking essentials you might already have. Here’s what you’ll need to create these perfect pencil-shaped shortbread cookies with royal icing:
- Unsalted butter, softened (adds richness and buttery flavor; I prefer Plugrá for smooth creaming)
- Granulated sugar (for sweetness and slight crunch)
- Pure vanilla extract (boosts flavor; use a good-quality brand like McCormick)
- All-purpose flour (provides structure; sifted for a tender crumb)
- Salt (balances sweetness and enhances flavor)
For the royal icing:
- Powdered sugar (sifted to avoid lumps)
- Pasteurized egg whites or meringue powder (for stability and smooth texture)
- Lemon juice or water (to adjust consistency)
- Food coloring gels (I like AmeriColor gels for vibrant, concentrated color without watering down the icing)
Optional for decoration:
- Edible gold dust or shimmer (for a fancy touch on the pencil tips)
- Black edible marker (to draw fine details like the pencil lines)
If you prefer a dairy-free option, swap the butter for vegan margarine or coconut oil, but keep in mind this might slightly alter the texture. For a gluten-free version, almond flour can be used with some adjustments, though the shaping might be trickier.
Equipment Needed
- Mixing bowls: One large bowl for the dough, and a smaller one for the icing.
- Electric mixer or stand mixer: Helps cream butter and sugar smoothly. I’ve used both — stand mixers are a dream, but hand mixers do the job just fine.
- Rolling pin: Essential for rolling dough evenly. A textured rolling pin can also add subtle patterns if you want to experiment.
- Pencil-shaped cookie cutter: You can find these online or at specialty baking stores. If unavailable, a small rectangular cutter plus a knife to shape the tips works.
- Baking sheets: Non-stick or lined with parchment paper to prevent sticking and promote even baking.
- Piping bags and tips: For precise royal icing application. A small round tip (#1 or #2) is best for details.
- Cooling racks: To let cookies cool completely before decorating.
If you don’t have a cookie cutter, no worries! A butter knife and a steady hand do wonders (I’ve been there). For piping bags, disposable ones are budget-friendly and clean-up is a breeze. Keep your tools clean and dry for the best icing results — a little moisture can throw off the consistency.
Preparation Method
- Cream the butter and sugar: In a large bowl, beat 1 cup (227 g) of softened unsalted butter with ¾ cup (150 g) granulated sugar using an electric mixer on medium speed until light and fluffy, about 3-4 minutes. The mixture should look pale and feel airy — this step is key for tender shortbread.
- Add vanilla extract: Beat in 1 teaspoon (5 ml) pure vanilla extract until combined. It’s amazing how this simple addition deepens the flavor.
- Incorporate dry ingredients: In a separate bowl, whisk together 2 ¼ cups (280 g) all-purpose flour and ¼ teaspoon (1.5 g) salt. Gradually add the dry mix to the wet mixture, mixing on low until just combined. Avoid overmixing — the dough should be soft but not sticky, and hold together when pressed.
- Chill the dough: Gather the dough into a ball, flatten into a disk, wrap in plastic wrap, and refrigerate for at least 1 hour. This firms up the dough, making it easier to roll and shape without losing its buttery texture.
- Preheat oven and prepare baking sheets: Set your oven to 325°F (163°C). Line baking sheets with parchment paper or silicone mats.
- Roll out and cut shapes: On a lightly floured surface, roll the dough to about ¼-inch (6 mm) thickness. Use the pencil-shaped cookie cutter to cut out cookies, placing them about 1 inch (2.5 cm) apart on the baking sheets. If you don’t have a cutter, cut rectangles about 3 inches (7.5 cm) long, then gently taper one end to mimic a pencil tip.
- Bake: Bake for 15-18 minutes, or until the edges turn a light golden brown. The cookies will still feel soft but will firm up as they cool.
- Cool completely: Transfer cookies to a cooling rack to cool fully before decorating — patience here is crucial to prevent icing from melting.
- Prepare royal icing: In a clean bowl, beat 3 cups (360 g) powdered sugar with 3 tablespoons (45 ml) pasteurized egg whites or 2 teaspoons meringue powder mixed with 5 tablespoons (75 ml) water. Add 1 teaspoon (5 ml) lemon juice for brightness. Beat until stiff peaks form, about 7-10 minutes. Adjust consistency by adding water or sugar to get a smooth, pipeable texture (think toothpaste consistency for outlining, thinner for flooding).
- Color the icing: Divide icing into small bowls and tint with gel food coloring — yellow for the pencil body, pink or red for the eraser, gray or black for the graphite tip, and white for highlights.
- Decorate: Using piping bags with small round tips, outline each cookie section first. Let the outlines dry for 10-15 minutes, then flood the spaces with thinner icing. Use a toothpick to spread and pop bubbles. After the base dries, add details like pencil lines or shading. Let the cookies dry completely overnight or for at least 6 hours.
Pro tip: If your royal icing is too runny, add more powdered sugar; if it’s too stiff, add drops of water carefully. Also, keep unused icing covered with a damp cloth to prevent drying out. And hey, don’t stress if your first batch looks a little messy — I’ve been there and learned that practice makes prettier pencils!
Cooking Tips & Techniques
Making these pencil-shaped shortbread cookies with royal icing can seem tricky at first glance, but a few tricks make the process smooth and enjoyable. Here’s what I’ve learned:
- Chilling is your friend: Don’t skip chilling the dough! It makes the rolling and cutting much easier and prevents spreading during baking.
- Use room temperature butter: It creams better with sugar, giving you that light texture. Cold butter won’t mix well, and melted butter can make the dough too soft.
- Roll evenly: Uneven dough thickness means uneven baking. Use rolling pin guides or a ruler to ensure uniform thickness around ¼ inch (6 mm).
- Practice piping on parchment: Before decorating your cookies, test your royal icing flow on parchment paper. This helps you get the feel for pressure and speed.
- Don’t rush icing drying: Let each layer dry before adding details. It prevents colors from bleeding and helps maintain crisp lines.
- Messes happen: I once knocked over a piping bag full of red icing mid-decorating. Clean it up quickly with a damp cloth and keep a spare icing batch ready if possible.
- Keep your workspace dry: Humidity affects royal icing drying time. Use a fan or air conditioner if needed to help speed drying.
Timing is everything here — baking, cooling, and decorating require patience, but the results are worth it. Multitasking helps; I usually bake the next batch while decorating the first, but I always make sure to cool cookies completely first.
Variations & Adaptations
These perfect pencil-shaped shortbread cookies are surprisingly versatile. Here are some ways to tweak the recipe to fit your needs or mood:
- Flavor twist: Add a teaspoon of almond extract or lemon zest to the dough for a subtle flavor boost that pairs beautifully with the icing.
- Gluten-free option: Substitute all-purpose flour with a gluten-free baking blend. The texture will be slightly different but still delightful.
- Vegan adaptation: Replace butter with coconut oil or vegan margarine, and use aquafaba (chickpea water) instead of egg whites for royal icing. The drying time may be longer, so plan accordingly.
- Seasonal designs: Instead of pencils, shape the cookies into crayons, paintbrushes, or even apples for back-to-school themes. Change the icing colors to match.
- Texture variation: Press finely chopped nuts into the dough edges before baking for an added crunch and nutty aroma.
Personally, I once swapped the yellow icing for pastel shades to make these cookies for a spring classroom party. The kids loved the softer colors, and it was fun to experiment with different piping techniques. Feel free to customize based on your occasion or taste buds!
Serving & Storage Suggestions
These cookies are best enjoyed fresh but store wonderfully if handled right. Here’s how I serve and keep them:
- Serving: Room temperature is ideal. The royal icing is crisp, and the shortbread is tender. Arrange them on a colorful platter for parties or wrap individually in clear cellophane bags tied with ribbon for gifting.
- Pairings: These cookies go great with a cup of hot tea, coffee, or even a cold glass of milk — perfect for an afternoon snack or school event.
- Storage: Store cookies in an airtight container at room temperature for up to 5 days. If your kitchen is humid, keep them in the fridge but bring to room temperature before serving to soften the shortbread slightly.
- Freezing: Freeze undecorated cookies in a single layer for up to 3 months. Decorate after thawing for best icing results. You can also freeze decorated cookies, but place parchment between layers to prevent sticking.
- Reheating: Shortbread is best not reheated, but if you want a warm treat, pop a cookie in the microwave for 5-7 seconds—just enough to soften the center without melting the icing.
Over time, the icing hardens further, which makes these cookies perfect for mailing or transporting. The flavors meld beautifully after a day or two, making them even more enjoyable if you can wait that long!
Nutritional Information & Benefits
Per cookie (based on 24 cookies per batch): approximately 120 calories, 6g fat, 15g carbohydrates, 1g protein.
Shortbread is rich in butter, making it a satisfying treat that’s indulging but not over-the-top. Using unsalted butter gives you control over sodium. The royal icing adds sweetness but in moderate amounts since the cookies themselves are subtly sweet.
This recipe is naturally gluten-containing, but as mentioned, substitutions are possible for gluten-free and vegan diets. Just be mindful of egg whites in the icing if you have allergies; meringue powder or aquafaba are good alternatives.
From my wellness perspective, these cookies are a once-in-a-while joy, perfect for sharing and celebrating without guilt. Baking them also offers a comforting, mindful activity that I treasure.
Conclusion
To wrap it up, these perfect pencil-shaped shortbread cookies with royal icing are both charming and delicious — a combination that makes baking truly rewarding. Whether you’re crafting them for a special occasion, a thoughtful gift, or simply a fun weekend project, the recipe strikes just the right balance between approachable and impressive.
Feel free to tweak the colors, flavors, or shapes to suit your style. I love how these cookies bring a little whimsy to the table, and honestly, they make me smile every time I see them. Now it’s your turn to make some magic in the kitchen!
Let me know how your pencil-shaped shortbread cookies turn out or if you have your own decorating tips to share — I’m always excited to hear from fellow bakers!
FAQs
Can I make the dough ahead of time?
Yes! You can prepare the dough and refrigerate it for up to 48 hours before rolling and cutting. Just bring it to room temperature for about 10 minutes before rolling.
What if I don’t have pasteurized egg whites for royal icing?
You can substitute with meringue powder mixed according to package instructions or use aquafaba (chickpea water) as a vegan option, though drying time may be longer.
How do I prevent the royal icing from cracking?
Make sure the icing isn’t too thick or too thin. Keep it covered when not in use to prevent drying out, and let each layer dry completely before adding more details.
Can I use store-bought icing instead of making royal icing?
While store-bought icing can work in a pinch, it typically doesn’t dry as hard or hold details as well as homemade royal icing, especially for intricate designs.
How should I store decorated cookies if I want to keep them fresh longer?
Store them in an airtight container at room temperature for up to 5 days. If your kitchen is humid, refrigerate and bring to room temperature before serving to enjoy the best texture.
Pin This Recipe!
Perfect Pencil-Shaped Shortbread Cookies
These pencil-shaped shortbread cookies with royal icing are buttery, crumbly, and decorated to look like tiny edible masterpieces. Perfect for gifting, celebrations, or a fun baking project.
- Prep Time: 15 minutes
- Cook Time: 15-18 minutes
- Total Time: 1 hour 45 minutes
- Yield: 24 cookies 1x
- Category: Dessert
- Cuisine: American
Ingredients
- 1 cup (227 g) unsalted butter, softened
- 3/4 cup (150 g) granulated sugar
- 1 teaspoon (5 ml) pure vanilla extract
- 2 1/4 cups (280 g) all-purpose flour, sifted
- 1/4 teaspoon (1.5 g) salt
- 3 cups (360 g) powdered sugar, sifted (for royal icing)
- 3 tablespoons (45 ml) pasteurized egg whites or 2 teaspoons meringue powder mixed with 5 tablespoons (75 ml) water
- 1 teaspoon (5 ml) lemon juice or water (for royal icing consistency)
- Food coloring gels (yellow, pink/red, gray/black, white)
- Optional: edible gold dust or shimmer
- Optional: black edible marker
Instructions
- Cream the butter and sugar: Beat 1 cup softened unsalted butter with 3/4 cup granulated sugar using an electric mixer on medium speed until light and fluffy, about 3-4 minutes.
- Add vanilla extract and beat until combined.
- In a separate bowl, whisk together 2 1/4 cups all-purpose flour and 1/4 teaspoon salt.
- Gradually add the dry mix to the wet mixture, mixing on low until just combined. Dough should be soft but not sticky.
- Gather dough into a ball, flatten into a disk, wrap in plastic wrap, and refrigerate for at least 1 hour.
- Preheat oven to 325°F (163°C). Line baking sheets with parchment paper or silicone mats.
- Roll dough on a lightly floured surface to about 1/4 inch (6 mm) thickness.
- Cut out pencil shapes using a pencil-shaped cookie cutter or cut rectangles about 3 inches long and taper one end to mimic a pencil tip.
- Place cookies about 1 inch apart on baking sheets.
- Bake for 15-18 minutes until edges are light golden brown. Cookies will be soft but firm up as they cool.
- Transfer cookies to a cooling rack to cool completely before decorating.
- Prepare royal icing: Beat 3 cups powdered sugar with 3 tablespoons pasteurized egg whites (or meringue powder mixture) and 1 teaspoon lemon juice until stiff peaks form, about 7-10 minutes. Adjust consistency with water or sugar as needed.
- Divide icing into bowls and tint with gel food coloring for pencil body (yellow), eraser (pink/red), graphite tip (gray/black), and highlights (white).
- Decorate cookies by outlining each section with piping bags and small round tips. Let outlines dry 10-15 minutes, then flood with thinner icing. Use a toothpick to spread and pop bubbles.
- After base dries, add details like pencil lines or shading. Let cookies dry completely overnight or at least 6 hours.
Notes
Chill dough for at least 1 hour to prevent spreading. Use room temperature butter for best creaming. Practice piping on parchment paper before decorating cookies. Let each icing layer dry completely before adding details to prevent bleeding. Store cookies in airtight container at room temperature up to 5 days or freeze undecorated cookies up to 3 months. For vegan adaptation, use coconut oil or vegan margarine and aquafaba instead of egg whites in icing.
Nutrition
- Serving Size: 1 cookie
- Calories: 120
- Fat: 6
- Carbohydrates: 15
- Protein: 1
Keywords: shortbread cookies, pencil-shaped cookies, royal icing, teacher appreciation, back-to-school treats, buttery cookies, easy cookie recipe