Love this? Save it for later!
Share the inspiration with your friends
“I wasn’t expecting to become the neighborhood snack hero that Saturday afternoon,” I admit. It all started with a last-minute invitation to a block party—big crowd, no time, and honestly, zero desire to turn on the oven in the middle of summer. My mind raced through the usual suspects: chips, cookies, maybe some fruit. Then I remembered a scribbled note tucked inside an old recipe journal from my college roommate, who swore by a simple, no-fuss snack that always went fast at gatherings: Easy No-Bake Peanut Butter Oat Bars for Big Groups.
The charm? No baking, just mixing, chilling, and slicing. I pulled out the ingredients, whisked everything together, and by the time the first guests arrived, I had a tray of chewy, nutty bars ready to go. You know that feeling when a recipe just clicks? It was that moment of relief and delight when people started asking for seconds, and I realized this no-bake recipe was a keeper. Maybe you’ve been there—facing a crowd and needing something quick, tasty, and crowd-pleasing without a ton of hassle.
Honestly, these Easy No-Bake Peanut Butter Oat Bars have stuck with me ever since. They’re perfect for big groups, potlucks, or anytime you want a homemade treat that’s as satisfying as it is simple. Let me tell you, once you try these bars, you’ll understand why they became my go-to for feeding a hungry crowd without any stress or oven battles.
Why You’ll Love This Recipe
After making these Easy No-Bake Peanut Butter Oat Bars for years, I can confidently say they’re a gem for several reasons. From the first batch to the last, this recipe has been tested in kitchens ranging from cramped apartment counters to spacious backyard parties. It’s simple, reliable, and honestly, a total crowd-pleaser.
- Quick & Easy: Comes together in under 15 minutes—perfect for busy weeknights or last-minute potlucks where time is tight.
- Simple Ingredients: Uses pantry staples like oats and peanut butter, so no frantic grocery runs required.
- Perfect for Big Groups: Scales up effortlessly, which means you can feed a crowd without breaking a sweat.
- Crowd-Pleaser: Kids and adults alike go crazy for the chewy texture and balanced sweetness—always a hit.
- Unbelievably Delicious: The combo of creamy peanut butter with hearty oats and a hint of vanilla makes every bite comforting without being overly sweet.
What sets this recipe apart is the no-bake method that keeps things cool and straightforward, especially when you’re dealing with a crowd and limited oven space. Plus, I add a pinch of salt to balance the sweetness, a little trick I picked up from a chef friend that takes the flavor from good to “wow.” This isn’t just another peanut butter oat bar—it’s the version I trust to impress without the fuss. So whether you’re planning a picnic, a school event, or just need a snack stash for a family gathering, this recipe has got your back.
What Ingredients You Will Need
This recipe relies on simple, wholesome ingredients to deliver a satisfying texture and bold flavor without any fuss. Most are pantry staples, and substitutions are straightforward if needed.
- Old-Fashioned Rolled Oats (3 cups / 270 grams) – Use rolled oats for the best chewy texture, not instant oats.
- Natural Peanut Butter (1 cup / 250 grams) – Creamy or chunky works; I prefer natural for that pure peanut flavor without added sugars.
- Honey (½ cup / 120 ml) – Acts as the natural sweetener and binder; swap with maple syrup for a vegan option.
- Unsalted Butter (4 tablespoons / 57 grams) – Softened; helps with richness and sets the bars nicely.
- Vanilla Extract (1 teaspoon) – Adds depth to the flavor profile; use pure vanilla for best results.
- Salt (¼ teaspoon) – Just a pinch to balance the sweetness, especially important if your peanut butter is unsalted.
- Mini Chocolate Chips (optional, ½ cup / 90 grams) – For a touch of indulgence; can be omitted or replaced with chopped nuts.
For a gluten-free version, make sure your oats are certified gluten-free. If you’re looking to switch things up, almond or cashew butter can substitute peanut butter, though the flavor and texture will shift slightly. I usually recommend Smucker’s Natural Peanut Butter for its smoothness and clean ingredient list, but any good-quality brand will do. The honey you choose can also subtly change the sweetness level, so taste as you go if you’re tweaking this for your crowd.
Equipment Needed
Making these Easy No-Bake Peanut Butter Oat Bars doesn’t call for fancy tools, which is part of what makes the recipe so accessible. Here’s what you’ll want on hand:
- Mixing Bowl: A large bowl for combining ingredients. Glass or stainless steel works well.
- Measuring Cups and Spoons: For accuracy—especially important with sticky ingredients like honey.
- Wooden Spoon or Silicone Spatula: To mix everything evenly without scraping the sides too much.
- 8×8-inch or 9×9-inch Baking Pan: Preferably with straight sides for easy slicing; you can line it with parchment paper for easy removal.
- Microwave-Safe Bowl (optional): For gently melting butter if needed.
If you don’t have a silicone spatula, a sturdy wooden spoon will do just fine. For an even easier cleanup, I like lining the pan with parchment—it’s a small step that saves a lot of scrubbing later. No specialized equipment means you can whip these bars up anywhere, from your home kitchen to a friend’s house without missing a beat.
Preparation Method
- Prepare Your Pan (5 minutes): Line an 8×8-inch (20×20 cm) baking pan with parchment paper, leaving some overhang on the sides for easy lifting later. This little step makes slicing and serving so much easier.
- Mix Wet Ingredients (3 minutes): In your large mixing bowl, combine 1 cup (250 grams) natural peanut butter, ½ cup (120 ml) honey, 4 tablespoons (57 grams) softened unsalted butter, 1 teaspoon vanilla extract, and ¼ teaspoon salt. Stir until smooth and fully combined. If the butter is too firm, microwave it in 15-second bursts until just melted but not hot.
- Add Oats (2 minutes): Gradually fold in 3 cups (270 grams) old-fashioned rolled oats. Mix gently but thoroughly so every oat is coated in the peanut butter mixture. The blend should be sticky and hold together when pressed.
- Optional Chocolate Chips (1 minute): If using, fold in ½ cup (90 grams) mini chocolate chips. Adding them last prevents melting and keeps their shape.
- Press Into Pan (5 minutes): Transfer the mixture into your prepared pan. Using a spatula or your hands (lightly greased), press the mixture firmly and evenly into the pan. Pressing hard is key to ensuring the bars hold together after chilling.
- Chill and Set (at least 2 hours): Place the pan in the refrigerator for a minimum of 2 hours. This step firms up the bars so they slice cleanly. If you’re in a hurry, pop them in the freezer for 45 minutes, but watch closely so they don’t freeze solid.
- Slice and Serve: Lift the bars out using the parchment overhang. Slice into 12-16 bars depending on your preferred size. Store leftovers in an airtight container in the fridge.
If the mixture feels too crumbly, add a tablespoon of honey or peanut butter until it sticks together better. Conversely, if it’s too sticky, a few extra oats can balance it out. Trust your instincts here—you want the texture to be firm but chewy, not dry or overly soft. Also, pressing firmly into the pan is a trick I learned the hard way (once ended up with crumbly bars that fell apart mid-potluck!).
Cooking Tips & Techniques
Making no-bake bars might seem straightforward, but a few insider tips can make all the difference between a so-so batch and truly delicious bars that hold together well.
- Use Rolled Oats, Not Quick or Instant: Quick oats absorb liquid differently and can make the bars mushy. Rolled oats provide the chewy texture that makes every bite satisfying.
- Softened Butter Is Your Friend: If the butter is too cold, it won’t mix well with the peanut butter and honey. I usually leave mine out for 15 minutes or use the microwave in short bursts.
- Press Firmly Into the Pan: Don’t be shy about packing the mixture down. This prevents crumbly bars and makes slicing easier later.
- Chill Long Enough: Patience is key. Chilling allows the fats to solidify and the bars to set. Rushing this step often leads to bars falling apart.
- Keep the Bars Refrigerated: They’re best served cold or at room temperature but should stay chilled between servings to maintain shape.
- Don’t Skip the Salt: A little salt balances the sweetness and enhances the peanut flavor. It’s a small detail that makes a big difference.
Once, I tried doubling the recipe without adjusting the mixing bowl size and ended up with a sticky mess everywhere. Lesson learned: always mix in a bowl big enough to handle the volume comfortably. Also, if you want to speed up the chilling time, divide the mixture into two smaller pans instead of one large one.
Variations & Adaptations
This recipe is a fantastic base for customization, so feel free to make it your own. Here are a few ideas I’ve tried or recommend:
- Chocolate Lover’s Version: Add ¼ cup (22 grams) unsweetened cocoa powder to the wet mixture and increase chocolate chips to ¾ cup (135 grams) for a richer bar.
- Nut-Free Adaptation: Substitute sunflower seed butter for peanut butter and use pumpkin seeds or dried fruit instead of nuts, great for allergy-friendly gatherings.
- Seasonal Twist: Stir in ½ cup (75 grams) dried cranberries or chopped apricots for a fruity bite, perfect for holiday parties.
- Boost the Protein: Add 2 tablespoons (15 grams) chia seeds or ground flaxseed for an extra nutritional punch without changing texture much.
- Vegan Version: Swap honey with maple syrup and use vegan butter or coconut oil instead of butter.
I personally love the chocolate and cranberry combo when making these bars for winter picnics—it feels festive and adds a lovely tang against the sweet peanut butter. These bars also adapt well if you want to bake them for a firmer texture, but honestly, the no-bake ease is part of their charm.
Serving & Storage Suggestions
These bars are best served chilled or at room temperature. When I serve them at parties, I like to arrange them on a platter with a few fresh fruit slices or a handful of nuts for contrast. They pair wonderfully with a cup of coffee or cold milk, making them a versatile snack for any time of day.
To store, keep the bars in an airtight container in the refrigerator for up to one week. They also freeze well—wrap individual bars in parchment and place them in a freezer-safe bag for up to three months. When ready to eat, thaw in the fridge overnight or at room temperature for 30 minutes.
Flavors tend to meld and deepen after a day or two in the fridge, so if you can wait, the bars taste even better the next day. Just remember to keep them cool; the peanut butter can soften and get oily if left out too long on a warm day.
Nutritional Information & Benefits
Each bar (assuming 12 bars per batch) contains approximately:
| Nutrient | Amount per Bar |
|---|---|
| Calories | 190 kcal |
| Protein | 5 grams |
| Fat | 10 grams |
| Carbohydrates | 20 grams |
| Fiber | 3 grams |
| Sugar | 9 grams |
Thanks to the oats and natural peanut butter, these bars provide a good mix of fiber and protein, helping keep you full longer. The simple ingredients mean you avoid the additives and preservatives found in many store-bought bars. Plus, oats are known for their heart-healthy benefits, while peanut butter adds healthy fats and essential nutrients like magnesium and vitamin E.
Just a heads up: This recipe contains nuts and dairy, so it’s not suitable for those with allergies. If that’s a concern, try the nut-free and vegan adaptations mentioned above.
Conclusion
Easy No-Bake Peanut Butter Oat Bars for Big Groups are the kind of recipe that makes feeding a crowd feel effortless and enjoyable. They’re quick, simple, and satisfyingly tasty—a rare combo when you’re juggling kitchen chaos and hungry guests. I love how they bring everyone together, from kids sneaking seconds to adults grabbing a quick energy boost.
Feel free to tweak the ingredients to match your taste or dietary needs—this recipe is forgiving and flexible, just like a good friend. If you try it, I’d love to hear how you made it your own or what crowd it wowed. Leave a comment below or share your favorite twist. Trust me, once you get these bars on your snack rotation, you’ll wonder how you ever hosted without them!
FAQs
Can I use crunchy peanut butter instead of creamy?
Absolutely! Crunchy peanut butter adds a nice texture, but make sure it’s well mixed in so the bars stick together well.
How long do these bars stay fresh?
Stored in an airtight container in the fridge, they last about a week. For longer storage, freeze them for up to three months.
What if I don’t have honey?
Maple syrup or agave nectar work great as vegan-friendly alternatives and provide similar sweetness and binding properties.
Can I make these bars nut-free?
Yes! Substitute peanut butter with sunflower seed butter and add seeds or dried fruit instead of nuts for allergy-friendly bars.
Is there a way to make these bars less sweet?
Try reducing the honey by a couple of tablespoons and adding a pinch more salt to balance. You can also skip the chocolate chips or use dark chocolate for less sweetness.
Thinking about other simple crowd-pleasers? You might enjoy my crispy garlic chicken or my go-to classic homemade mac and cheese for easy, comforting meals that impress without stress.
Pin This Recipe!
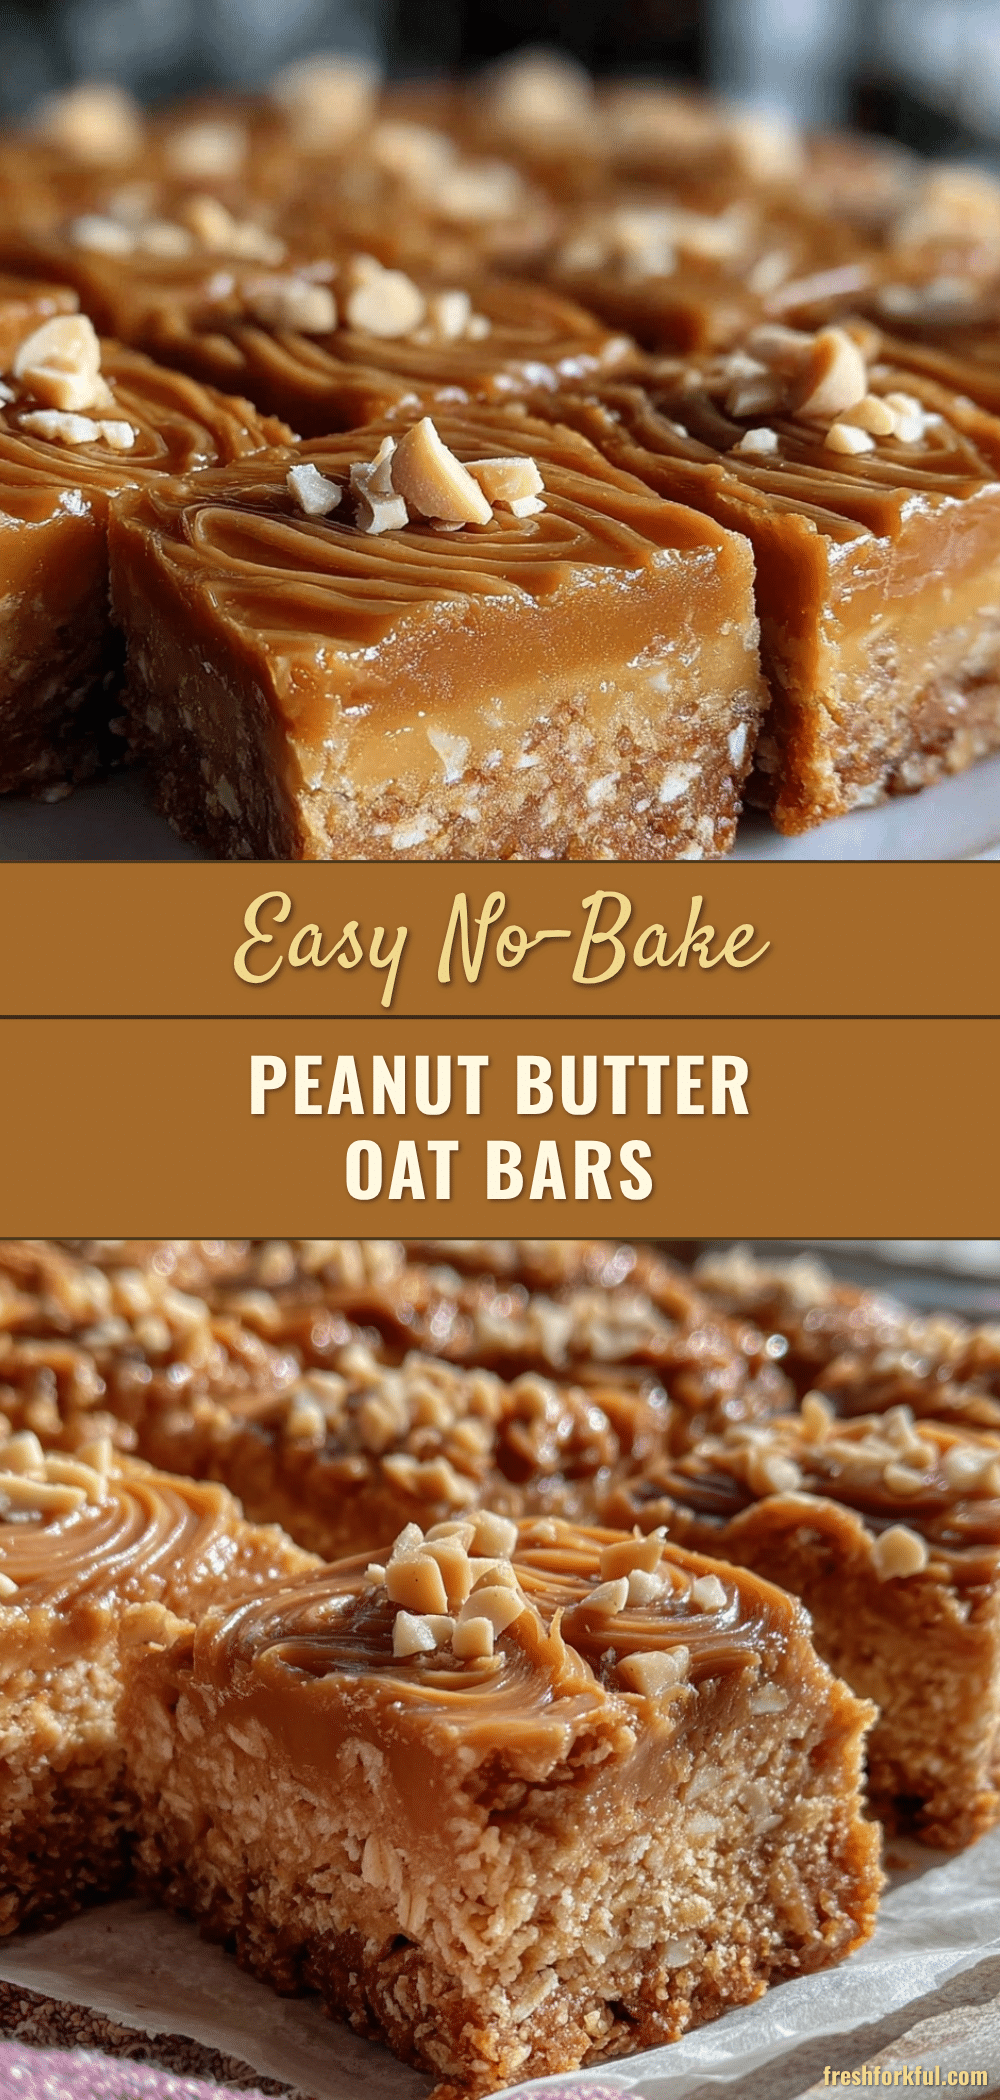
Easy No-Bake Peanut Butter Oat Bars Recipe Perfect for Big Groups
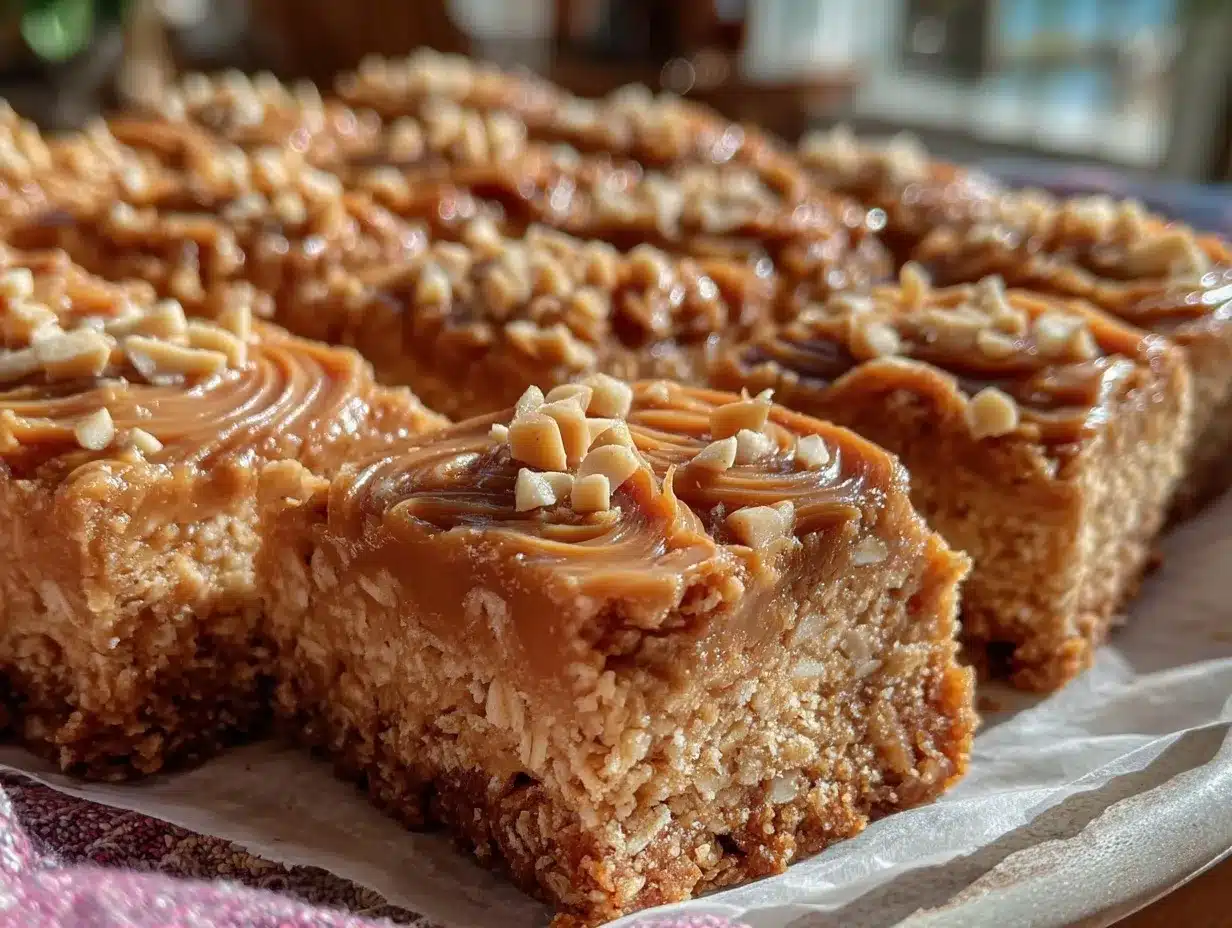
These no-bake peanut butter oat bars are quick, simple, and perfect for feeding big groups. They combine creamy peanut butter with hearty oats and a hint of vanilla for a chewy, crowd-pleasing snack.
- Prep Time: 15 minutes
- Cook Time: 0 minutes
- Total Time: 2 hours 15 minutes
- Yield: 12-16 bars 1x
- Category: Snack
- Cuisine: American
Ingredients
- 3 cups (270 grams) old-fashioned rolled oats
- 1 cup (250 grams) natural peanut butter (creamy or chunky)
- ½ cup (120 ml) honey (or maple syrup for vegan option)
- 4 tablespoons (57 grams) unsalted butter, softened
- 1 teaspoon vanilla extract
- ¼ teaspoon salt
- ½ cup (90 grams) mini chocolate chips (optional)
Instructions
- Line an 8×8-inch (20×20 cm) baking pan with parchment paper, leaving some overhang on the sides for easy lifting.
- In a large mixing bowl, combine peanut butter, honey, softened butter, vanilla extract, and salt. Stir until smooth and fully combined. If butter is too firm, microwave in 15-second bursts until just melted but not hot.
- Gradually fold in the rolled oats, mixing gently but thoroughly until every oat is coated and the mixture is sticky and holds together when pressed.
- If using, fold in mini chocolate chips last to prevent melting.
- Transfer the mixture into the prepared pan and press firmly and evenly using a spatula or lightly greased hands.
- Chill in the refrigerator for at least 2 hours to set. Alternatively, freeze for 45 minutes but do not let freeze solid.
- Lift the bars out using the parchment overhang and slice into 12-16 bars depending on preferred size.
- Store leftovers in an airtight container in the refrigerator.
Notes
Use rolled oats for best chewy texture, not instant oats. Press mixture firmly into pan to prevent crumbly bars. Chill long enough to set bars properly. Keep bars refrigerated to maintain shape. Salt balances sweetness and enhances flavor. For vegan version, substitute honey with maple syrup and butter with vegan butter or coconut oil. Optional chocolate chips add indulgence but can be omitted or replaced with nuts.
Nutrition
- Serving Size: 1 bar (assuming 12 b
- Calories: 190
- Sugar: 9
- Fat: 10
- Carbohydrates: 20
- Fiber: 3
- Protein: 5
Keywords: no-bake, peanut butter, oat bars, easy snack, crowd-pleaser, potluck, no oven, quick recipe